Loading ...
Loading ...
Loading ...
o Keepsmall vent holesopen.
o Rechargeat 6-I0 amperesfor 1 hour.
NOTE:The originalequipmentbatteryon
your tractoris maintenancefree.Do not
attemptto open or removecaps or covers.
Adding or checkinglevelof electrolyteis
not necessary.
TO CLEAN BATTERYAND TERMINALS
Corrosionand dirt on the batteryand
terminalscan causethe batteryto "leak"
power.
1. DisconnectBLACKbattery cablefirst
then RED battery cableand remove
batteryfrom tractor.
2. Rinse the battery with plain water and
dry.
3. Cleanterminals and batterycableends
with wire brushuntil bright.
4. Coat terminalswith greaseor petro-
leumjelly.
5. Reinstallbattery (See "REPLACING
BATTERY"in the SERVICEAND AD-
JUSTMENTSsectionof this manual).
TRANSAXLE COOLING
Keeptransaxlefree from build-upof dirt
and chaffwhich can restrictcooling.
VoBELTS
CheckV-beltsfor deteriorationand wear
after 100 hoursof operationand replace
if necessary.The belts are not adjustable.
Replacebelts if they beginto slip from
wear.
LUBRICATION
Only use high quality detergent oil rated
with API service classification SG-SL,
Select the oil's SAE viscosity grade
according to your expected operating
temperature,
SAE VISCOSITY GRADES
BAE
TEMP
-30 -20 -10 0 10 20 30 40 "C
TEMPERATURE RANGE ANTICIPATED BEFORE NEXT OIL CHANGE
oiLvisc chart1 e honda
Change the oil after every 50 hours of op-
eration or at least once a year if the tractor
is not used for 50 hours in one year.
Check the crankcase oil level before start-
ing the engine and after each eight (8)
hours of operation.
TO CHANGE ENGINE OIL
Determine temperature range expected
before oil change. All oil must meet API
service classification SG-SL.
o Be sure tractor is on level surface.
o Oil will drain more freely when warm.
o Catch oil in a suitable container.
1. Remove oil fill cap/dipstick. Be careful
not to allow dirt to enter the engine
when changing oil.
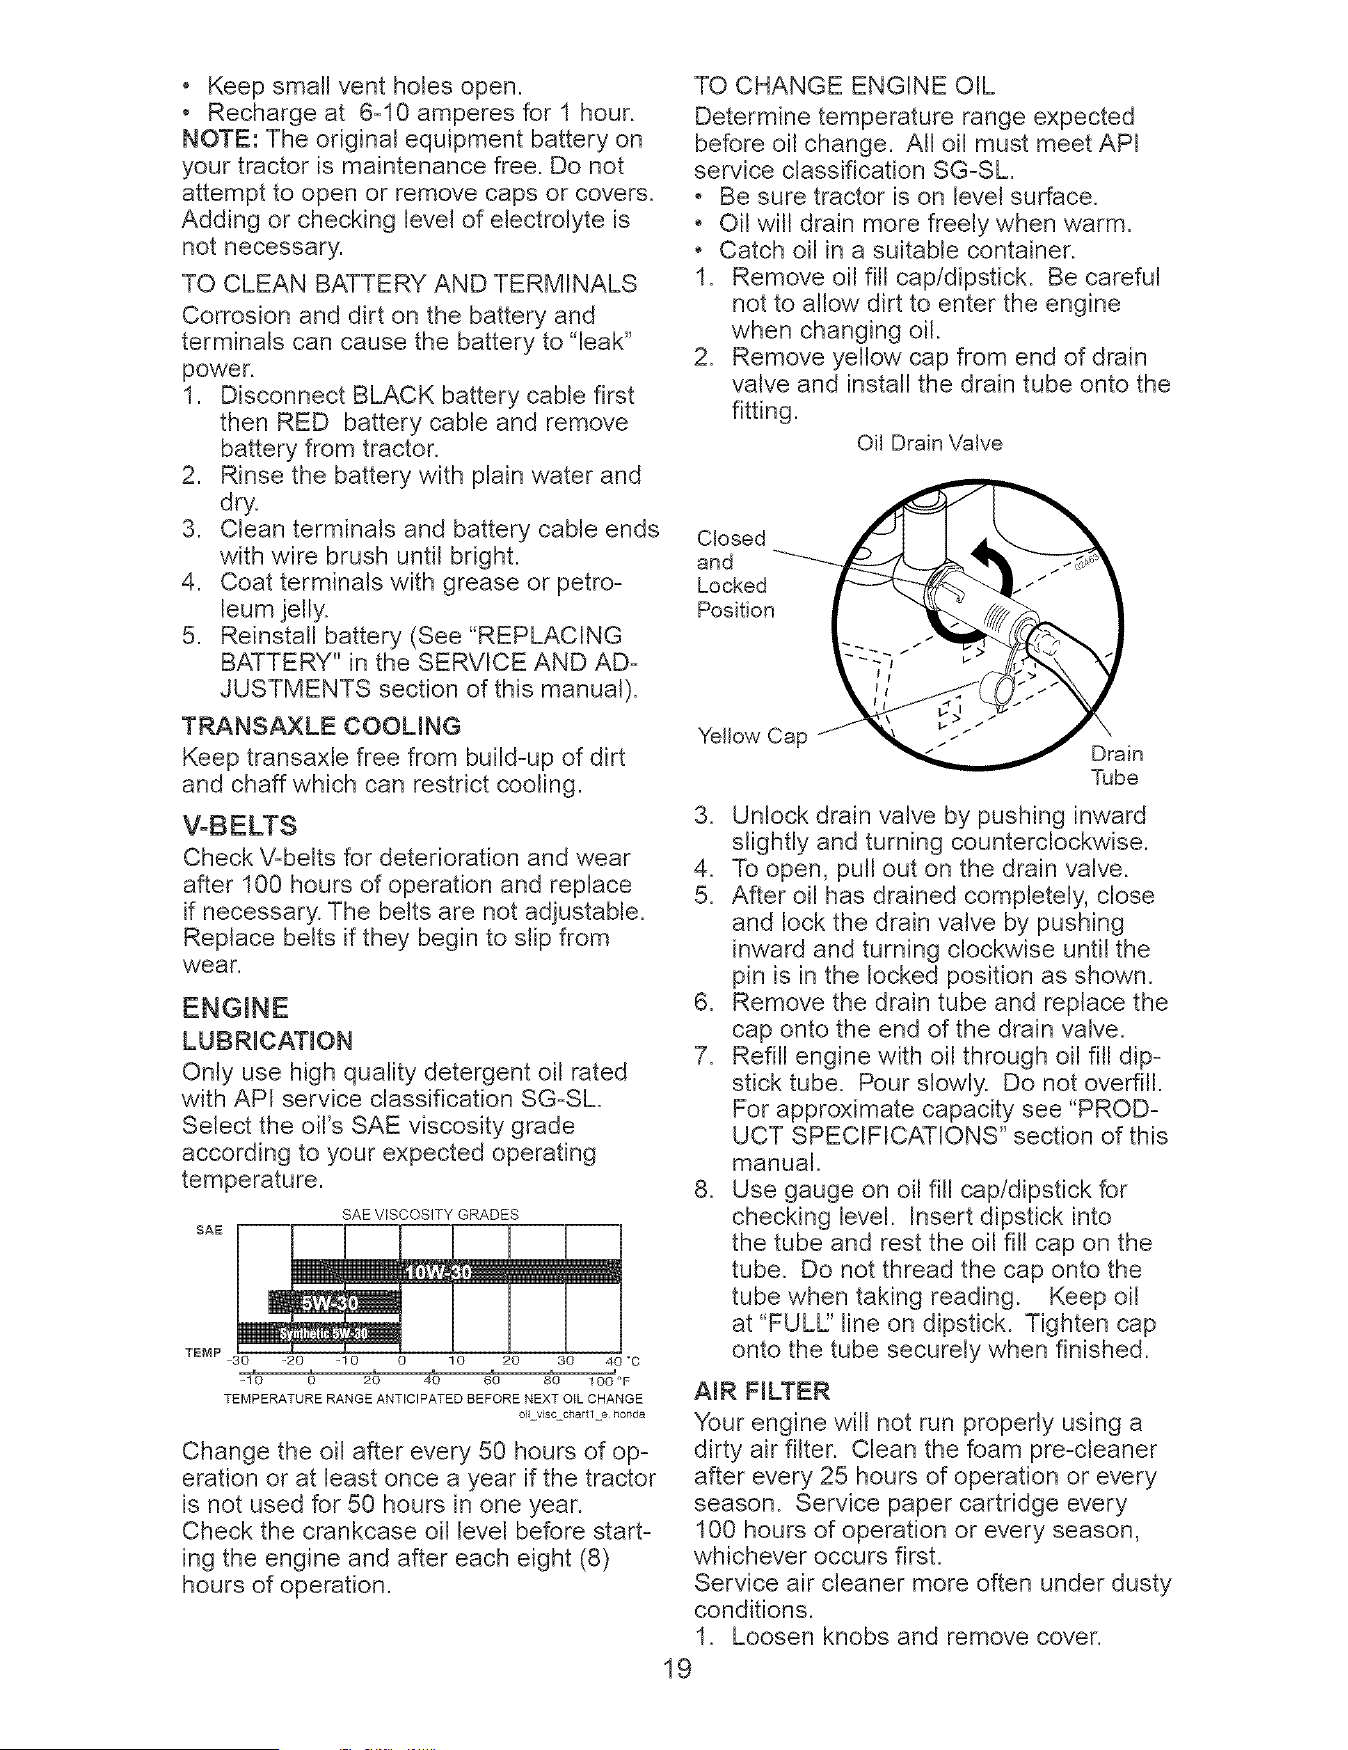
2. Remove yellow cap from end of drain
valve and install the drain tube onto the
fitting.
oil Drain Valve
Closed
and
Locked
Position
Yellow Cap
Drain
Tube
3. Unlock drain valve by pushing inward
slightly and turning counterclockwise.
4. To open, pull out on the drain valve.
5. After oil has drained completely, close
and lock the drain valve by pushing
inward and turning clockwise until the
pin is in the locked position as shown.
6. Remove the drain tube and replace the
cap onto the end of the drain valve.
7. Refill engine with oil through oil fill dip-
stick tube. Pour slowly. Do not overfill.
For approximate capacity see "PROD-
UCT SPECIFICATIONS" section of this
manual.
8. Use gauge on oil fill cap/dipstick for
checking level. Insert dipstick into
the tube and rest the oil fill cap on the
tube. Do not thread the cap onto the
tube when taking reading. Keep oil
at "FULL:' line on dipstick. Tighten cap
onto the tube securely when finished.
AIR FILTER
Your engine will not run properly using a
dirty air filter. Clean the foam pre-cleaner
after every 25 hours of operation or every
season. Service paper cartridge every
100 hours of operation or every season,
whichever occurs first.
Service air cleaner more often under dusty
conditions.
1. Loosen knobs and remove cover.
19
Loading ...
Loading ...
Loading ...