Loading ...
Loading ...
Loading ...
Section 4 - REPAIR & ADJUSTMENTS
CAUTION
Before attempting any adjUstments, maintenance,
service, or repairs, stop engine and auger, always
remove key from ignition switch, remove spark plug
wire and secure wire away fro m spark plug.
4.1
AUGER BELT ADJUSTMENT/REPLACEMENT
When operating machine release the auger clutch
control, auger should come to a complete stop in 5
seconds. If auger does not come to a complete stop in
the required time, check and adjust belt tension.
Inspect belt frequently for signs of excessive wear.
Observe drive belt for slippage due to wear when
operating machine.
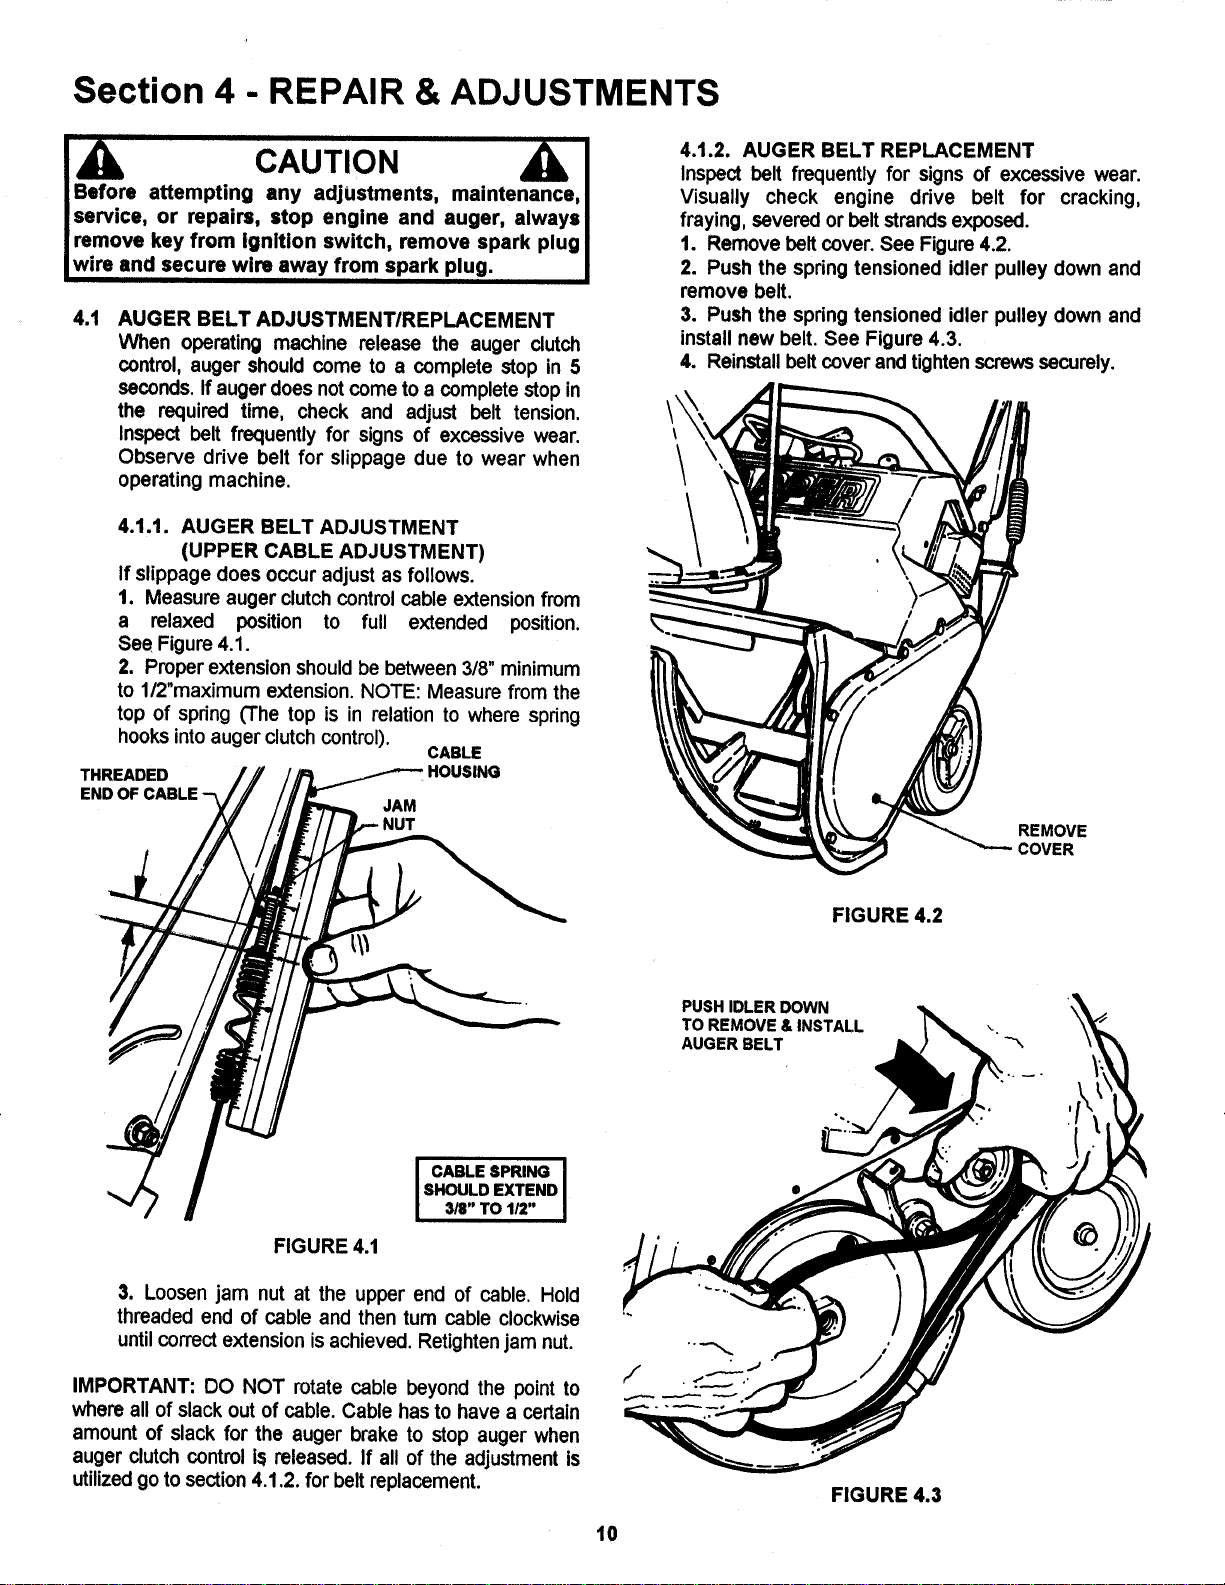
4.1.2. AUGER BELT REPLACEMENT
Inspect belt frequently for signs of excessive wear.
Visually check engine drive belt for cracking,
fraying, severed or belt strands exposed.
1. Remove belt cover. See Figure4.2.
2. Push the spring tensioned idler pulley down and
remove belt.
3. Push the spring tensioned idler pulley down and
install new belt. See Figure 4.3.
4. Reinstall beltcover and tighten screwssecurely.
\
4.1.t. AUGER BELT ADJUSTMENT
(UPPER CABLE ADJUSTMENT)
If slippage does occur adjust as follows.
1. Measure auger clutchcontrolcable extension from
a relaxed position to full extended position.
See Figure4.1,
2. Proper extension shouldbe between 3/8" minimum
to 1/2"maximum extension. NOTE: Measure from the
top of spring (The top is in relation to where spring
hooksintoauger clutchcontrol).
CABLE
THREADED
END OF CABLE "--,
JAM
REMOVE
COVER
FIGURE 4.2
FIGURE 4.1
I CABLE SPRING I
SHOULD EXTEND I
3/8" TO 1/2" I
3, Loosen jam nut at the upper end of cable. Hold
threaded end of cable and then turn cable clockwise
untilcorrect extension isachieved. Retightenjam nut.
IMPORTANT: DO NOT rotate cable beyond the point to
where all of slack out of cable. Cable has to have a certain
amount of slack for the auger brake to stop auger when
auger clutch control is released. If all of the adjustment is
utilizedgo to section4.1.2. for belt replacement.
PUSH IDLER DOWN
TO REMOVE & INSTALL
AUGER BELT
FIGURE 4.3
10
Loading ...
Loading ...
Loading ...