Loading ...
Loading ...
Loading ...

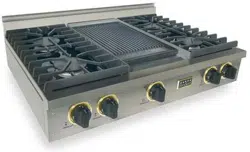
Oven and Griddle Burners
These concealed burners use
automatic ignitors. The griddle and
oven control dials do not need to be
set to a LITE position to light the
burners. Simply turn the control dial
to the desired setting.
IF THE OVEN OR GRIDDLE
BURNER DOES NOT IGNITE
WITHIN 90 SECONDS OF TURNING
ON THE OVEN CONTROL DIAL,
TURN THE OVEN OR GRIDDLE
BACK OFF. DO NOT ATTEMPT TO
USE THE OVEN OR GRIDDLE.
CONTACT A QUALIFIED SERVICE
TECHNICIAN TO DETERMINE
THE SOURCE OF THE PROBLEM.
Before Using the Range or
Cooktop
New units are wiped clean with
solvents at the factory to remove any
traces of dirt and grease. Each range
and cooktop is then coated with a thin
film of mineral oil. Some stainless
steel parts may have a plastic
protective wrapper which must be
removed before using the range.
Before starting too cook the range
should be washed thoroughly with
hot, soapy water to remove film
residue and any dust or debris from
installation. Rinse and wipe dry.
If the range contains an oven or
ovens, remove and unwrap all loose
pieces from inside the oven(s) and/or
broiler area. If the unit contains a gas
oven, remove the included broiler pan
in lower broiler area. Remove and
discard the plastic and wash and dry
the pan thoroughly before replacing it
in broiler cavity. If the unit contains
an electric oven, remove the broiler
pan from inside the oven. Wash and
dry the piece and store it for later use.
If the unit contains an oven or ovens,
turn on each oven to 400°F for
approximately one hour. This burns
off the binder from the insulation and
prepares your oven(s) for normal use.
There may be a slight odor.
Once the unit is installed as outlined
in the Installation Instructions (pages
3-6), it is important that the air supply
to the unit remains open. The oven air
supply comes through the front floor
area under the range. The surface
burners get air from the area below
the control panel. See FIG. 2 on page
3. THESE AREAS MUST REMAIN
OPEN AND UNOBSTRUCTED.
Cooking Utensils
Most cooking utensils are suitable for
use on the FiveStar, and it is not
necessary to replace your present
domestic utensils with commercial
cookware. Cookware should be in
good condition and free of excessive
dents or bulging on the bottom to
provide maximum performance and
convenience.
Use of Oven
Preheat oven if necessary or desired.
While several variables affect preheat
time, the general recommendations
are:
Electric Oven:
12-15 minutes to 350°F.
Gas Oven:
8-10 minutes to reach 350°F.
Preheat time will vary.
Allow at least one inch space around
oven pans and the oven walls. Correct
pan placement allows air circulation
for proper baking and browning.
Do not place pans in the oven directly
over one another. Stagger the pans so
that air flow will not be inhibited. See
FIG. 15.
Always keep oven vent ducts un-
obstructed.
FIG. 15
PAN POSITIONING–TOP RACK
(LEFT), BOTTOM RACK (RIGHT)
Oven Temperature
Selection
It is important to select a proper
temperature setting. Never set the
oven dial to a higher degree than
needed with the intention of lowering
the setting at a later time. This will
not speed up the action. Doing this
can actually cause the oven to cycle
more slowly, making the tempera-
tures vary and cooking results to be
unsatisfactory. The oven will
maintain an even temperature if the
oven control dial is set directly from
OFF to the desired temperature.
Temperature ranges from 140°F to
200°F are for “low temp” warming.
These temperature settings are used
to keep food at serving temperature.
The temperature range from 250°F to
550°F is usually used for normal
baking. The general baking range is
from 350°F to 425°F.
Oven Racks
All convection ovens (gas and
electric) contain three oven racks,
while gas ovens without convection
contain two oven racks.
The oven racks should be arranged
before the oven knob is turned to the
ON position. Place the racks so the
food will be centered in the oven.
When more than one utensil is used,
be sure to stagger them allowing
space between each one (See FIG.
15). Do not allow the utensils to
touch any part of the oven, especially
the glass window. It is best to use
only two racks at a time and place
food so one utensil is not directly
over another.
Oven Rack Removal
First make sure oven and rack have
cooled sufficiently for handling. If
still warm or hot, use oven mitts.
Pull the oven rack forward and lift up
on the front of the rack so it will clear
the rack keeper.
To replace the oven rack, guide the
angled rear portion of the rack under
the rack keeper and slide the rack to
the rear.
13
Loading ...
Loading ...
Loading ...