®
Electric
Slide-in models
Modelos deslizables
Models, Modelos
790.46578
8 = Color number, nOmero de color
318200848(0403)Rev.A Sears Roebuck and Co., Hoffman Estates, [L 60179 U.S.A. www.sears.corn
Table of Contents
Slide-in RangeWarranty ................................................. 2
Product Record ............................................................... 2
mMPORTANT SAFETY mNSTRUCTmONS......................... 3-5
Protection Agreements ................................................... 6
Range Features ............................................................... 7
Control Pad Functions .................................................... 8
Temperature Conversion ................................................. 8
Setting the CJock ............................................................. 9
Selecting Surface Cooking Uteneite ............................. 10
SpeciaJty Pane &Trivets ................................................ 10
Surface Cooking ........................................................ 11-12
Oven Vent(e) and Racks ................................................. 12
Changing Oven Light ..................................................... 12
Setting Oven ControJs .............................................. 13-17
* To Set or Change Temperature for NormaU Baking ...... 13
o Timed Bake Feature .................................................. 14
o Oven Baking Unformations ......................................... 15
o Air CimuUation in the Oven ......................................... 15
, BFoH........................................................................... 16
. Broiling Informations .................................................. 17
Oven Cleaning ........................................................... 18-!9
General CJeaning ...................................................... 20-24
Recalibrating Your Oven Temperature ........................... 24
Before you call .......................................................... 25-26
EepaSoJ .......................................................................... 27
Sears Service .................................................. Back Cover
S ide- n Range Warranty
FULL ONEYEAR WARRANTY ON ALL PARTS
If, within one year from the date of installation, any part fails to function properly due to a defect in material or
workmanship, Sears will repair or replace it, at our option, free of charge,
If the product is subjected to other than private residential use, the above warranty is effective for only 90 days,
WARRANTY SERVICE IS AVAILABLE BY CONTACTING SEARS AT 1-800-4-MY-HOME®.
This warranty gives you specific legal rights, and you may also have other rights which vary from state to state,
Sears Roebuck and Co., Dept. 817WA Hoffman Estates, IL 60179
Product Record
In this space below, record the date of purchase, model and serial number of your product, You will find the model and
serial number printed on an identification plate, The identification plate is located on the left side of the range and are
visible when the oven door is open or on the inside of the drawer along the side of the frame.
Model No, 790. Date of Purchase
Serial No,
Save these instructions and your sales receipt for reference,
Read a[[ instructions before using this appliance.
Save these instructions for future reference,
This manual contains many important safety messages. Always read and obey ai[ safety messages.
The safety symbol _ calls your attention to safety messages that inform you of hazards that can kii[ or hurt you or others,
or cause damage to the product.
indicates an imminently hazardous situation which, if not avoided may result in death or serious injury.
indicates an imminently hazardous situation which, if not avoided may result in minor or moderate injury, or
product damage.
Ai[ safety messages wii[ identify the hazard, tel[ you how to reduce the chance of injury, and tel[ you what can happen if the
instructions are not followed.
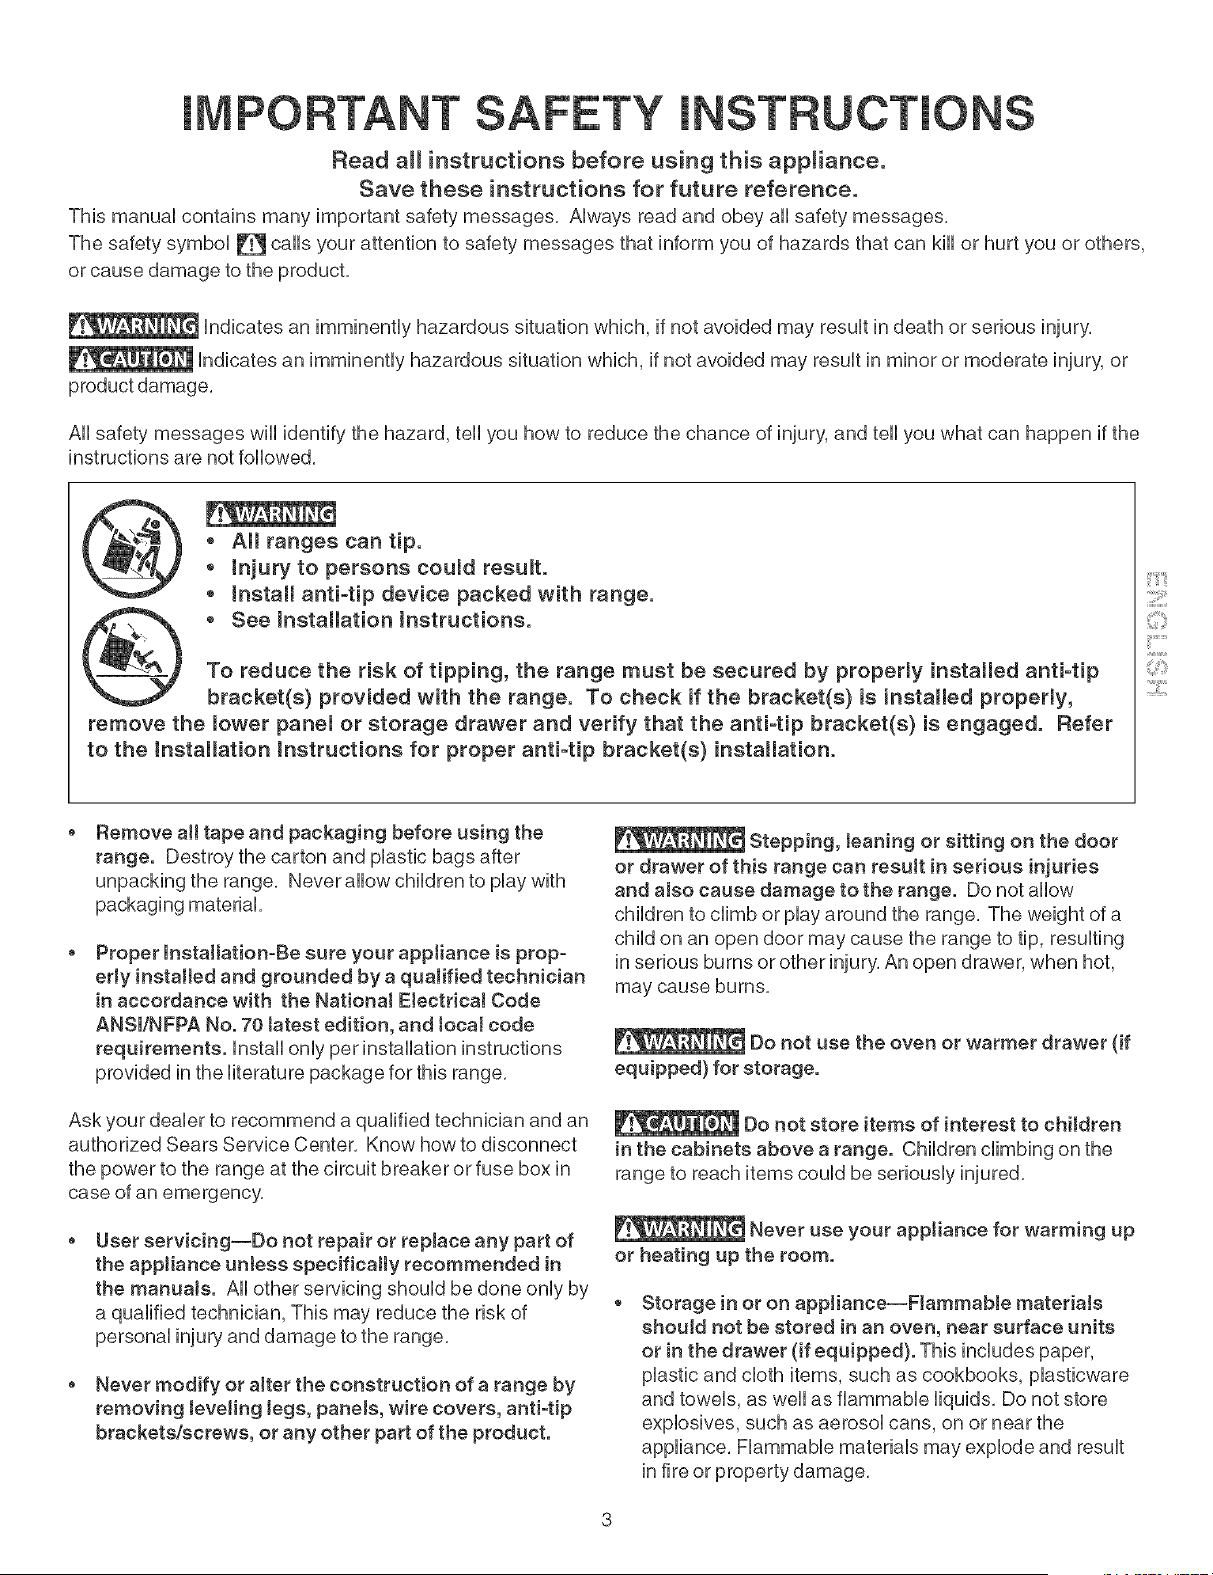
,, All ranges can tip.
,, injury to persons could result.
o Install anti-tip device packed with range.
• See Installation Instructions.
To reduce the risk of tipping, the range must be secured by properly installed antFtip
bracket(s) provided with the range. To check if the bracket(s) is installed properly,
remove the lower pane[ or storage drawer and verify that the anti-tip bracket(s) is engaged. Refer
to the Installation Instructions for proper antFtip bracket(s) installation.
::::[1!!!!!1
;i
2::i;i
Remove all tape and packaging before using the
range. Destroy the carton and plastic bags after
unpacking the range. Never allow children to play with
packaging material
Proper installation-Be sure your appliance is prop-
erly installed and grounded by a qualified technician
in accordance with the National E[ectdca! Code
ANSm/NFPA No. 70 tatest edition, and tocal code
requirements, instal[ only per installation instructions
provided in the literature package for this range.
Ask your dealer to recommend a qualified technician and an
authorized Sears Service Center. Know how to disconnect
the power to the range at the circuit breaker or fuse box in
case of an emergency.
User servicing--Do not repair or replace any part of
the appliance unless specifically recommended in
the manuals. Ai[ other servicing should be done only by
a qualified technician, This may reduce the risk of
personal injury and damage to the range.
o Never modify or alter the construction of a range by
removing leveling tegs, panels, wire covers, anti-tip
brackets/screws, or any other part of the product.
Stepping, teaning or sitting on the door
or drawer of this range can result in serious injuries
and also cause damage to the range. Do not allow
children to climb or play around the range. The weight of a
child on an open door may cause the range to tip, resulting
in serious burns or other injury. An open drawer, when hot,
may cause burns.
Do not use the oven or warmer drawer (if
equipped) for storage.
Do not store items of interest to children
in the cabinets above a range. Children climbing on the
range to reach items could be seriously injured.
Never use your appliance for warming up
or heating up the room.
Storage inor on appliance--Flammable materials
should not be stored in an oven, near surface units
or in the drawer (if equipped). This includes paper,
plastic and cloth items, such as cookbooks, piasticware
and towels, as wei[ as flammable liquids. Do not store
explosives, such as aerosol cans, on or near the
appliance. Flammable materials may explode and result
in fire or property damage.
Donot leavechildrenatone--Childrenshouldnotbe
teftaloneorunattendedintheareawhereappliance
is in use. TheyshouUdneverbeallowedtositorstand
onanypartoftheappliance.
DONOTTOUCHSURFACEUNITS,AREASNEAR
THESEUNITS,OVENHEATINGELEMENTSOR
INTERIORSURFACESOFTHEOVENOF{WARMER
DRAWER(ifequipped}.Bothsurfaceandovenheating
ebmentsmaybehoteventhoughtheyaredarkincobr.
Areasnearsurfaceunitsmaybecomehotenoughto
causeburns.Duringandafteruse,donottouch,orbt
clothingorotherflammabbmateriaUstouchtheseareas
untiltheyhavehadsufficienttimetocool Amongthese
areasarethecooktop,surfacesfacingthecooktop,the
ovenventopeningsandsurfacesneartheseopenings,
ovendoorandwindow.
Wearproperapparel--Loose-fittingor hanging
garmentsshouldneverbewornwhileusingthe
appliance.Donotletclothingorotherflammable
materialscontacthotsurfaces.
* Do not use water or flour on grease fires--Smother
the fire with a pan lid,or use baking soda, a dry
chemicaJ or foam-type extinguisher.
o When heating fat or grease, watch it cJosely. Fat or
grease may catch fire if allowed to become too hot.
Use onJy dry pothoJders--Moist or damp potholders
on hot surfaces may resuJt in burns from steam. Do
not let potholders touch hot heating elements, Do not
use a towel or other bulky cloth instead of a potholder,
o Do not heat unopened food containers--BuiJdup of
pressure may cause container to burst and result in
injury.
o Remove the oven door from any unused range if it is
to be stored or discarded.
IMPORTANT--Do not attempt to operate the oven
during a power faiJure, if the power falls, aJways turn
the oven off. If the oven is not turned off and the power
resumes, the oven may begin to operate again. (Food left
unattended could catch fire or spoil.)
Electronic controllers can be damaged
by cold temperatures.When you use your appliance for
the first time, or if it has not been used for a long
period of time, make sure that it has been exposed to a
temperature above 0°0/32°F for at least 3 hours before
connecting it to the power supply.
mMPORTANT mNSTRUCTmONS FOR USmNG
YOUR COOKTOP
o Know which knob controls each surface heating unit.
Use proper pan size. This appliance is equipped with
one or more surface units of different sizes. Select
utensils having flat bottoms large enough to cover the
surface unit. The use of undersized utensils will expose a
portion of the surface heating unit to direct contact and
may result in ignition of clothing. Proper relationship of
utensil to the surface unit will also improve efficiency.
Utensil handJes shouJd be turned inward and not
extend over adjacent surface unite. To reduce the risk
of burns, ignition of flammable materials, and spillage
due to unintentional contact with the utensil.
Never Jeave surface burners unattended at high heat
settings--Boilovers cause smoking and greasy accumu-
lations that may ignite, or a pan that has boiled dry may
melt.
Protective Jiners--Do not use aluminum foil to line oven
bottom or any other part of the appliance. Only use
aluminum foil as recommended for baking if used as a
cover placed on the food. Any other use of protective
liners or aluminum foil may result in a risk of electric
shock or fire or short circuit.
Glazed cooking utensils--Only certain types of glass,
glass/ceramic, ceramic, earthenware, or other glazed
utensils are suitable for rangetop service without breaking
due to the sudden change in temperature. Check the
manufacturer's recommendations for cooktop use.
Do not use decorative surface element covers, if an
element is accidentally turned on, the decorative cover
will become hot and possibly melt, Burns will occur if the
hot covers are touched, Damage may also be done to the
cooktop,
FOR COOKTOPS WITH COIL ELEMENTS ONLY
o Do Not Immerse or Soak RemovaMe Surface Heating
Elements. Surface heating elements should never be
immerse in water. Heating elements clean themselves
o Make Sure Drip Pans or Drip BowJs Are in Ptace.
Absence of these pans or bowls during cooking may subject
wiring or components underneath to damage.
FOR GLASS COOKTOPS ONLY
o Do not cJean or operate a broken cooktop--lf cooktop
should break, cleaning solutions and spillovers may
penetrate the broken cooktop and create a risk of electric
shock, Contact a qualified technician immediately,
CleancooktopgJasswithcaution--ifawetspongeor
clothis usedtowipespillsona hotcookingarea,be
carefultoavoidasteamburn,Somecleanerscan
produceharmfulfumesifappliedtoa hotsurface,
o Avoidscratchingthecooktopglasswithsharp
objects.
mMPORTANT mNSTRUCTmONS FOR USING
YOUR OVEN
* Use care when opening oven door or warmer drawer
(if equipped)--Stand to the side of the range when
opening the door of a hot oven, Let hot air or steam
escape before you remove or repUacefood in the oven /
warmer drawer,
Keep oven vent ducts unobstructed. The oven vent is
Uocatedat the rear of the cooktop on the right side,
Touching the surfaces in this area when the oven is
operating may cause severe burns, AUso,do not pUace
pUasticor heat-sensitive items on or near the oven vent,
These items couUdmeR or ignite,
Placement of oven/warmer drawer (if equipped}
Racks. AUways pUaceoven racks in desired Uocation
while oven/warmer drawer (if equipped) is cool If rack
must be moved while oven is hot use extreme caution,
Use potholders and grasp the rack with both hands to
reposition, Do not let potholders contact the hot heating
elements in the oven/warmer drawer (if equipped),
Remove all utensils from the rack before moving,
o Do not use the broiter pan without its insert. The
broiler pan and its insert allow dripping fat to drain and be
kept away from the high heat of the broiler,
o Do not cover the broiJer insert with aJuminum foit.
Exposed fat and grease could ignite,
Do not touch a hot light bulb with a damp cloth.
Doing so could cause the bulb to break, Disconnect the
appliance or turn off the power to the appliance before
removing and replacing light bulb,
mMPORTANT mNSTRUCTmONS FOR CLEAN°
raNGYOUR RANGE
, Ctean the range regulaHy to keep aH parts free of
grease that couM catch fire. Exhaust fan ventilation
hoods and grease filters should be kept clean, Do not
allow grease to accumulate on hood or filter, Greasy
deposits in the fan could catch fire, When you are
flaming food under the hood, turn the fan on, Refer to
the hood manufacturer's instructions for cleaning,
Kitchen cteaners and aerosols--Always follow the
manufacturer's recommended directions for use, Be
aware that excess residue from cleaners and aerosols
may ignite causing damage and injury,
SELF-CLEANmNG OVENS
, in the seff-cJeaning cycJe, onty cJean the parts listed
in this Use and Care Guide. Before seDdeaning the
oven, remove the broiler pan and any utensils or foods
from the oven,
o Do not use oven cleaners--No commercial oven
cleaner or oven liner protective coating of any kind
should be used in or around any part of the oven,
o Do not cJean door gasket--The door gasket is essen-
tial for a good seal, Care should be taken not to rub,
damage or move the gasket,
o Remove oven racks. Oven racks color will change if
left in the oven during a seDdeaning cycle,
_The heaJth of some birds is extremeJy
sensitive to the fumes given off during the serf-cleaning
cycle of any range. Move birds to another well venti-
lated room.
IMPORTANT SAFETY NOTICE
The California Safe Drinking Water and Toxic Enforcement
Act requires the Governor of California to publish a list of
substances known to the state to cause cancer, birth
defects or other reproductive harm, and requires
businesses to warn customers of potential exposure to
such substances,
::::ii!!!!!i
!!_ii Si
PROTECTION AGREEMENTS
h the U.S.A.
Master Protection Agreements
CongratuUations on making a smart purchase, Your new
Kenmore ®product is designed and manufactured for years
of dependabb operation, But Hkeaft products, it may require
preventive maintenance or repair from time to time, That's
when having a Master Protection Agreement can save you
money and aggravation,
Purchase a Master Protection Agreement now and protect
yourself from unexpected hassle and expense.
The Master Protection Agreement aUsoheUpsextend the Hfe
of your new product, Here's what's incUudedin the
Agreement:
5_ Expert service by our 12,000 professionaU repair
speciafists
[_ Unlimited service and no charge for parts and labor on
aU[covered repairs
[Y_ "Noqemon" guarantee- repUacement
of your covered product if four or more product failures
occur within twelve months
[_ Product replacement if your covered product can't be
fixed
[_ AnnuaJ Preventive Maintenance Check at your request
- no extra charge
[_ Fast hetp by phone- phone support from a Sears
technician on products requiring in-home repair, plus
convenient repair scheduling
[_ Power surge protection against electrical damage due
to power fluctuations
[_ RentaJ reimbursement if repair of your covered product
takes longer than promised
Once you purchase the Agreement, a simple phone call is
all that it takes for you to schedule service, You can call
anytime day or night, or schedule a service appointment
online,
In Canada
Maintenance Agreements
Your purchase has added value because you can depend
on Sears HomeCentraPfor sewice, With over 2400
Service Technicians and more than a million parts and
accessories, we have the tools, parts, knowledge and
skills to ensure our pledge: We Service What We Sell,
Your Kenmord_product is designed, manufactured
and tested to provide years of dependable operation, But
like all products, it may require service from time to time,
The Sears Maintenance Agreement offers you an
outstanding service program, affordably priced,
The Sears Maintenance Agreement:
is your way to buy tomorrow's service at today's price
Eliminates repair biffs resulting from normal wear and
tear
Provides phone support from a Sears technician on
products requiring
Even if you don't need repairs, provides an annual
Preventive Maintenance Check, at your request, to
ensure that your product is in proper running condition,
Some Jimitations apply. For more information about
Sears Canada Maintenance Agreements,
call 1-600-361-6665
Sears has over 12,000 professional repair specialists, who
have access to over 4,5 million quality parts and
accessories, That's the kind of professionalism you can
count on to help prolong the life of your new purchase for
years to come, Purchase your Master Protection Agreement
today!
Some limitations and exclusions apply,
For prices and additionaJ information call
1-800-827-6655.
Sears Installation Service
For Sears professional installation of home
appliances, garage door openers, water heaters,
and other major home items, in the U,S,A, carl
1-600-4-MY-HOME®
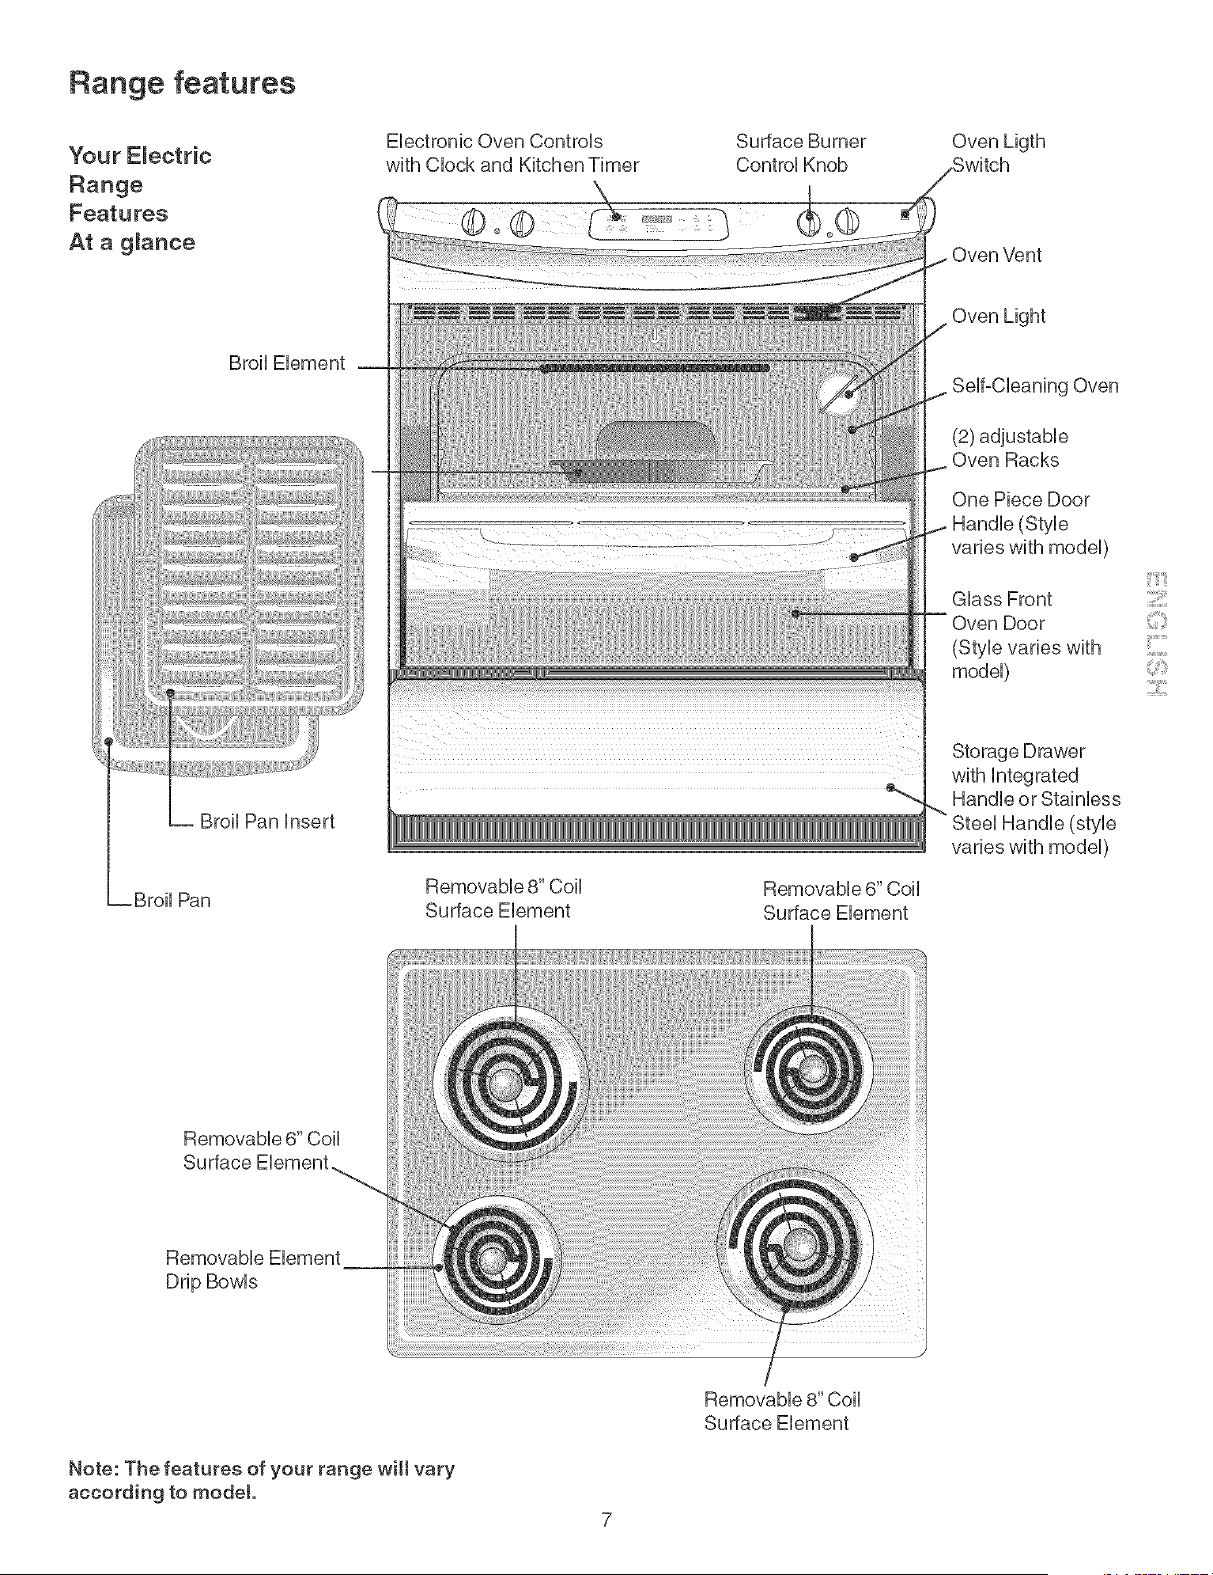
Range features
Your E_ectric
Range
Features
At a g_ance
Broil Element
Broil Pan insert
Broil Pan
Electronic Oven Controls
with Clock and Kitchen Timer
Surface Burner
Control Knob
Removable 8" Coil
Surface Element
Removable 6" Coil
Surface Element
Removable 8" Coil
Surface Element
Oven Ligth
Oven Vent
•Oven Light
Self-Cleaning Oven
(2) adjustable
Oven Racks
One Piece Door
(SUe
varies with model)
Glass Front
(Style varies with
model)
Storage Drawer
with integrated
_ Handle or Stainless
Steel Handle (sUe
varies with model)
:3i!!!i
;i
_iiiii:';i_i
2:11;i
Removable 6" Coil
Surface Element
Removable Element
Drip Bowls
Note: The features of your range wilt vary
according to model.
7
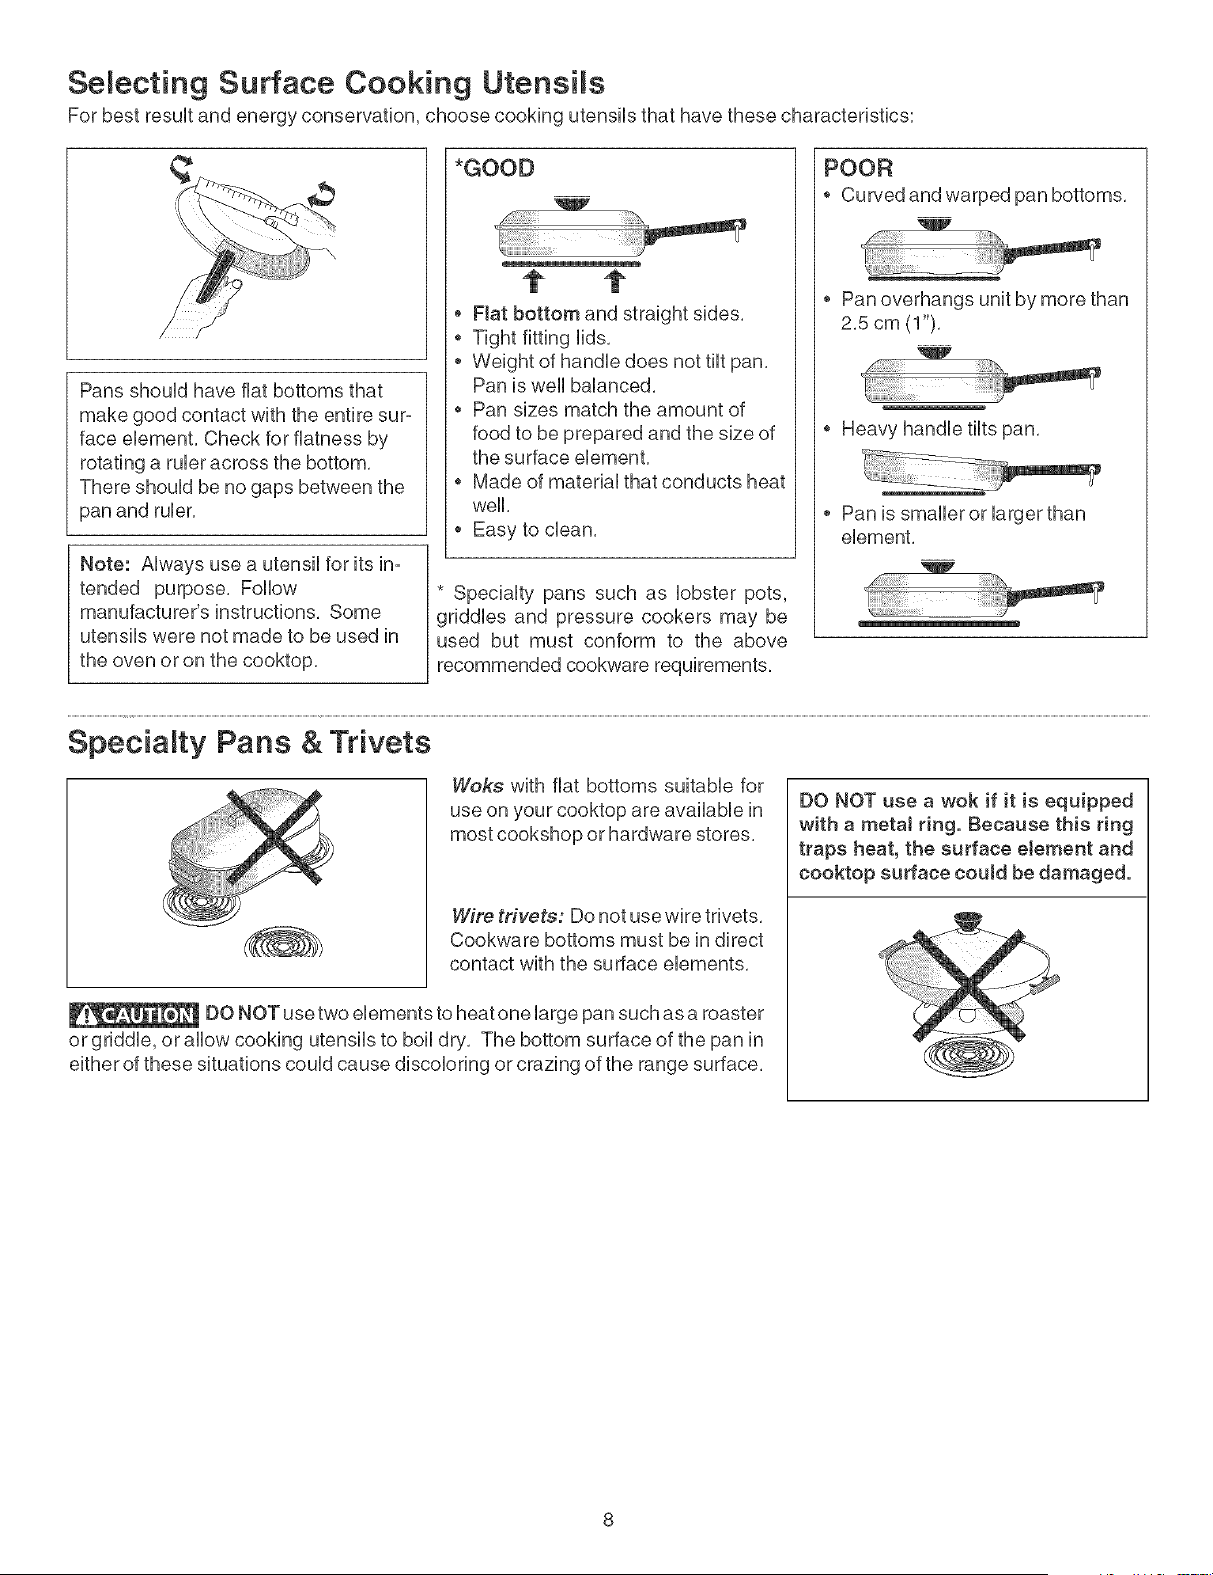
Selecting Surface Cooking Utensils
For best result and energy conservation, choose cooking utensils that have these characteristics:
Pans should have fiat bottoms that
make good contact with the entire sur-
face element, Check for flatness by
rotating a ruler across the bottom,
There should be no gaps between the
pan and ruler,
Note: Always use a utensil for its in-
tended purpose. Follow
manufacturer's instructions. Some
utensils were not made to be used in
the oven or on the cooktop.
*GOOD
t t
o Flat bottom and straight sides.
* Tight fitting lids.
* Weight of handle does not tilt pan.
Pan is well balanced.
* Pan sizes match the amount of
food to be prepared and the size of
the surface element.
* Made of material that conducts heat
well.
* Easy to dean.
* Specialty pans such as lobster pots,
griddles and pressure cookers may be
used but must conform to the above
recommended cookware requirements.
POOR
° Curved and warped pan bottoms.
* Pan overhangs unit by more than
2.5 cm (1").
, Heavy handle tilts pan,
* Pan is smalleror larger than
element,
w
41!ii i !!!iiiii!i!i!i i!!iii!ili i:i'i'i
_i!!!_i!i!ii!ii!;il;i;i;i;i;!i¸
Specialty Pans & Trivets
Woks with flat bottoms suitable for
use on your cooktop are available in
most cookshop or hardware stores.
Wire trivets: Do not use wire trivets,
Cookware bottoms must be in direct
contact with the surface elements,
DO NOT use two elements to heat one large pan such as a roaster
or griddle, or allow cooking utensils to boil dry. The bottom surface of the pan in
either of these situations could cause discoloring or crazing of the range surface.
DO NOT use a wok if it is equipped
with a metaJ ring, Because this ring
traps heat, the surface eJement and
cooktop surface could be damaged,
Surface Cooking
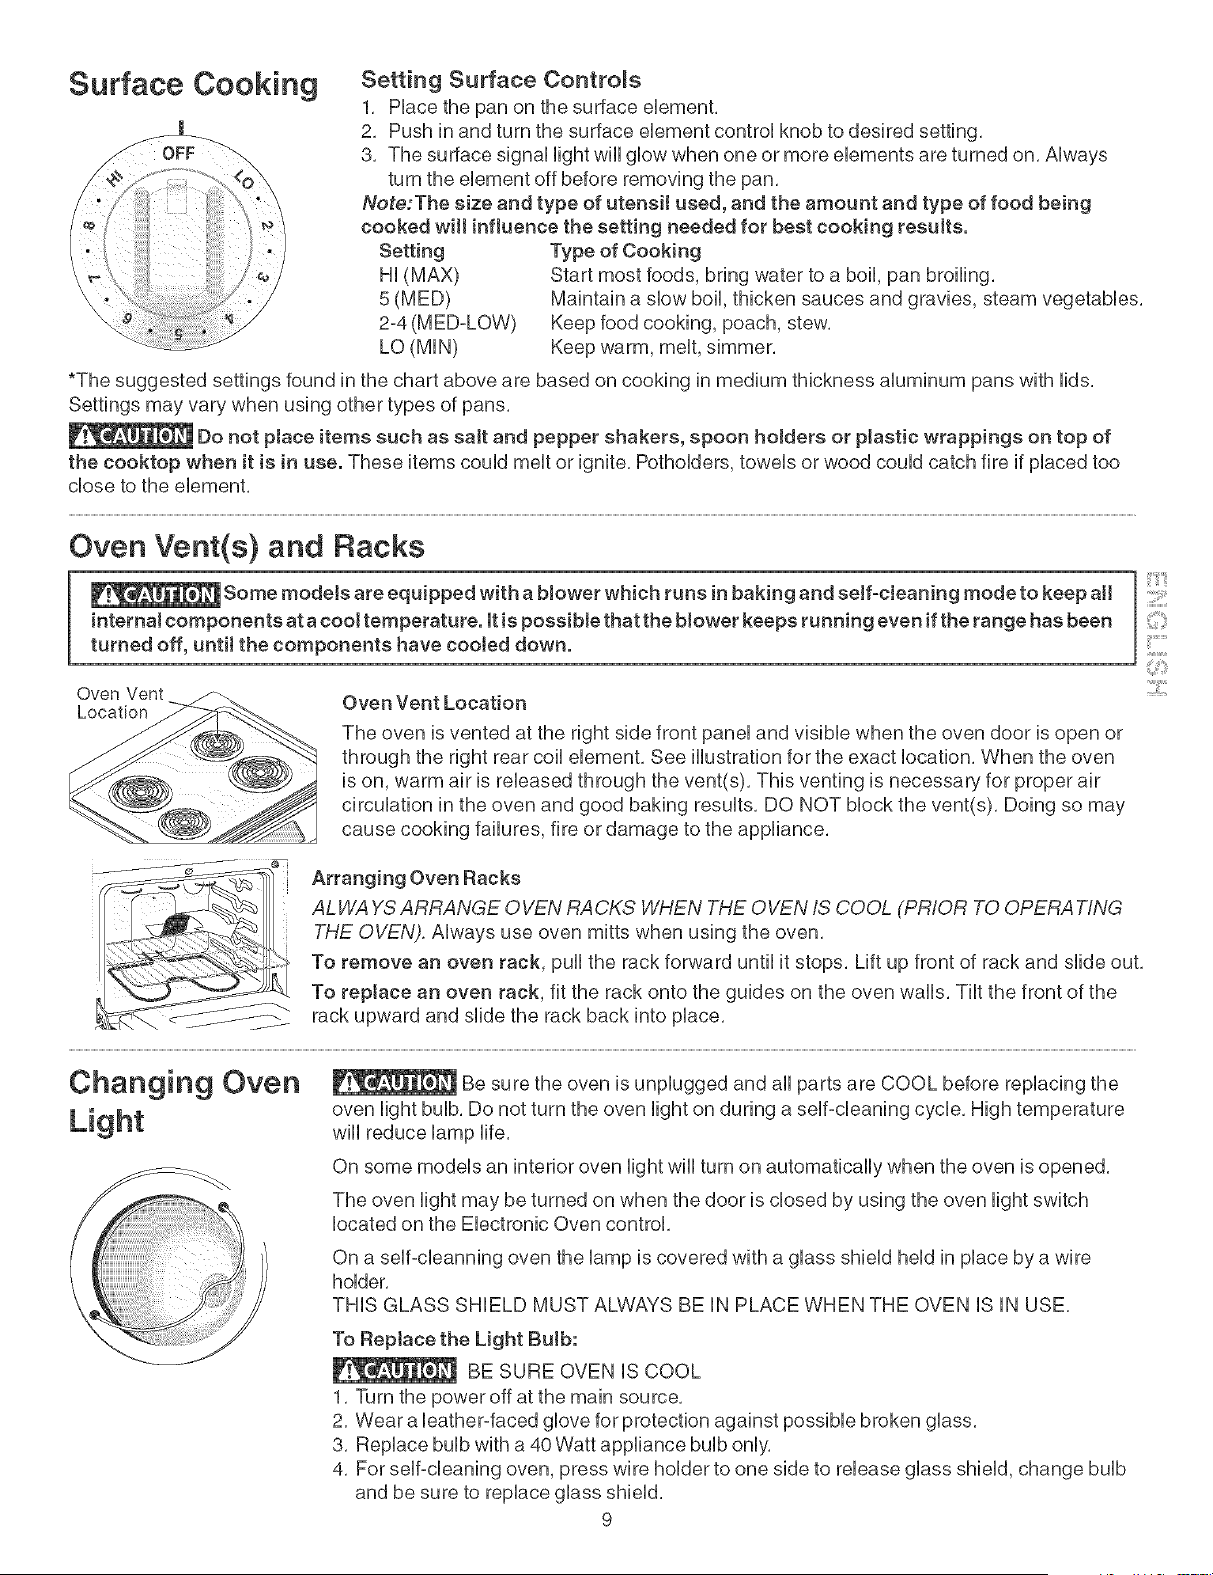
Setting Surface Controls
1, PUacethe pan on the surface eUement,
2, Push in and turn the surface eUement controUknob to desired setting,
3, The surface signaUUightwiUUgUowwhen one or more eUements are turned on, AUways
turn the element off before removing the pan,
Note:The size and type of utensiJ used, and the amount and type of food being
cooked wilt influence the setting needed for best cooking results.
Setting
Hi (MAX)
5(MED)
2-4 (M ED=LOW)
LO (MIN)
Type of Cooking
Start most foods, bring water to a boil, pan broiling,
Maintain a slow boil, thicken sauces and gravies, steam vegetables,
Keep food cooking, poach, stew,
Keep warm, melt, simmer,
*The suggested settings found in the chart above are based on cooking in medium thickness aluminum pans with lids.
Settings may vary when using other types of pans.
Do not place items such as salt and pepper shakers, spoon holders or pJastic wrappings on top of
the cooktop when it is in use. These items could melt or ignite, Potholders, towels or wood could catch fire if placed too
close to the element,
Oven Vent(s) and Racks
Some models are equipped with a blower which runs in baking and seff-cJeaning mode to keep aH
internal components at a cool temperature, it is possibte that the blower keeps running even if the range has been
turned off, untit the components have cooled down.
Oven Vent
Location
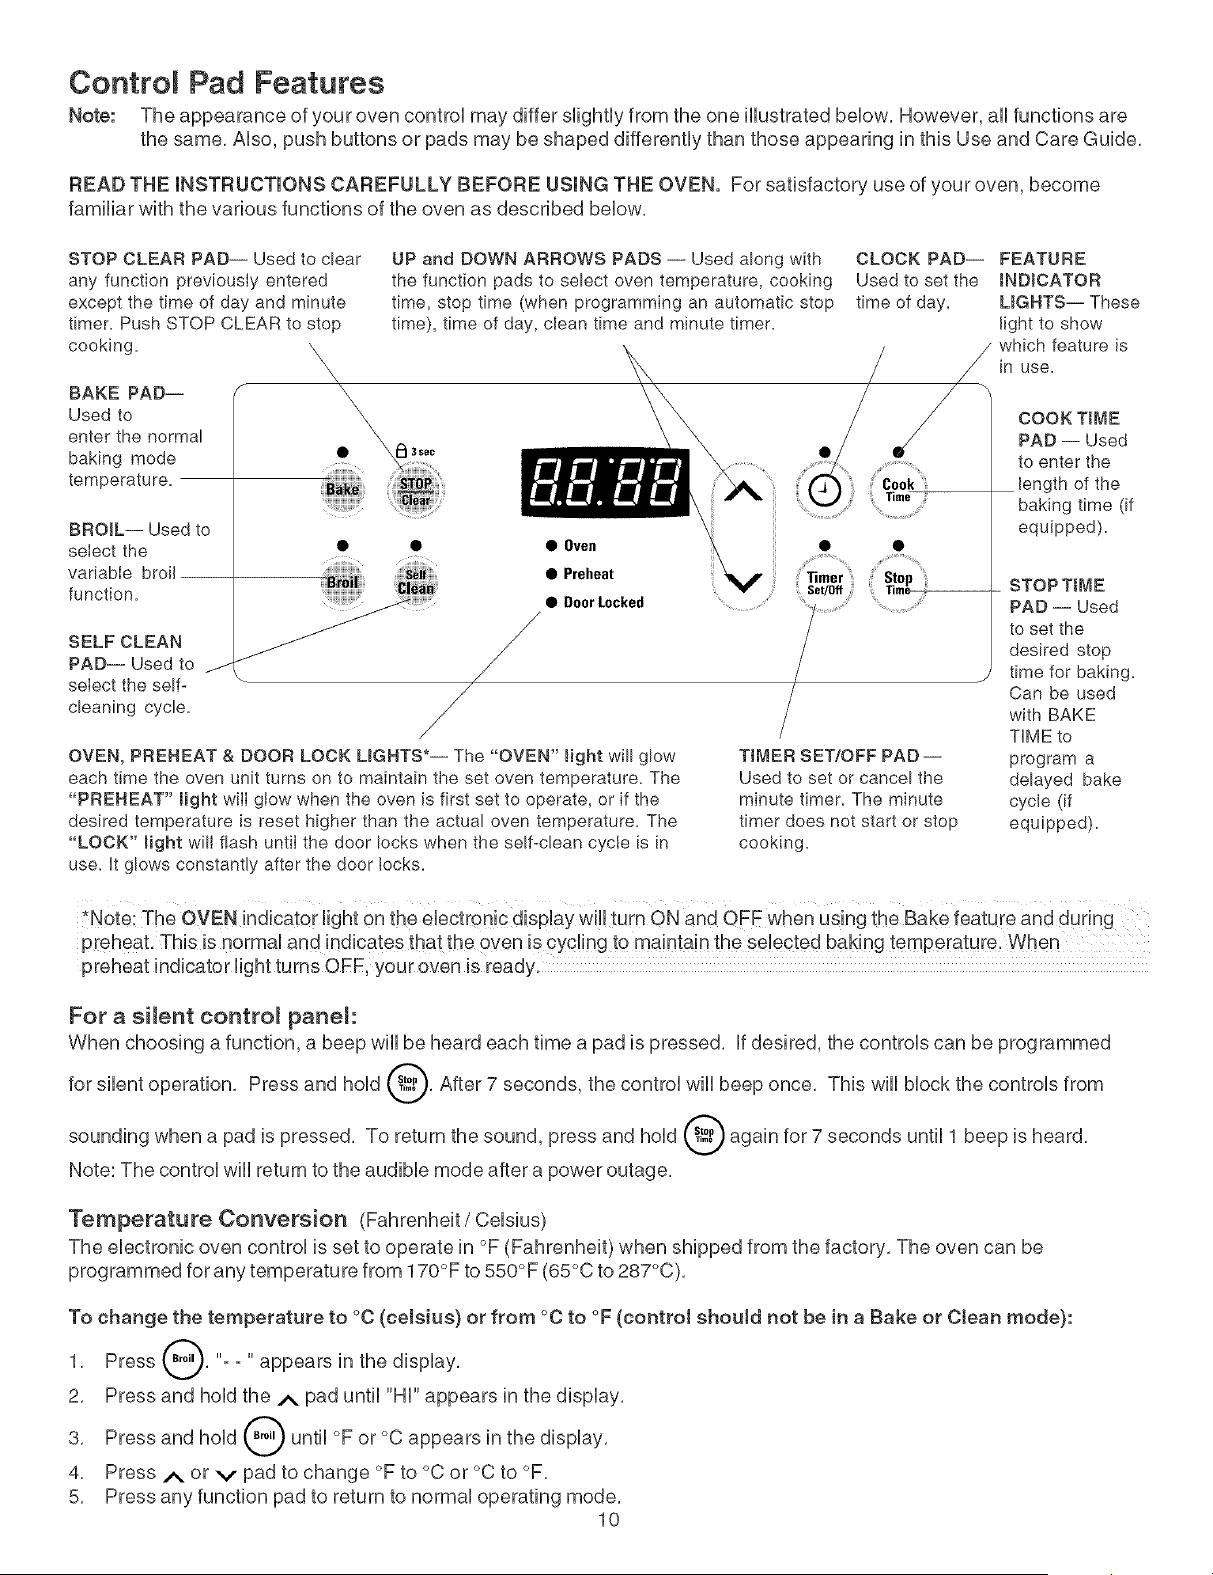
Oven Vent Location
The oven is vented at the right side front panel and visible when the oven door is open or
through the right rear coil element, See illustration for the exact location, When the oven
is on, warm air is released through the vent(s), This venting is necessary for proper air
circulation in the oven and good baking results, DO NOT block the vent(s), Doing so may
cause cooking failures, fire or damage to the appliance,
::::[1!!!!!1
;i
Arranging Oven Racks
ALH/A YSARRANGE OVEN RACKS H/HEN THE OVEN IS COOL (PRIOR TO OPERATING
THE OVEN). Always use oven mitts when using the oven,
To remove an oven rack, pull the rack forward until it stops, Lift up front of rack and slide out,
To reptace an oven rack, fit the rack onto the guides on the oven walls, Tilt the front of the
rack upward and slide the rack back into place,
Changing Oven
Light
Be sure the oven is unplugged and all parts are COOL before replacing the
oven light bulb, Do not turn the oven light on during a self-cleaning cycle, High temperature
will reduce lamp life,
On some models an interior oven light will turn on automatically when the oven is opened,
The oven light may be turned on when the door is closed by using the oven light switch
located on the Electronic Oven control,
On a self=cleanning oven the lamp is covered with a glass shield held in place by a wire
holder,
THIS GLASS SHIELD MUST ALWAYS BE IN PLACE WHEN THE OVEN IS IN USE,
To Reptace the Light Bulb:
BE SURE OVEN iS COOL
1, Turn the power off at the main source,
2, Wear a leather-faced glove for protection against possible broken glass,
3, Replace bulb with a 40 Watt appliance bulb only,
4, For self-cleaning oven, press wire holder to one side to release glass shield, change bulb
and be sure to replace glass shield,
9
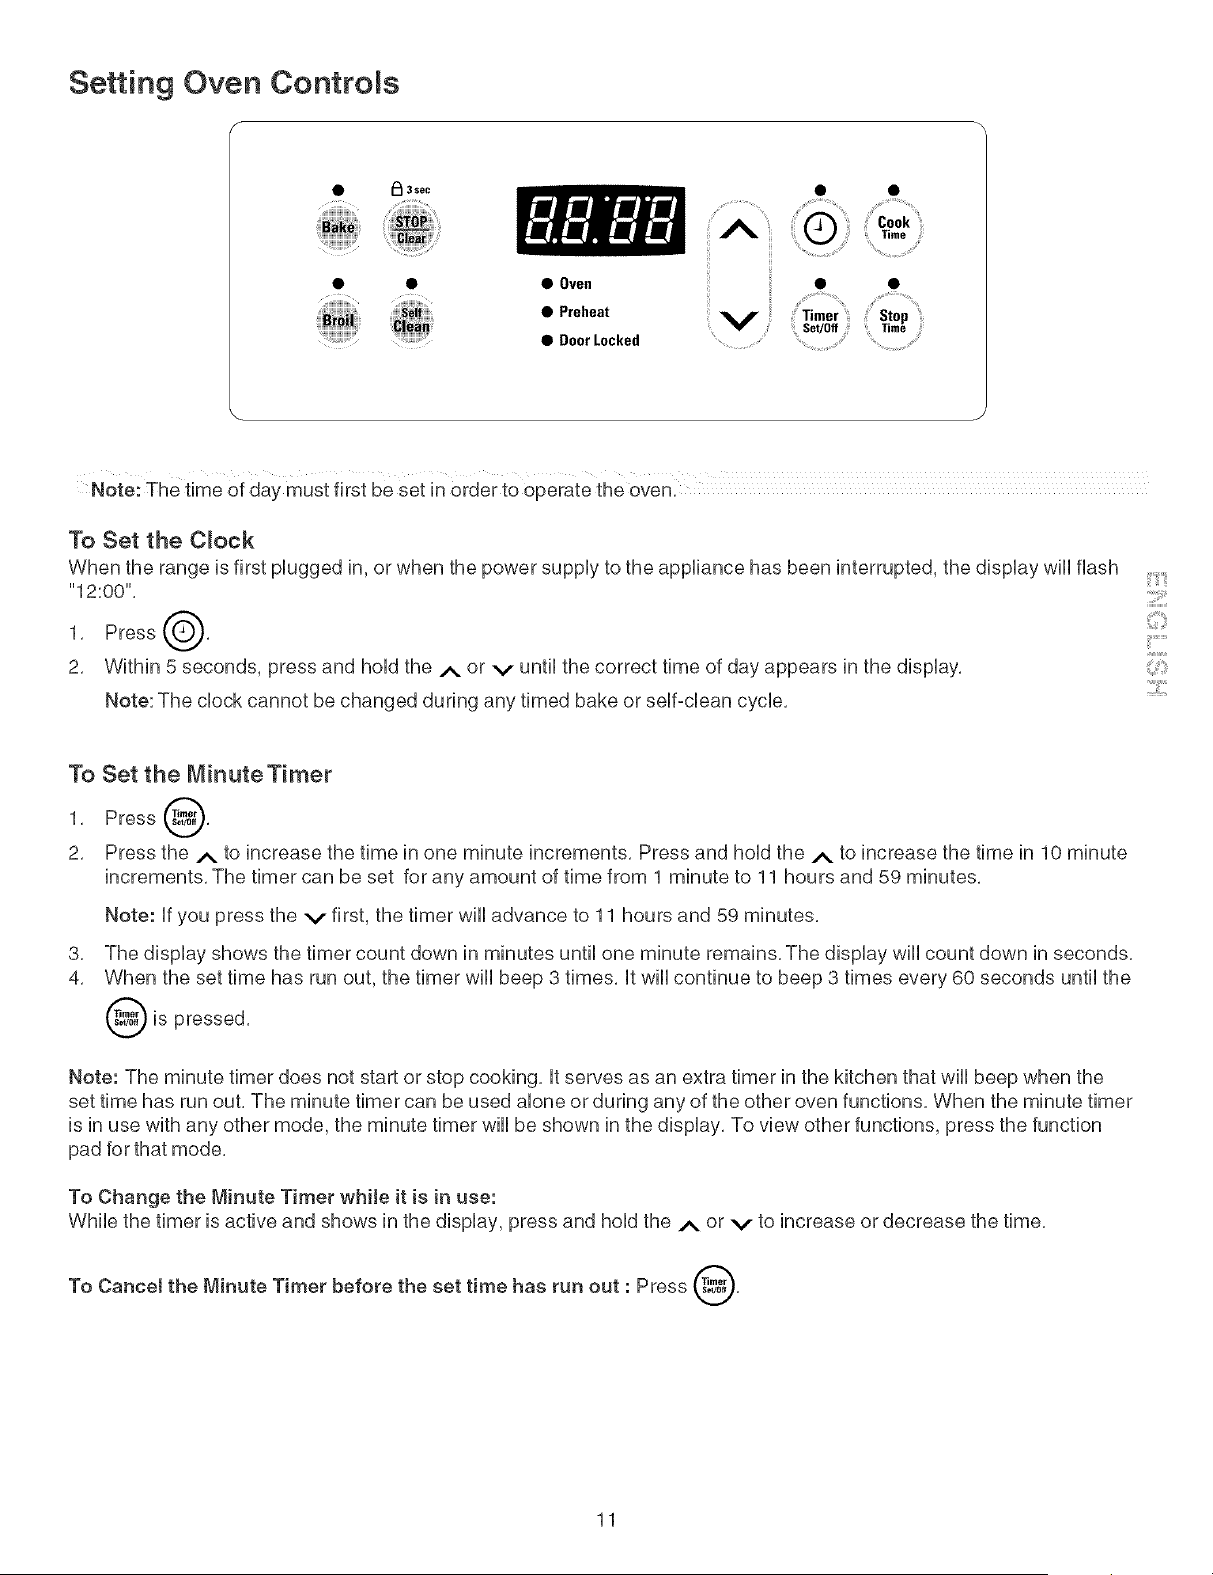
Contro Pad Features
Note: The appearance of your oven controU may differ sfightUyfrom the one HUustratedbeUow, However, aH functions are
the same, AUso,push buttons or pads may be shaped differentUy than those appearing in this Use and Care Guide,
READ THE INSTRUCTIONS CAREFULLY BEFORE USING THE OVEN. For satisfactory use of your oven, become
familiar with the various functions of the oven as described beUow,
STOP CLEAR PAD-- Used to clear
any function previously entered
except the time of day and minute
timer. Push STOP CLEAR to stop
cooking, \\
\
x
BAKE PAD-- '_
Used to
enter the normal
baking mode
temperature.
BROIL-- Used to
seIect the •
variable broil
function.
SELF CLEAN
PAD-- Used to j
select the self-
cleaning cycle.
UP and DOWN ARROWS PADS -- Used along with
the function pads to select oven temperature, cooking
time, stop time (when programming an automatic stop
time), time of day, clean time and minute timer.
• • Oven
• Preheat
• OoorLocked .............
/
/
/
/
OVEN, PREHEAT & DOOR LOCK LIGHTS*-- The "OVEN" light will glow
each time the oven unit turns on to maintain the set oven temperature. The
"PREHEAT" might will gtow when the oven is first set to operate, or if the
desired temperature is reset higher than the actual oven temperature. The
"LOCK" Bight will flash until the door locks when the self-clean cycle is in
use. It glows constantly after the door locks.
TIMER SET/OFF PAD --
Used to set or cancel the
minute timer. The minute
timer does not start or stop
cooking.
CLOCK PAD-- FEATURE
Used to set the INDICATOR
time of day. LIGHTS-- These
fight to show
/ which feature is
in use.
COOK TiME
PAD -- Used
to enter the
length of the
baking time (if
equipped),
STOP T_ME
PAD -- Used
to set the
desired stop
time for baking.
Can be used
with BAKE
TIME to
program a
delayed bake
cycle (if
equipped).
P[eheat. This is normal and indicates that the oven is cyc!ing to ma!nta!n the se!ected baking temperature. When
preheat indicator light turns OFF, your oven is ready.
For a silent contro_ panel:
When choosing a function, a beep will be heard each time a pad is pressed, If desired, the controls can be programmed
for silent operation, Press and hold @, After 7 seconds, the control will beep once, This will block the controls from
sounding when a pad is pressed, To return the sound, press and hold @ again for 7 seconds until 1 beep is heard,
Note: The control will return to the audible mode after a power outage,
Temperature Conversion (Fahrenheit / Celsius)
The electronic oven control is set to operate in °F (Fahrenheit) when shipped from the factory, The oven can be
programmed for any temperature from 170°F to 550°F (65°C to 287°C),
To change the temperature to °C (celsius) or from °C to °F (control should not be in a Bake or Ctean mode):
1, Press _, "- - " appears in the display,
2, Press and hold the A pad until "HI" appears in the display,
3, Press and hold _ until °F or °C appears in the display,
4, Press _,_ or v pad to change °F to °C or °C to °F,
5, Press any function pad to return to normal operating mode,
10
Setting Oven Controls
f
• i_l 3sec
....HH"H,,..... ......................
_ii_keiii,
• • • Oven
iiii_!;i!iiiiii_ iii!iii_! iiiiiill • Preheat
......._i_Hi_,,_ • DoorLocked
"Cook,,
Time
,i;' Stop 'ill
Time
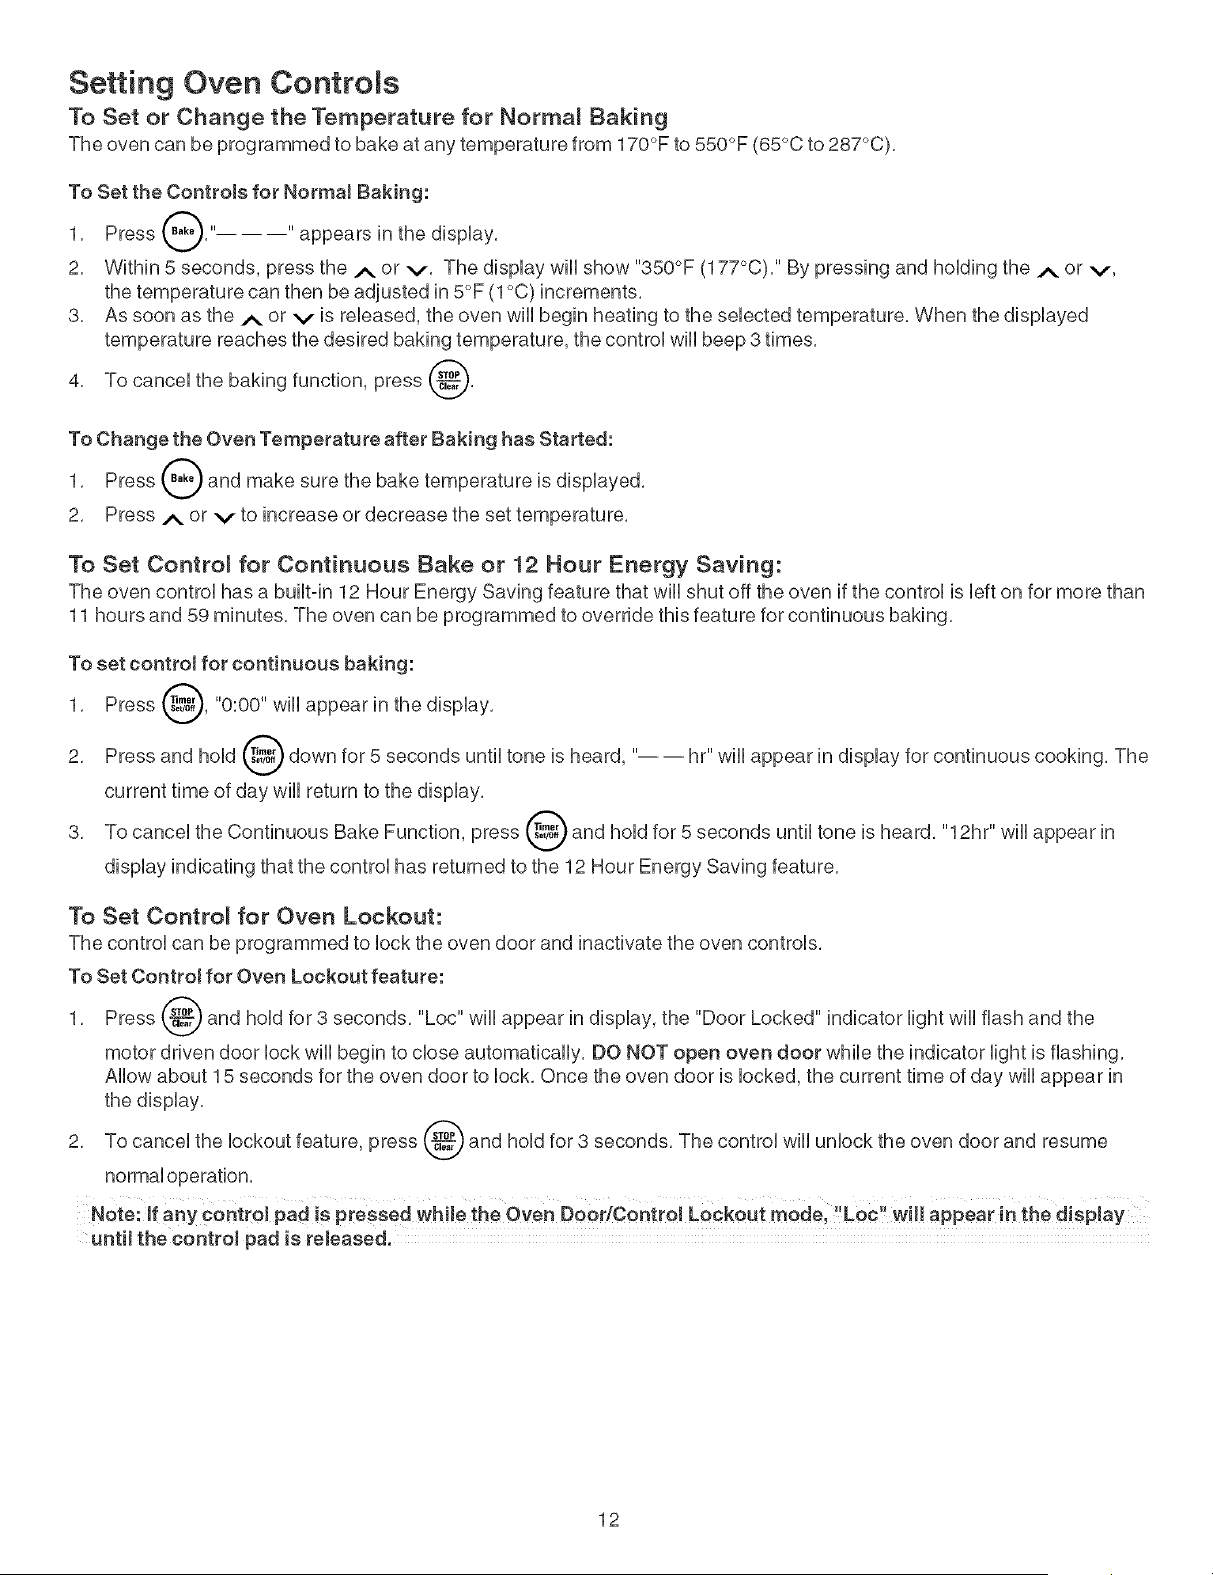
Note: The time of day must first be set in order to Operate the oven:
To Set the C_ock
When the range is first plugged in, or when the power supply to the appliance has been interrupted, the display will flash
"12:00",
1. Press
2, Within 5 seconds, press and hold the A or v until the correct time of day appears in the display,
Note: The clock cannot be changed during any timed bake or self=dean cycle, :2::i
To Set the MinuteTimer
1, Press @,
2, Press the A to increase the time in one minute increments, Press and hold the _ to increase the time in 10 minute
increments, The timer can be set for any amount of time from 1 minute to 11 hours and 59 minutes,
Note: If you press the v first, the timer will advance to 11 hours and 59 minutes,
3,
4,
The display shows the timer count down in minutes until one minute remains, The display wiii count down in seconds,
When the set time has run out, the timer wiii beep 3 times, it wiii continue to beep 3 times every 60 seconds until the
is pressed,
Note: The minute timer does not start or stop cooking, it serves as an extra timer in the kitchen that wiii beep when the
set time has run out, The minute timer can be used alone or during any of the other oven functions, When the minute timer
is in use with any other mode, the minute timer will be shown in the display, To view other functions, press the function
pad for that mode,
To Change the Minute Timer while it is in use:
While the timer is active and shows in the display, press and hold the A or v to increase or decrease the time,
To Cancel the Minute Timer before the set time has run out : Press @,
11
Setting Oven Controls
To Set or Change the Temperature for Normal Saking
The oven can be programmed to bake at any temperature from 170°F to 550°F (65°C to 287°C),
To Set the Controls for NormaJ Baking:
1, Press _," "appears in the dispHay,
A
2, Within 5 seconds, press the A or v, The dispHay wHHshow "350°F (177°C), '' By pressing and hoHding the A or v,
the temperature can then be adjusted in 5°F (1°C) increments,
3, As soon as the A or v is reHeased, the oven wHHbegin heating to the seHected temperature, When the dispHayed
temperature reaches the desired baking temperature, the control wHHbeep 3 times,
4, To canceHthe baking function, press _,
To Change the Oven Temperature after Baking has Started:
1, Press _ and make sure the bake temperature is dispHayed,
2, Press A or v to increase or decrease the set temperature,
To Set Contro_ for Continuous Sake or 12 Hour Energy Saving:
The oven controHhas a buHtqn 12 Hour Energy Saving feature that wHHshut off the oven if the controH is Hefton for more than
11 hours and 59 minutes, The oven can be programmed to override this feature for continuous baking,
To set control for continuous baking:
1, Press _, "0:00" wiHHappear in the dispHay,
Press and hoHd_ down for 5 seconds untiHtone is heard, "---- hr" wiHHappear in dispHayfor continuous cooking, The
2,
current time of day wiHHreturn to the dispHay,
3, To canceHthe Continuous Bake Function, press _ and hoHdfor 5 seconds untiHtone is heard, "12hr" wiHHappear in
dispHayindicating that the controHhas returned to the 12 Hour Energy Saving feature,
To Set Control for Oven Lockout:
The controH can be programmed to Hockthe oven door and inactivate the oven controHs,
To Set Control for Oven Lockout feature:
1, Press _ and hoHdfor 3 seconds, "Loc" wiHHappear in dispHay, the "Door Locked" indicator HightwiHHflash and the
motor driven door HockwiHHbegin to chose automaticaHHy,DO NOT open oven door whiHe the indicator Hightis flashing,
AHHowabout 15 seconds for the oven door to Hock,Once the oven door is Hocked,the current time of day wiHHappear in
the dispHay,
2, To canceHthe Hockout feature, press _ and hoHdfor 3 seconds, The controH wiHHunHockthe oven door and resume
normaHoperation,
Note: If any COntCol pad is pressed while the Oven Door/Control Lockout mode, "Loc" will appear in the display
untH the control pad is released.
12
Setting Oven Controls
To Set the Timed Bake Feature
The _ COOK TIME and _ STOP TIME controUsoperate the TUmed Bake Feature, The automatic timer wiUUturn the
oven on and off at the times you seUectin advance,The oven can be programmed to start immediateUy and shut off
automatically or to begin baking at a later time with an automatic shutoffl
Note: During Timed Bake the preeat indicator light will not function.
To Program the Oven to Begin Baking Immediately and To Shut Off Automatically:
1, Be sure that the clock shows the correct time of day,
2, Place the food in the oven,
3, Press 0'
4, Within 5 seconds, press the .,_ or v, The display wiii show "350°F (177°C), '' By holding the A or v, the
temperature can then be adjusted in 5°F (1°C) increments,
Press _, "0:00" will flash in the
5,
display,
6, Press the/_, or v until the desired amount of baking time appears in the display,
7, The oven will turn on and begin heating,
To Program Oven for a Delayed Start Time and to Shut-Off Automatically:
1, Be sure that the clock shows the correct time of day,
2, Place the food in the oven,
3, Press Q,
4, Within 5 seconds, press the A or v, The display will show "350°F (177°C), '' By holding the ._. or v, the
temperature can then be adjusted in 5°F (1°C) increments,
5, Press @, "0:00" will flash in the display,
6, Press the ._ or v until the desired baking time appears,
Press _'_,"-"_,The earliest possible stop time will flash in the
7,
display,
8, Press the A or v until the desired stop time appears in the display,
9, Once the controls are set, the control calculates the time when baking will start in order to finish at the time you have
set,
10, The oven will turn on at the delayed start time and begin heating,
::::[1!!!!!1
!!_ii Si
When the Set Cook Time Rune Out:
1, "END" will appear in the display window and the oven will shut off automatically,
2, The control will beep 3 times every 60 seconds until d_ is pressed,
v
To Change the Oven Temperature or Cook Time after Baking has Started:
1, Press the function pad you want to change,
2, Press the A or v to adjust the setting,
Use caution when using the automatic timer, Use the automatic timer when cooking cured or frozen meats
and most fruits and vegetables, Foods that can easily spoil such as milk, eggs, fish, meat or poultry, should be chilled in
the refrigerator first, Even when chilled, they should not stand in the oven for more than 1 hour before cooking begins, and
should be removed promptly when cooking is completed,
13
Setting Oven Controls
Oven Baking mnformations
For best resuUts,preheat the oven before baking cookies, breads, cakes, pies or pastries, etc, There is no need to
preheat the oven for roasting meat or baking casseroUes,
The cooking times and temperatures needed to bake a product may vary sHghtUyfrom your previousUy owned appliance,
Refer to "RecaJibrating Your Oven Temperature" section,
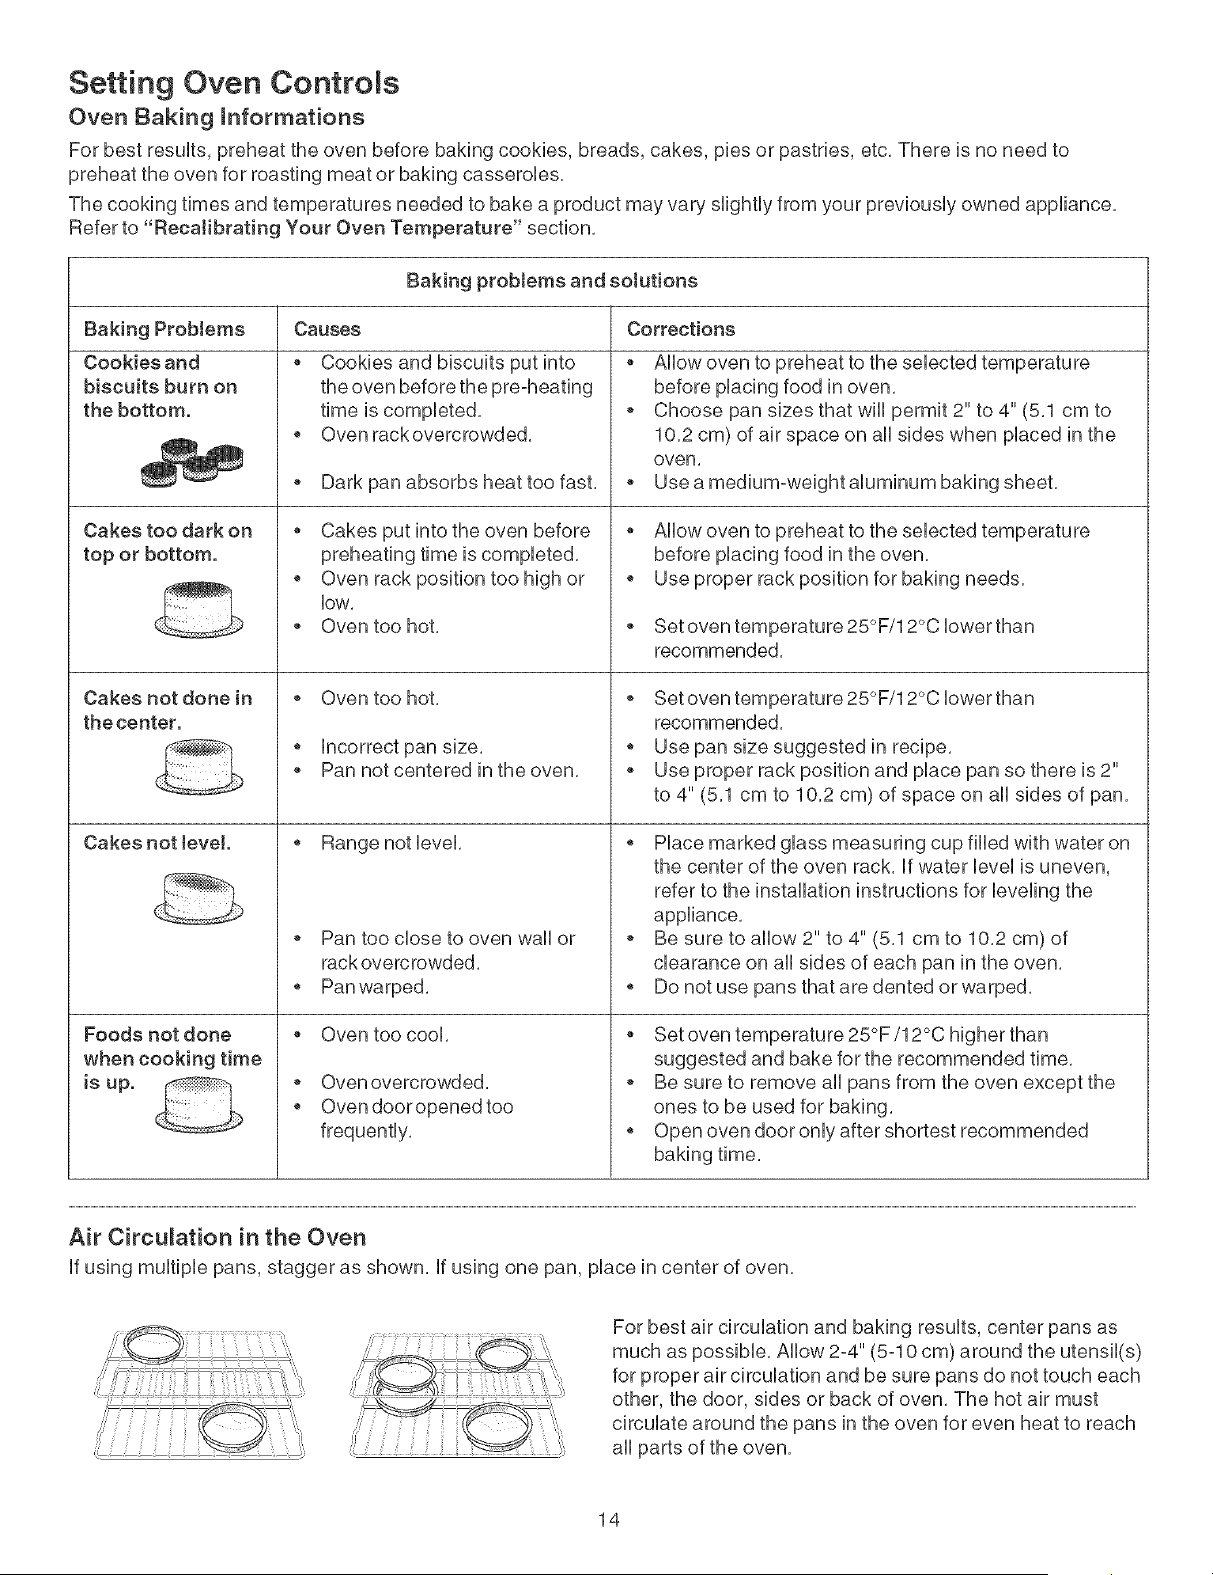
Baking problems and solutions
Causes Corrections
Baking ProMems
Cookies and
biscuits burn on
the bottom.
Cakes too dark on
top or bottom.
Cakes not done in
the center.
Cakes not tevel.
Foods not done
when cooking time
is up.
Cookies and biscuits put into
the oven before the pre°heating
time is completed,
Oven rack overcrowded,
Dark pan absorbs heat too fast,
Cakes put into the oven before
preheating time is completed,
o Oven rack position too high or
low,
Oven too hot,
o Oven too hot,
o Incorrect pan size,
Pan not centered in the oven,
o Range notlevel,
o Pan too close to oven wall or
rack overcrowded,
o Pan warped,
Oven too cool,
o Oven overcrowded,
o Oven dooropened too
frequently,
Allow oven to preheat to the selected temperature
before placing food in oven,
Choose pan sizes that will permit 2" to 4" (5,1 cm to
10,2 cm) of air space on all sides when placed in the
oven,
Use a medium-weight aluminum baking sheet,
Allow oven to preheat to the selected temperature
before placing food in the oven,
Use proper rack position for baking needs,
Set oven temperature 25°F/12°C lower than
recommended,
Set oven temperature 25°F/12°C lower than
recommended,
o Use pan size suggested in recipe,
Use proper rack position and place pan so there is 2"
to 4" (5,1 cm to 10,2 cm) of space on all sides of pan,
Place marked glass measuring cup filled with water on
the center of the oven rack, If water level is uneven,
refer to the installation instructions for leveling the
appliance,
Be sure to allow 2" to 4" (5,1 cm to 10,2 cm) of
clearance on all sides of each pan in the oven,
Do not use pans that are dented or warped,
Set oven temperature 25°F/12°C higher than
suggested and bake for the recommended time,
Be sure to remove all pans from the oven except the
ones to be used for baking,
Open oven door only after shortest recommended
Air Circulation in the Oven
If using multiple pans, stagger as shown, If using one pan, place in center of oven,
For best air circulation and baking results, center pans as
much as possible, Allow 2-4" (5-10 cm) around the utensil(s)
for proper air circulation and be sure pans do not touch each
other, the door, sides or back of oven, The hot air must
circulate around the pans in the oven for even heat to reach
all parts of the oven,
14
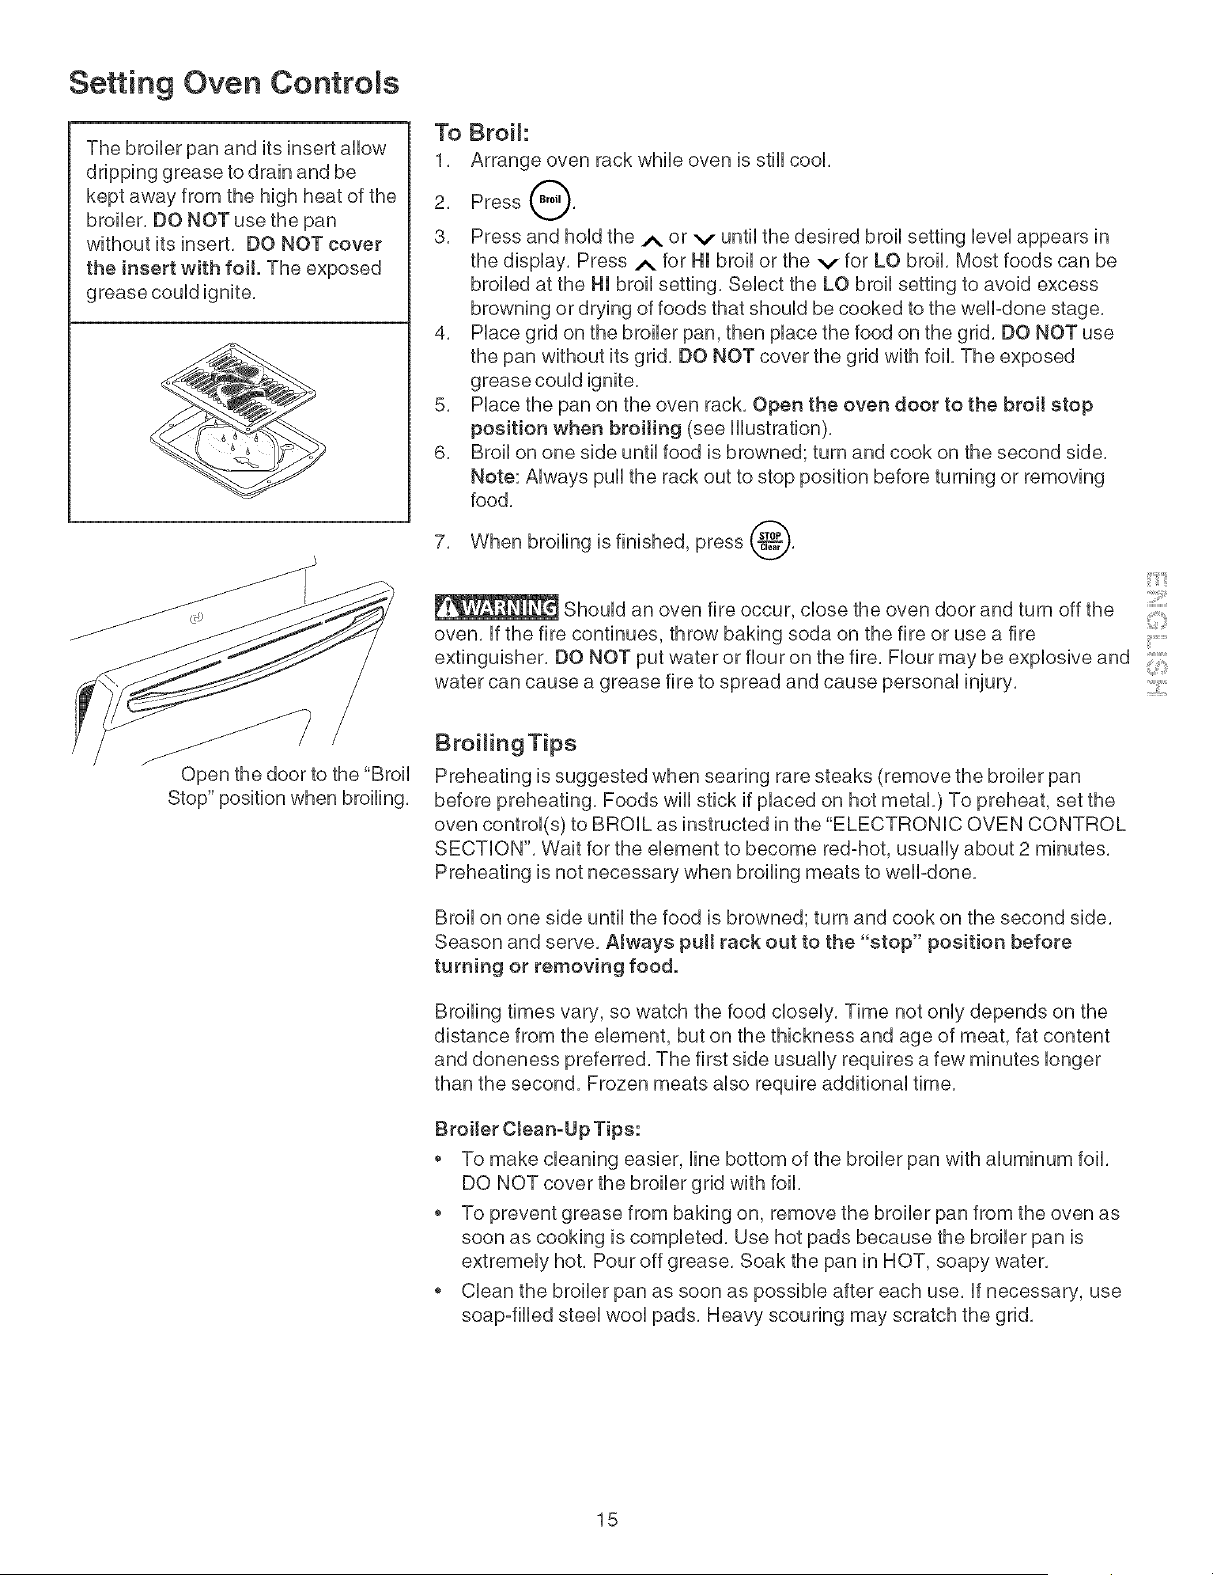
Setting Oven Controls
The broiler pan and its insert allow
dripping grease to drain and be
kept away from the high heat of the
broiler. DO NOT use the pan
without its insert, DO NOT cover
the insert with foil. The exposed
grease could ignite,
Open the door to the "Broil
Stop" position when broiling.
To Broil:
1. Arrange oven rack while oven is still cool.
2. Press @.
3. Press and hold the A or v until the desired broil setting level appears in
the display. Press .,_ for Hmbroil or the v for LO broil. Most foods can be
broiled at the Hmbroil setting, Select the LO broil setting to avoid excess
browning or drying of foods that should be cooked to the well-done stage,
4. Place grid on the broiler pan, then place the food on the grid, DO NOT use
the pan without its grid, DO NOT cover the grid with foil, The exposed
grease could ignite,
5. Place the pan on the oven rack. Open the oven door to the broil stop
position when broiling (see illustration).
6. Broil on one side until food is browned; turn and cook on the second side.
Note: Always pull the rack out to stop position before turning or removing
food.
7. When broiling is finished, press _.
g
::::
Should an oven fire occur, close the oven door and turn off the
oven, if the fire continues, throw baking soda on the fire or use a fire .......
extinguisher, DO NOT put water or flour on the fire, Flour may be explosive and
water can cause a grease fire to spread and cause personal injury,
Broiling Tips
Preheating is suggested when searing rare steaks (remove the broiler pan
before preheating. Foods wHUstick if pUaced on hot metaL) To preheat, set the
oven controU(s) to BROIL as instructed in the "ELECTRONIC OVEN CONTROL
SECTION'. Wait for the element to become red-hot, usually about 2 minutes.
Preheating is not necessary when broiling meats to welPdone.
Broil on one side until the food is browned; turn and cook on the second side,
Season and serve. Atways pull rack out to the "stop" position before
turning or removing food.
Broiling times vary, so watch the food closely. Time not only depends on the
distance from the element, but on the thickness and age of meat, fat content
and doneness preferred, The first side usually requires a few minutes longer
than the second, Frozen meats also require additional time,
Broiler Ctean-Up Tips:
To make cleaning easier, line bottom of the broiler pan with aluminum foil.
DO NOT cover the broiler grid with foil,
To prevent grease from baking on, remove the broiler pan from the oven as
soon as cooking is completed. Use hot pads because the broiler pan is
extremely hot. Pour off grease, Soak the pan in HOT, soapy water,
Clean the broiler pan as soon as possible after each use. if necessary, use
soap°filled steel wool pads, Heavy scouring may scratch the grid,
15
Oven CReaning
Seff°CWean Oven Cycle
Adhere to the Following Precautions:
Ailow the oven to cooi before cieaning,
Wear rubber gioves when cieaning any exterior part of the oven manualiy,
Before cieaning any part of the oven, be sure the eHectronb oven
controi is turned off or eise press CANCEL pad, Wait until the oven is cool
DO NOT use commercial oven cleaners or oven protective coatings in or around any
part of the self-cleaning oven, DO NOT clean the oven door gasket, The gasket on
the oven door is essential for a good seal, Care should be taken not to rub, damage
or move the gasket, DO NOT use aluminum foil to line the oven bottom, This may
affect cooking, or the foil could melt and damage the oven surface,
A self°cleaning oven cleans itself with high temperatures (well above cooking
temperatures) which eliminate soil completely or reduce it to a fine powdered ash you
can wash away with damp cloth,
Preparing the Oven for Seff-C_eaning
1, Before starting the seif-ciean cycie, remove excess spHiovers in the oven cavity
by using hot soapy water and a cioth, Large spHiovers can cause heavy smoke or
fire when subjected to high temperatures, DO NOT allow food spilis with a high
sugar or acid content (such as tomatoes, sauerkraut, fruit juices or pie flirting) to
remain on the surface as they may cause a duli spot even after cieaning,
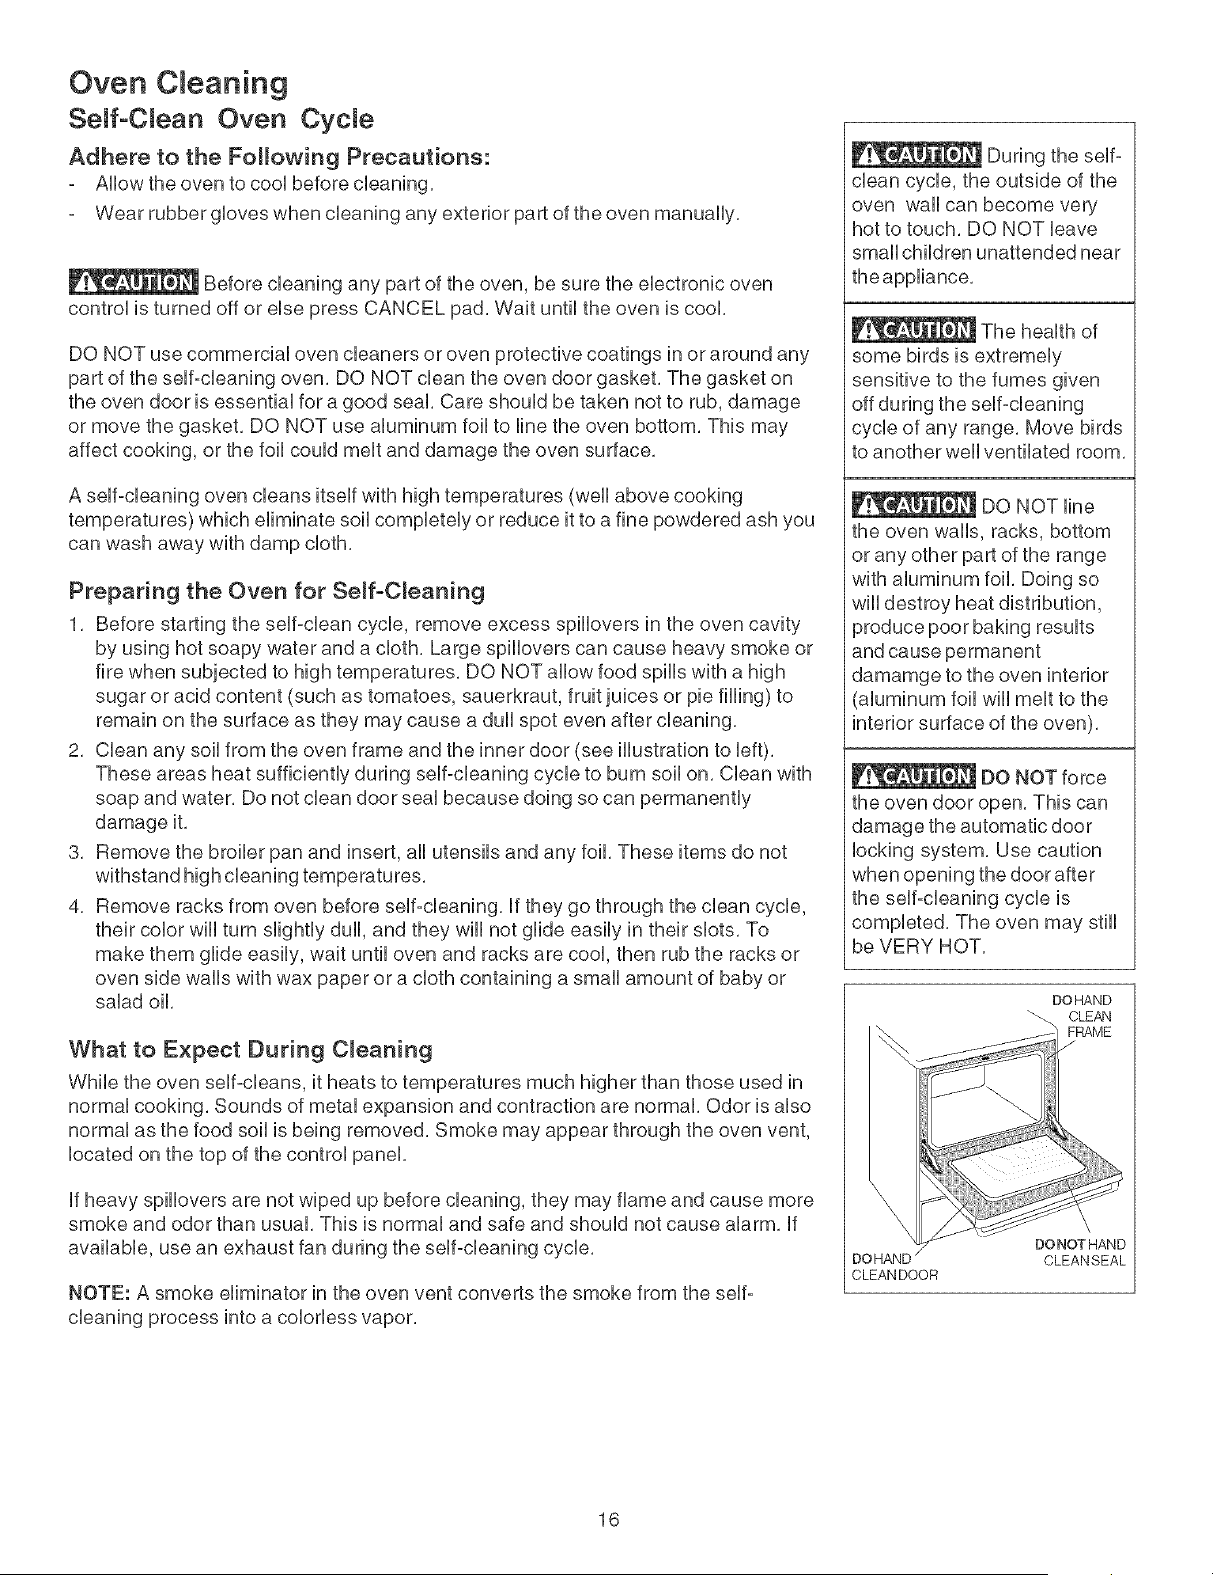
2, Ciean any soii from the oven frame and the inner door (see illustration to Heft),
These areas heat sufficientiy during seif-cieaning cycie to burn soii on, Ciean with
soap and water, Do not clean door seai because doing so can permanentiy
damage it,
3, Remove the broiler pan and insert, ali utensiis and any foil These items do not
withstand high cieaning temperatures,
4, Remove racks from oven before seif-cieaning, if they go through the clean cycie,
their color wili turn siightiy duli, and they wili not giide easiiy in their shots, To
make them giide easiiy, wait untii oven and racks are cool then rub the racks or
oven side walis with wax paper or a cioth containing a smali amount of baby or
salad oil,
What to Expect During C_eaning
While the oven seif-cieans, it heats to temperatures much higher than those used in
normai cooking, Sounds of metai expansion and contraction are normal Odor is aiso
normai as the food soii is being removed, Smoke may appear through the oven vent,
iocated on the top of the controi panel
if heavy spillovers are not wiped up before cleaning, they may flame and cause more
smoke and odor than usual, This is normal and safe and should not cause alarm, if
available, use an exhaust fan during the self-cleaning cycle,
NOTE: A smoke eliminator in the oven vent converts the smoke from the self:
cleaning process into a colorless vapor,
During the self-
clean cycle, the outside of the
oven wall can become very
hot to touch, DO NOT leave
small children unattended near
the appliance,
The health of
some birds is extremely
sensitive to the fumes given
off during the self-cleaning
cycle of any range, Move birds
to another well ventilated room,
DO NOT line
the oven walls, racks, bottom
or any other part of the range
with aluminum foil, Doing so
wiii destroy heat distribution,
produce poor baking results
and cause permanent
damamge to the oven interior
aluminum foil will melt to the
interior surface of the oven),
DO NOT force
the oven door open. This can
damage the automatic door
locking system, Use caution
when opening the door after
the self-cleaning cycle is
completed, The oven may still
be VERY HOT,
DOHAND
_-\ CLEAN
D(
CLEAN DOOR
DONOTHAND
CLEANSEAL
16
Oven C eaning
f
• i_l 3 sec
:!:i!!!!!!!!!!!!!!!!!!!!::....
• • • Oven
_roii • Preheat
• DoorLocked
;Cook
Time
Ste,
V so,/o. Time
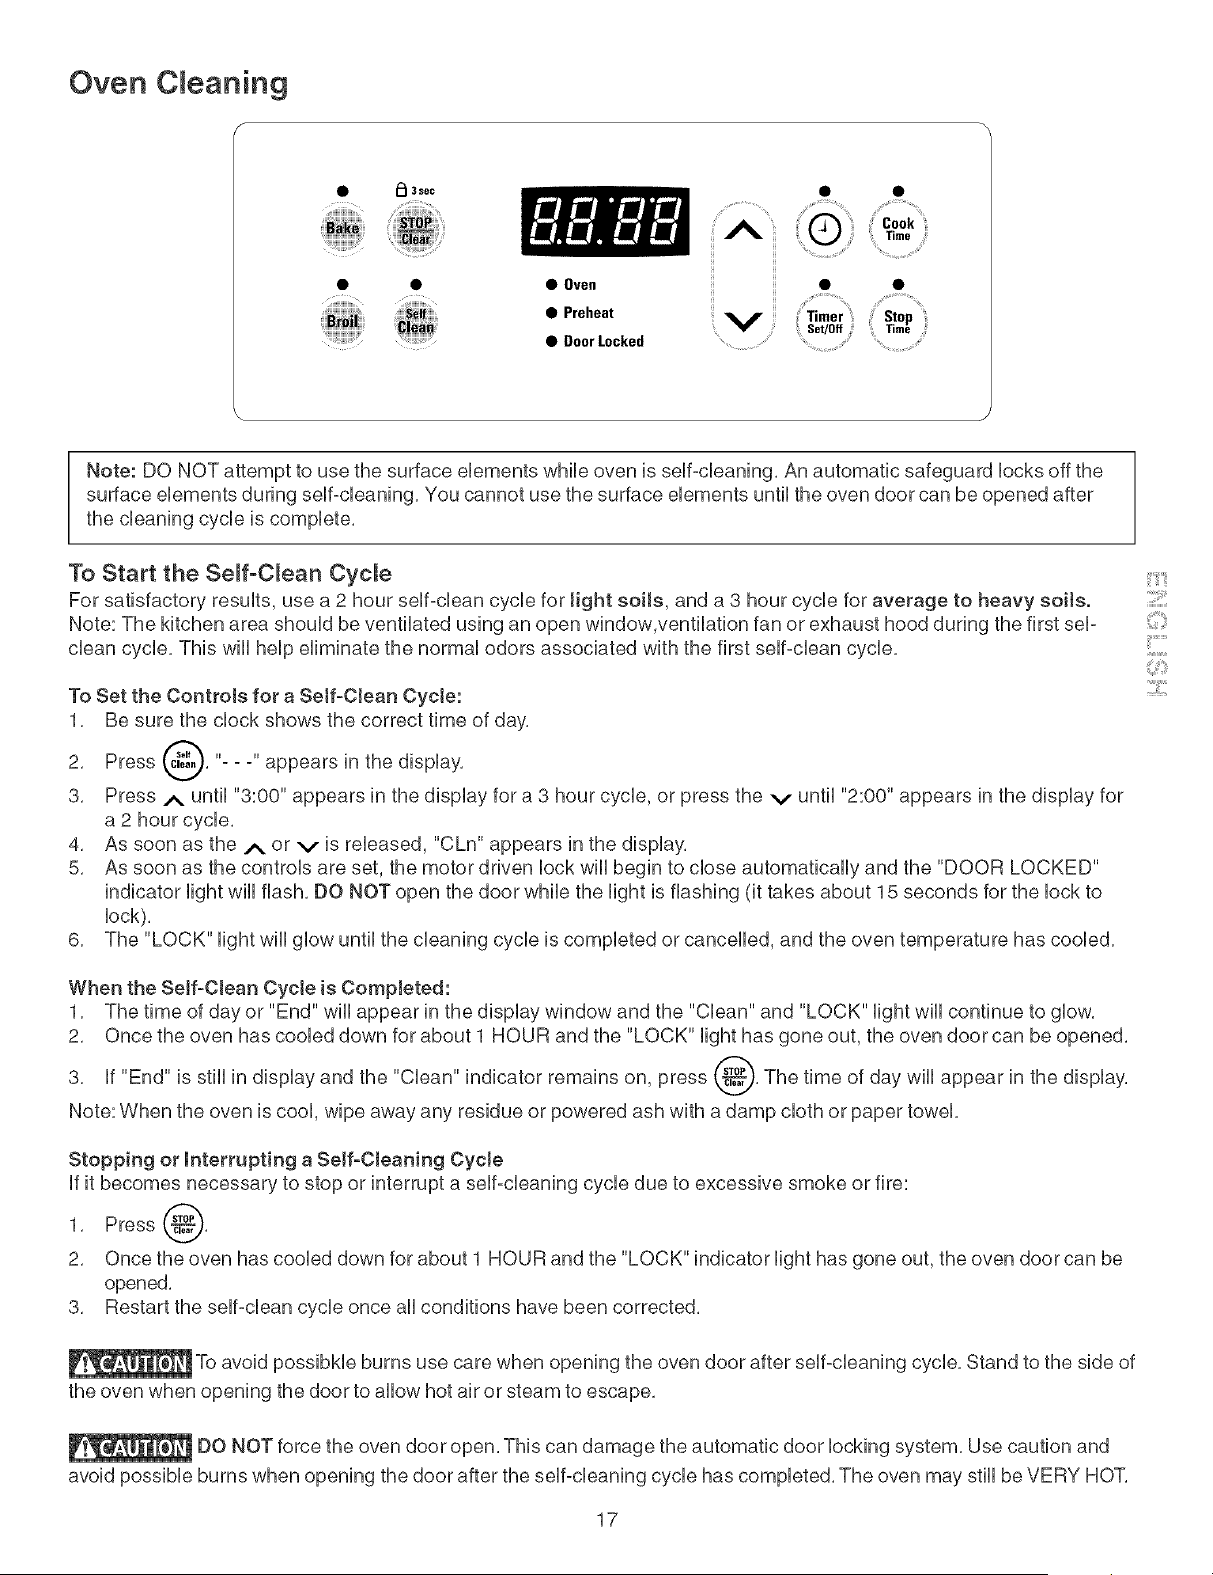
Note: DO NOT attempt to use the surface eUements while oven is seff=cUeaning,An automatic safeguard Uocksoff the
surface elements during self-cleaning, You cannot use the surface elements until the oven door can be opened after
the cleaning cycle is complete,
To Start the SeJf-Clean CycJe
For satisfactory results, use a 2 hour self-clean cycle for Jight soils, and a 3 hour cycle for average to heavy eoite.
Note: The kitchen area should be ventilated using an open window,ventilation fan or exhaust hood during the first sel-
clean cycle, This will help eliminate the normal odors associated with the first self-clean cycle,
To Set the Controls for a Self-Clean Cycte:
1, Be sure the clock shows the correct time of day,
Press _, "- - -" appears in the
2,
display,
3, Press _. until "3:00" appears in the display for a 3 hour cycle, or press the v until "2:00" appears in the display for
a 2 hour cycle,
4, As soon as the A or v is released, "CLn" appears in the display,
5, As soon as the controls are set, the motor driven lock will begin to close automatically and the "DOOR LOCKED"
indicator light will flash, DO NOT open the door while the light is flashing (it takes about 15 seconds for the lock to
lock),
6, The "LOCK" light will glow until the cleaning cycle is completed or cancelled, and the oven temperature has cooled,
When the Serf-Clean Cycte is Completed:
1, The time of day or "End" wiii appear in the display window and the "Clean" and "LOCK" light wiii continue to glow,
2, Once the oven has cooled down for about 1 HOUR and the "LOCK" light has gone out, the oven door can be opened,
3, if "End" is still in display and the "Clean" indicator remains on, press _, The time of day will appear in the display,
Note: When the oven is cool, wipe away any residue or sowered ash with a damp cloth or paper towel,
Stopping or interrupting a Serf-Cleaning CycJe
If it becomes necessary to stop or interrupt a self-cleaning cycle due to excessive smoke or fire:
1, Press @,
2, Once the oven has cooled down for about 1 HOUR and the "LOCK" indicator light has gone out, the oven door can be
opened,
3, Restart the self-clean cycle once all conditions have been corrected,
_To avoid possibHe burns use care when opening the oven door after self=cleaning cycle, Stand to the side of
the oven when opening the door to allow hot air or steam to escape,
DO NOT force the oven door open, This can damage the automatic door locking system, Use caution and
avoid possible burns when opening the door after the self-cleaning cycle has completed, The oven may still be VERY HOT,
17
::::[1!!!!!1
!!_ii Si
:i:iiii:!iii_
Genera Care & CReaning
C_eaning Various Parts of Your Range
Before cleaning any part of the range, be sure aHcontroUs are turned OFF and the range is cool Remove spHUoversand
heavy soiling as soon as possiMe, ReguUarcUeanings wHUreduce the effort required for major deanings later,
Surfaces
Aluminum & VinyJ
ControJ Panet and Trim
Pieces
GJass, Painted and PJastic
Body Parts, Control Knobs
and Decorative Trim Pieces
Stainless Steel (some
models) Oven door & drawer
Oven Racks
Surface Elements and Drip
Bowls
PorceJain Enamel
Broiler Pan and Insert, Door
Liner, Body Parts and
Warmer Drawerand Drawer
Cavity,
How to Clean
Use hot, soapy water and a cloth, Dry with a clean cloth,
Before cleaning the control panel, turn all controls to OFF and remove the control
knobs, To remove, pull each knob straight off the shaft, Clean using hot, soapy water
and a dishcloth, Rinse with a clean water and a dishcloth, Be sure to squeeze excess
water from the cloth before wiping the panel; especially when wiping around the
controls, Excess water in or around the controls may cause damage to the appliance,
Be sure to rinse the cleaners as bluish stains may occur during heating and cannot de
removed, To replace knobs after cleaning, line up the flat sides of both the knob and
the shaft; then push the knob into place,
For general cleaning, use hot, soapy water and a cloth, For more difficult soils and
built-up grease, apply a liquid detergent directly onto the soil, Leave on soil for 30 to
60 minutes, Rinse with a damp cloth and dry, DO NOT use abrasive cleaners on any
of these materials; they can scratch, To remove control knobs, turn to the OFF
)osition; grasp firmly and pull straight off the shaft, To replace knobs after cleaning,
line up the flat sides of both the knob and the shaft; then push the knob into place,
Clean with hot, soapy water and disdoth, Rinse with clean water and cloth, Do not
use cteaners with high concentrations of cHorides or cHorines. Do not use harsh
scrubbing cleaners, Only use kitchen cleaners that are especially made for cleaning
stainless steel, Always be sure to rinse the cleaners off from the surface as bluish
stains may occur during heating that cannot be removed,
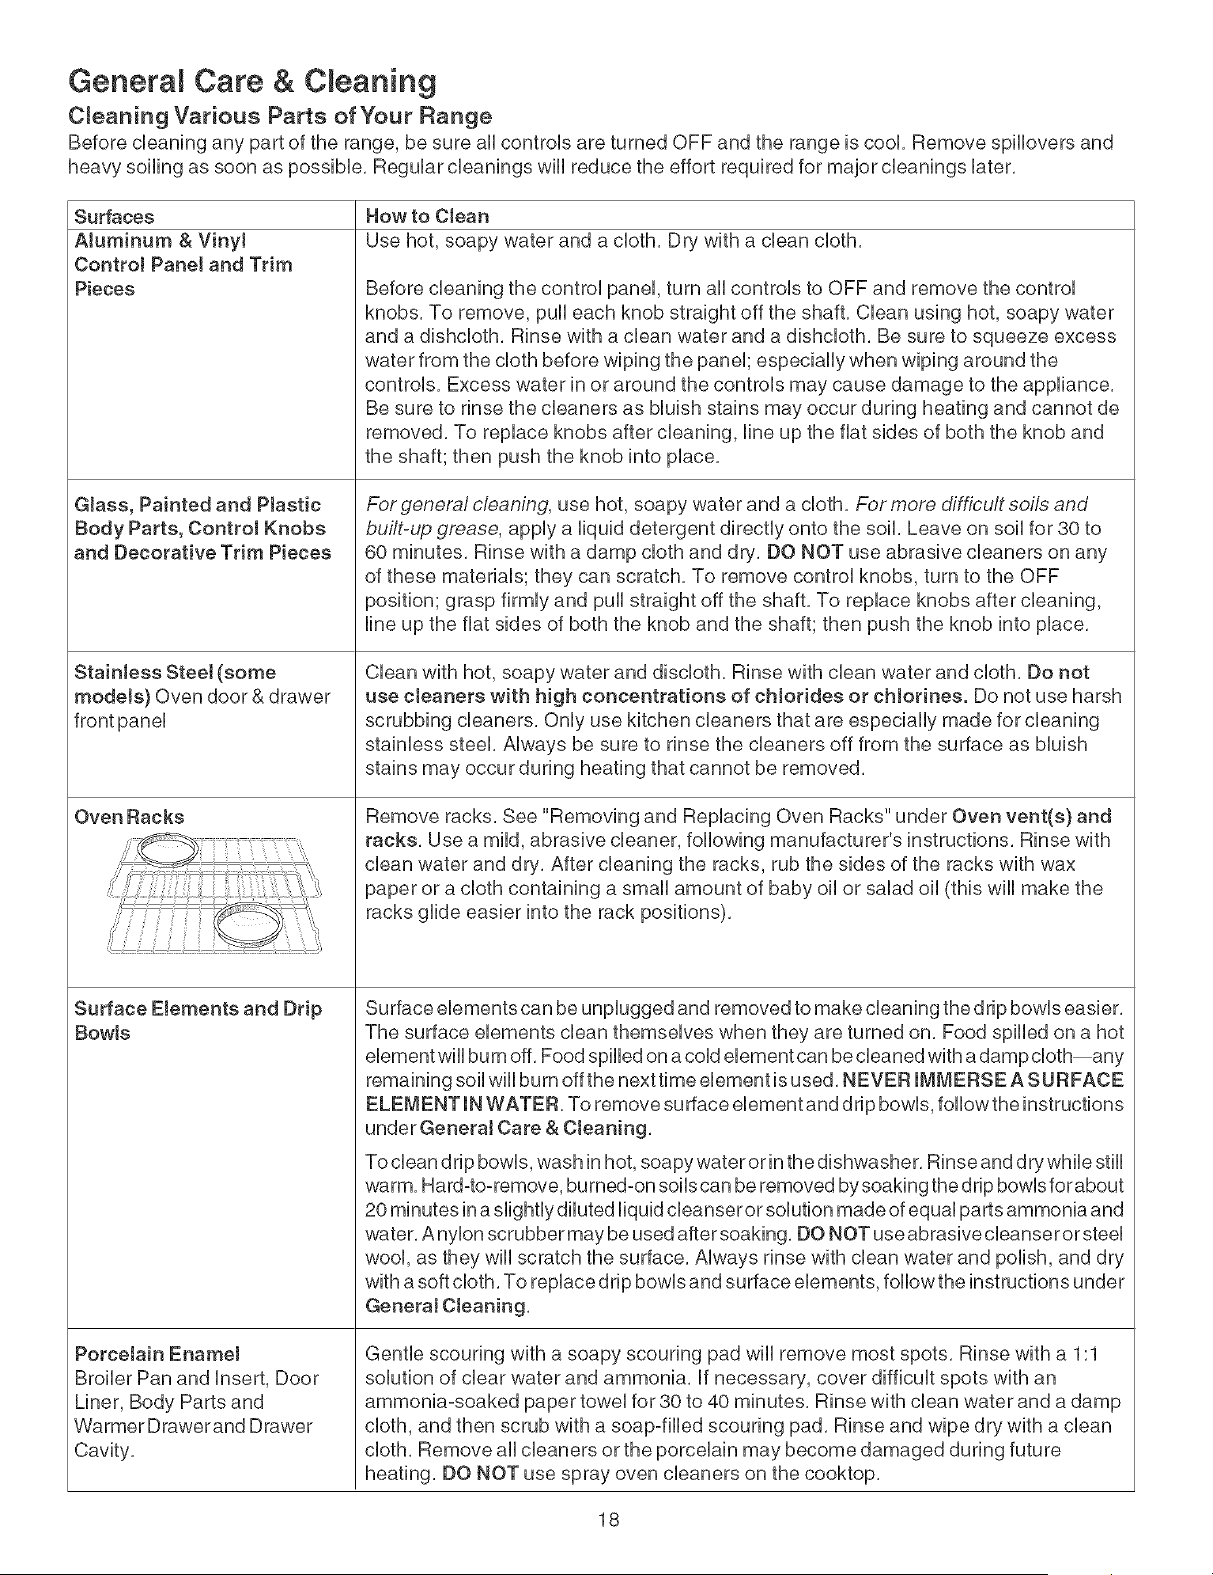
Remove racks, See "Removing and Replacing Oven Racks" under Oven vent(s) and
racks, Use a mild, abrasive cleaner, following manufacturer's instructions, Rinse with
clean water and dry, After cleaning the racks, rub the sides of the racks with wax
paper or a cloth containing a small amount of baby oil or salad oil (this will make the
racks glide easier into the rack positions),
Surface elements can be unplugged and removed to make cleaning the drip bowls easier,
The surface elements clean themselves when they are turned on, Food spilled on a hot
element will bum off, Food spilled on a cold element can be cleaned with a damp cloth any
remaining soil will burn offthe next time element is used, NEVER IMMERSE A SURFACE
ELEMENT IN WATER, To remove su dace element and drip bowls, follow the instructions
under GeneraJ Care & Cleaning,
To clean drip bowls, wash in hot, soapy water or in the dishwasher, Rinse and dry while still
warm, Hard-to-remove, burned-on soils can be removed by soaking the drip bowls forabout
20 minutes in a slightly diluted liquid cleanser or solution made of equal parts ammonia and
water, A nylon scrubber may be used after soaking, DO NOT use abrasive cleanser or steel
wool, as they will scratch the surface, Always rinse with clean water and polish, and dry
with a soft cloth, To replace drip bowls and surface elements, follow the instructions under
GeneraJ Cleaning,
Gentle scouring with a soapy scouring pad will remove most spots, Rinse with a 1:1
solution of clear water and ammonia, If necessary, cover difficult spots with an
ammonia-soaked paper towel for 30 to 40 minutes, Rinse with clean water and a damp
cloth, and then scrub with a soap-filled scouring pad, Rinse and wipe dry with a clean
cloth, Remove all cleaners or the porcelain may become damaged during future
heating, DO NOT use spray oven cleaners on the cooktop,
18
Genera Care & C eaning
Porcelain Ename_ Cooktop C_eaning mnstructions
Do not use acooktop cbaner on a hot cooktop, The fumes can be hazardous to your heaUth,and can chemically
damage the cooking surface,
Before cbaning the surface cooktop, be sure the controUs are turned to OFF and the cooktop is cool
DO NOT use commerciaJ oven cteaners on the exterior surfaces incUuding rangetop and door frame,
Correct and consistent cleaning is essential to maintaining your porcelain enamel cooktop, if food spills and grease spatters
are not removed, they may burn onto the surface of the cooktop and cause permanent discoloration,
Daily Charting
For normal soil:
1, Allow cooktop surface to cool,
2, Wipe off spills and spatters using a clean paper towel or a clean cloth with warm, soapy water,
3, if needed, use a soapy steel wool pad or other mild household cleaners,
4, Be sure to rinse off the cleaners or the porcelain may become damaged during future heating,
For heavy, burned-on soil:
1, Allow cooktop surface to cool,
2, Use a soap filled scouring pad with warm water or cover heavily soiled spots with a solution of clear water and ammonia,
3,
For sugary spHJovers:
Sugary spills can chemically damage your cooktop surface, Therefore, you must begin cleaning the spills while the cooktop
is still hot, Use caution when following the steps below,
1, Turn off all surface units and remove all pans immediately,
2, Put on an oven mitt, wipe up carefully or move hot spills away from the element area with a clean damp cloth,
3, Allow the cooktop to cool, Follow the instructions above for heavy, burnedoon soil,
Scour gently, Rinse and wipe dry with a clean cloth,
if any soil remains, apply a few drops of a recommended cooktop cleaning cream on the spots and rub gently using a clean
damp cloth or scouring pad, Buff with a dry cloth until all soil and cream are removed, Frequent cleaning with the cooktop ....
cleaning cream leaves a protective coating which helps in preventing scratches and abrasions,
COOKTOP CLEANING / POLISHING CREAM can be purchased through authorized Sears service centers or Sears stores,
SURFACES CLEANmNG AGENTS mNSTRUCTmONS
Porcelain enamel (cooktop, Mild cleaners or soap-filled Use a damp sponge or dampened soap pad, rinse
surface under cooktop) steel wool pads, and dry,
Broil Insert Hot, soapy water or cleaner Use a clean soapy, dampened cloth or paper towel,
ControJ Panel cream, remove soil and dry, Do not use abrasive products,
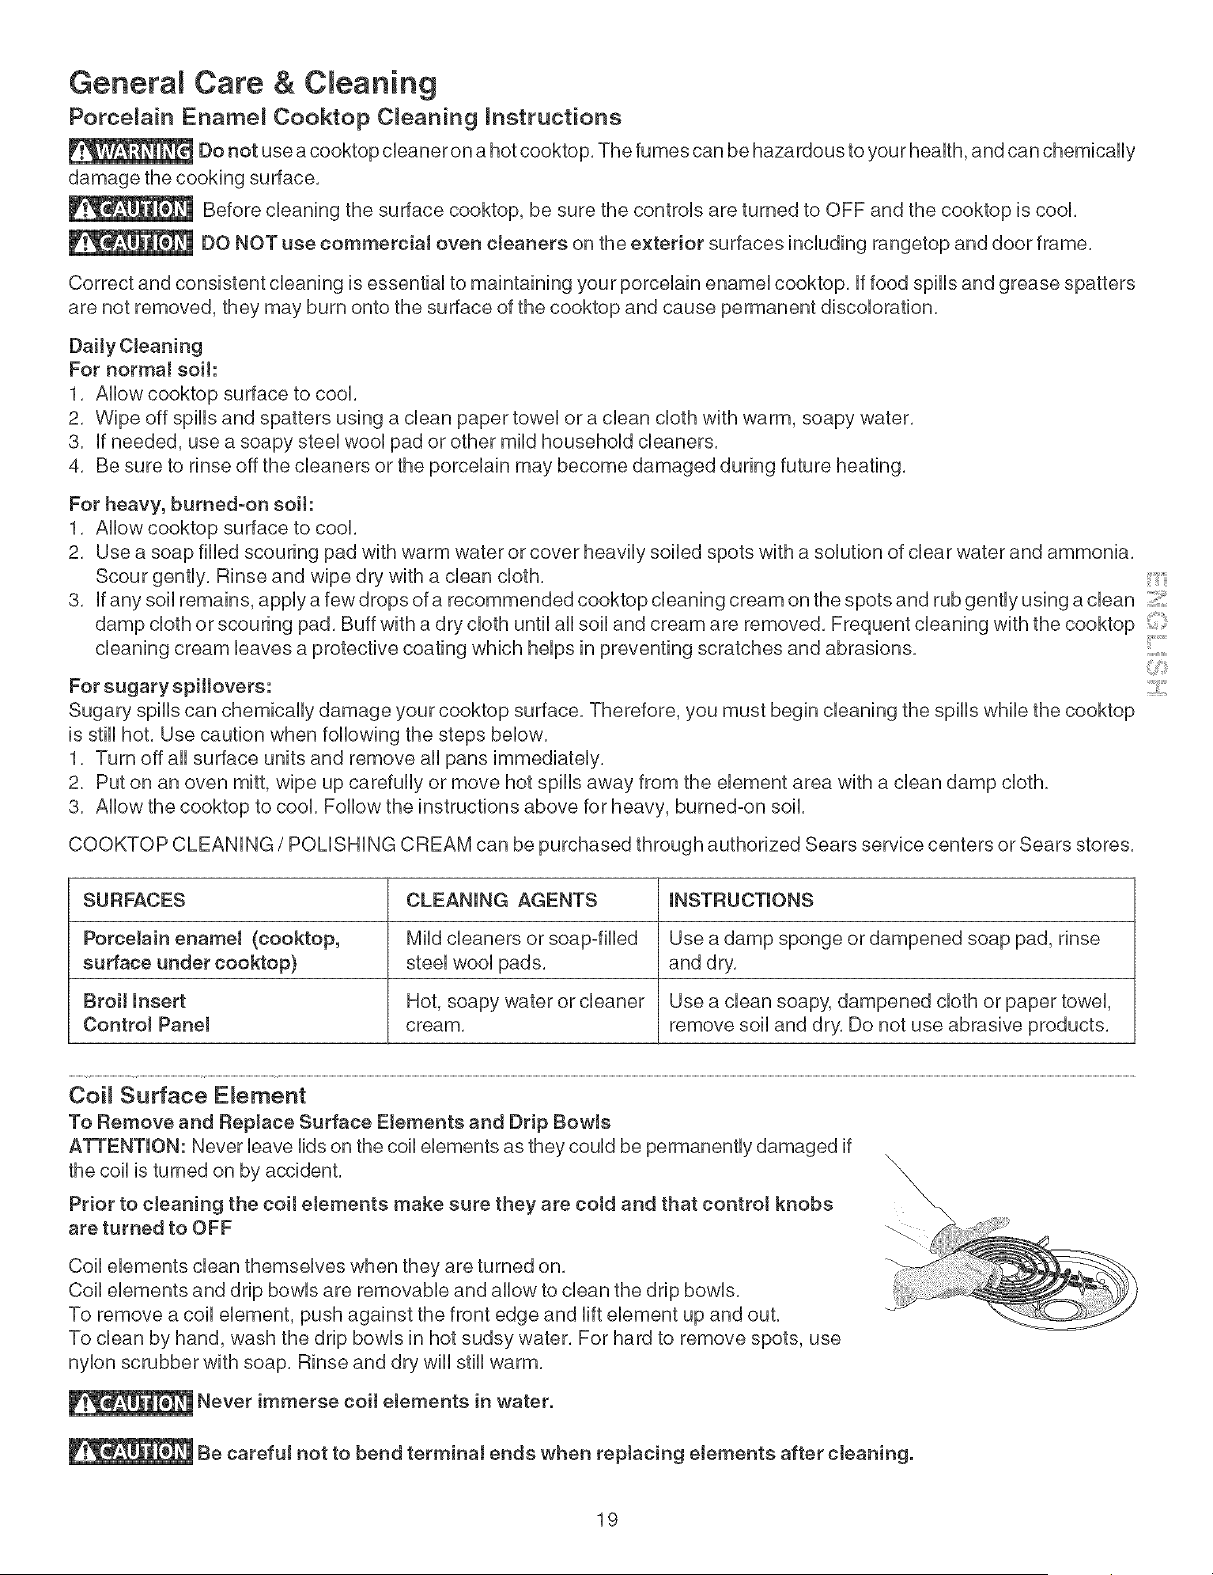
Coil Surface E_ement
To Remove and Replace Surface EJements and Drip BowJs
ATTENTION: Never leave lids on the coil elements as they could be permanently damaged if
the coil is turned on by accident,
Prior to cleaning the coit etements make sure they are cold and that control knobs
are turned to OFF
Coil elements clean themselves when they are turned on,
Coil elements and drip bowls are removable and allow to clean the drip bowls,
To remove a coil element, push against the front edge and lift element up and out,
To clean by hand, wash the drip bowls in hot sudsy water, For hard to remove spots, use
nylon scrubber with soap, Rinse and dry wiii still warm,
Never immerse coit etements in water,
Be carefu! not to bend terminaJ ends when replacing elements after cleaning,
19
Care & Cleaning
To Raise theTop for C_eaning
1, Grasp the sides and Hftfrom the front, A Hft-up rod wHUsupport the top in its raised position,
OnUyHftthe top high enough to aUUowthe support rod to rest in pUaceunder the front of the
cooktop,
2, CUeanunderneath using a dean cUothand hot, soapy water,
3, To Uowerthe top, Hft the top sHghtUyand Uowerthe rod, Lower the range top down into the
range frame,
A rod swings up to support _ When bwedng the Hft-up range top, grasp the sides with fingertips onhi, Be
neath, carefuUnot to pinch fingers, DO NOT drop or bend the range top when raising or bwering, This
couUddamage the surface,
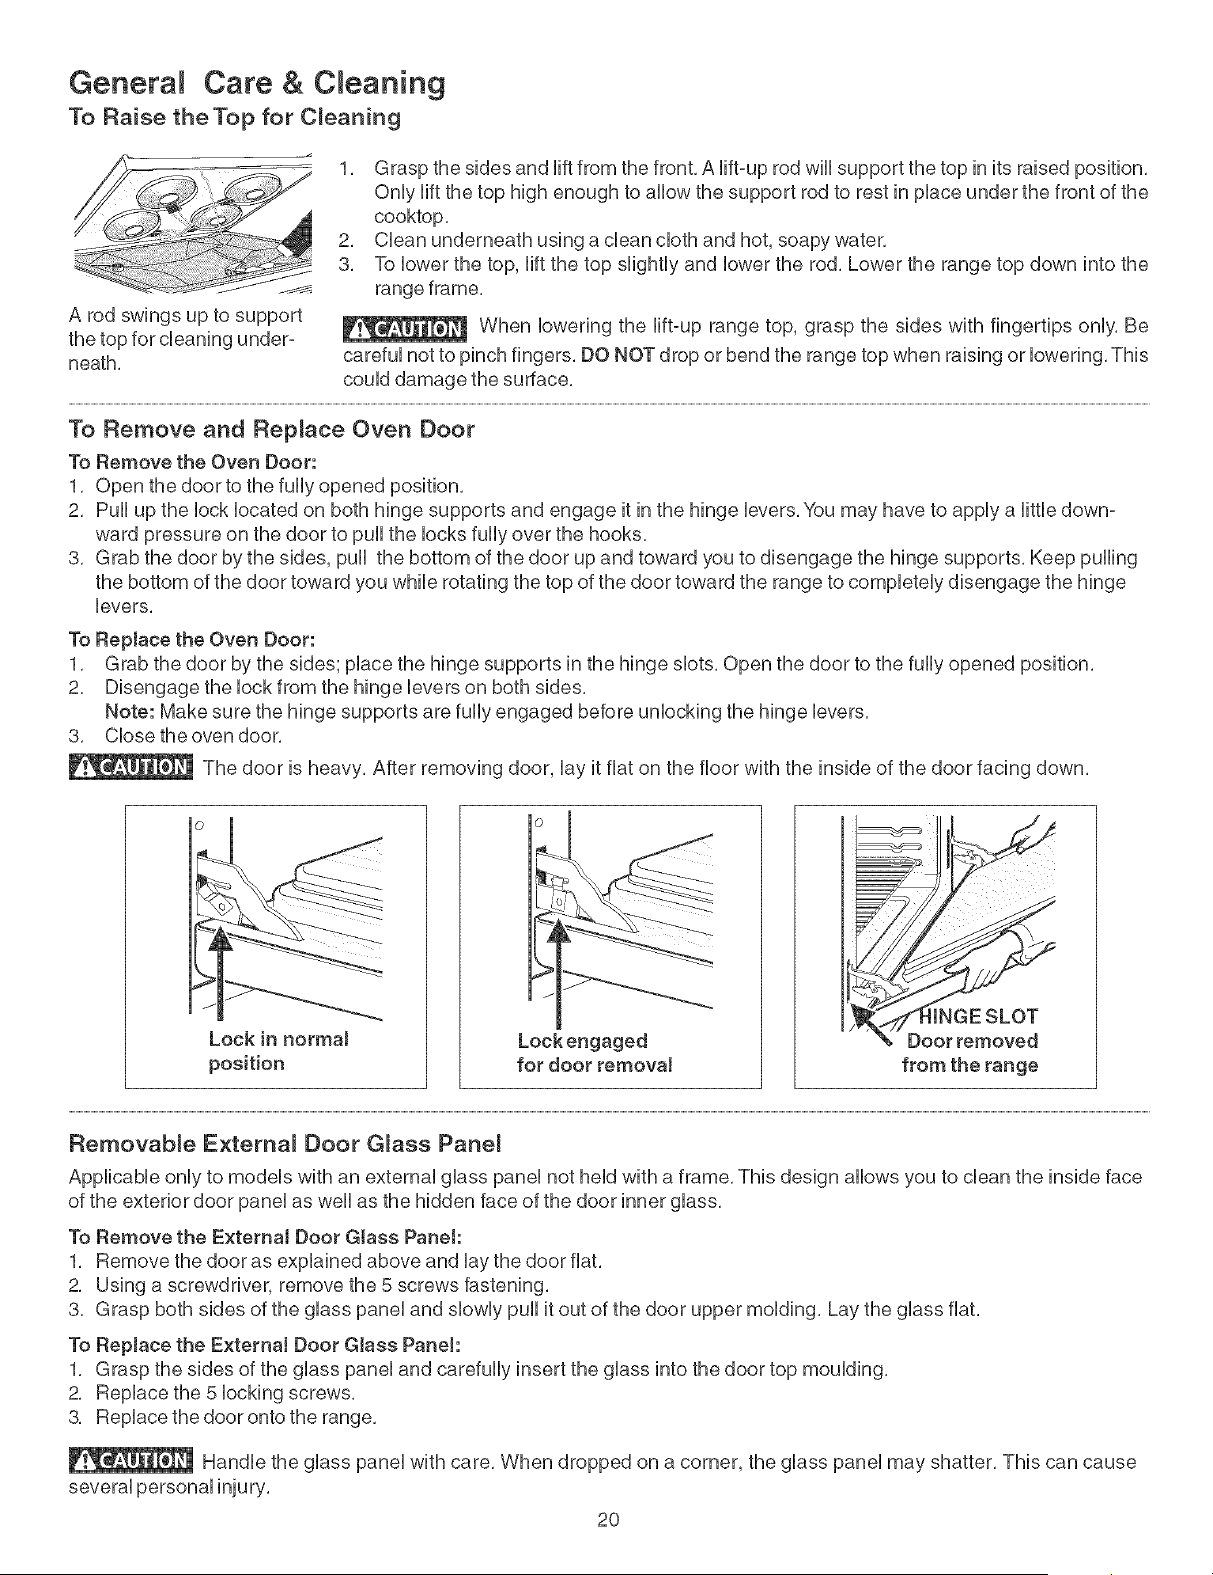
To Remove and Replace Over) Door
To Remove the Oven Door:
1, Open the door to the fully opened position,
2, Pull up the lock located on both hinge supports and engage it in the hinge levers, You may have to apply a little down-
ward pressure on the door to pull the locks fully over the hooks,
3, Grab the door by the sides, pull the bottom of the door up and toward you to disengage the hinge supports, Keep pulling
the bottom of the door toward you while rotating the top of the door toward the range to completely disengage the hinge
levers,
To Replace the Oven Door:
1, Grab the door by the sides; place the hinge supports in the hinge slots, Open the door to the fully opened position,
2, Disengage the lock from the hinge levers on both sides,
Note: Make sure the hinge supports are fully engaged before unlocking the hinge levers,
3, Close the oven door,
The door is heavy, After removing door, lay it flat on the floor with the inside of the door facing down,
Lock in normaJ
position
Lock engaged
for door removaJ
{INGE SLOT
Door removed
from the range
Removable Externa_ Door G_ass Pane_
Applicable only to models with an external glass panel not held with a frame, This design allows you to clean the inside face
of the exterior door panel as well as the hidden face of the door inner glass,
To Remove the ExternaJ Door Glass Panet:
1, Remove the door as explained above and lay the door flat,
2, Using a screwdriver, remove the 5 screws fastening,
3, Grasp both sides of the glass panel and slowly pull it out of the door upper molding, Lay the glass flat,
To Rep(ace the External Door G(ass PaneJ:
1, Grasp the sides of the glass panel and carefully insert the glass into the door top moulding,
2, Replace the 5 locking screws,
3, Replace the door onto the range,
Handle the glass panel with care, When dropped on a corner, the glass panel may shatter, This can cause
several personal injury,
2O

Genera C eaning
To Remove and Replace the Storage Drawer
Use the storage drawer for storing cooking utensils, The drawer can de removed to facilitate cleaning under the range, Use
care when handling the drawer,
To open the storage drawer, push the drawer in gently and it wiii spring open, To close, push the drawer until you hear a
click, which indicates that the spring is compressed, and the drawer is closed,
Frame
Storage
Drawer
To remove the drawer:
1, Pull empty drawer out to the roller guide stop,
2, Tilt the drawer up and pull it out over the rollers,
To replace the drawer:
1, insert the rear end of the drawer into the opening,
2, Fit the drawer end rollers onto the guide rails,
3, Push the drawer in until it stops, then lift to allow the rollers to clear the roller guide
stop, and push in,
Care and CJeaning of StainJess SteeJ (Stainless Steel models only)
Some models are equipped with stainless steel exterior parts, Special care and cleaning are required for maintaining the
appearance of stainless parts, Please refer to the table provided at the beginning of the GeneraJ Care & Cleaning section
in this Use & Care Manual, .......
RecaRibrat[ng Your Oven Temperature
Your oven thermostat has been precisely set at the factory, This setting may differ from your previous oven, however, so
your recipe times may not give you the results you expect, if you think that the oven is cooking too hot or cool for your
recipe times, you can adjust the thermostat so that the oven cooks hotter or cooler than the temperature displayed,
To Adjust OvenTemperature:
1, Press @,
2, Set the temperature to 550°F (287°C) by pressing and holding the i'.,
3, Within 2 seconds, press and hold @ until the special 2 digit display appears, Release @, The display now
indicates the amount of degrees offset between the original factory temperature setting and the current temperature
setting, if the oven control has the original factory calibration, the display will read %0,"
4, The temperature can now be adjusted up or down 35°F (17°C), in 5°F (1°C) steps by pressing and holding the A or
v, Adjust until the desired amount of degrees offset appears in the display, When lowering the oven temperature, a
minus sign (=)will appear before the number to indicate that the oven will be cooler by the displayed amount of de=
grees,
5, When you have made the desired adjustment, press (_c.'-_,P_to go back to the time of day display,
Note: The adjustment made wiii not change the self=cleaning temperature,
21
Before you call
Solutions to Common Problems
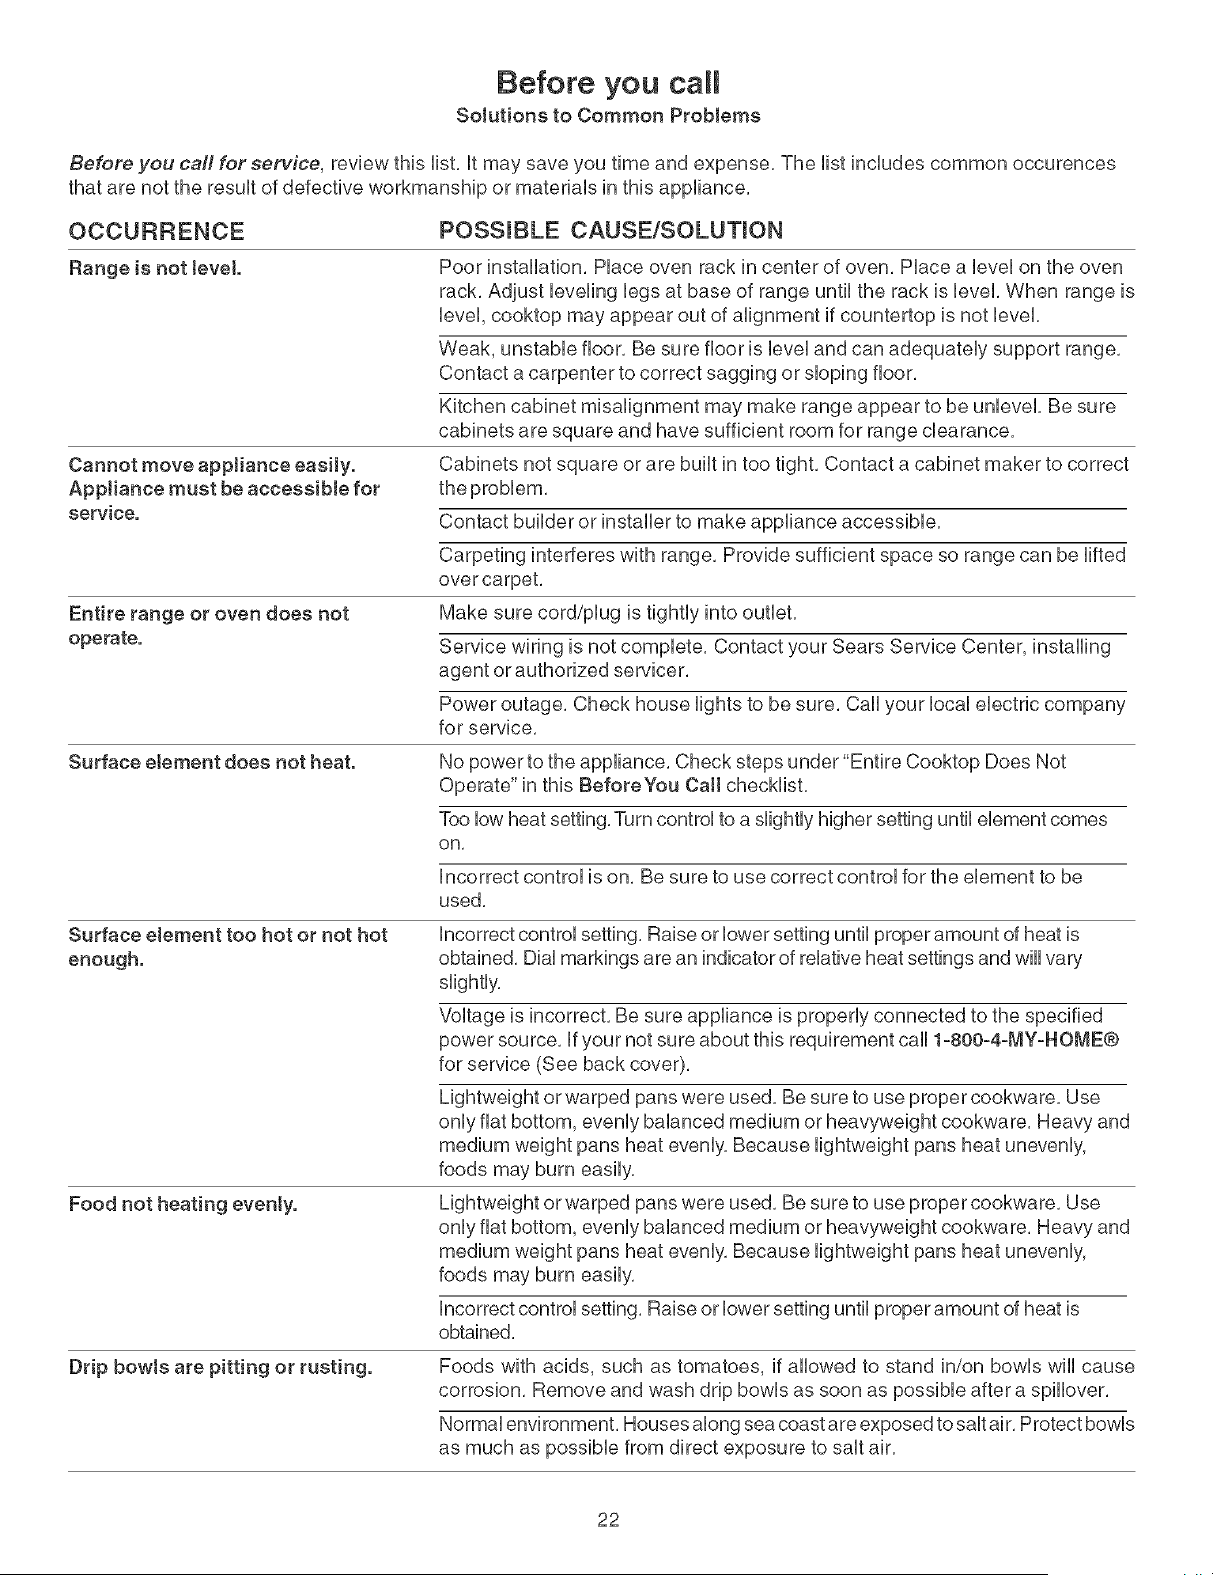
Before you call for service, review this list, it may save you time and expense, The list includes common occurences
that are not the result of defective workmanship or materials in this appliance,
OCCURRENCE
Range is not level.
Cannot move appliance easily.
AppJiance must be accessible for
service.
Entire range or oven does not
operate.
Surface element does not heat.
Surface element too hot or not hot
enough.
Food not heating evenly.
Drip bowls are pitting or rusting.
POSSIBLE CAUSEiSOLUTmON
Poor installation, Place oven rack in center of oven, Place a level on the oven
rack, Adjust leveling legs at base of range until the rack is level, When range is
level, cooktop may appear out of alignment if countertop is not level,
Weak, unstable floor, Be sure floor is level and can adequately support range,
Contact a carpenter to correct sagging or sloping floor,
Kitchen cabinet misalignment may make range appear to be unbvel, Be sure
cabinets are square and have sufficient room for range clearance,
Cabinets not square or are built in too tight, Contact a cabinet maker to correct
Contact builder or installer to make appliance accessible,
Carpeting interferes with range, Provide sufficient space so range can be lifted
over carpet,
Make sure cord/plug is tightly into outlet,
Service wiring is not complete, Contact your Sears Service Center, installing
agent or authorized servicer,
Power outage, Check house lights to be sure, Call your local electric company
for service,
No power to the appliance, Check steps under"Entire Cooktop Does Not
Operate" in this BeforeYou Call checklist,
Too low heat setting, Turn control to a slightly higher setting until element comes
on,
Incorrect control is on, Be sure to use correct control for the element to be
used,
Incorrect control setting, Raise or lower setting until proper amount of heat is
obtained, Dial markings are an indicator of relative heat settings and will vary
slightly,
Voltage is incorrect, Be sure appliance is properly connected to the specified
power source, If your not sure about this requirement call 1-800-4-MY-HOME®
for service (See back cover),
Lightweight or warped pans were used, Be sure to use proper cookware, Use
only flat bottom, evenly balanced medium or heavyweight cookware, Heavy and
medium weight pans heat evenly, Because lightweight pans heat unevenly,
foods may burn easily,
Lightweight or warped pans were used, Be sure to use proper cookware, Use
only flat bottom, evenly balanced medium or heavyweight cookware, Heavy and
medium weight pans heat evenly, Because lightweight pans heat unevenly,
foods may burn easily,
incorrect control setting, Raise or lower setting until proper amount of heat is
obtained,
Foods with acids, such as tomatoes, if allowed to stand in/on bowls wiii cause
corrosion, Remove and wash drip bowls as soon as possible after a spillover,
Normal environment, Houses along sea coast are exposed to salt air, Protect bowls
as much as possible from direct exposure to salt air,
22
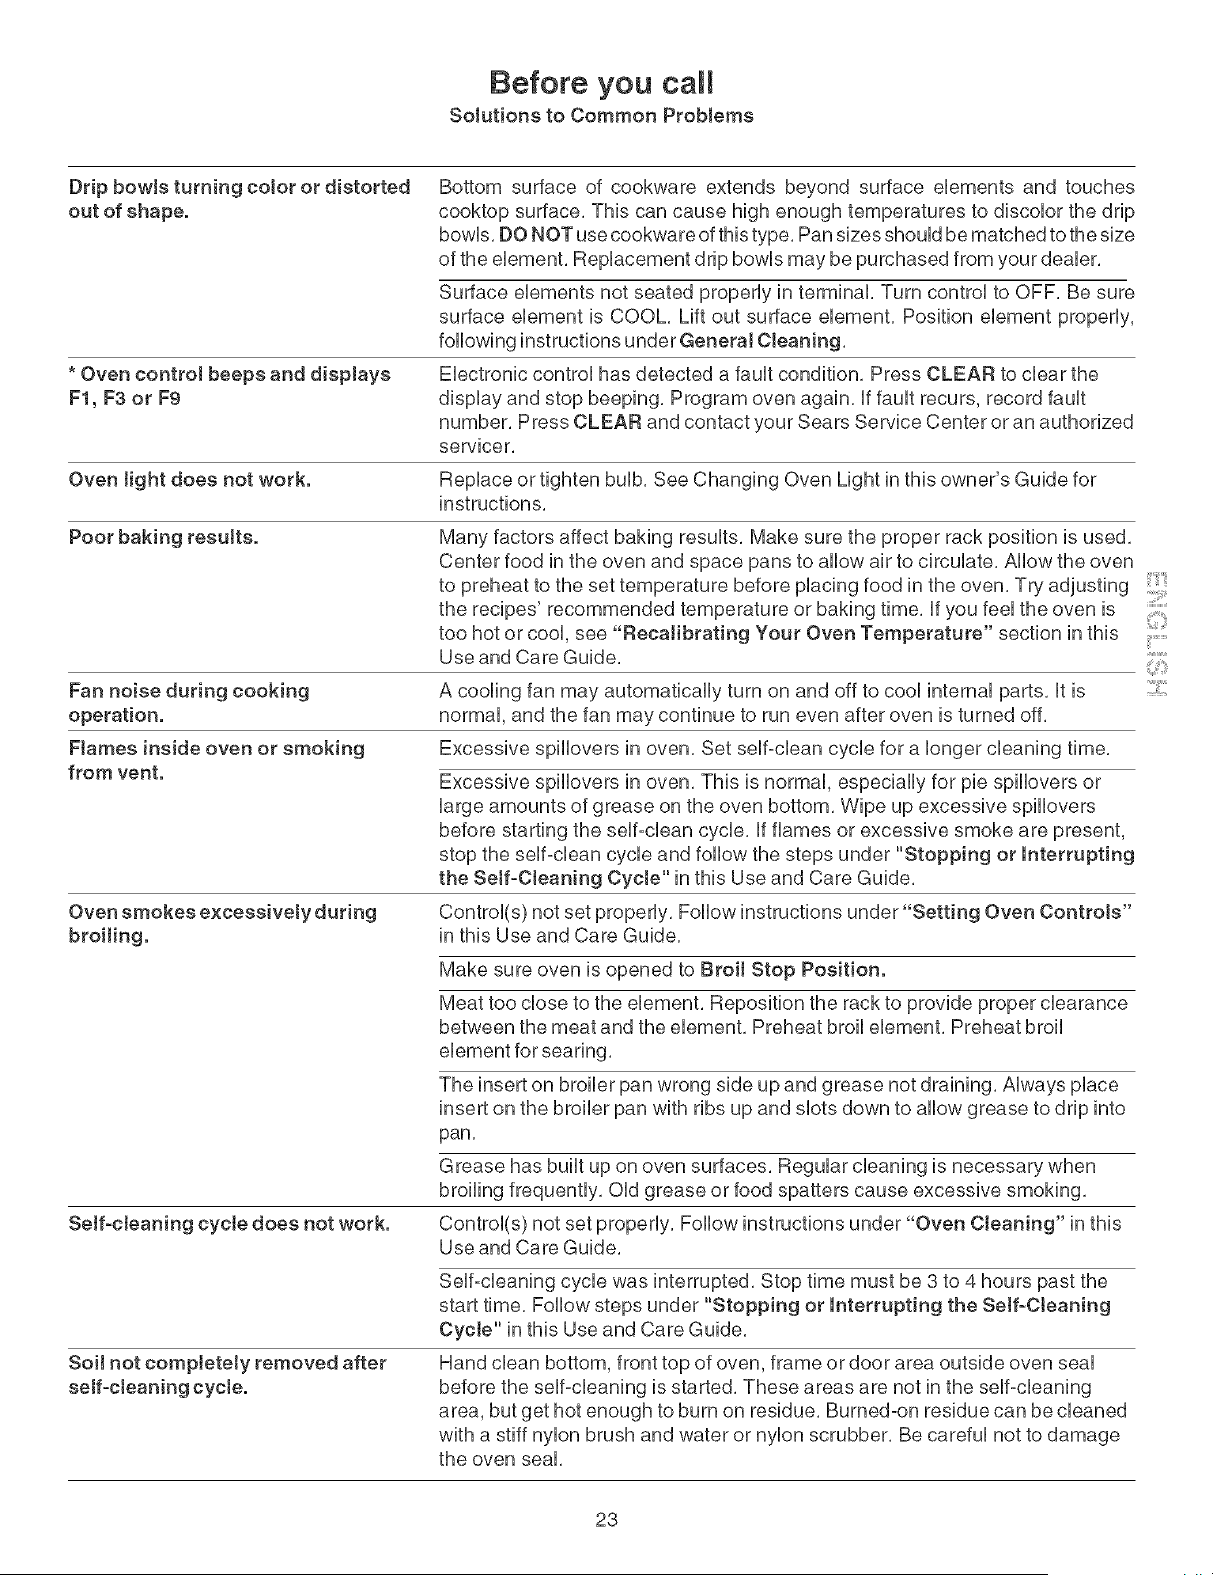
Before you call
Solutions to Common Problems
Drip bowls turning color or distorted
out of shape.
Bottom surface of cookware extends beyond surface ebments and touches
cooktop surface, This can cause high enough temperatures to discobr the drip
bowb, DO NOT use cookware of this type, Pan sizes shouUdbe matched to the size
of the ebment, RepUacement drip bowUsmay be purchased from your deabr,
Surface ebments not seated property in terminal Turn controU to OFF, Be sure
surface ebment is COOL, Lift out surface ebment, Position ebment properUy,
following instructions under General Cleaning,
* Oven control beeps and displays Electronic control has detected a fault condition, Press CLEAR to clear the
F1, F3 or F9 display and stop beeping, Program oven again, If fault recurs, record fault
number, Press CLEAR and contact your Sears Service Center or an authorized
servicer,
Oven tight does not work. Replace or tighten bulb, See Changing Oven Light in this owner's Guide for
instructions,
Poor baking results. Many factors affect baking results, Make sure the proper rack position is used,
Center food in the oven and space pans to allow air to circulate, Allow the oven
to preheat to the set temperature before placing food in the oven, Try adjusting
the recipes' recommended temperature or baking time, if you feel the oven is
too hot or cool, see "Becalibrating Your Oven Temperature" section in this .......
Use and Care Guide, ::
2:::
Fan noise during cooking
operation.
Flames inside oven or smoking
from vent.
Oven smokes excessively during
broiling.
A cooling fan may automatically turn on and off to cool internal parts, it is
normal, and the fan may continue to run even after oven is turned off.
Excessive spillovers in oven. Set self-clean cycle for a longer cleaning time.
Excessive spiiiovers in oven. This is normal, especially for pie spiiiovers or
large amounts of grease on the oven bottom. Wipe up excessive spillovers
before starting the self-clean cycle, if flames or excessive smoke are present,
stop the self°clean cycle and follow the steps under "Stopping or Interrupting
the Self-Cleaning Cycte" in this Use and Care Guide,
Control(s) not set properly, Follow instructions under"Setting Oven Controls"
in this Use and Care Guide,
Make sure oven is opened to Broit Stop Position.
Meat too close to the element, Reposition the rack to provide proper clearance
between the meat and the element, Preheat broil element, Preheat broil
Self-cleaning cycte does not work.
The insert on broiler pan wrong side up and grease not draining. Always place
insert on the broiler pan with ribs up and slots down to allow grease to drip into
pan.
Grease has built up on oven surfaces. Regular cleaning is necessary when
broiling frequently. Old grease or food spatters cause excessive smoking.
Control(s) not set properly, Follow instructions under "Oven Cleaning" in this
Use and Care Guide,
Soil not compJetety removed after
self-cleaning cycte.
Self-cleaning cycle was interrupted, Stop time must be 3 to 4 hours past the
start time, Follow steps under "Stopping or Interrupting the Self-Cleaning
Cyete" in this Use and Care Guide,
Hand clean bottom, front top of oven, frame or door area outside oven seal
before the self-cleaning is started, These areas are not in the self-cleaning
area, but get hot enough to burn on residue, Burned-on residue can be cleaned
with a stiff nylon brush and water or nylon scrubber, Be careful not to damage
the oven seal,
23

TM SM
® Registered Trademark / Trademark / Sewice Mark of Scars, Roebuck and Co,
TM
® Marca Registrada / Marca de Ffibrica / SM Marca de Servicio de Sears, Roebuck and Co,
MD
MCMarque de commerce / Marque d_pos_e de Sears, Roebuck and Co= © Sears, Roebuck and Co=


