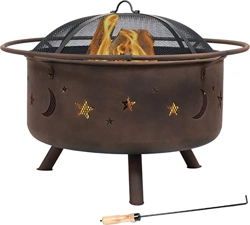
Assembly and Instruction Sheet
Important!
Please read and follow ALL instructions before assembling or using this
product, particularly the safety statements. Failure to follow instructions
and warnings could result in damage to property, serious injury or death.
Tools Required:
• Phillips Head Screwdriver
• Adjustable Wrench
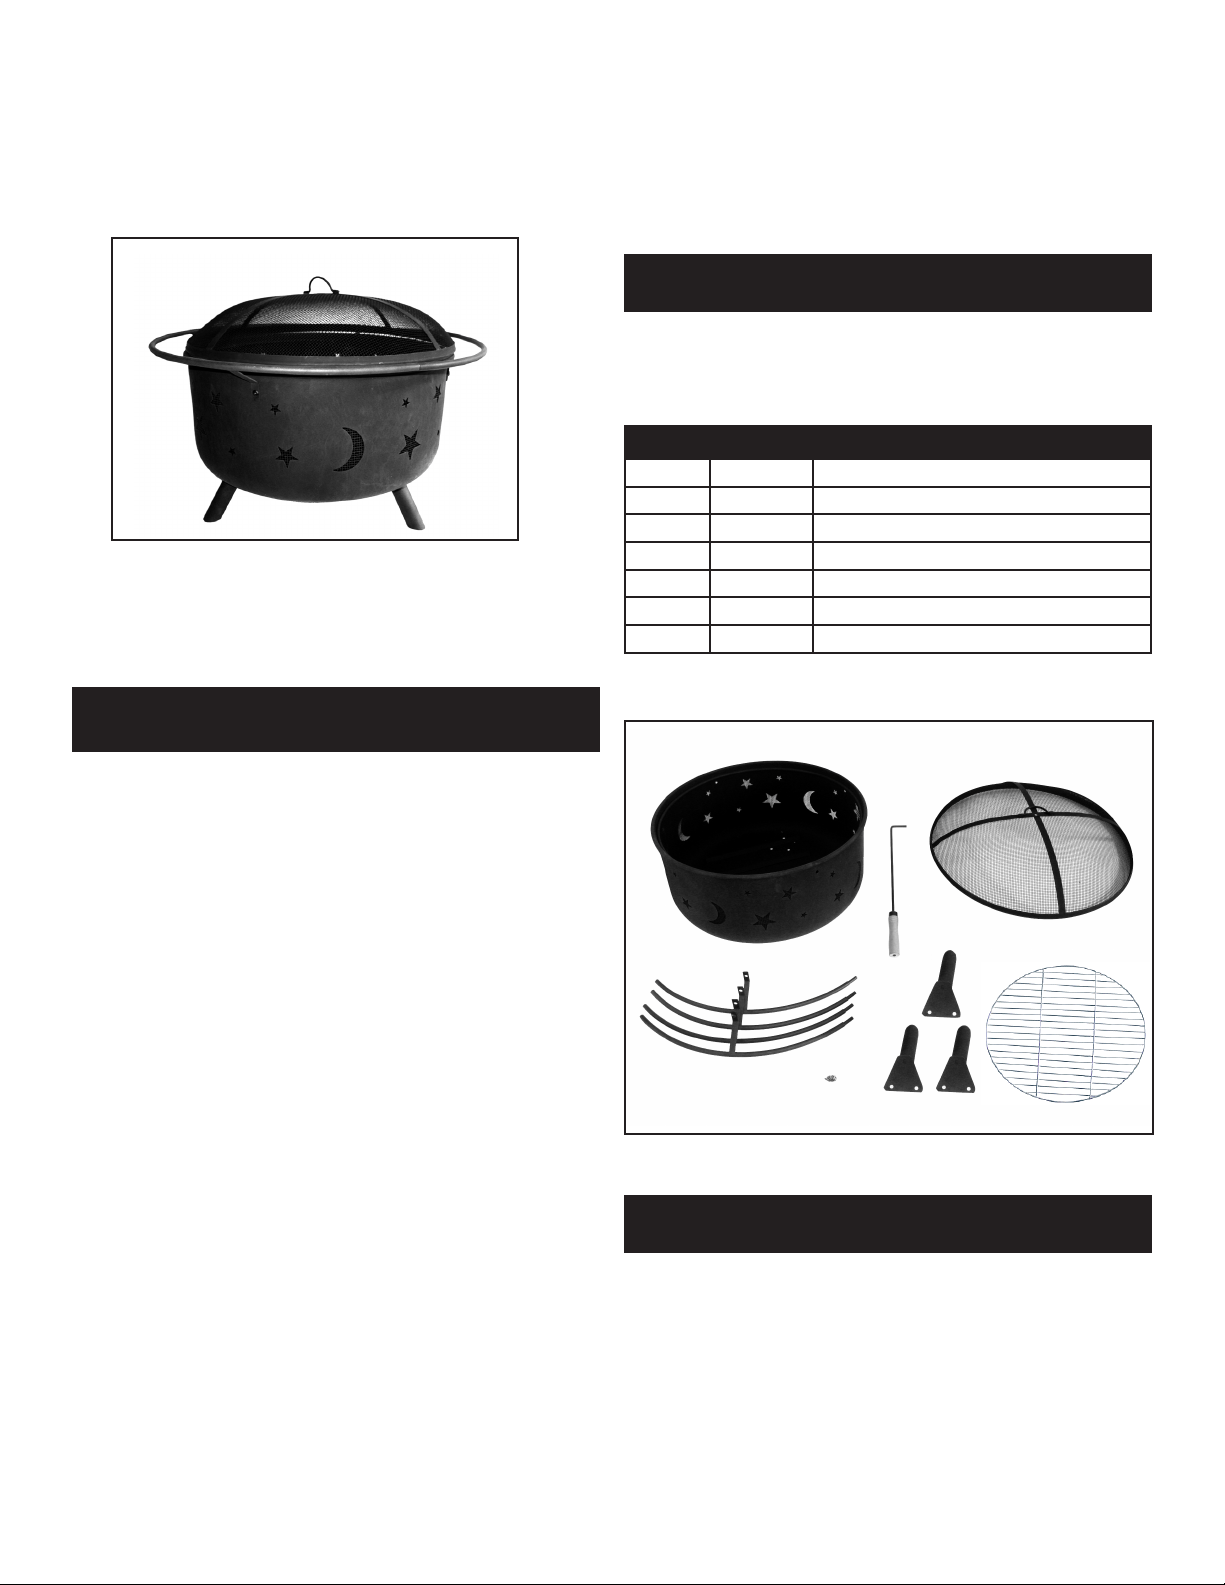
Part # Quantity Part Description
A 1 Fire Bowl
B 1 Screen Lifting Tool
C 1 Spark Screen
D 4 Outer Ring Section
E 1 Hardware Pack
F 3 Stand Legs
G 1
• Outdoor use only. Never use in enclosed area. Use in
unventilated areas will endanger your life.
• Do not use this unit on or near combustible surfaces or
structures such as wood decks, dry leaves or grass, vinyl or
wood siding, etc.
• Use on level, non-combustible surface only.
• Keep away from all combustible materials including gasoline
and other ammable liquids and vapors.
• Never use ammable accelerants, such as: gasoline, alcohol,
paint thinners, kerosene, etc. to start a re. Serious injury or
property damage could result.
• Screen lifting tool may become hot when in use! Failure
to wear protective gloves may lead to injury.
• Always wear re-resistant gloves when handling hot
metal screen and lifting tool.
• Keep away from house, garage, balconies, or overhangs.
• Avoid using during dry or windy conditions.
• Keep out of reach of children.
• Do not overll or use to burn leaves or trash.
• Exercise the same care you would with an open re.
• Never leave unit unattended while hot or in use.
• Completely extinguish re before leaving.
• Ashes can remain hot for a long time after re is extinguished.
• Dispose of cold ashes properly.
• Any modication of the unit will void product warranty.
Contact local authorities regarding possible burn
restrictions before using product.
WARNING!
Assembly Instructions
Step 1:
Carefully unpack all parts. Inspect for missing
parts or damage.
Parts Check List
A
B
D
E
C
F
G
Continued on Reverse
Cooking Grill
NB-MS201
Assembly Instructions
(cont.)
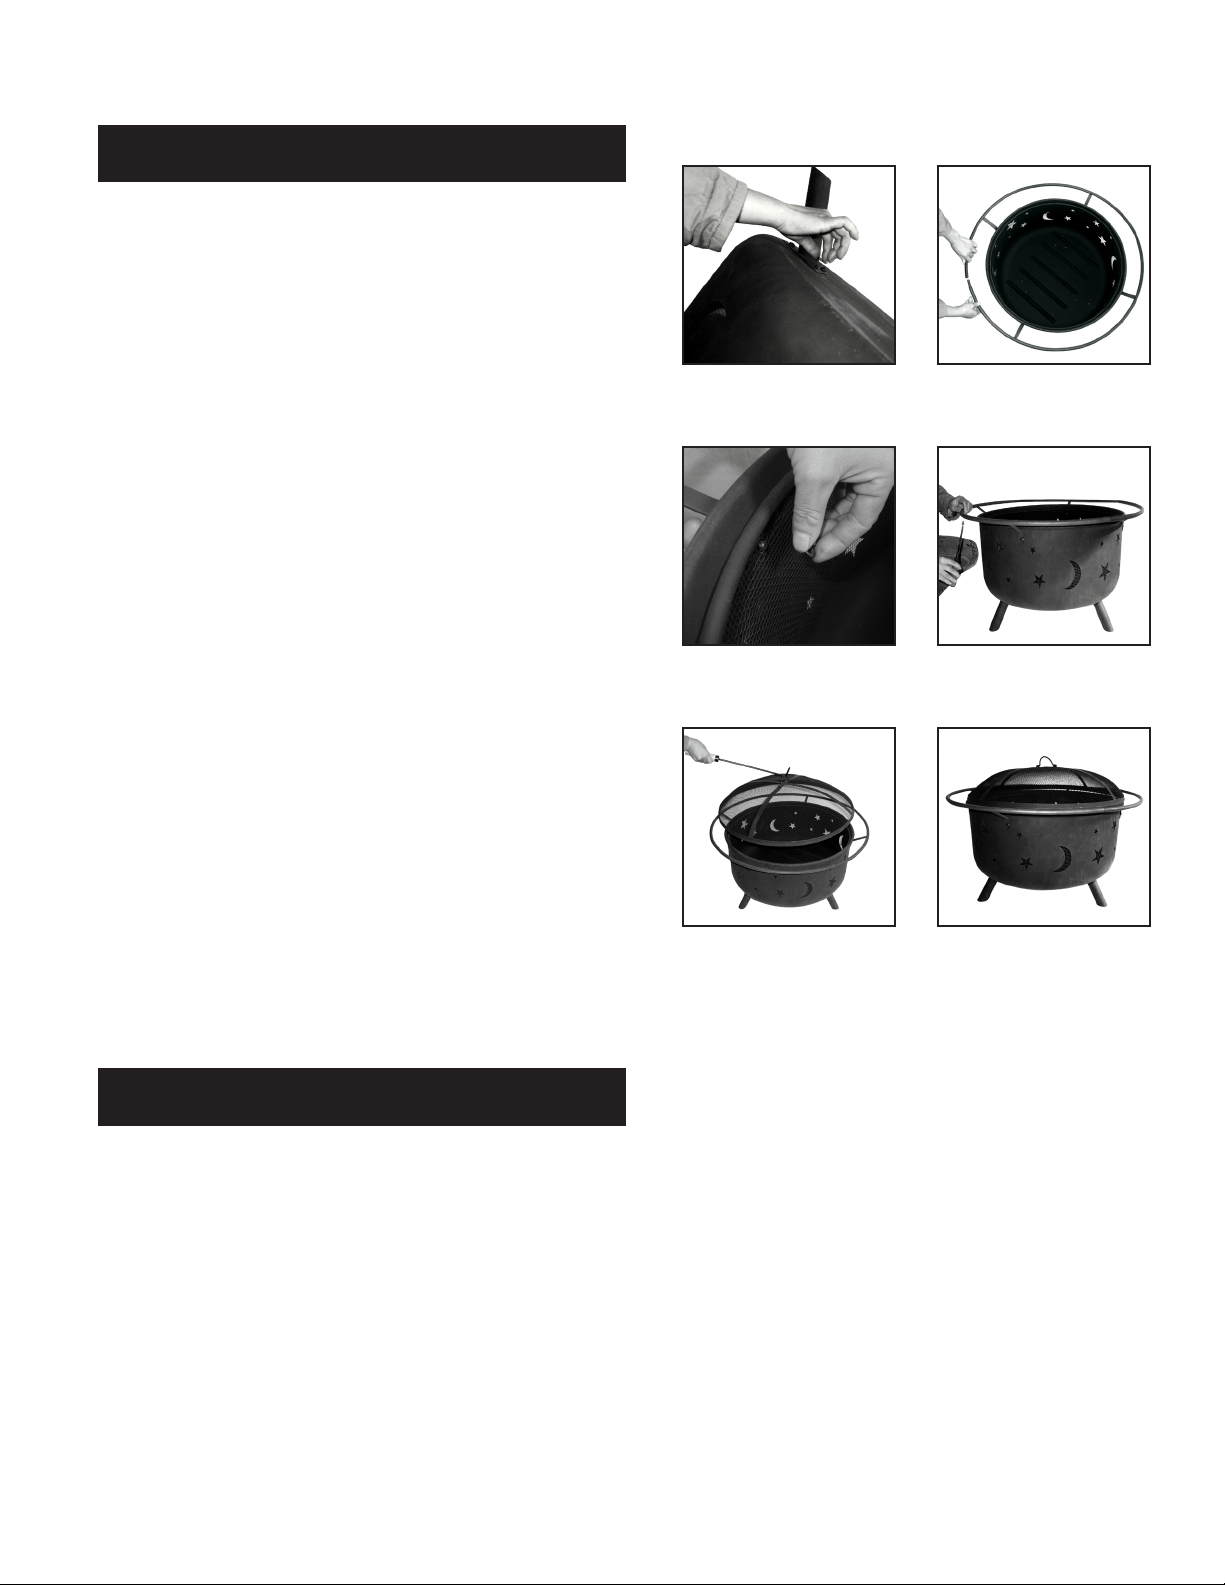
Step 2:
Align holes of Fire Bowl (A) with holes of stand Legs (F).
Insert Bolts through holes of Fire Bowl and Legs and attach
with Nuts (Fig 1). Attach all three (3) legs to Fire Bowl and
securely fasten bolts with screwdriver and wrench.
Step 3:
Attach four (4) Outer Ring Sections together by inserting
each end together forming ring as shown (Fig 2). Once as-
sembled, place ring around Fire Bowl and align screw holes
of re bowl and ring. Insert bolts through screw holes and
attach nuts (Fig 3). Hand tighten nuts only until all bolts are
in place. Securely tighten with screwdriver wrench.
Step 4:
Insert screws through underside of ring at each joint in Outer
Ring (Fig. 4). Securely fasten with screwdriver.
Step 5:
Place put on the Cooking grill and Screen if needed (Fig 5).
Step 6:
Your replace is now ready for outside use on a level
non-combustible surface.
Please read and follow all Warnings and
safety instructions before using.
Figure 1 Figure 2
Figure 3 Figure 4
Figure 5 Figure 6
• Fire bowl may be cleaned with water and mild detergent.
• Do not use abrasive detergents or pads to clean surround or re bowl.
• As with any outdoor grill, periodic maintenance is required to
return painted steel surfaces to original appearance. Remove any
rust with sandpaper or steel brush and repaint with grill paint suitable
for high-temperature surfaces. Follow manufacturer’s instructions.
General Care