Loading ...
Loading ...
Loading ...
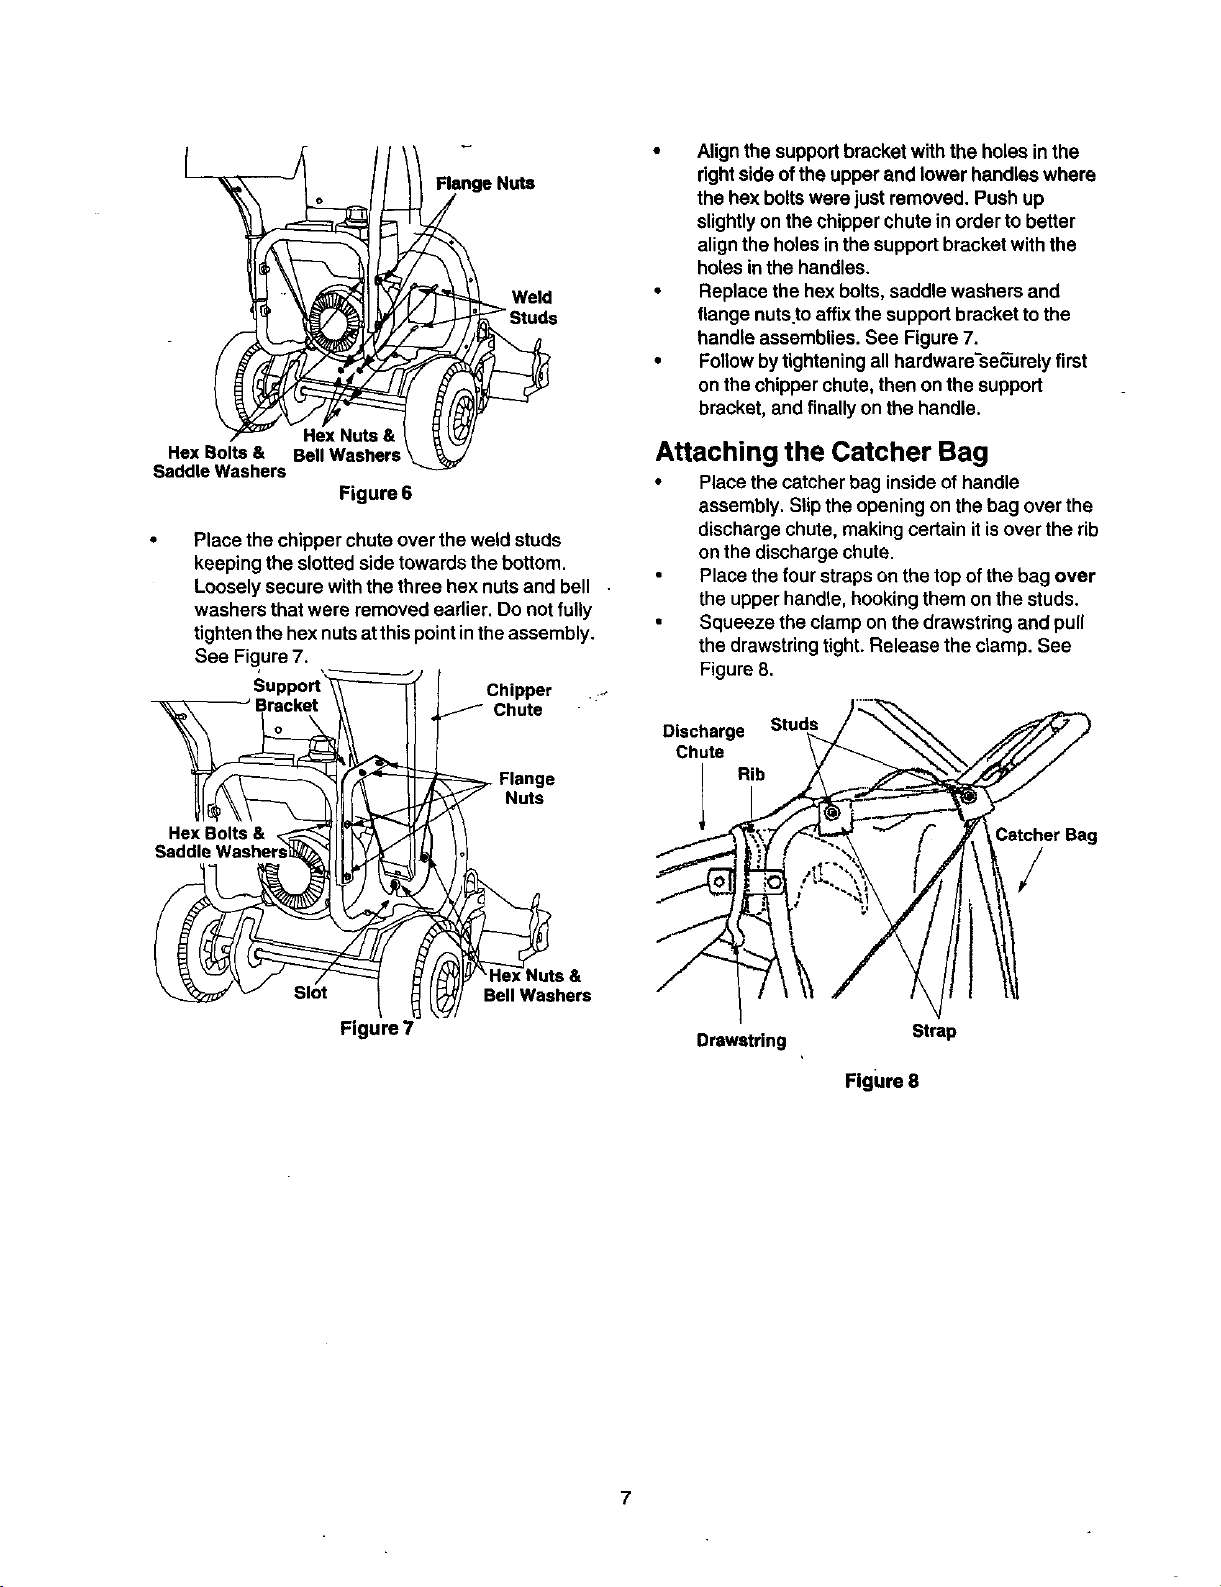
Flange Nuts
Weld
Hex Nuts &
Hex Bolts & Bell Washers
Saddle Washers
Figure 6
• Place thechipper chuteover the weld studs
keeping the slottedside towardsthe bottom.
Loosely secure with the three hex nuts and bell •
washers that were removed earlier. Do not fully
tighten the hex nuts at this point in the assembly.
See Figure 7.
Support'_ ! Chipper ..
Bracket \\ II 1_ Chute
_ Flange
.uts
\ _-_ _" __./_'_ _/_J_l-lexNuts&
"_._ v _lOt / _/ BellWashers
Figure 7
• Alignthe supportbracket with the holesin the
rightside ofthe upper and lower handleswhere
the hex boltswere justremoved. Push up
slightlyon thechipperchute in orderto better
alignthe holesinthe supportbracket withthe
holesinthe handles.
• Replace the hex bolts,saddle washers and
flange nuts.toaffixthe supportbracketto the
handle assemblies. See Figure7.
• Followbytighteningall hardware-se_-urelyfirst
on thechipperchute,then on the support
bracket,and finally on the handle.
Attaching the Catcher Bag
• Place the catcher bag insideof handle
assembly, Slipthe opening on thebag over the
dischargechute,makingcertain itisover the rib
on the dischargechute.
Placethe fourstrapson the top ofthe bag over
the upper handle,hookingthem on the studs.
Squeeze the clamp on thedrawstring and pull
the drawstringtight. Release the clamp. See
Figure8,
Discharge Studs
Chute
Rib
CatcherBag
/
Drawstring Strap
Figure 8
7
Loading ...
Loading ...
Loading ...