Loading ...

Introduction
Placement
The in ceiling loudspeakers are designed to be installed in any standard ceiling.
If you are unsure of the mounting location or correct installation techniques or
type of speaker wiring to use, consult a professional audio specialist or a
building contractor for assistance.
The goal is to get the best stereo effect possible from the loudspeakers. To
achieve this we recommend placing both loudspeakers at equal distance from
the listener and 6 to 10 feet apart from each other. Avoid installing them near
corners or reflective surfaces to prevent a “boomy” or diffracted sound.
When determining the location for the loudspeaker cutout, keep in mind that
mounting arms will extend 3/4 inch beyond cutout. Make sure that you do not
place the edge of the cutout directly next to a ceiling joist. Locate the joists
using a stud sensor or by hand knocking.
Important:
Before you cut into any wall, inspect the location of where the speakers are to be
installed and be very careful not to drill through existing wires, pipes, or
structure. If you feel any extra resistance as you drill, please stop.
Note:
Please read this manual completely before installing this product! It is
important to completely understand the operation of this product to achieve
optimum and reliable performance. Failure to do so can result in damage to the
actual product and other audio electronics
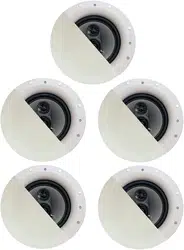
Congratulations on your purchase! Acoustic Audio Cinema Series In-Wall/
Ceiling speakers are the new standard for in-home entertainment. They deliver
incredible sound to every room in your home without using any floor or shelf
space. These are designed for super easy,out of the box and into your wall
installation. They feature an Integrated Wall-Lock Mounting system, Audiophile
grade drivers and tweeters that deliver unprecedented detail and accuracy,
realistic,low distortion sound and surprisingly deep bass response.
Features:
- All weather design for indoor/ outdoor use
- Low profile baffle housing designed for easy installation
- Detailed High Frequencies
- Butyl rubber surround for increased performance and durability
- Progressive spider for greater control and higher excursion capabilities
- 13mm Mylar soft dome or piezo tweeter for detailed high frequencies
- Poly-Mica dome midrange driver(3-Way)
- Paintable housing and flush mount speaker grilles to match any home or office
decor
- Spring loaded speaker wire terminals for easy connectivity
- Integrated wall lock mounting system with cutout templates included
2. At each speaker location, route the wire to the input connectors, then
separate the loudspeaker wire so that at least 2 inches of each conductor are
free. Strip away 1/4 inch of insulation from each individual loudspeaker wire.
3. Press down each spring-loaded connector one at a time, insert the
appropriate conductor and then release the connector. Check to be sure that
the conductor is making contact with stripped wire and not the wire jacket.
Gently tug on the loudspeaker wire to make sure it is held in place. If not, repeat
this procedure.
4. Insert the loudspeaker into the hole by carefully holding it with both hands
and angling it slowly into the hole untill the frame is flush with the ceiling.
Holding it in place carefully with one hand, (do not push against the woofer or
tweeter) use a drill to begin mounting the speaker.
5. Tighten the four screws. Use low torque and low speed or you may damage
the loudspeaker. This should pull the frame and mounting together
(sandwiching the drywall) so that the frame is absolutely flush with the wall
surface. There should be no gaps between the wall and the frame.
6. Install the grille by simply pushing the grille evenly into the hole until it
snaps in place.
7. Connect the other end of each loudspeaker wire to the receiver (or amplifier)
carefully observing polarity.
8. Turn on receiver / amplifier and test all loudspeakers in the system.
Installation
Observe correct polarity: Positive (+) goes to the red post and negative (-)
goes to the black post.
Do not overtighten the screws Over-tightening may cause the grille to be
difficult to install.
When running loudspeaker wires inside walls or ceilings, use special
jacketed cable to protect the wire and for fire prevention.
1. Once you have determined the mounting installation location for the
speakers,drill the cutout hole for the speakers.