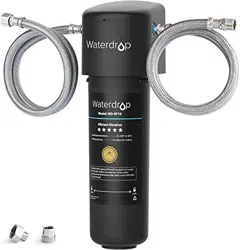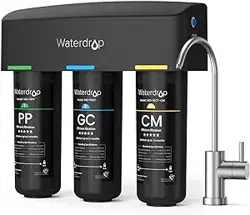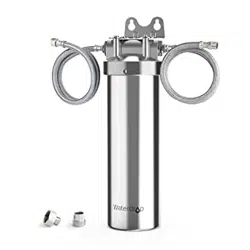

Quick Connect Under Sink Stainless-steel Water Filtration System
Instruction
Manual
Model No.: WD-BS08
Operating temperature
Working pressure
Flow rate
Feed water requirement
Filter capacity
41-100℉/5-38℃
15-100 psi/100-689 kpa
1.6 gpm/6.0 lpm (tested under 60psi)
Municipal tap water
Up to 1 year/8000 gallons
Specifications
Precautions
• Please wear a pair of gloves when installing to avoid scratching your hand.
• Do not use it with water that is microbiologically unsafe or of unknown quality without
adequate disinfection.
• For use only with cold water.
• Do not freeze the lter, as this can cause cracking and water leakage.
• Do not allow children under 3 years old to have access to small parts during installation of this
product.
• This installation must comply with all applicable state and local regulations.
• Turn o the water supply while replacing the lter.
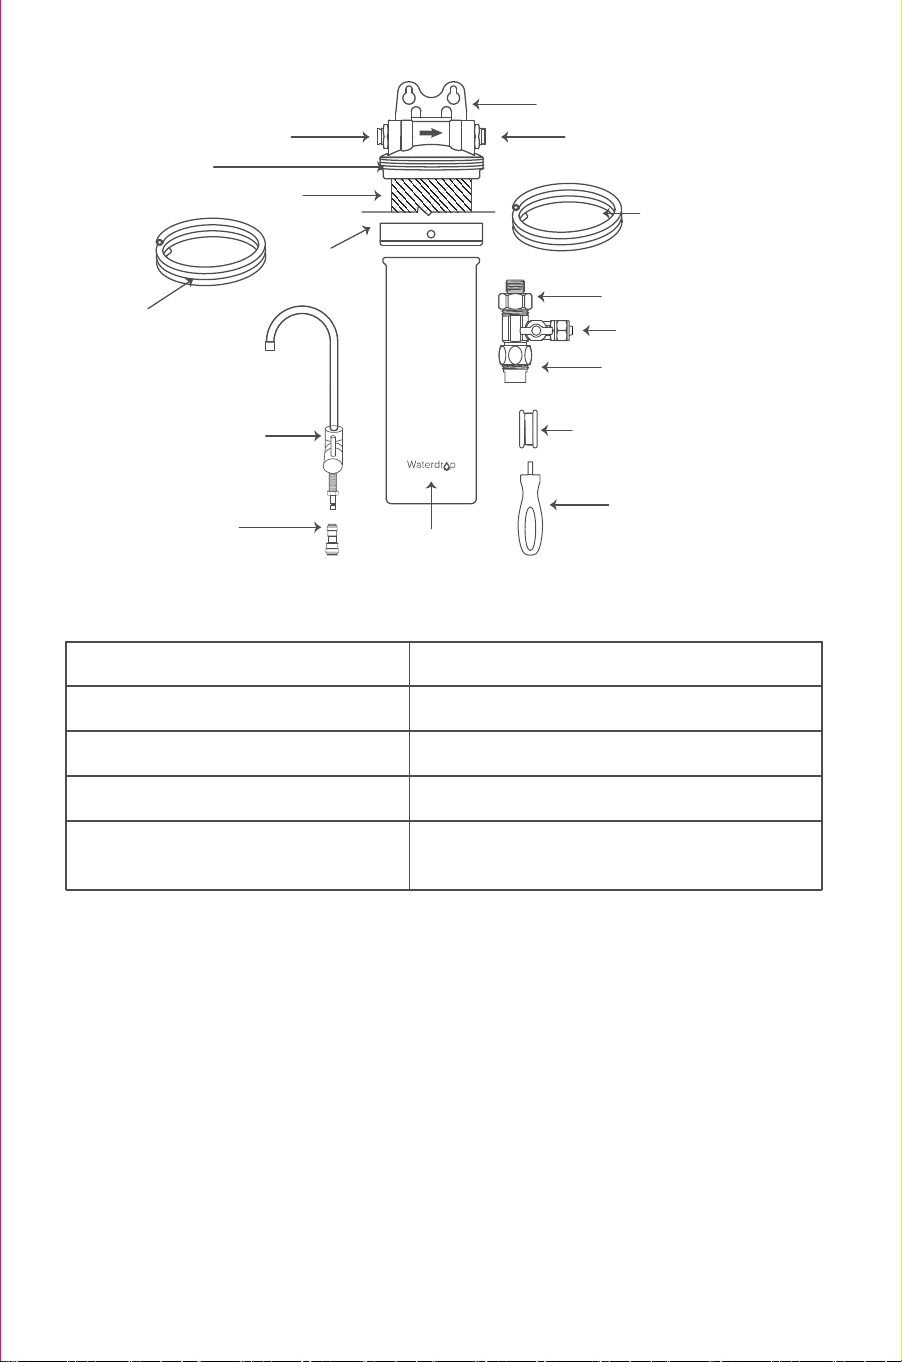
39.3 inches
3/8‘’ tubing
Inlet
Cartridge
Filter head
Fastening
ring
Outlet
Bracket
Quick-connect
tting
Faucet
39.3 inches 3/8‘’ tubing
Wrench
Teon tape
3/8‘’-1/2‘’ Converter
3/8‘’-1/2‘’ Converter
Feed water adapter
Filter housing
(Note: Actual life varies according to local water quality.)
Quick Connect Under Sink Stainless-steel Water Filtration System
Instruction
Manual
Model No.: WD-BS08
Operating temperature
Working pressure
Flow rate
Feed water requirement
Filter capacity
41-100℉/5-38℃
15-100 psi/100-689 kpa
1.6 gpm/6.0 lpm (tested under 60psi)
Municipal tap water
Up to 1 year/8000 gallons
Specifications
Precautions
• Please wear a pair of gloves when installing to avoid scratching your hand.
• Do not use it with water that is microbiologically unsafe or of unknown quality without
adequate disinfection.
• For use only with cold water.
• Do not freeze the lter, as this can cause cracking and water leakage.
• Do not allow children under 3 years old to have access to small parts during installation of this
product.
• This installation must comply with all applicable state and local regulations.
• Turn o the water supply while replacing the lter.
39.3 inches
3/8‘’ tubing
Inlet
Cartridge
Filter head
Fastening
ring
Outlet
Bracket
Quick-connect
tting
Faucet
39.3 inches 3/8‘’ tubing
Wrench
Teon tape
3/8‘’-1/2‘’ Converter
3/8‘’-1/2‘’ Converter
Feed water adapter
Filter housing
(Note: Actual life varies according to local water quality.)
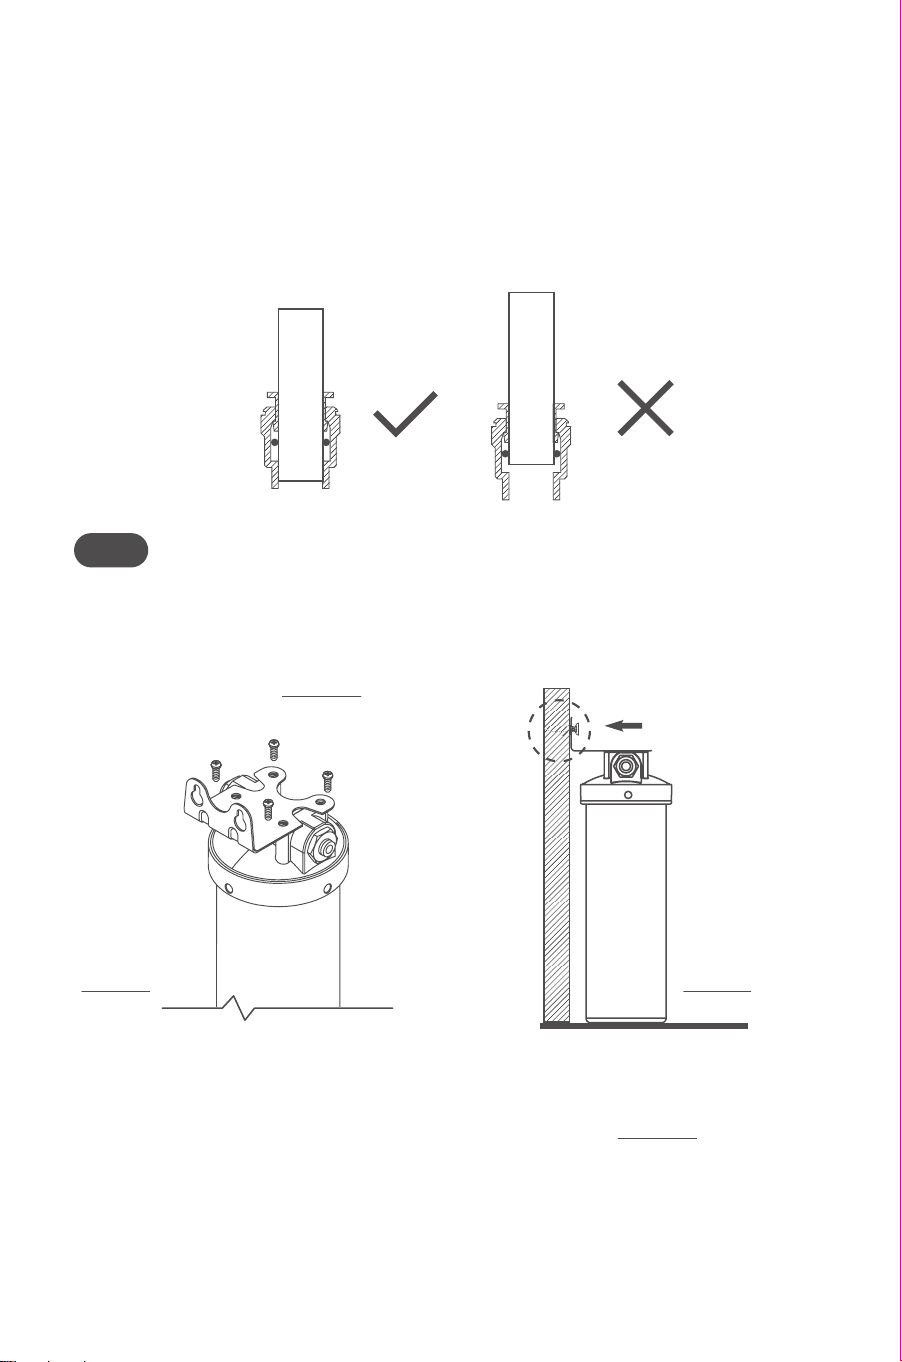
Installation of the filter system
How to Use the Quick-Connect Fittings (To connect)
If the tubing is not fully inserted, no seal will be created, and leakage will occur.
When the tubing is fully inserted, put the blue lock clip on the tting. It will lock the tubing in
place and prevent it from falling o.
Step 1 Mount the Bracket
1. Make sure the arrows on the lter head are consistent with the direction of your water ow.
Unscrew four screws on the lter head then align the holes on the bracket with the holes in the
lter head. Insert four mounting screws included with the system through the bracket and into
the lter head until tight.
(Figure 1)
2. Choose a suitable installation position in advance. It can be put on the ground of cabinet or
xed on one side of cabinet with a bracket.
3. Paste the assistant label to nish drill. Insert two screws in the hole.
(Figure 2)
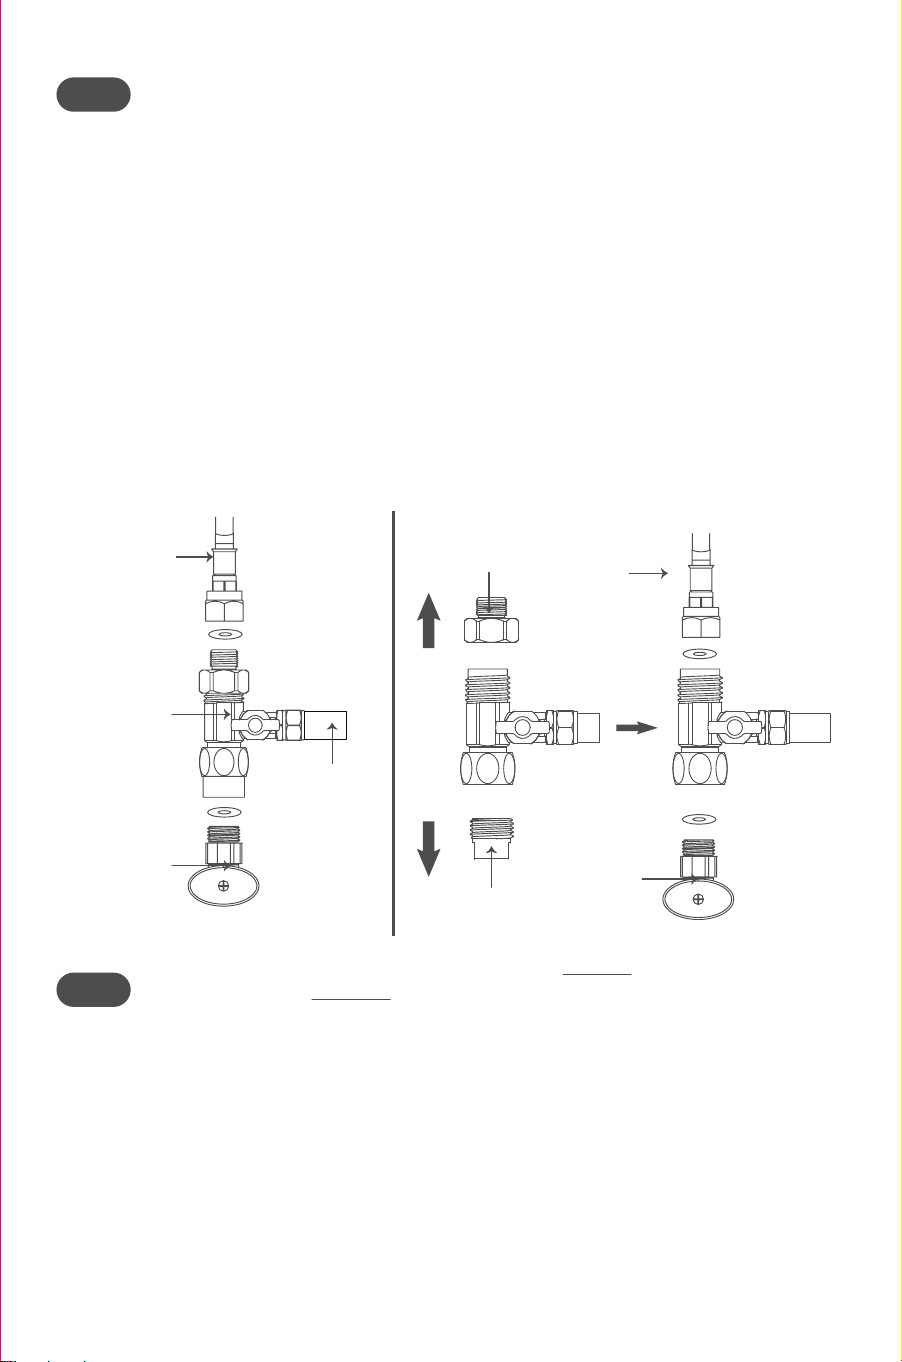
Step 2 Install the Feed Water Adapter (cold water only)
1. Shut o the water supply. Turn on the kitchen faucet to release the water pressure;
Note: Make sure the water has stopped running before proceeding to the next step. Get
a towel or bucket to catch water.
2. Disconnect the cold water pipe from the cold water supply valve;
3. Twist the feed water adapter onto the cold water supply valve (with its washer) and tighten it
with an adjustable wrench;
Note:
If the cold water pipe is 1/2", unscrew the two converters from the feed water adapter
rstly (Figure 3), then implement step 3.
4. Twist the cold water pipe (with its washer) onto the feed water adapter and tighten with an
adjustable wrench.
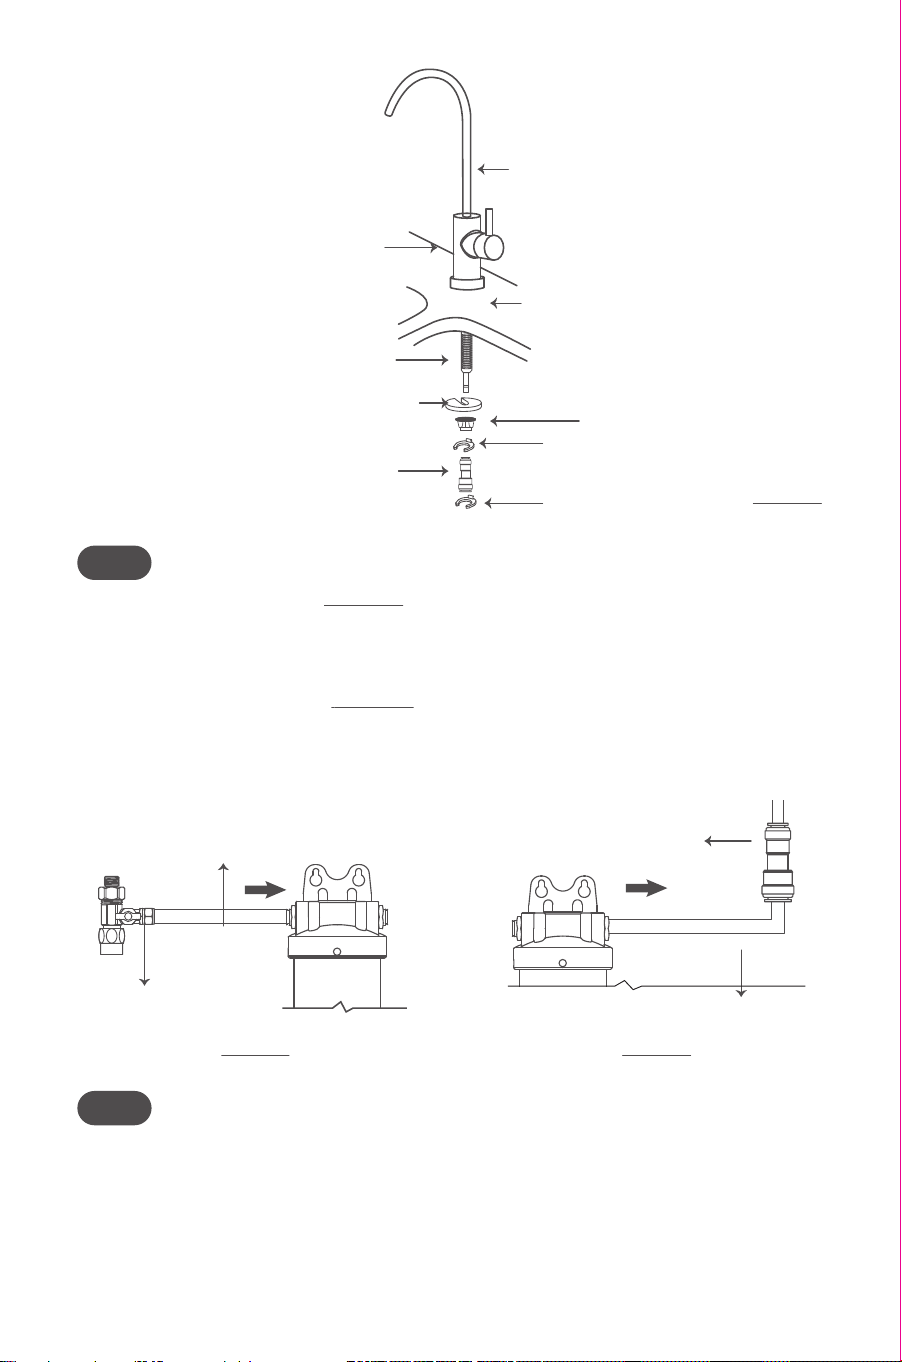
Step 3 Install the Faucet
(Figure 4)
Note: If there is no hole in your kitchen sink or countertop,you have to drill one (1") or use the
hole from the soap dispenser.
1. Insert the faucet spout into the faucet body;
2. Insert the faucet stem into the hole on the countertop;
3. Under the sink, slip on other parts in the order shown in the picture;
4. Insert the quick-connect tting onto the faucet stem fully and rmly.
3/8" Cold
water Pipe
Feed water
adpater
3/8" Inlet
water tubing
Cold water
supply valve
1/2" Cold
water Pipe
Cold water
supply valve
Unscrew
Unscrew
Figure 3
Figure 1 Figure 2
Installation of the filter system
How to Use the Quick-Connect Fittings (To connect)
If the tubing is not fully inserted, no seal will be created, and leakage will occur.
When the tubing is fully inserted, put the blue lock clip on the tting. It will lock the tubing in
place and prevent it from falling o.
Step 1 Mount the Bracket
1. Make sure the arrows on the lter head are consistent with the direction of your water ow.
Unscrew four screws on the lter head then align the holes on the bracket with the holes in the
lter head. Insert four mounting screws included with the system through the bracket and into
the lter head until tight.
(Figure 1)
2. Choose a suitable installation position in advance. It can be put on the ground of cabinet or
xed on one side of cabinet with a bracket.
3. Paste the assistant label to nish drill. Insert two screws in the hole.
(Figure 2)
Step 2 Install the Feed Water Adapter (cold water only)
1. Shut o the water supply. Turn on the kitchen faucet to release the water pressure;
Note: Make sure the water has stopped running before proceeding to the next step. Get
a towel or bucket to catch water.
2. Disconnect the cold water pipe from the cold water supply valve;
3. Twist the feed water adapter onto the cold water supply valve (with its washer) and tighten it
with an adjustable wrench;
Note:
If the cold water pipe is 1/2", unscrew the two converters from the feed water adapter
rstly (Figure 3), then implement step 3.
4. Twist the cold water pipe (with its washer) onto the feed water adapter and tighten with an
adjustable wrench.
Step 3 Install the Faucet
(Figure 4)
Note: If there is no hole in your kitchen sink or countertop,you have to drill one (1") or use the
hole from the soap dispenser.
1. Insert the faucet spout into the faucet body;
2. Insert the faucet stem into the hole on the countertop;
3. Under the sink, slip on other parts in the order shown in the picture;
4. Insert the quick-connect tting onto the faucet stem fully and rmly.
3/8" Cold
water Pipe
Feed water
adpater
3/8" Inlet
water tubing
Cold water
supply valve
1/2" Cold
water Pipe
Cold water
supply valve
Unscrew
Unscrew
Figure 3
Figure 1 Figure 2
Hot Cold
Filter system
Inlet
Outlet
Step 4 Connect Tubing
1. Install the Inlet Water Tubing (Figure 5)
Connect the inlet water tubing from the feed water adapter to the inlet water port and pop the
lock clip on the tting;
2.Install the Outlet Water Tubing
(Figure 6)
Connect the outlet water tubing from the faucet to the outlet water port and pop the lock clip on
the tting;
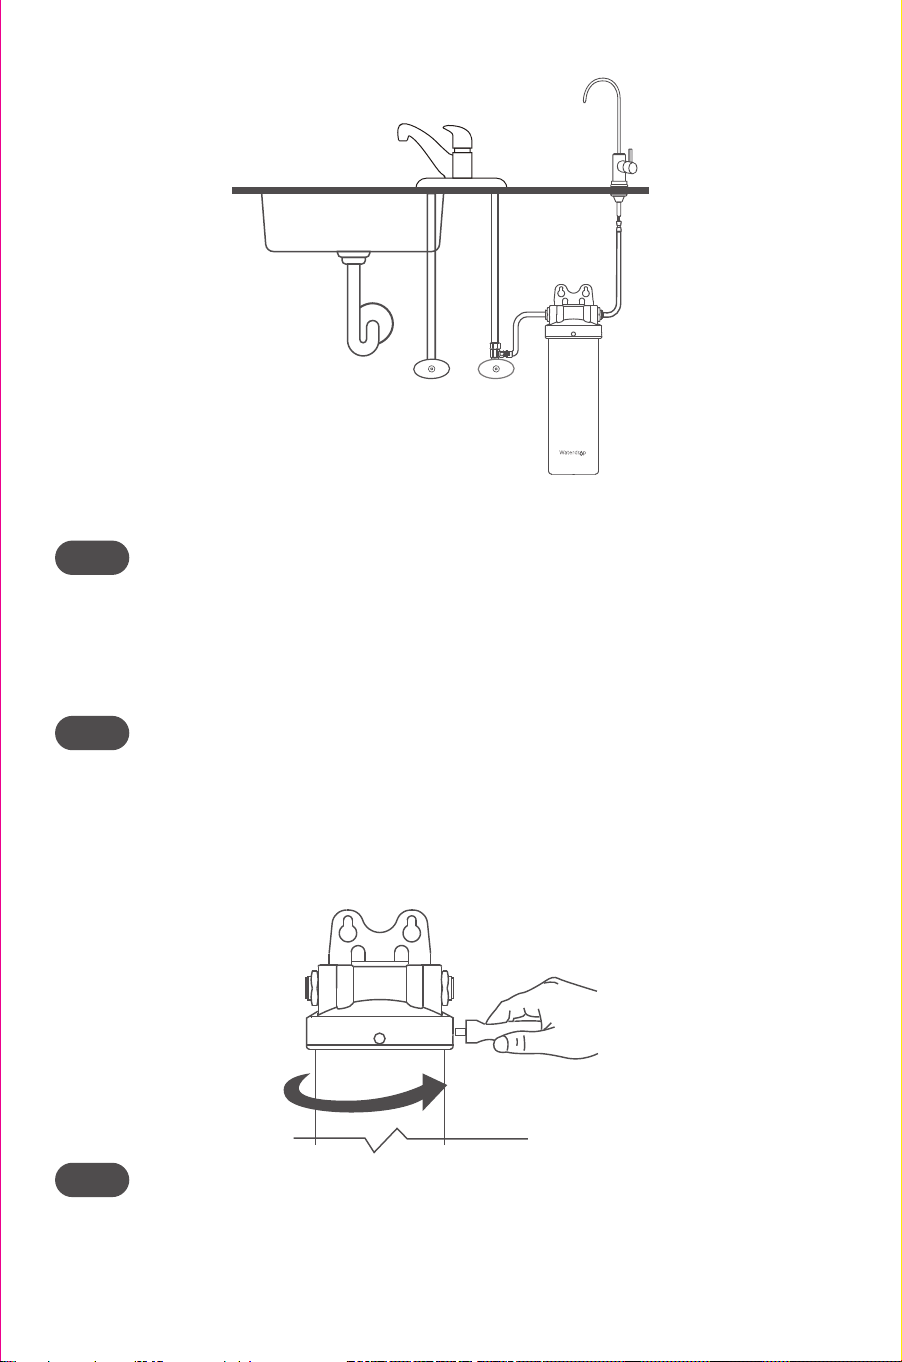
Step 5 Check the Leaks and Flush the Filter
Turn on the cold water supply valve. Check if there’s water leakage at connectors, components,
valve or any connecting position. Then turn on the new faucet. It may dispense muddy or black
water at the beginning. Please ush for 10 minutes continuously.
Note: The water is not drinkable until ushing for 10 minutes.
Cartridge change instructions
Step 1 Remove the Old Cartridge
Turn o the water supply to the system. Open faucet to release the pressure and drain the water.
Take o the cartridge and unscrew the fastening ring using the lter wrench included with your
system. Hold the lter head with one hand and pull o the cartridge with another hand. Remove
and discard the old lter cartridge.
Step 2 Install the New Cartridge
Hold the lter head with one hand and insert the cartridge into the head with another hand until
two black sealing rings are fully inserted and the cartridge reaches the end.
Press the lter head downwards hard into the cartridge. Then screw the fastening ring counter-
clockwise with a wrench. Hang the bracket on the screws.
Step 3 Flush the System
Turn on the cold water supply valve and check if there’s water leakage. Then turn on the faucet. It
may dispense muddy or black water at the beginning. Please ush for 10 minutes continuously.
Quick-connect
tting on faucet
3/8’’ Outlet water tubing
Figure 6
Figure 4
Faucet Body
Mounting Washer
Nut
Countertop
Faucet Spout
Quick-Connect
tting
Faucet Stem
Lock clip
Lock clip
Close
Feed water adapter
3/8’’ Inlet water tubing
Figure 5
Hot Cold
Filter system
Inlet
Outlet
Step 4 Connect Tubing
1. Install the Inlet Water Tubing (Figure 5)
Connect the inlet water tubing from the feed water adapter to the inlet water port and pop the
lock clip on the tting;
2.Install the Outlet Water Tubing
(Figure 6)
Connect the outlet water tubing from the faucet to the outlet water port and pop the lock clip on
the tting;
Step 5 Check the Leaks and Flush the Filter
Turn on the cold water supply valve. Check if there’s water leakage at connectors, components,
valve or any connecting position. Then turn on the new faucet. It may dispense muddy or black
water at the beginning. Please ush for 10 minutes continuously.
Note: The water is not drinkable until ushing for 10 minutes.
Cartridge change instructions
Step 1 Remove the Old Cartridge
Turn o the water supply to the system. Open faucet to release the pressure and drain the water.
Take o the cartridge and unscrew the fastening ring using the lter wrench included with your
system. Hold the lter head with one hand and pull o the cartridge with another hand. Remove
and discard the old lter cartridge.
Step 2 Install the New Cartridge
Hold the lter head with one hand and insert the cartridge into the head with another hand until
two black sealing rings are fully inserted and the cartridge reaches the end.
Press the lter head downwards hard into the cartridge. Then screw the fastening ring counter-
clockwise with a wrench. Hang the bracket on the screws.
Step 3 Flush the System
Turn on the cold water supply valve and check if there’s water leakage. Then turn on the faucet. It
may dispense muddy or black water at the beginning. Please ush for 10 minutes continuously.
Quick-connect
tting on faucet
3/8’’ Outlet water tubing
Figure 6
Figure 4
Faucet Body
Mounting Washer
Nut
Countertop
Faucet Spout
Quick-Connect
tting
Faucet Stem
Lock clip
Lock clip
Close
Feed water adapter
3/8’’ Inlet water tubing
Figure 5

Frequently asked questions
Q: What should I do if water leaks after installation?
A: In the event of water leakage, turn o the water supply. If the water leakage is occurring at the
thread, wrap Teon tape on the external thread. If the water leakage is occurring at the quick
connect position, check whether the cut of PE tubing is at. If it is not at, re-cut the tubing. Also
make sure the tubing hits the bottom of the tting. Contact us for solutions if the water leakage
persists.
Q: Why didn't the TDS value lower after filtration?
A: The main purpose of this Waterdrop lter is not to remove TDS. TDS stands for total dissolved
solids, and it is basically composed of inorganic salts and a small amount of organic matter. The
lter can remove harmful substances while keeping benecial trace elements. Please choose
Waterdrop RO system if you are looking for physical removal of TDS.
Q: When should I replace the cartridge?
A: The lter's service life is related to the water quality. If the ow rate is signicantly reduced or if
the water has a peculiar smell, we suggest that you replace the cartridge.
Q: What substances can the filter remove?
A: Our premium coconut carbon block lter can eectively reduce chlorine, taste and odor,
limescale, cysts and other heavy metals.
5-year quality assurance
All mechanical devices with moving parts have a normal life span and will need to be replaced
periodically. For this reason, mechanical devices such as lter housing, lter head, and faucets
have a limited replacement assurance of 5 year.
No assurance is given as to the service life of any lter cartridge, as the service life will vary based
on local water conditions and water consumption.If the product proves to be defective within 5
year from the date of purchase, please contact our customer service department. During the
assurance period, we will replace or repair any part that is deemed to be defective if the product
has not been subjected to tampering, alteration, or improper use after delivery, and has not been
repaired by the manufacturer.We do not make any promises in the event of misuse, use in
abnormal temperature conditions, conditions outside those listed in the operating parameters, or
use in commercial operations.
V010Made in China
Manufacturer Technical Support:
Qingdao Ecopure Filter Co., Ltd.
1-888-352-3558 (U.S.) Mon-Fri 8:00AM-5:00PM (PST)
If you encounter any problem with our product, please contact us
to get support via the purchase channel.