Loading ...
Loading ...
Loading ...
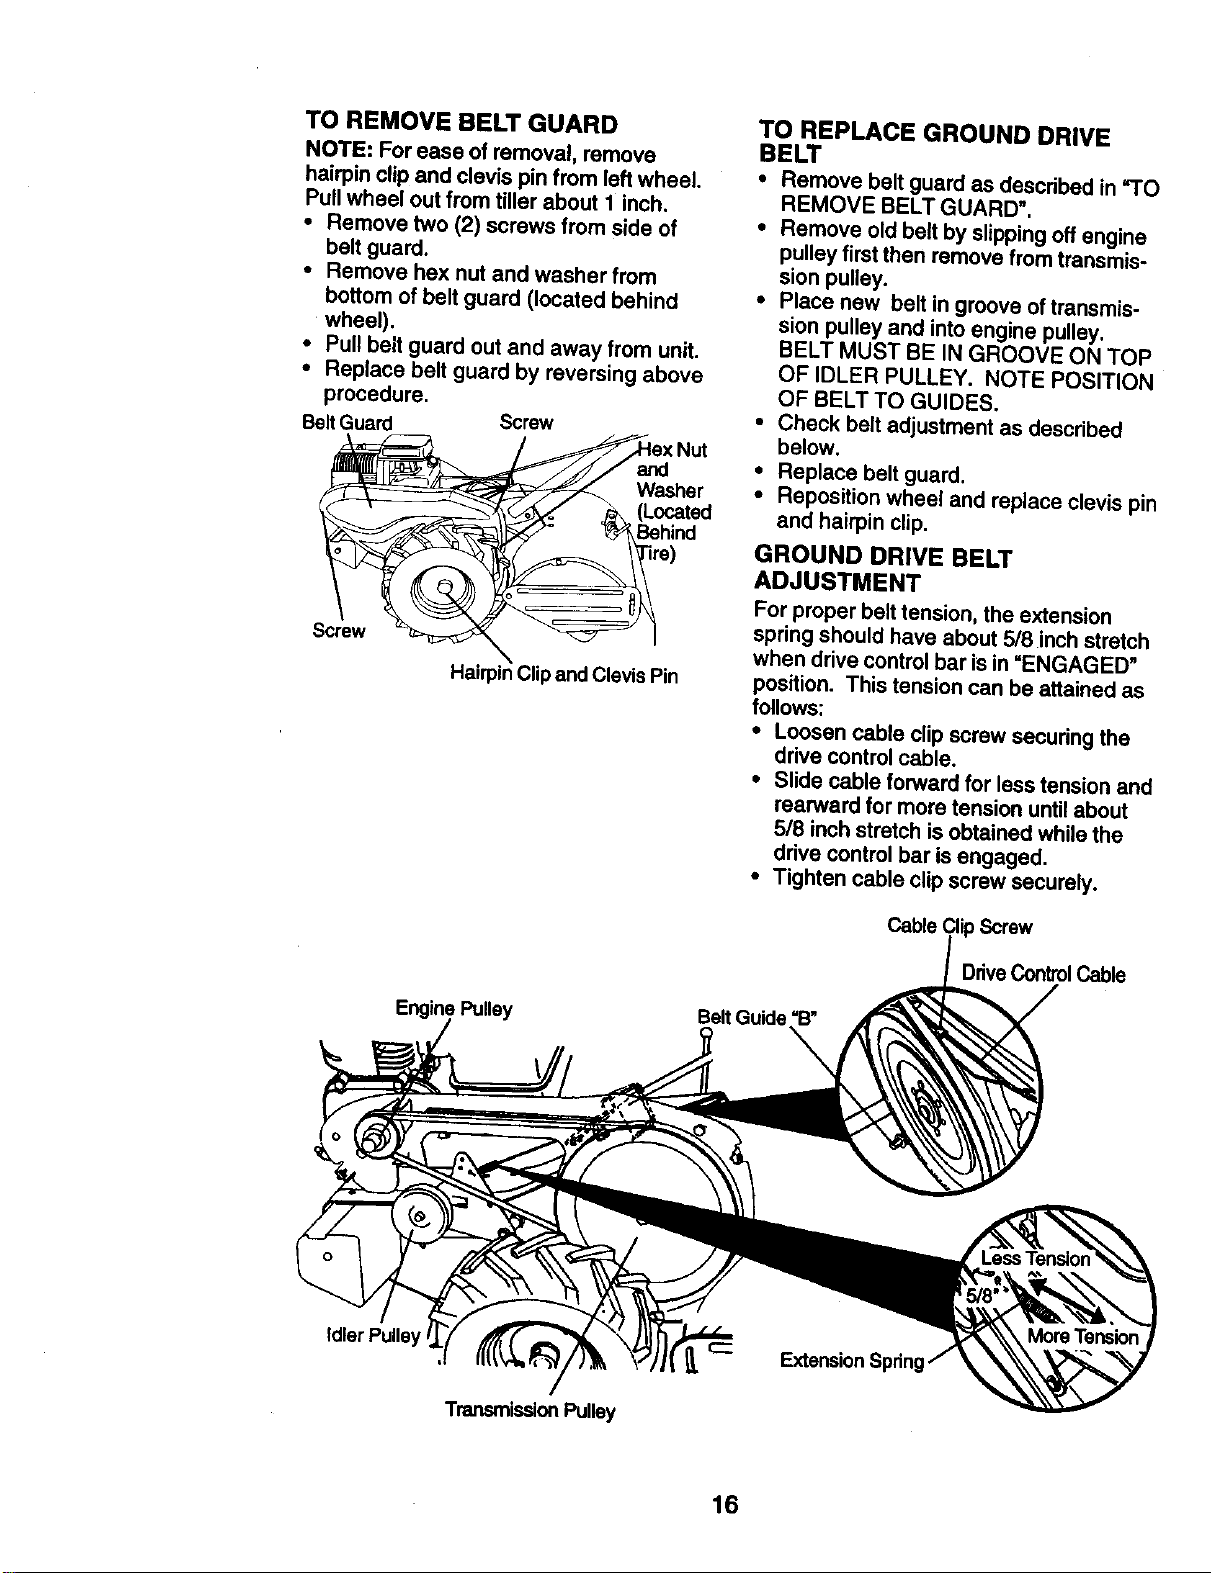
TO REMOVE BELT GUARD
NOTE: For ease of removal, remove
hairpin clipand clevis pin from leftwheel.
Pullwheel out from tiller about 1 inch.
• Remove two (2) screws from side of
belt guard.
• Remove hex nut and washer from
bottom of belt guard (located behind
wheel).
• Pullbelt guard out and away from unit.
• Replace belt guard by reversing above
procedure.
BeltGuard
Screw
_< _ ._ (Located
_ 9° _hind
\
Hahpin Clip and Clevis Pin
TO REPLACE GROUND DRIVE
BELT
• Remove belt guard as described in "TO
REMOVE BELT GUARD".
• Remove old belt by slippingoff engine
pulley first then remove from transmis-
sion pulley.
• Place new belt in groove oftransmis-
sion pulley and intoengine pulley.
BELT MUST BE IN GROOVE ON TOP
OF IDLER PULLEY. NOTE POSITION
OF BELT TO GUIDES.
• Check belt adjustment as described
below.
• Replace belt guard.
• Reposition wheel and replace clevis pin
and hairpin clip.
GROUND DRIVE BELT
ADJUSTMENT
For proper belt tension, the extension
spring should have about 5/8 inch stretch
when drive controlbar is in"ENGAGED"
position. This tension can be attained as
follows:
• Loosen cable clipscrew securing the
drive control cable.
• Slide cable forward for less tension and
rearward for more tension untilabout
5/8 inchstretch is obtained while the
drive control bar isengaged.
• Tighten cable clipscrew securely.
Cable ClipScrew
DriveControlCable
Be_tGuide
Extension
TransmissionPulley
16
Loading ...
Loading ...
Loading ...