Loading ...
Loading ...
Loading ...
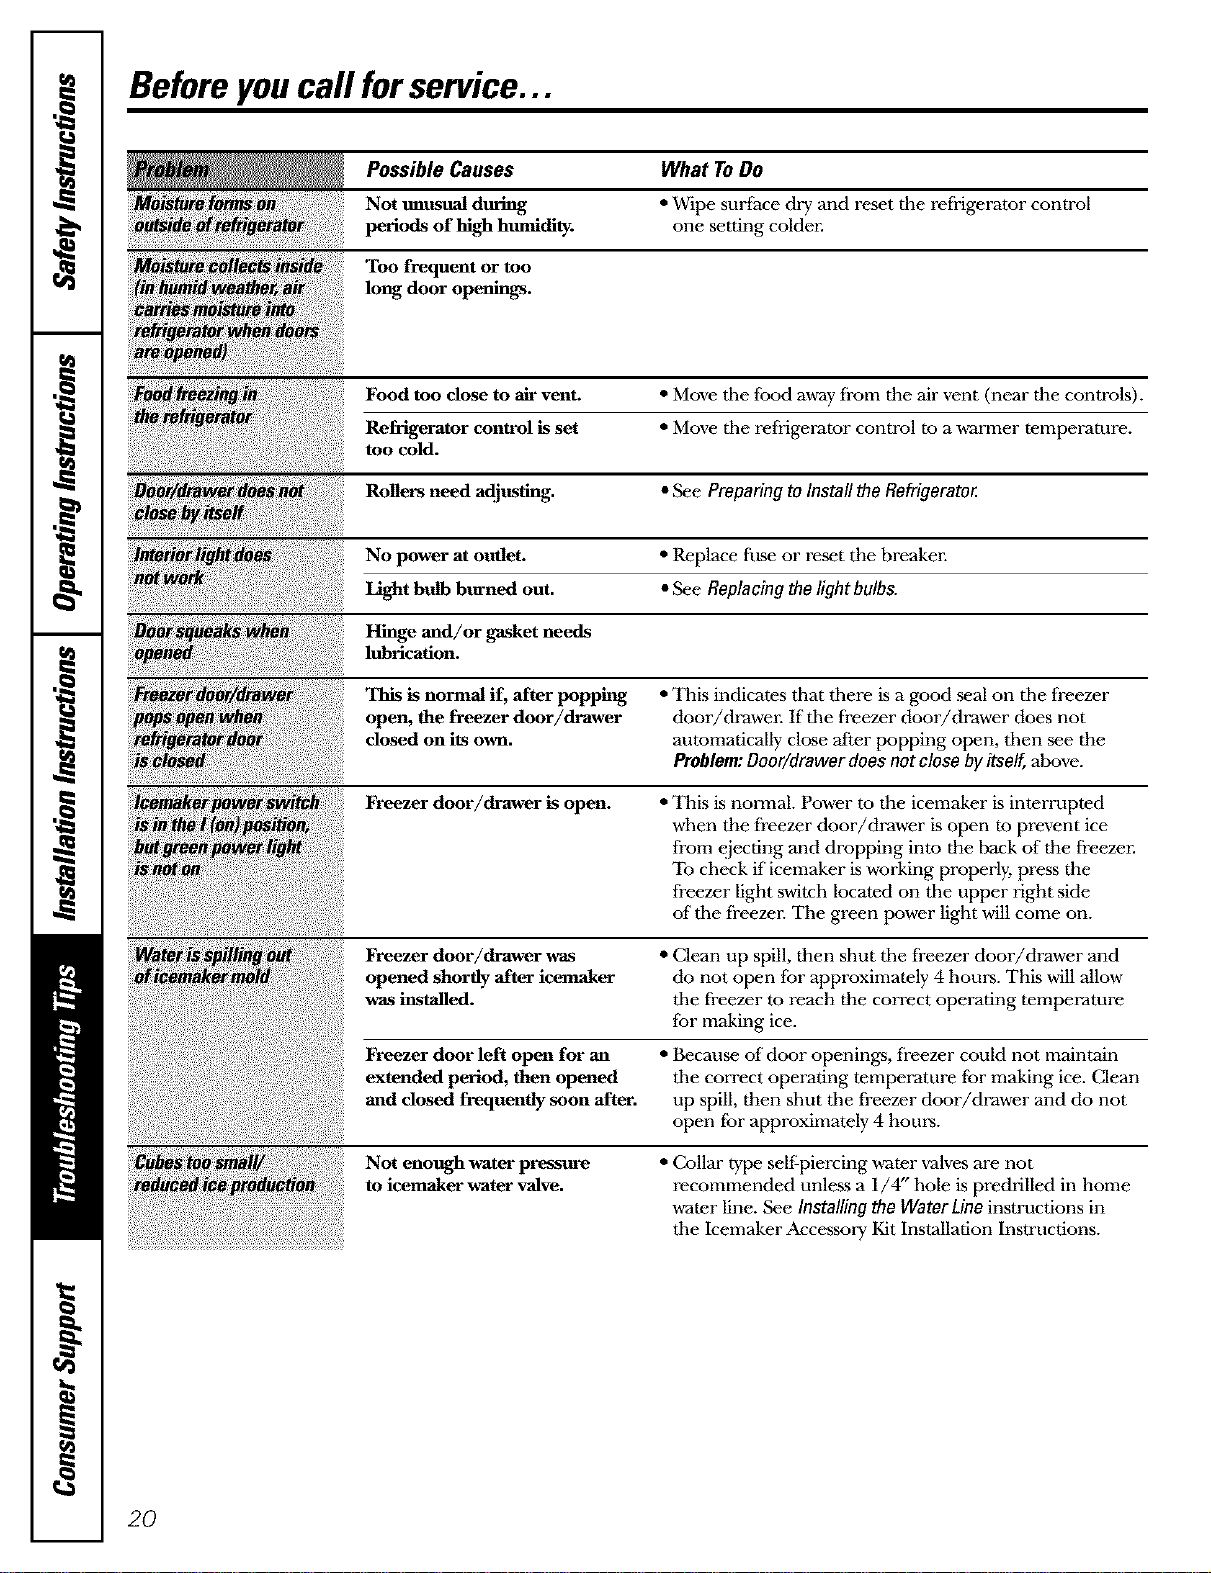
Before youcall forservice...
Possible Causes What ToDo
Not unustml during • Wipe surface dry and reset the refrigerator control
periods of high humidity, one setting colden
Too frequent or too
long door openings.
Food too dose to air vent. • Move tile food away from the air vent (near the controls).
Refrigerator control is set • Move the refrigerator control re a ,a_armer temperature.
too cold.
Rollers need adjusting. • See Preparing to Install the Refrigerato_
No power at outlet. • Replace fuse or reset the breakel:
Light bulb burned out. • See Replacing the light bulbs.
Hinge and/or gasket needs
lubrication.
This is normal if, after popping • This indicates that there is a good seal on tile freezer
open, the freezer door/drawer door/drawel: If tile freezer door/drawer does not
dosed on its own. automatically close a£ter popping open, then see the
Problem: Door/drawer does not close byitself, above.
Freezer door/drawer is open. • This is normal. Power to the icemaker is interrupted
when the freezer door/drawer is open to prevent ice
from ejecdng and dropping into the back of the freezen
To check if icemaker is working properly, press the
freezer light switch located on tile tipper right side
of tile freezel: The green power light will come on.
Freezer door/drawer was • Clean up spill, then shut tile freezer door/drawer and
opened shortly after icemaker do not open for approximately 4 hours. This will allow
was installed, tile freezer to reach the correct operating temperature
for making ice.
Freezer door left open for an • Because of"door openings, freezer could not maintain
extended period, then opened tile correct operating temperature for making ice. Clean
and closed frequently soon after, tip spill, then shut tile freezer door/drawer and do not
open for approximately 4 hours.
Not enough water pressure • Collar type self'piercing ,_ter valves are not
to icemaker water valve, recommended unless a 1/4" hole is predfilled in home
water line. See Installing the WaterLine instructions in
the Icemaker Accessory Kit Installation Instructions.
2O
Loading ...
Loading ...
Loading ...