Loading ...
Loading ...
Loading ...
Care and Cleaning
Figure 1
(Lock tab is visible only after drawer has
been pulled out)
ure 3
Figure 4
Outside
• Whenwashingiscompleted, wipetopandsidesofwasherwithadampcloth. Turn
water faucets off to prevent pressure build-up in the hoses.
As needed, cleanthe cabinet with mild soap and water. Never use harsh, gritty
or abrasive cleansers. If door or console becomes stained, clean with diluted
chlorine bleach [1/2 cup (120 ml)in 1quart (.95 L)water]. Rinseseveraltimes with
clear water.
Removeglue residue from tape or labels with a mixture of warm water and mild
detergent. Or, touch residue with the sticky side of the tape or label.
Before moving the washer, placeastrip of cardboard or thin fiberboard under
the front leveling legsto prevent floor damage
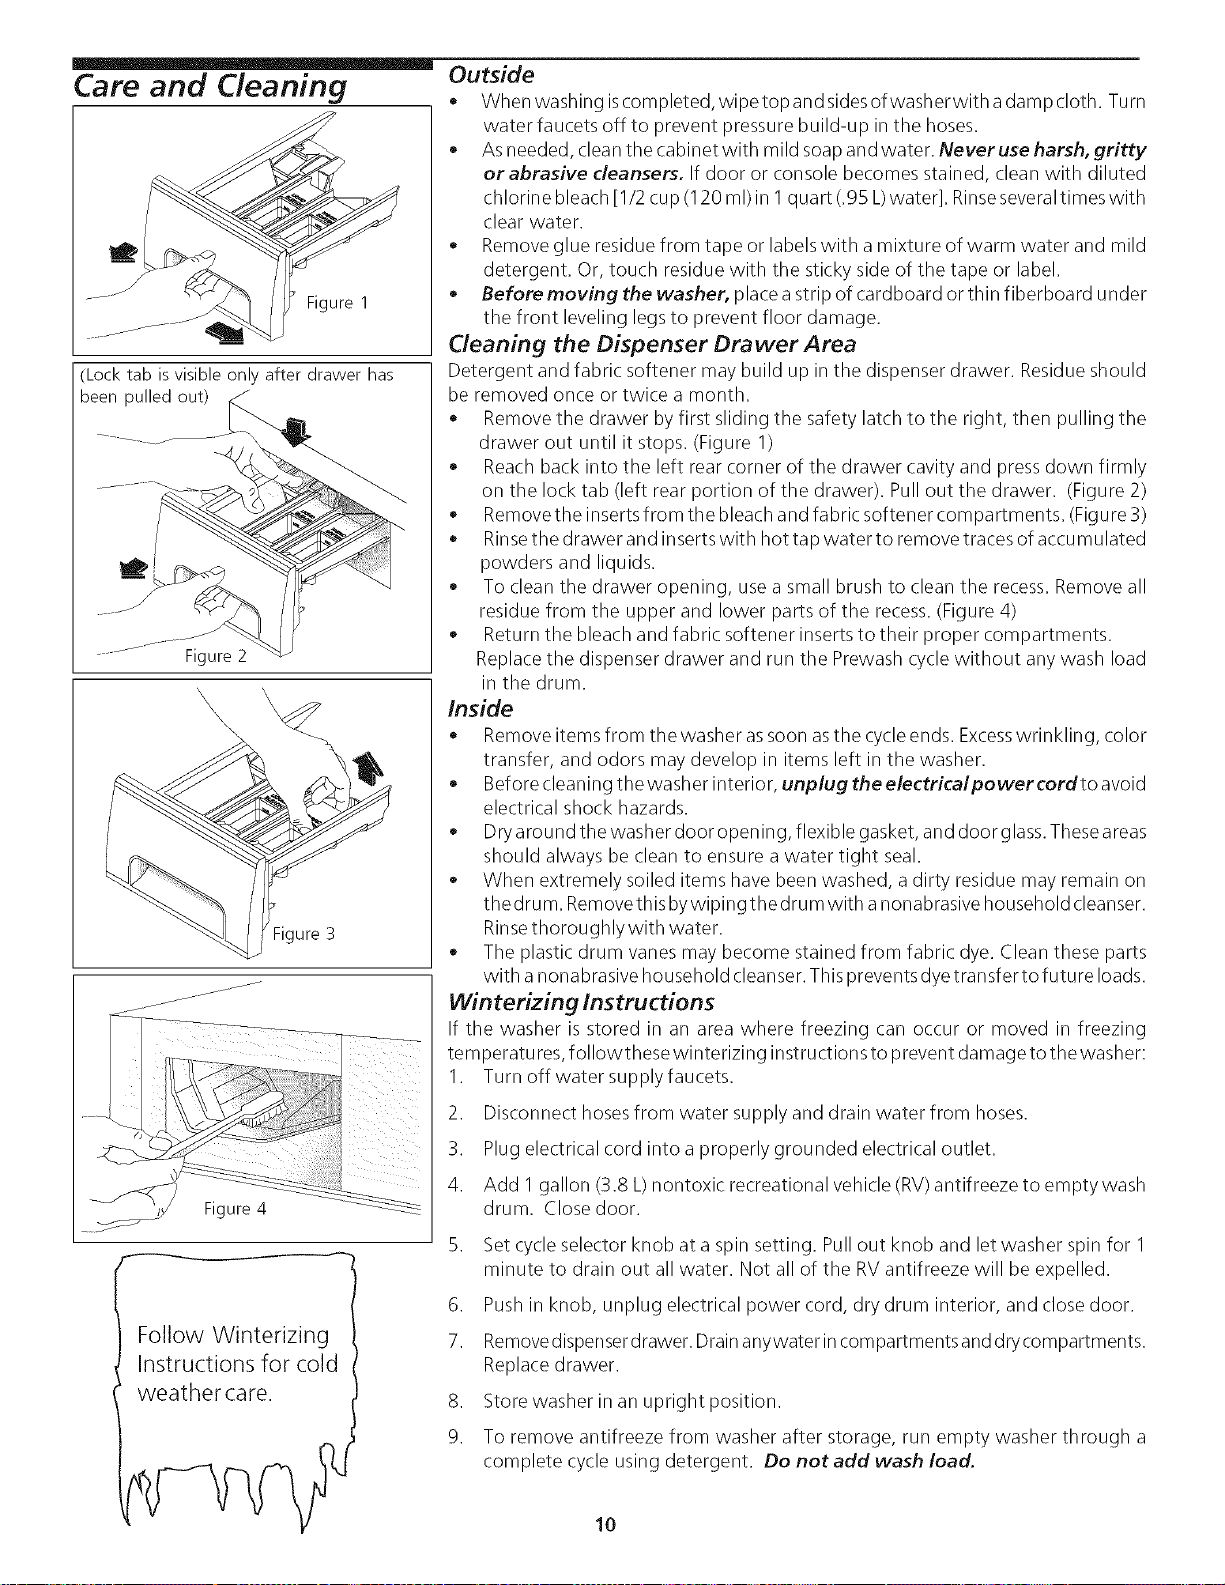
Cleaning the Dispenser Drawer Area
Detergent and fabric softener may build up in the dispenser drawer Residueshould
be removed once or twice a month
Removethe drawer byfirst sliding the safety latch to the right, then pulling the
drawer out until it stops (Figure 1)
Reach back into the left rear corner of the drawer cavity and press down firmly
on the lock tab (left rear portion of the drawer) Pull out the drawer (Figure 2)
Removethe insertsfrom the bleach and fabric:softener compartments. (Figure3)
Rinsethe drawer and inserts with hot tap water to remove traces of accumulated
powders and liquids.
To clean the drawer opening, usea small brush to clean the recess. Remove all
residue from the upper and lower parts of the recess. (Figure 4)
Return the bleach and fabric softener inserts to their proper compartments.
Replace the dispenser drawer and run the Prewash cyclewithout any wash load
in the drum.
Inside
Removeitems from the washer assoon asthe cycleends Excesswrinkling, color
transfer, and odors may develop in items left in the washer.
Before cleaning the washer interior, unplug the electrical power cord to avoid
electrical shock hazards
Dryaround the washer door opening, flexible gasket, and door glass Theseareas
should always be clean to ensure a water tight seal.
When extremely soiled items have been washed, a dirty residue may remain on
thedrum Removethisbywipingthedrumwith a nonabrasive householdcleanser
Rinsethoroughlywith water
The plastic drum vanes may become stained from fabric dye. Clean these parts
with anonabrasive household cleanser This prevents dyetransfer to future loads
Winterizing Instructions
If the washer is stored in an area where freezing can occur or moved in freezing
temperatures, followthese winterizing instructions to prevent damage to the washer:
I Turn off water supply faucets
2 Disconnect hosesfrom water supply and drain water from hoses
3 Plug electrical cord into a properly grounded electrical outlet
4 Add 1 gallon (38 L) nontoxic recreational vehicle (RV)antifreeze to empty wash
drum Close door
5. Set cycle selector knob at a spin setting. Pull out knob and let washer spin for I
minute to drain out all water. Not all of the RVantifreeze will be expelled.
6. Pushin knob, unplug electrical power cord, dry drum interior, and close door.
7. Removedispenserdrawer. Drainanywater incompartments and drycompartments.
Replace drawer.
8. Store washer in an upright position.
9. To remove antifreeze from washer after storage, run empty washer through a
complete cycle using detergent. Do not add wash load.
10
Loading ...
Loading ...