Loading ...
Loading ...
Loading ...
Float/Cage Assembly
WARNING: For-your own safety,
never connect _plug to power source
outlet until all assembly steps are
complete and you have read and
understood the safety and operation
instructions. Do not operate vac with
any parts damaged or missing.
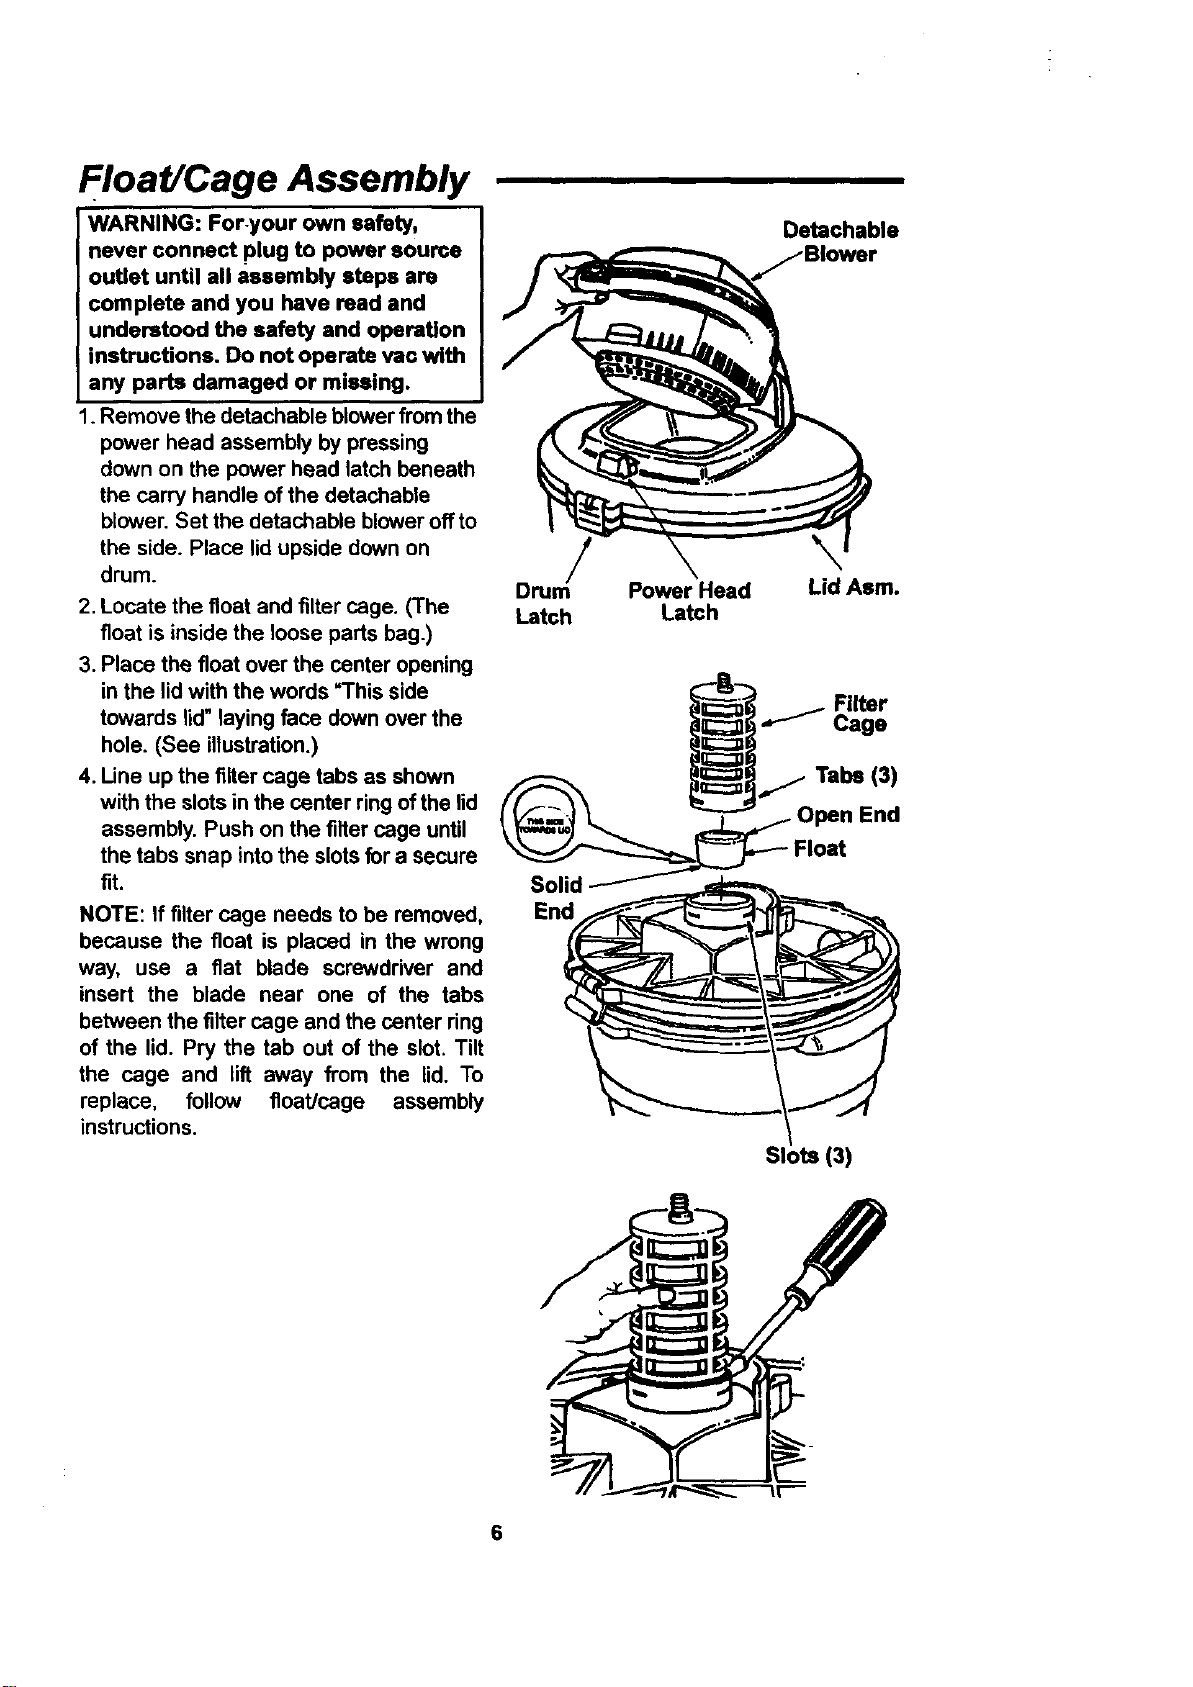
1. Remove the detachable blower from the
power head assembly by pressing
down on the power head latch beneath
the carry handle of the detachable
blower. Set the detachable blower off to
the side. Place lid upside down on
drum.
2. Locate the float and filter cage. (The
float is inside the loose parts bag.)
3. Place the float over the center opening
in the lid with the words "This side
towards lid" laying face down over the
hole. (See illustration.)
4. Line up the filter cage tabs as shown
with the slots in the center ring of the lid
assembly. Push on the filter cage until
the tabs snap into the slots for a secure
fit.
NOTE: If filter cage needs to be removed,
because the float is placed in the wrong
way, use a fiat blade screwdriver and
insert the blade near one of the tabs
between the filter cage and the center ring
of the lid. Pry the tab out of the slot. Tilt
the cage and lift away from the lid. To
replace, follow float/cage assembly
instructions.
/
Drum
Latch
Solid
End
Detachable
Power Head Lid Asm.
Latch
_1 j Filter
Cage
,,1/Tabs (3)
End
6
Loading ...
Loading ...
Loading ...