Loading ...
Loading ...
Loading ...
PART 2: FAN MOTOR INSTALLTION GUIDE
External Solution - Roof Mounted
Models included: EL.800, EP
.1140 and EPP.2010
19
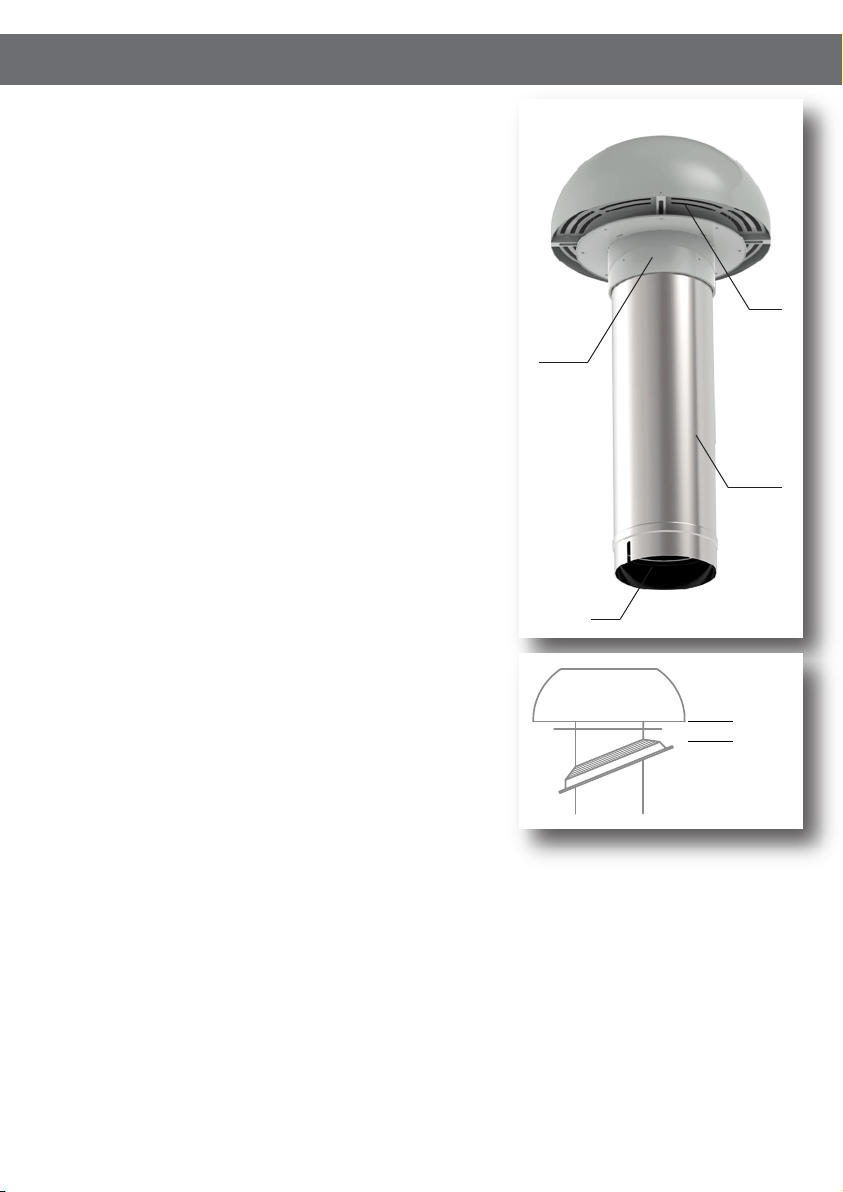
Inlet
Outlet
Mounting
Bracket
Rigid Duct
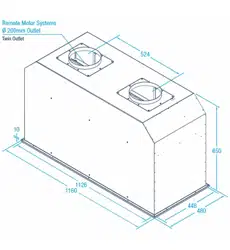
Positioning your KLEENAIR Unit:
It is recommended that when the KLEENAIR EXTERNAL UNIT is ROOF
mounted, it is positioned a minimum 2100mm above the ground surface
with a radial clearance of 600mm. Please ensure that the KLEENAIR unit is
positioned in an environment that is free of other gases to enable an efcient
expulsion of the cooking by-products and to ensure that back-draft of
external gases doesn’t take place.
Please ensure the fan motor is positioned away from other exhausts such as
chimneys, gas fuses, etc. The unit can be mounted so that it ducts directly
through the roof and is mounted below the highest point of the roof line.
STEP 1:
Cut a 200mm diameter hole in the roof to enable the rigid duct on the base
of the KLEENAIR unit to protrude down into the roof space. Please ensure
that the hole is cut in a practical position to enable sufcient clearance
around the fan motor unit. Afx the ashing (optional accessory
X1IK.200TILE or X1IK.200MET) to the roof surface. Please ensure that
the ashing is sealed thoroughly onto the rigid duct with silicone to prevent
water leaks.
STEP 2:
Using standard 200mm pipe mounts (optional accessory), mount the rigid
duct to beams, trusses or other appropriate structures in the roof space.
Ensure the rigid duct protrudes past the top of the ashing by at least 75mm.
min 75mm,
max 150mm,
STEP 3:
Remove the mounting bracket from your KLEENAIR unit by rotating the cover
in an anti-clockwise direction.
STEP 4:
Fix the mounting bracket to the rigid duct using the screws provided.
STEP 5:
Feed the power cable through the centre of the mounting bracket and return the KLEENAIR unit on to the mounting bracket and
x it by rotating the cover in a clockwise direction. Lock the cover into position by tightening the locking screw, which is located
between the outlet and the mounting bracket.
STEP 6:
Attach the exi-duct to the rigid duct using the pipe clamps supplied.
STEP 7:
Attach
exi-duct from the KLEENAIR unit to the rangehood using pipe clamps. Ensure that the duct is pulled tightly to ensure that
exi-duct remains rm and stable during operation. Avoid sharp bends in the duct. Gentle bends in the ducting are recommended
as it assists in mufing noise from the fan unit back to the rangehood. If the exi-duct needs to be extended, attach the two
exi-duct ends using a rigid duct insert, secured by pipe clamps or duct tape. (Optional Accessory - X1IK.200DUCT)
STEP 8:
Attach the male plug of the KLEENAIR unit to the female plug of the rangehood to enable power supply to the fan motor unit. An
extension lead (not supplied) of up to ve meters may be added if required.
Loading ...
Loading ...
Loading ...