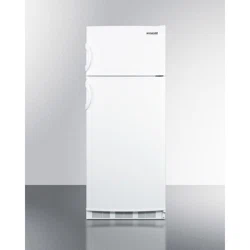
Loading ...
Loading ...
Loading ...

6
NOTE: All parts removed must be saved to do the reinstallation of the doors.
1. Remove the hinge cover on the right top of the cabinet.
2. Remove the three bolts and washers (using a ratchet tool with an 8mm socket) that
holds the top hinge to the cabinet. Keep these for later use.
3. Lift the top hinge straight up to free the pin from the socket on the top of the door.
4. Lift the freezer door and place it on a padded surface to prevent scratching it.
5. Remove the plug buttons from the upper left holes as illustrated and transfer them to
the uncovered holes at the right side. Be sure to press the plug buttons firmly into
the holes.
6. Unscrew the middle hinge and washer. Keep these for later use.
7. Take off the refrigerator door and place it on a padded surface to prevent scratching.
8. Unscrew the lower hinge. Push the kick plate to the right in the new position.
9. Lay the appliance on its back on the floor. Remove, change and replace the bottom
hinge and plugs to the opposite side.
10. Stand the unit upright and replace the refrigerator door.
11. Insert the bottom of the middle hinge into the top of the refrigerator door. With the
door open, screw the middle hinge into the uncovered holes. Do not tighten screw
until you have checked that the door is level.
12. Place the bottom of the freezer door into the top of the middle hinge.
13. Replace the top hinge in the uncovered holes on the top left side of the freezer. Do
not tighten it until you have checked that the door is level.
14. Replace the hinge cover.
15. Should the gasket seals not adhere to the casing of the appliance perfectly, they will
have to be heated from a suitable distance (by means of a hair drier, for example)
and lightly stretched to the required height.
1. Upper hinge cover
2. Upper hinge
3. Middle hinge
4. Middle hinge washer
5. Lower hinge
6. Kick plate
7. Handle
8. Door hinge plug
Loading ...
Loading ...
Loading ...
