Loading ...
2
Tel: (613) 342-5424, Fax: (800) 263-4598
Lower
Connector
Nipple
Upper
connector
Mounting
bracket
Mounting
bracket
Electrical
Box
Nipple
Hex nut
Electrical
box screws
(not included)
Power
cord
Chain
Chain
Nipple
Upper
connector
Nut
Black
House supply
Ground wire
Fixture
Ground
wire
White
Nut
Canopy
Canopy
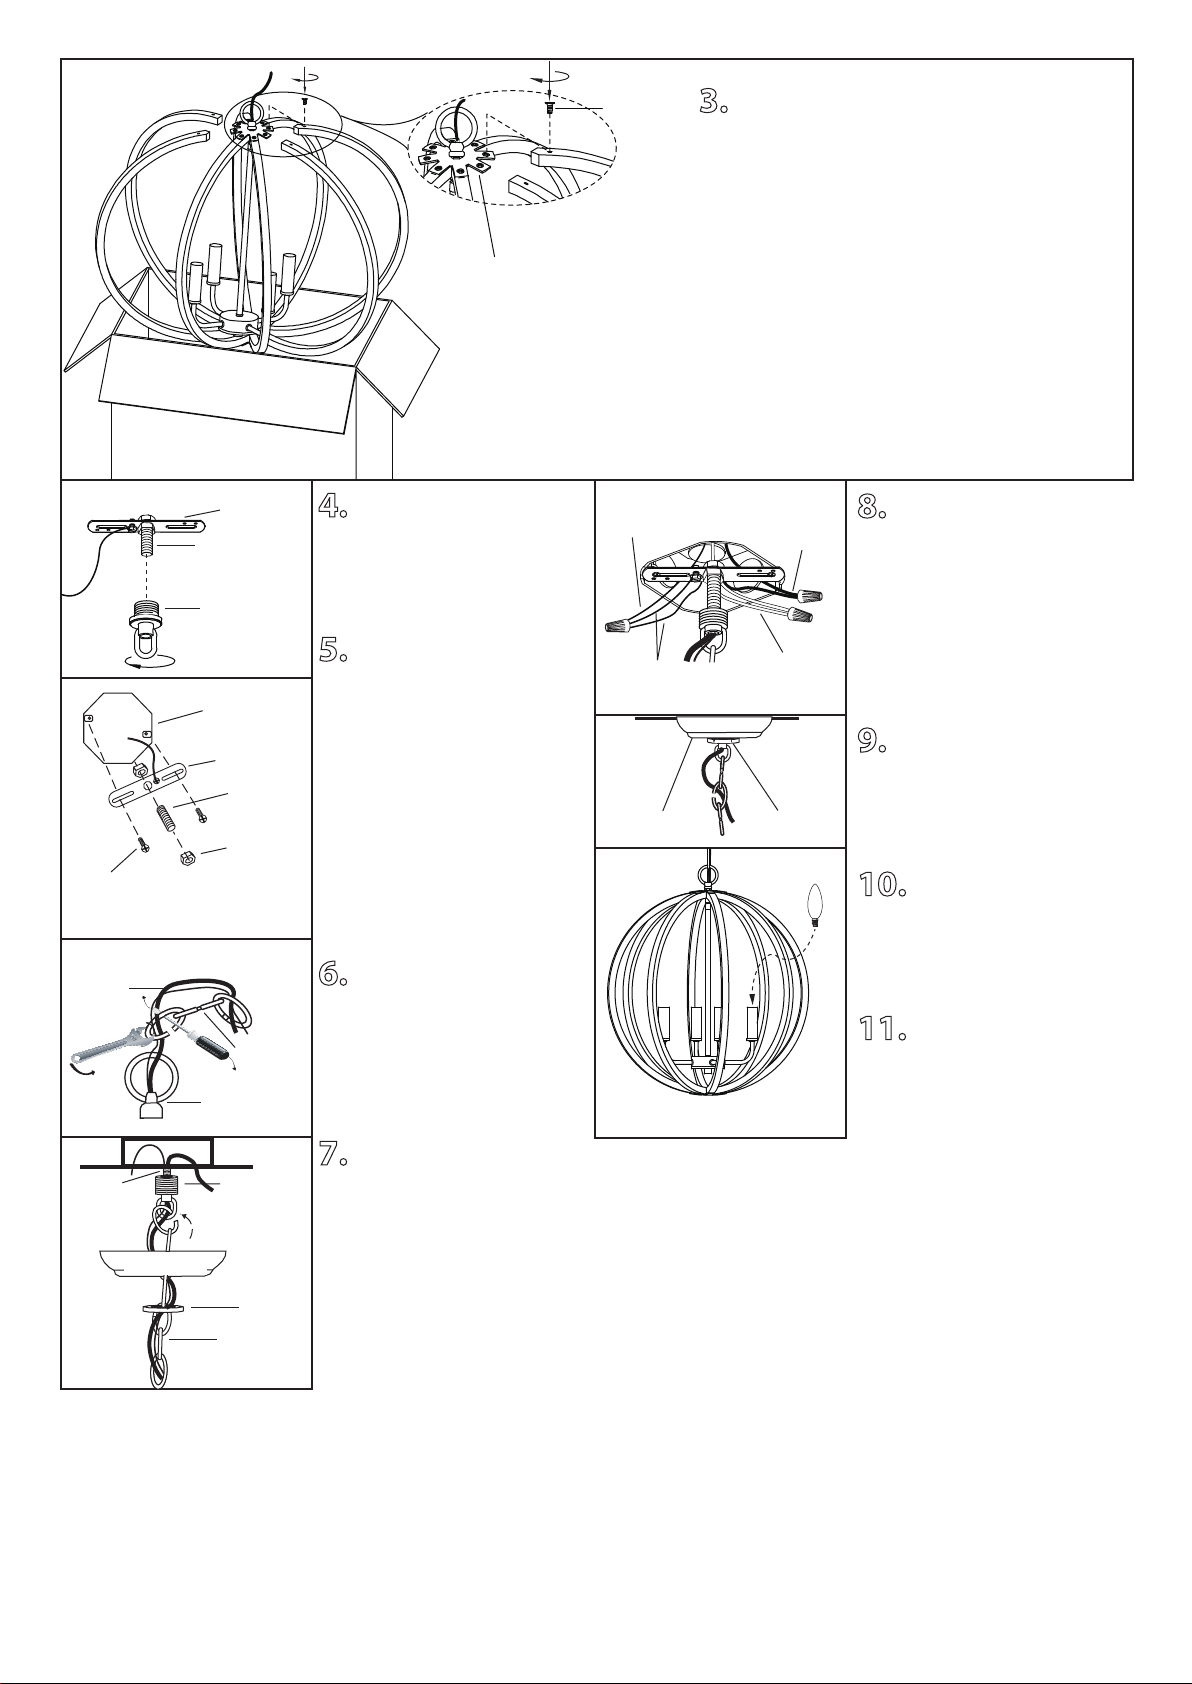
8. Connect the ground wires
(bare copper or green) from your
fixture to the ground wire (bare
copper or green) or ground
screw in the electrical box.
Connect the black wire (or wire
marked “SPT-1”) from the fixture
to the black wire in the electrical
box and connect the white wire
(or the wire with ribbed side)
from the fixture to the white
wire in the electrical box.
9. Once connections of wires
are completed, carefully tuck
wires and wire nuts into the
electrical box making sure no
bare wire (on the black and
white) is visible at the wire nuts.
10. Slide the canopy up the
chain and over the upper
connector. Slide the nut up the
chain and thread onto the upper
connector.
11. Install specified bulb type
and wattage (not included).
4. Determine the height that
you would like to hang your
fixture. Trim the cord and chain.
Allow 10” of extra wiring for the
electrical box connections.
5. Loosen the upper
connector from nipple. Attach
the mounting bracket to the
electrical box using electrical
box screws (not included).
Attach the nipple to the
mounting bracket and adjust
until it will clear the canopy
when assembled (Place the
canopy over the nipple and
tighten the upper connector
onto the nipple until snug. The
upper connector should hold
the canopy snug to the ceiling).
Lock the nipple in the correct
position using the hex nut.
6. To attach chain loop to light
fixture, use a screwdriver and
wrench to open and close chain
loop. Ensure to close the
opening. Weave the power cord
and ground wire through the
links in the chain.
7. Loosen the nut on the
upper connector and slide it
down the chain towards the
lower connector. Slide the
canopy down the chain towards
the lower connector. Feed the
wire through nut, canopy, the
upper connector and onto the
nipple. Tighten the upper
connector onto the nipple.
Spread the other end of the
chain open and fasten to the
upper connector. Ensure the
opening is closed.
3. Turn the fixture up-side-down and
press the arm slightly under the metal plate on
the top and tighten the arms with the screws.
Screw
Metal Plate
Loading ...
Loading ...