Loading ...
Loading ...
Loading ...
THANK YOU FOR BUYING A HOTPOINT PRODUCT.
In order to receive a more complete assistance, please
register your product on www.hotpoint.eu/register
Policies, standard documentation, ordering of spare parts and additional product information can be
found by:
• Visiting our website docs.hotpoint.eu and parts-selfservice.whirlpool.com
• Using QR Code
• Alternatively, contact our After-sales Service (See phone number in the warranty booklet). When
contacting our After-sales Service, please state the codes provided on your product’s identi cation plate.
EN
Quick guide
Before using the appliance carefully read the Safety
Instructions.
xxxxxxxxxxxx
xxxx
11/2021
W11247965
TROUBLESHOOTING EN
Before contacting the After-sales Service, refer to the table below. Often the malfunctions are minor and can be solved in few
minutes.
Malfunction
Possible cause
Solution
The tumble
dryer does not
turn on.
The plug is not inserted into the socket.
Insert the plug into the socket.
The plug is faulty.
Try to plug another appliance in the same socket. Do not use
connecting electrical devices to the socket, such as adapters or
extensions.
A power failure occurred.
Wait for the power supply to be restored and switch the fuse on again
if necessary.
The tumble
dryer does not
start.
The door has not been closed properly.
Close the door.
A time delay was set to the start of the cycle.
For machines equipped with this function: wait for the set delay to
end or switch the machine o to reset it. Refer to the Options section.
The "Start/Pause" button was not pressed in
order to start the programme.
Press the "Start/Pause" button.
The Key Lock function was enabled (for machines
equipped with this option).
Refer to the Options section. If Key Lock was selected, disable it.
Switching the machine o will not disable this option.
Garments are
wet at cycle
completion.
Small load.
The automatic programme has not sensed the required nal moisture
so that the dryer completes the programme and stops. If this happens
simply select an additional short period of drying or select Extra Dry
option if available.
Large loads or heavier fabrics.
Dryness levels can be modi ed to the speci c dryness desired.
Extra Dry is recommended for ready to wear items.
The drying
times are very
long.
An appropriate maintenance was not carried out.
Refer to the Care & Maintenace section and perform the operations
described.
The programme, the time and/or the drying level
set are not suitable for the type and the amount
of load inserted into the dryer.
Refer to Programmes and Options sections to nd the programme
and options most suitable for the type of load..
The garments are too wet.
Carry out a washing cycle with higher spin speed to remove as much
water as possible.
The dryer may be overloaded.
Refer to the Programmes section to check the max load for each
programme.
Room temperature.
The drying time may be longer if the room temperature falls outside
the 14–30°C range.
The programme
did not end.
A power failure occurred might have occurred.
In case of power failure, it is necessary to press the "Start/Pause"
button to restart the cycle
Lights on or ashing
Water tank The water tank is full. Empty the water tank. Refer to the Care & Maintenance section
Door lter
Failure of the air ow necessary for machine
operation.
Clean the door lter and check whether air intake is free. Carrying
out these operations improperly may cause damages. Refer to Care &
Maintenance section.
Bottom lter* The bottom lter requires cleaning. Clean the bottom lter. Refer to Care & Maintenance section.
DEMO
The cycle lasts
few minutes.
The dryer is in DEMO mode. The DEMO indicator
is on.
Disable the DEMO mode. The following actions must be carried out in
sequence, without breaks. Switch the machine on and then switch it o
again. Press the Start/Pause button until the buzzer is heard. Switch the
machine on again. The “DEMO” indicator ashes and then turns o .
The presence
of wrench
symbol signals a
malfunction.
The machine sensors detected a failure.
Switch the dryer o and unplug it. Open the door immediately and
pull laundry out, to allow the heat to dissipate. Wait for about 15
minutes. Reconnect the dryer to the power supply, load the laundry
and restart the drying cycle. If the problem still occurs, contact
the After-Sales Service Centre and communicate the letters and
digits ashing on the display.
For instance: F3 and E2.
*Note: some models are auto-cleaning and not equipped with bottom lter. Please refer to the Care & Maintenance section.
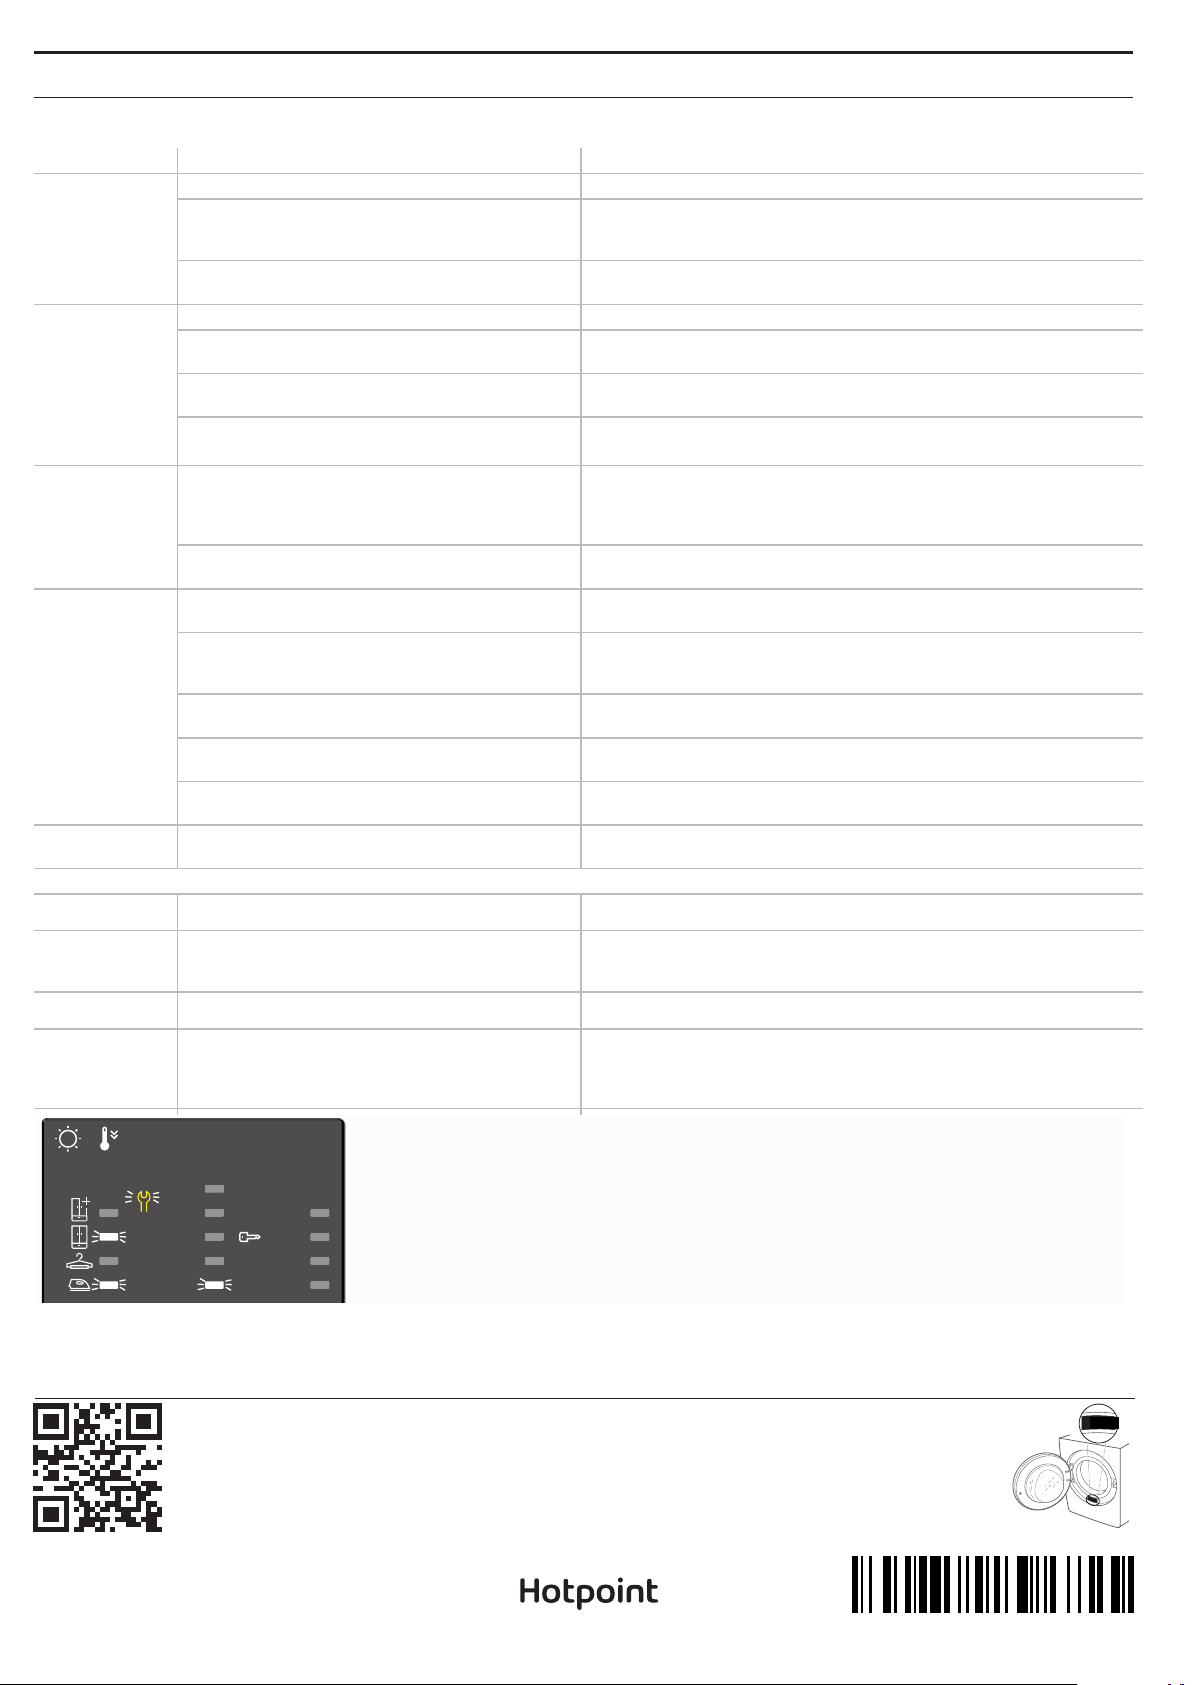
The presence of wrench symbol signals a malfunction. Carry out the operations described.
Switch the dryer o and unplug it. Open the door immediately and pull landry out, to allow
the heat to dissipate. Wait for about one hour. Reconnect the dryer to the power supply, load
the laundry and restart the drying cycle.
If the problem still occurs, contact the After-Sales Service Centre and communicate the
number and the position of the ashing LEDs, starting from the bottom and the left column.
e.g.:
First, left column, LEDs No. 1 and 3 on.
Central column, LED No. 1 on.
60’
30’ 1h
3h
6h
9h
90’
120’
180’
h
END
DEMO