
Loading ...
Loading ...
Loading ...
CHAIN SPROCKET
Regularly check the condition of the sprocket with
your local retailer and replace it when it is worn.
Do not mount a new chain with a worn sprocket
or vice-versa.
SHARPENING THE CHAIN (Fig. 12)
DANGER! To ensure that the chain-
saw works safely and eciently, it is essential
that the cutting components are well-sharp-
ened.
Sharpening is necessary when:
• The sawdust looks like dust.
• Cutting becomes more dicult.
• The cut is not straight.
• Vibrations increase.
• Fuel consumption increases.
DANGER! If the chain is not su-
ciently sharpened, the kick-back’s risk in-
creases.
A specialized centre will sharpen the chain using
the right tools to ensure minimum removal of ma-
terial and even sharpness on all the cutting edges.
If you sharpen the chain yourself, use special
round-section les with the right diameter de-
pending on the type of chain (see “Chain Main-
tenance Table”). You need a certain amount of
skill and experience to avoid damaging the cutting
edges.
Sharpen the chain as follows:
– Disassemble the pruner from the brush cutter
and secure the bar with the chain in a vice, so
that the chain can run smoothly.
– Tighten the chain if it is loose.
– Mount the le in the guide and then insert it in
the tooth at a constant angle from the cutting
13 MAINTENANCE AND STORAGE
EN
edge.
– Sharpen in a forward motion a few times and
repeat this on all the cutting edges facing the
same way (right or left).
– Turn the bar over in the vice and repeat on all the
other cutting edges.
– Check that the limiter tooth does not stick out
further than the inspection instrument and le
any projecting parts with a at le, rounding o
the edge.
– After sharpening, remove all traces of ling and
dust and lubricate the chain in an oil bath.
Replace the chain whenever:
– The length of the cutting edges reduces to 5
mm or less;
– There is too much play between the links and
the rivets.
BAR MAINTENANCE (Fig. 13)
To avoid asymmetrical wear on the bar, make sure
it is turned over periodically.
To keep the bar in perfect working order, proceed
as follows:
– grease the bearings on the nose sprocket (if
present) with the syringe;
– Clean the bar groove with the scraper (not in-
cluded);
– clean the lubrication holes;
– with a at le, remove burr from the edges and
level o the guides.
Replace the bar whenever:
– the groove is not as deep as the height of the
drive links (which must never touch the bottom);
– the inside of the guide is worn enough to make
the chain lean to one side.
Given product evolution, the tools may be repla-
ced in time with others having similar interchange-
able and operating safety characteristics.
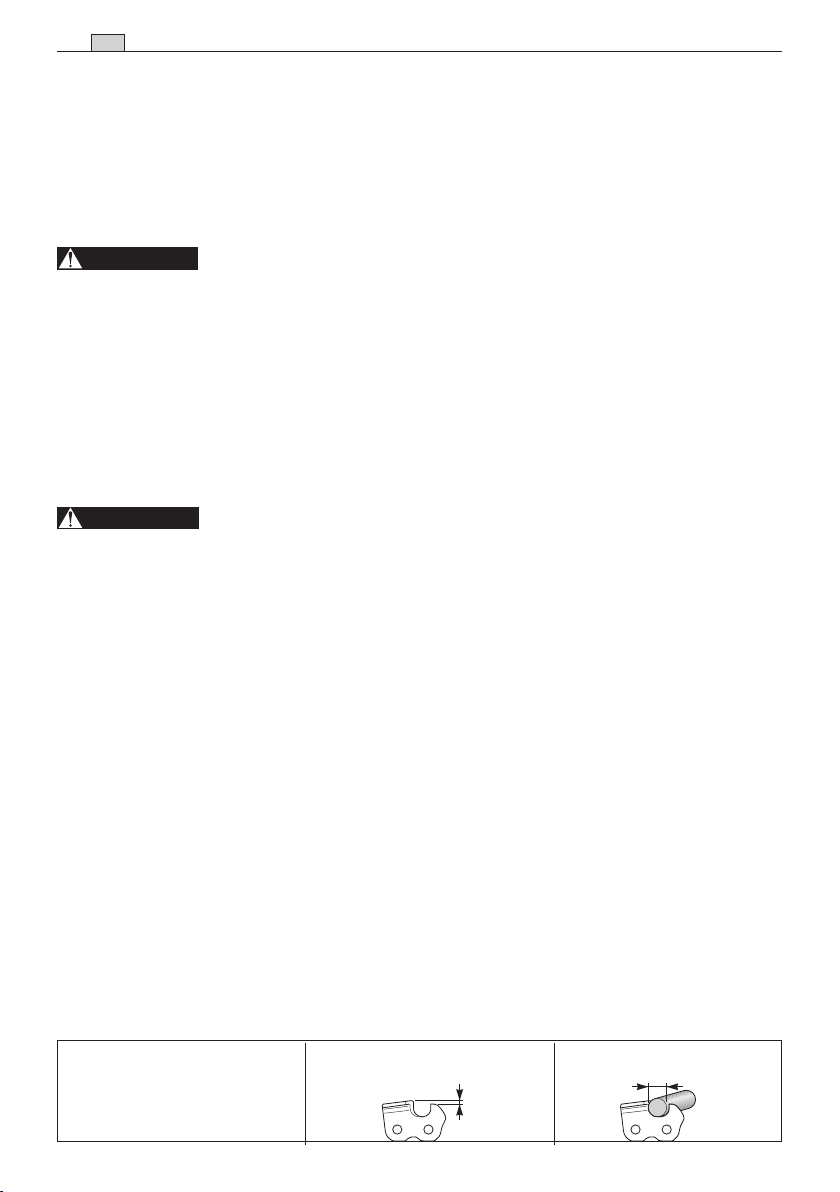
Chain pitch Limiter tooth level (a) File diameter (d)
inches: 3/8 Mini
mm: 9,32
a = 0,45 mm (0,018”) d = 4 mm (5/32”)
a = 0,45 mm (0,018”) d = 4 mm (5/32”)
Loading ...
Loading ...
Loading ...