Loading ...
Loading ...
Loading ...
E_GLISH
HOWTOMAiNTAiN
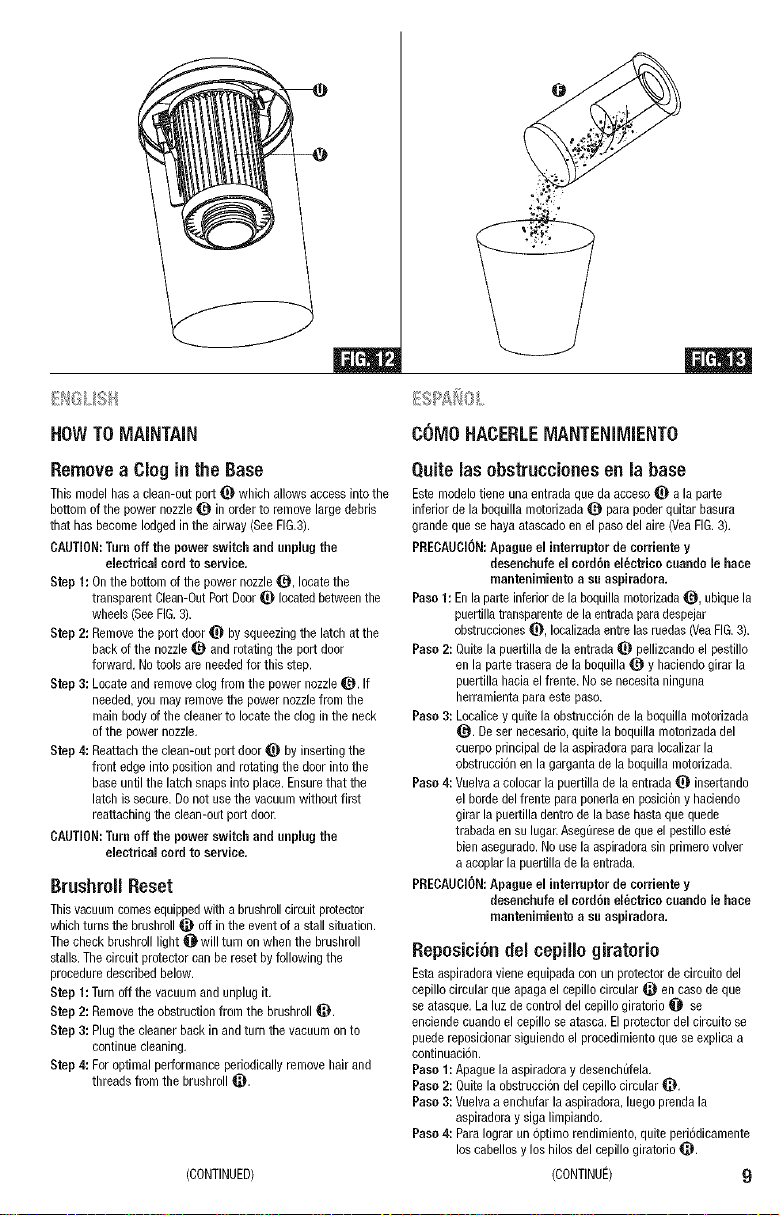
Removea Clogin the Base
This medelhas a clean-outpert _ which allows access intothe
bottom ofthe power nozzle_ in orderto removelarge debris
that has becomelodgedinthe airway (SeeFIG.3).
CAUTION:Tern off the power switchand unplugthe
electrical cord to service.
Stop 1: Onthe bottom ofthe power nozzle_, locatethe
transparent Clean-OutPortDoor_ locatedbetweenthe
wheels(SeeFIG.3).
Stop 2: Removethe port door_} by squeezingthe latch at the
back of the nozzle_ androtating the port door
forward. No toolsare neededfor this step.
Stop 3: Locateand removeclog from the power nozzle_. If
needed,you mayremovethe power nozzlefrom the
main bodyd the cleanerto locatethe clogin the neck
ofthe power nozzle.
Stop 4: Reattachthe clean-out port door_ by insertingthe
front edgeinto position androtating the door intothe
baseuntil the latch snaps into place. Ensurethat the
latch issecure. Do not usethe vacuumwithout first
reattaching the clean-out port door.
CAUTION:Turn off the power switch and unplugthe
electrical cord to service.
Brushroll Reset
Thisvacuumcomesequippedwith a brushrellcircuit protecter
whichturns thebrushroll_ off in the eventof a stall situation.
Thecheck brushrolllight O will turn on when the brushroll
stalls.Thecircuit protector canbe reset byfollowing the
proceduredescribedbelow.
Stop t: Turn off the vacuum andunplug it.
Stop 2: Removethe obstruction from the brushroll _}.
Stop 3: Plugthe cleaner backin and turn the vacuum onto
continue cleaning.
Stop 4: Foroptimal performance periodicallyremovehair and
threadsfrom the brushroll _.
(CONTINUED)
COMONACERLEMANTENIMIENTO
Quitelasebstrucciones en labase
Estemodelotiene unaentrada queda acceso_} a la parte
inferior de la boquilla motodzada_ parapoder quitar basura
grande quese hayaatascadoen el pasodel aire(VeaFIG.3).
PREDAUCION:Apagee el interruptorde corriente y
desenchufeei corddu elDctrieo ceandole haee
mantenimiento a se aspiradora.
Paso 1:Enla parteinferior de la boquilla meterizada_, ubiquela
puertillatransparentede laentradaparadespejar
obstrucciones_, Iocalizadaentre lasruedas(VeaFIG.3).
Paso2: Quitela puertilla de la entrada_} pellizcandeel pestillo
en la partetraserade la bequilla_ y haciendogirar la
puertilla haciael frente. No se necesitaninguna
herramientaparaeste paso.
Paso 3: Localicey quitela obstrucciSnde la boquillametorizada
_}. Deser necesario,quite la bequillamotedzadadel
cuerpoprincipal de la aspiraderapara Iocalizarla
obstrucci6n en lagarganta de la boquilla motorizada.
Paso 4: Vuelvaa celecar la puertillade la entrada_} insertande
el horde delfrente paraponerlaen posici6ny haciende
girarla puertilladentrode la basehastaque quede
trabada en su lugar.Aseguresede queel pestilloeste
bienasegurado.Nouse la aspiradorasin primero volver
aacoplar la puertillade laentrada.
PREDAUCi(SN:Apageeel ieterrnptorde corrientey
desenchufeel cordDuelDetricoceando le haee
mantenimientoa se aspiradora.
Reposi¢iDndel cepillogiratorio
Estaaspiraderaviene equipadacon un protector de circuite del
cepillocircular que apaga el cepillo circular _ en case deque
seatasque.La luz de controldel cepillo giratorio 0 se
enciendecuando elcepillo se atasca.Elprotector del circuito se
puede reposicionarsiguiendo el procedimientoquese explicaa
continuaciSn.
Paso 1: Apaguela aspiradoray desenchufela.
Paso 2: Quitela ebstrucciSndel cepillocircular _.
Paso 3: Vuelvaa enchufar laaspiradora,luegoprenda la
aspiradoray sigalimpiando.
Paso 4: ParaIograrun optimo rendimiento,quite periodicamente
los cabellosy los hilos del cepillegiratorie _.
(CONTINUE) 9
Loading ...
Loading ...
Loading ...