ଚ⫼ৄᓣ᧙ᢠᴎ
䇈ᯢк䇈ᯢк
Batedeira Profissional
I N S T R U Ç Õ E S
Commercial Stand Mixer
I N S T R U C T I O N S
㌗㠛㣿G㓺䌶✲G⹏㍲㌗㠛㣿㓺䌶✲⹏㍲
㌂㣿G㍺ⳛ㍲㌂㣿㍺ⳛ㍲
W10523279B.indd 1W10523279B.indd 1 10/31/2012 2:30:20 PM10/31/2012 2:30:20 PM

2
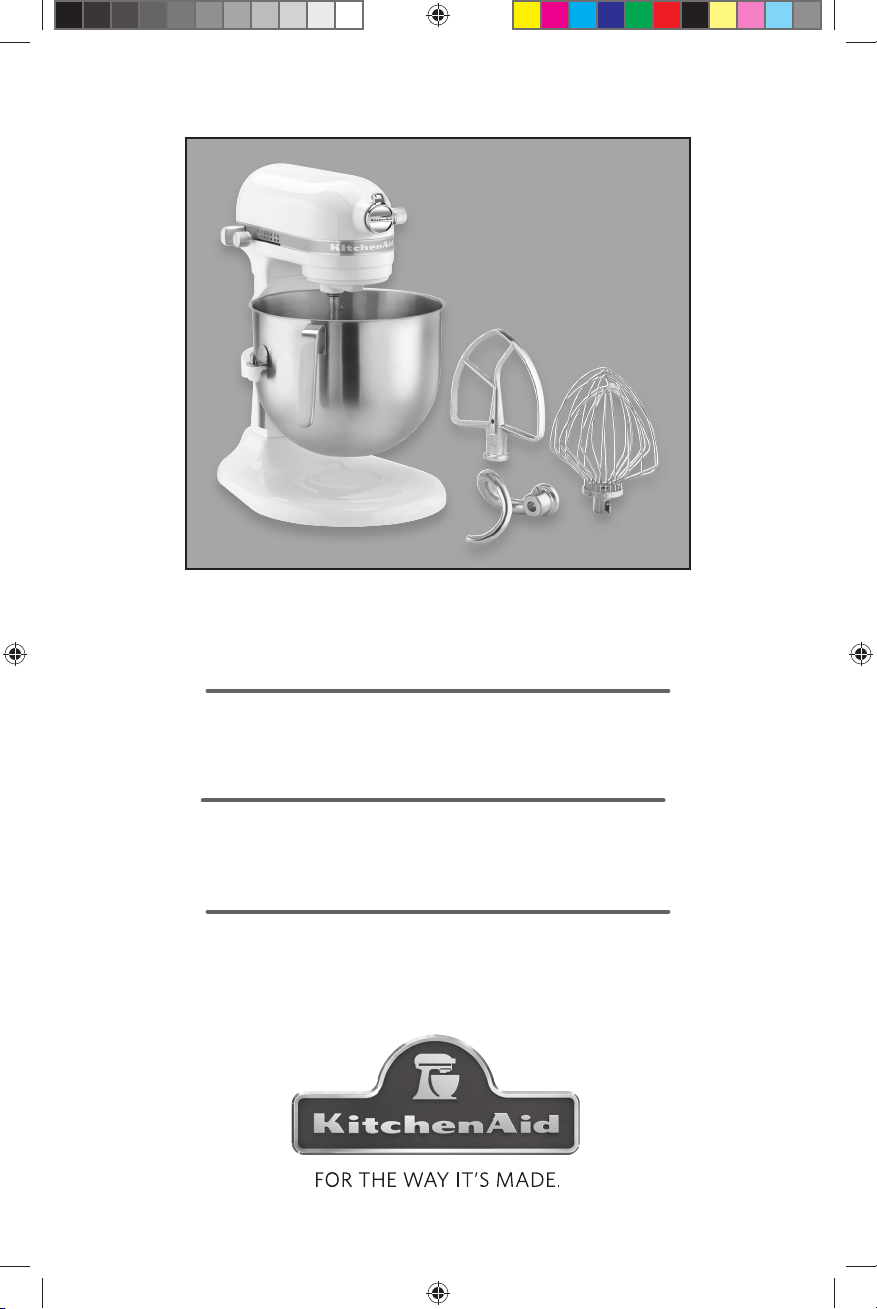
Stand Mixer Safety............................................................................................................................ 3
Electrical Requirements .................................................................................................................... 4
Troubleshooting Problems................................................................................................................ 6
Stand Mixer Features........................................................................................................................ 7
Assembling Your Bowl Lift Stand Mixer ........................................................................................... 8
Using Your KitchenAid Attachments ................................................................................................ 9
Mixing Time...................................................................................................................................... 9
Mixer Use......................................................................................................................................... 9
Speed Control Guide - 10 Speed Stand Mixers .............................................................................. 10
Care And Cleaning ......................................................................................................................... 11
Beater To Bowl Clearance .............................................................................................................. 11
Mixing Tips ..................................................................................................................................... 12
Table of Contents
W10523279B.indd 2W10523279B.indd 2 10/31/2012 2:30:34 PM10/31/2012 2:30:34 PM
3
English
SAVE THESE INSTRUCTIONS
When using electrical appliances, basic safety precautions should always
be followed, including the following:
1. Read all instructions.
2. To protect against risk of electrical shock, do not put Stand Mixer in water or other
liquid.
3. Close supervision is necessary when any appliance is used by or near children.
4. Unplug Stand Mixer from outlet when not in use, before putting on or taking off
parts and before cleaning.
5. Avoid contacting moving parts. Keep hands, hair, clothing, as well as spatulas and
other utensils away from beater during operation to reduce the risk of injury to
persons and/or damage to the Stand Mixer.
6. Do not operate Stand Mixer with a damaged cord or plug or after the Stand
Mixer malfunctions, or is dropped, or damaged in any manner.
7. The use of attachments not recommended or sold by KitchenAid may cause fire,
electrical shock or injury.
8. Do not use the Stand Mixer outdoors.
9. Do not let the cord hang over edge of table or counter.
10. Remove flat beater, wire whip or dough hook from Stand Mixer before washing.
11. This appliance is not intended for use by persons (including children) with reduced
physical, sensory or mental capabilities, or lack of experience and knowledge, unless
they have been given supervision or instruction concerning use of the appliance by
a person responsible for their safety.
12. Children should be supervised to ensure that they do not play with the appliance.
13. Switch off the appliance and disconnect from supply before changing accessories
or approaching parts that move in use.
IMPORTANT SAFEGUARDS
Stand Mixer Safety
W10523279B.indd 3W10523279B.indd 3 10/31/2012 2:30:34 PM10/31/2012 2:30:34 PM
4
Electrical Requirements
Volts: 220-240 A.C. only.
Hertz: 50/60
The power rating for your Stand Mixer
is printed on the trim brand or on the
serial plate.
Do not use an extension cord. If the
power supply cord is too short, have
a qualified electrician or serviceman
install an outlet near the appliance.
W10523279B.indd 4W10523279B.indd 4 10/31/2012 2:30:34 PM10/31/2012 2:30:34 PM
5
English
Electrical Requirements for Brazil Only
Residence mains:
The mains wires must be of copper
with a minimum cross-section per
ABNT (NBR-5410.)
To protect this appliance and the mains
against over loading, this appliance must
be connected to a circuit that is protected
with a thermo-magnetic circuit breaker.
If the household circuit does not include
a circuit breaker, contact an electrician
to have one installed.
Electric outlet:
For your safety and to avoid damage to
your product, it is very important that
your product is earthed correctly.
Your appliance power cord features a
hexagon-shaped plug, 10A, per ABNT
(NBR 14136).
Your residence electrical installation
must have a suitable electric outlet for
this type of plug. If not, it is your
responsibility to have one installed
by a qualified electrician.
Use appropriate outlet type for your
appliance plug, as shown below:
Before operating
this appliance,
make sure the
main voltage at the
installation site is
the same as indicated
on product technical
data label.
This information is also included on the
label attached to your appliance’s cord
near the plug.
IMPORTANT:
• If it is necessary to convert your
127V appliance to 220V, use a
1.0 KVA stabiliser.
• If it is necessary to convert your 220V
appliance to 127V, use a 1.0 KVA
stabiliser.
• Never plug your
appliance into
multi-plug adapters
with another
appliance in the
same socket. Do
not use an extension cord. This type
of connection may cause electrical
overload in the mains, and can damage
the appliance and could cause a fire.
The appliance should be plugged into
its own outlet.
• In case of oscillation in mains voltage,
install an automatic voltage stabiliser
with minimum rating of 1500 Watts
between the appliance and the socket.
• If the cord of this appliance is damaged,
it must be replaced. Contact your
nearest authorized KitchenAid
Customer Care Center.
W10523279B.indd 5W10523279B.indd 5 10/31/2012 2:30:34 PM10/31/2012 2:30:34 PM

6
Troubleshooting Problems
Please read the following before
calling your service center.
1. The Stand Mixer may warm up during
use. Under heavy loads with extended
mixing time periods, you may not be
able to comfortably touch the top of
the Stand Mixer. This is normal.
2. The Stand Mixer may emit a pungent
odor, especially when new. This is
common with electric motors.
3. If the flat beater hits the bowl, stop
the Stand Mixer. See “Beater to
Bowl Clearance.”
If your Stand Mixer should
malfunction or fail to operate,
please check the following:
- Is the Stand Mixer plugged in?
- Is the fuse in the circuit to the Stand
Mixer in working order? If you have a
circuit breaker box, be sure the circuit
is closed.
- Turn the Stand Mixer to the “0” (Off)
position for 10-15 seconds, then turn
it back on. If the mixer still does not
start, allow it to cool for 30 minutes
before turning it back on.
If the problem is not due to one of
the above items, see the KitchenAid
Warranty. Do not return the Stand
Mixer to the retailer, as they do not
provide service.
W10523279B.indd 6W10523279B.indd 6 10/31/2012 2:30:35 PM10/31/2012 2:30:35 PM
7
English
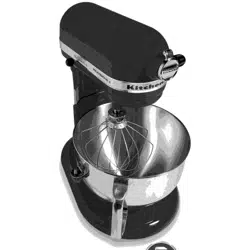
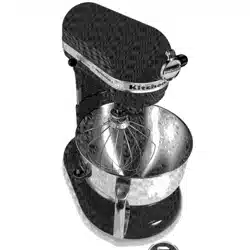
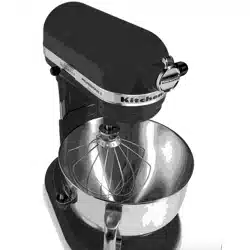
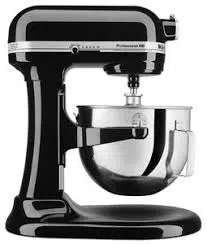
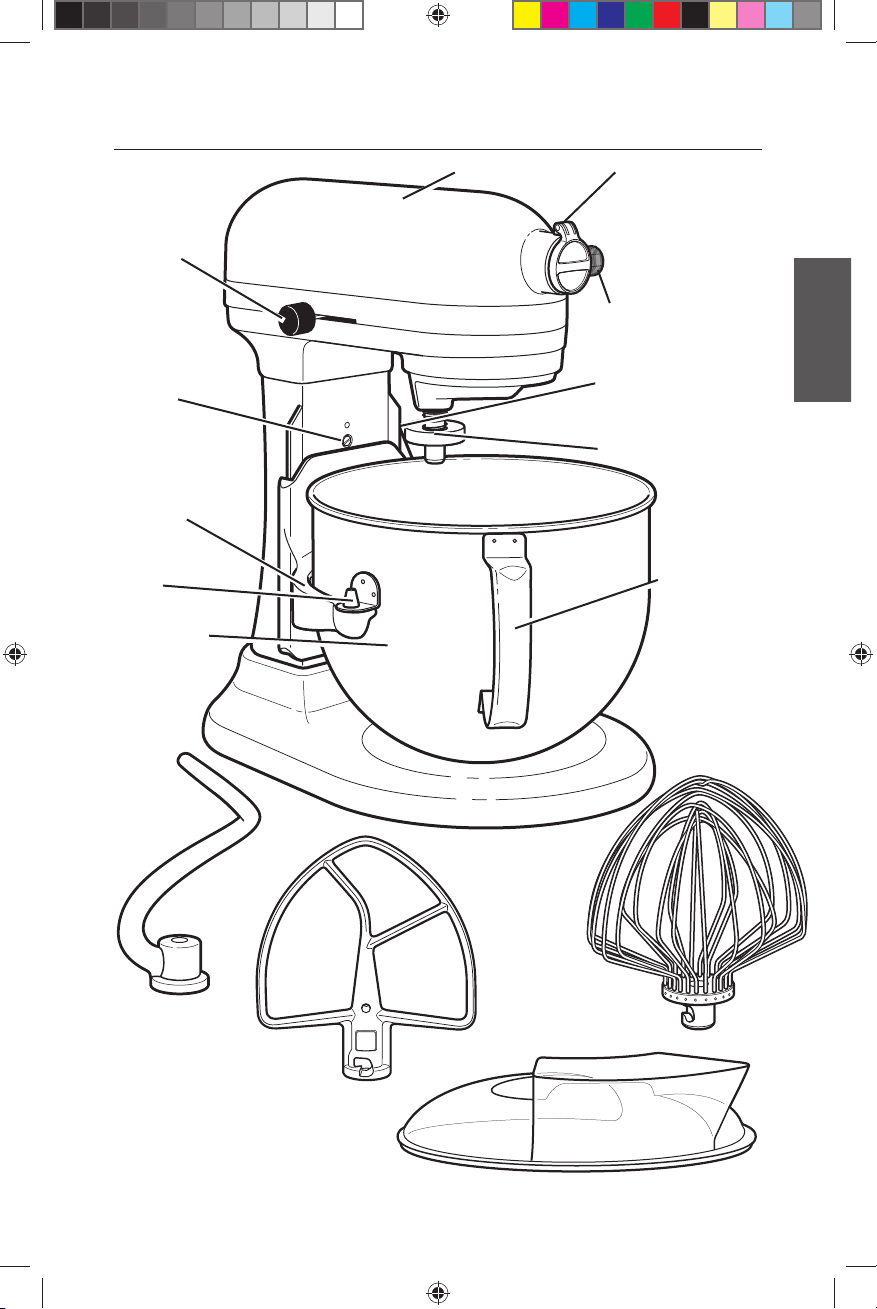
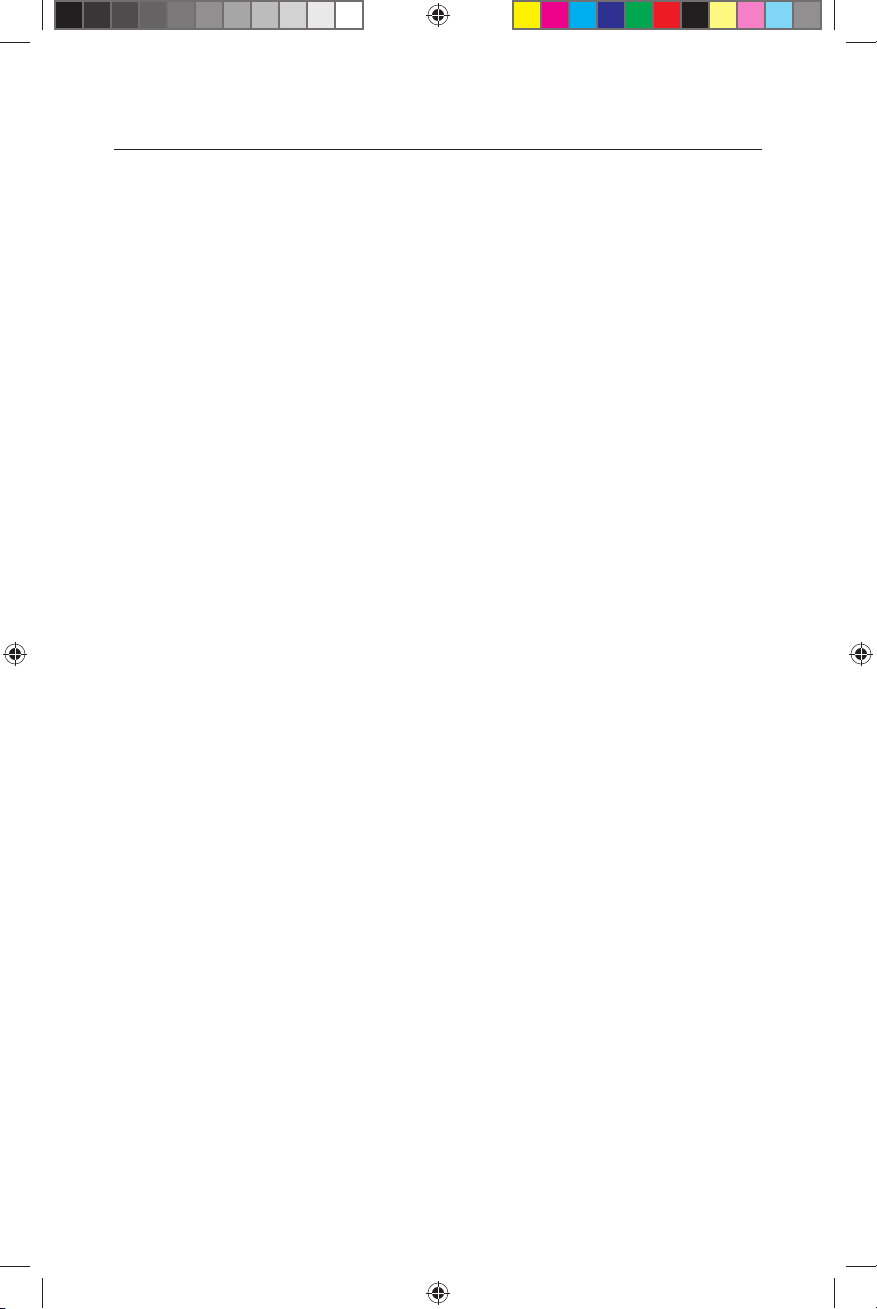
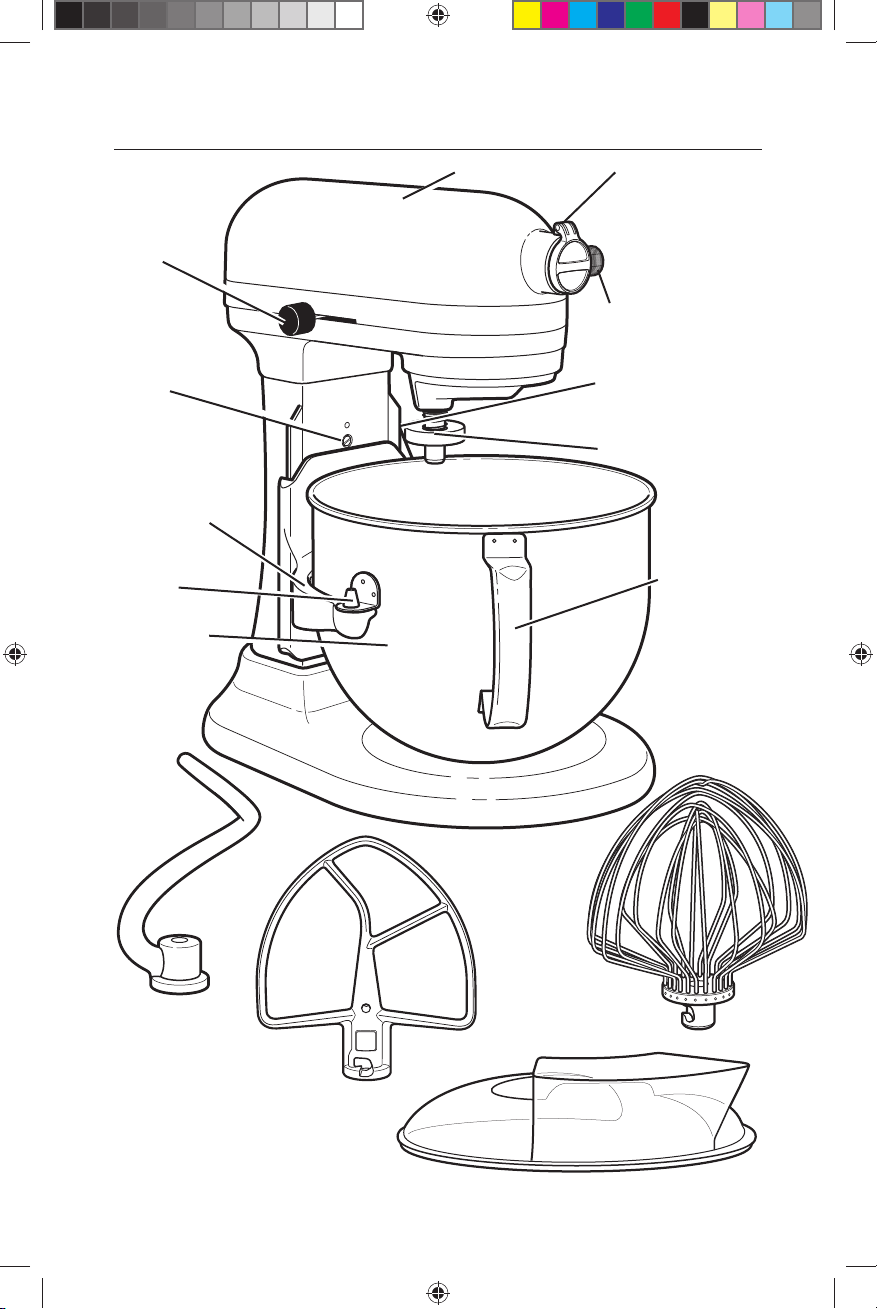
Stand Mixer Features
Speed
Control
Lever
Bowl Lift Lever
(not shown)
Beater Shaft
Stainless Steel
Whip
6,9L (7 qt)
Stainless
Steel Bowl
Spiral Dough
Hook
Flat Beater
Locating
Pins
Bowl
Support
Beater Height
Adjustment
Screw
Motor Head
Bowl Handle
(style may
vary
depending
on model)
Attachment Hub
(see the
“Attachments”
section)
Attachment
Knob
Pouring Shield
W10523279B.indd 7W10523279B.indd 7 10/31/2012 2:30:35 PM10/31/2012 2:30:35 PM

8
Assembling Your Bowl Lift Stand Mixer
To Attach Bowl
1. Turn speed control to “0” (Off).
2. Unplug Stand Mixer or disconnect power.
3. Place bowl lift lever in down position.
4. Fit bowl supports over locating pins.
5. Press down on back of bowl until
bowl pin snaps into spring latch.
6. Raise bowl before mixing.
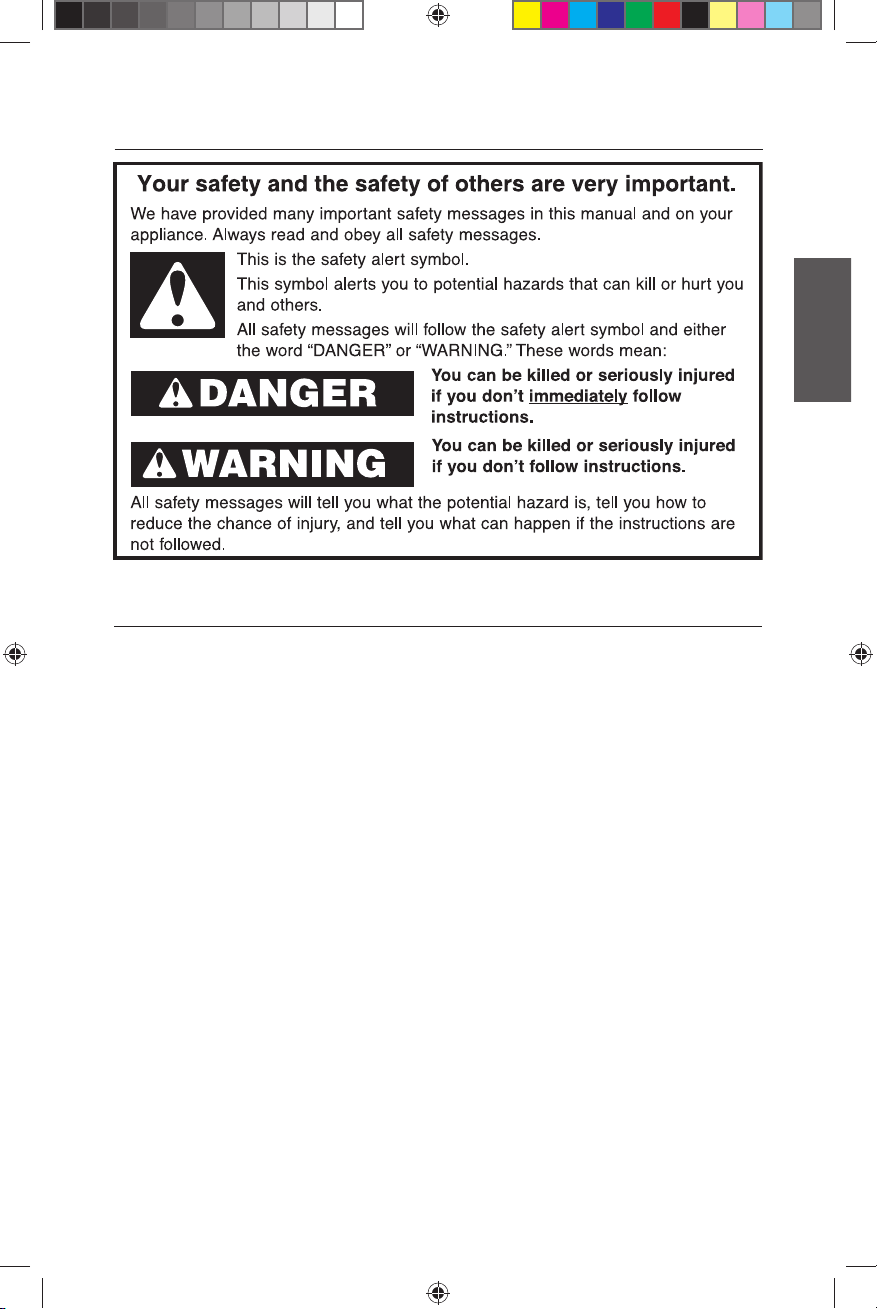
7. Plug into a grounded outlet
or reconnect power.
To Remove Bowl
1. Turn speed control to “0” (Off).
2. Unplug Stand Mixer or disconnect
power.
3. Place bowl lift lever in down position
4. Remove flat beater, wire whip, or
dough hook.
5. Grasp bowl handle and lift straight
up and off locating pins.
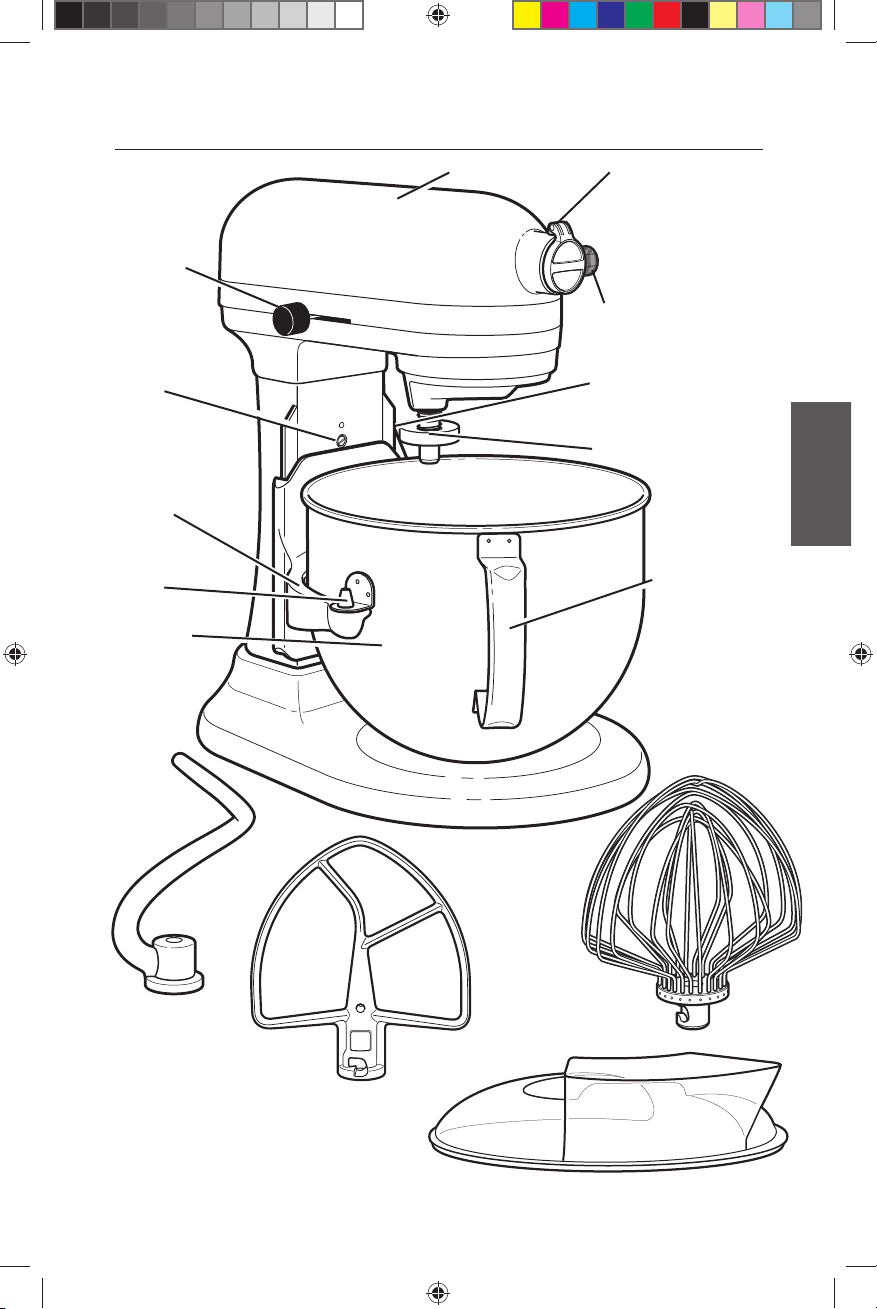
To Raise Bowl
1. Rotate lever to straight-up position.
2. Bowl must always be in raised, locked
position when mixing.
To Lower Bowl
1. Rotate lever back and down.
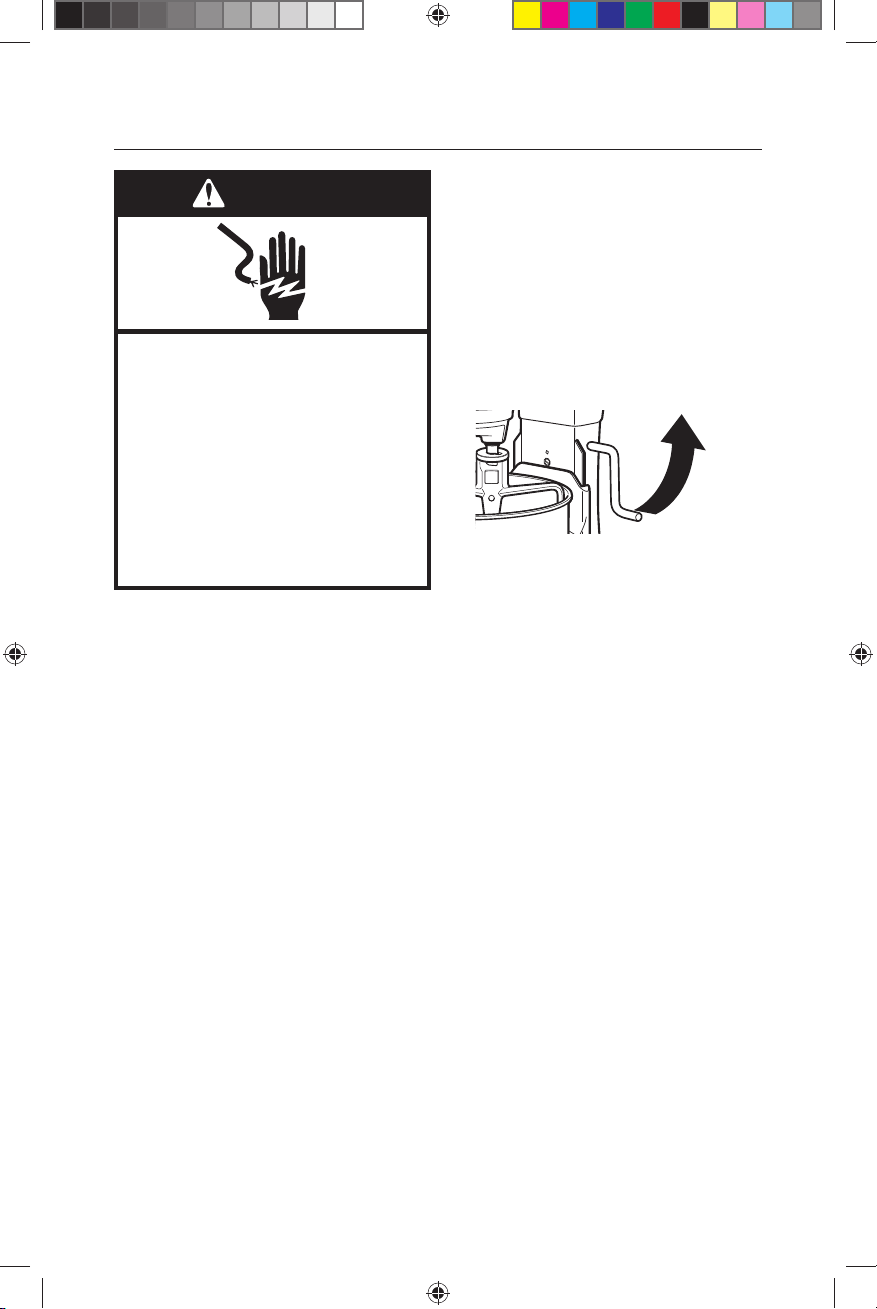
To Attach Flat Beater, Wire Whip,
or Dough Hook
1. Turn speed control to “0” (Off).
2. Unplug Stand Mixer or disconnect
power.
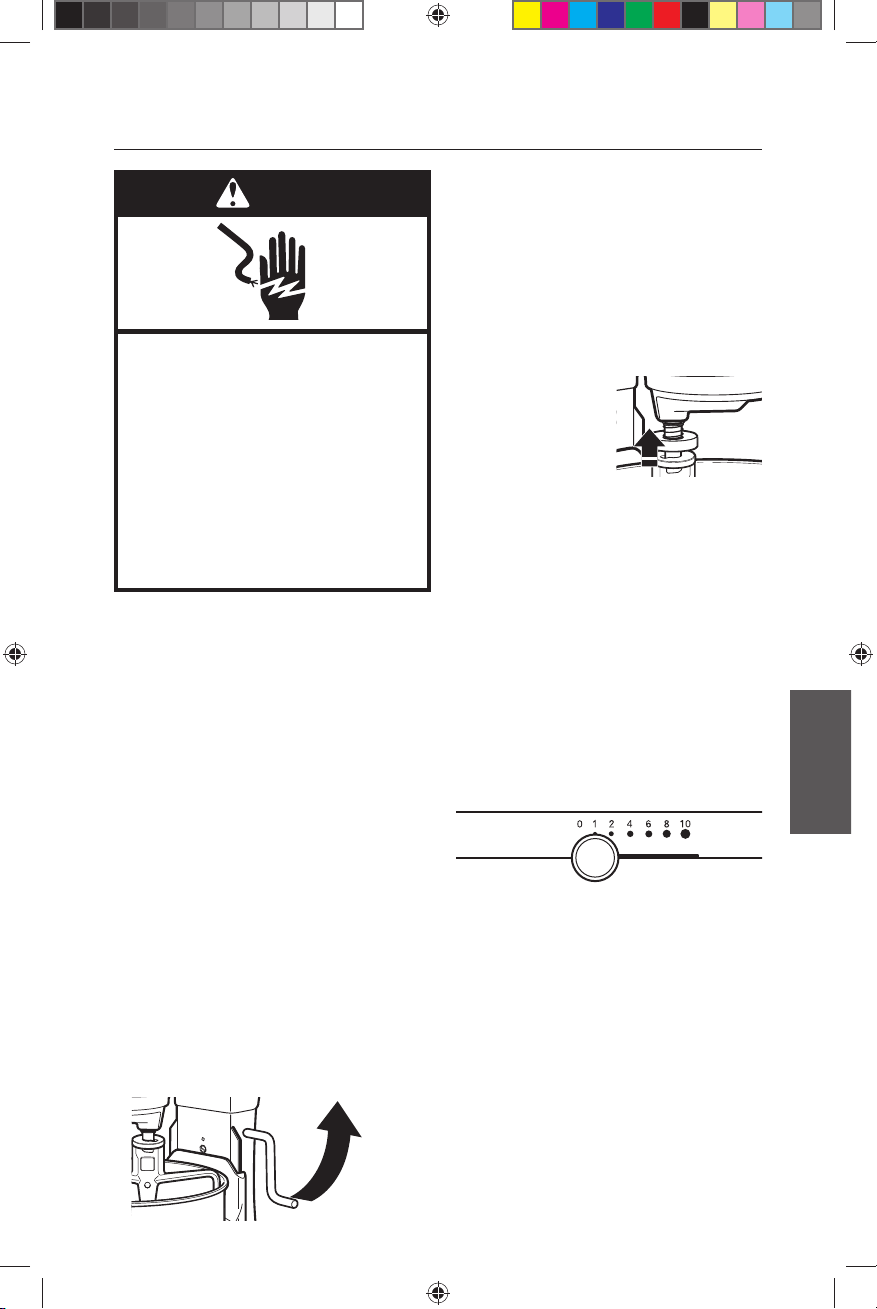
3. Slip flat beater
on beater shaft
and press upward
as far as possible.
4. Turn beater to right, hooking beater
over the pin on shaft.
5. Plug into a grounded outlet or
reconnect power.
To Remove Flat Beater, Wire Whip,
or Dough Hook
1. Turn speed control to “0” (Off).
2. Unplug Stand Mixer or disconnect
power.
3. Press beater upward as far as
possible and turn left.
4. Pull beater from beater shaft.
5. Plug into a grounded outlet
or reconnect power.
Commercial Stand Mixer SPEED
Control and Lever Guard
The Stand Mixer has a feature that
minimizes splash-out by starting the mixer
slowly before increasing to the selected
speed. To further reduce the potential
for splash-out, always begin mixing using
the Speed 1, then gradually move to
higher speeds as needed. See “Speed
Control Guide.”
Auto-Reset Motor Protection
If the Stand Mixer stops due to overload,
slide the speed control lever to “0” (Off).
After a few minutes, the stand mixer
will automatically reset. Slide the Speed
Control Lever to the desired speed
and continue mixing. If the Stand Mixer
does not restart, see “Troubleshooting
Problems.”
W10523279B.indd 8W10523279B.indd 8 10/31/2012 2:30:35 PM10/31/2012 2:30:35 PM
9
English
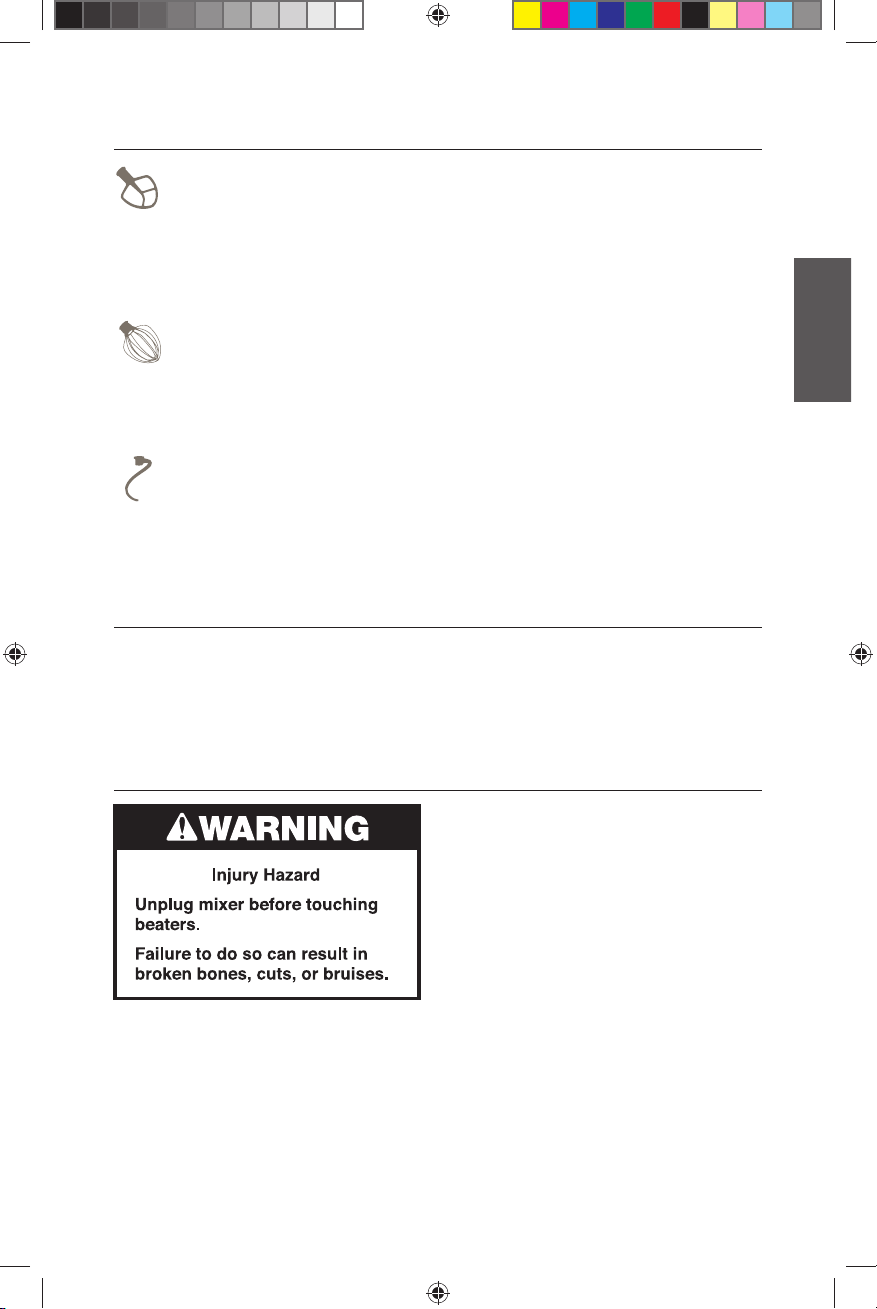
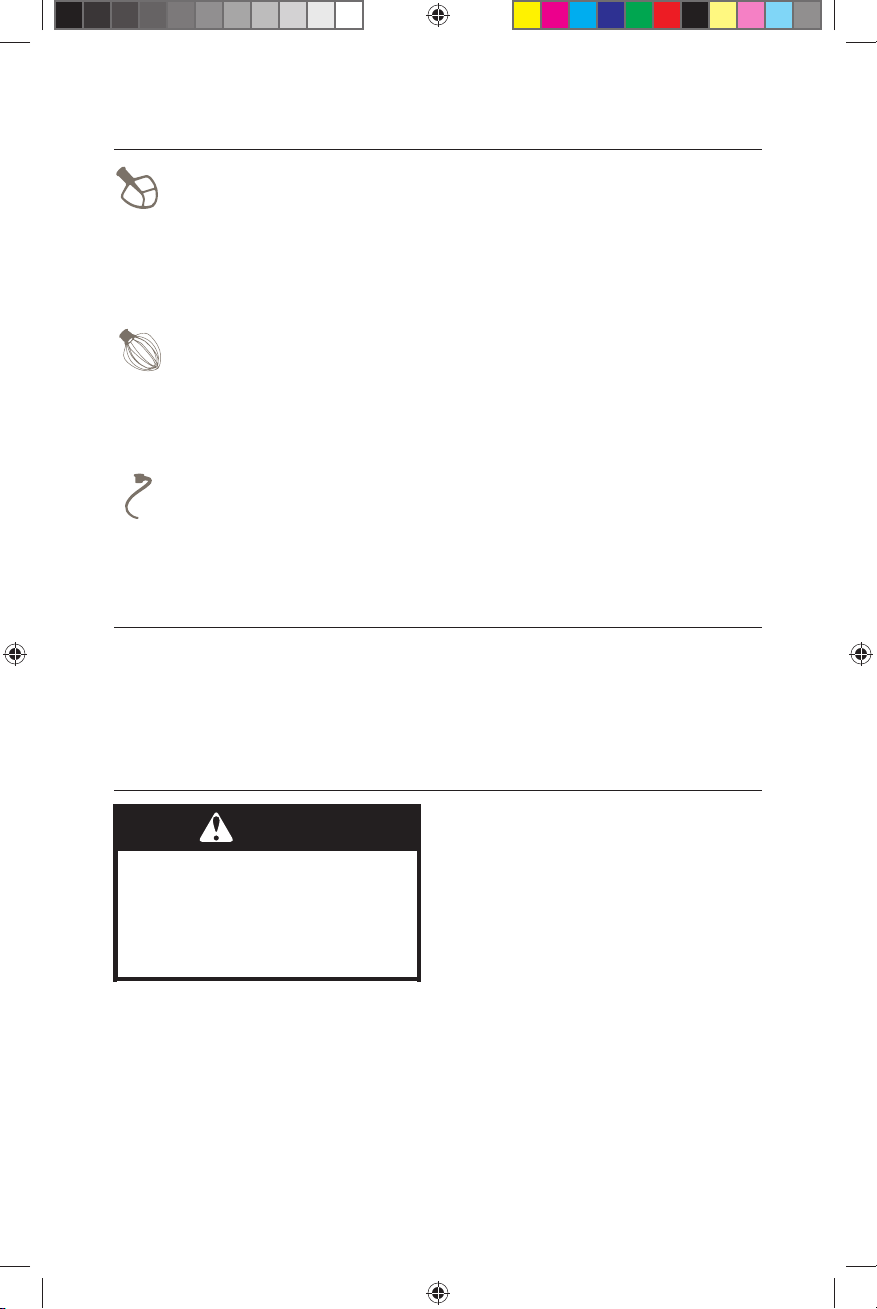
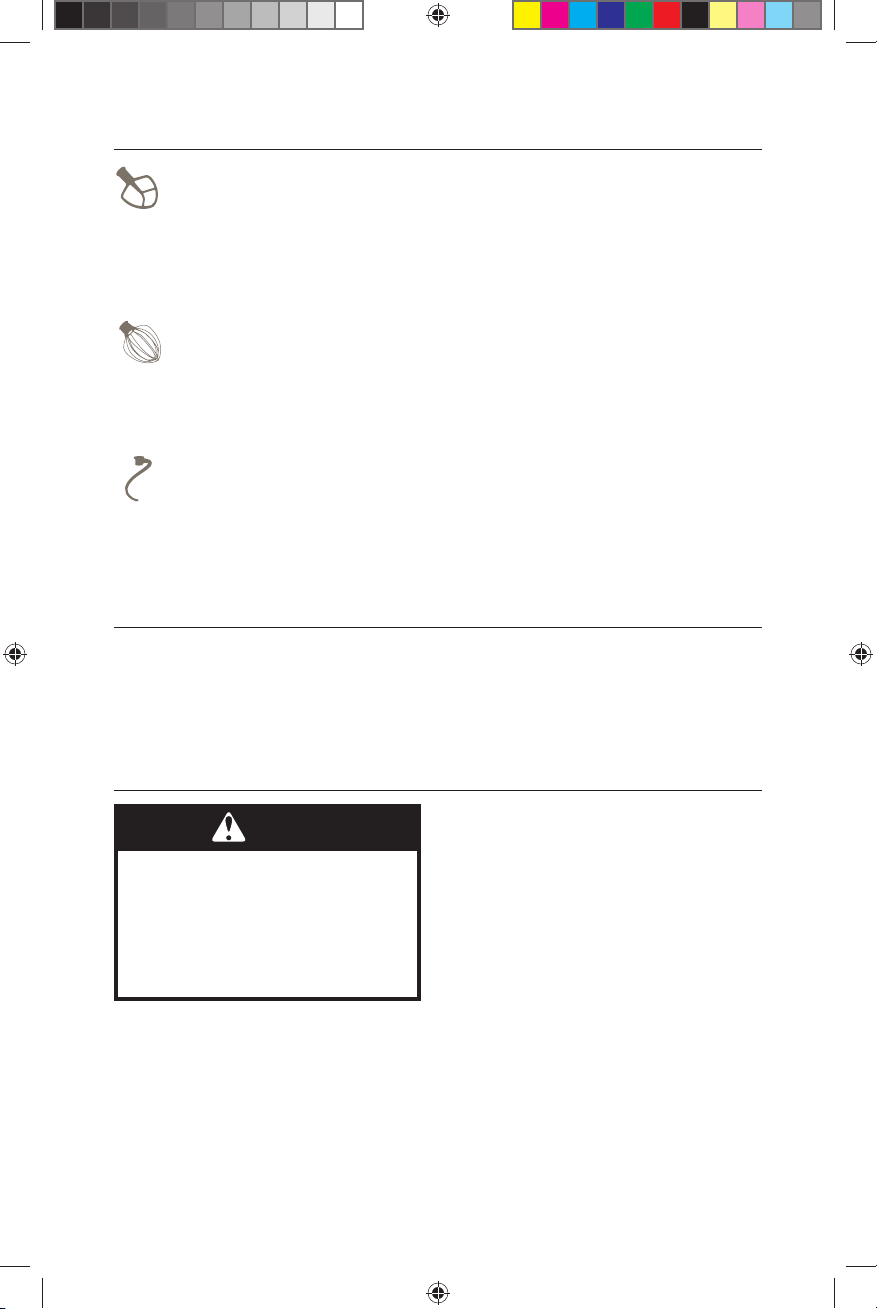
Using Your KitchenAid Attachments
Flat Beater for normal to heavy mixtures:
cakes biscuits
creamed frostings quick breads
candies meat loaf
cookies mashed potatoes
pie pastry
Wire Whip for mixtures that need air incorporated:
eggs sponge cakes
egg whites angel food cakes
heavy cream mayonnaise
boiled frostings some candies
Dough Hook for mixing and kneading yeast doughs:
breads coffee cakes
rolls buns
Mixing Time
Your KitchenAid Stand Mixer will mix
faster and more thoroughly than most
other electric stand mixers. Therefore,
the mixing time in most recipes must
be adjusted to avoid overbeating. With
cakes, for example, beating time may be
half as long as with other stand mixers.
Mixer Use
NOTE: Do not scrape bowl while Stand
Mixer is operating.
The bowl and beater are designed
to provide thorough mixing without
frequent scraping. Scraping the bowl once
or twice during mixing is usually sufficient.
Turn Stand Mixer off before scraping.
The Stand Mixer may warm up during
use. Under heavy loads with extended
mixing time, you may not be able to
comfortably touch the top of the Stand
Mixer. This is normal.
If the Stand Mixer becomes overloaded,
it will automatically shut off to prevent
damage. See “A u t o -Reset Motor
Protection.”
W10523279B.indd 9W10523279B.indd 9 10/31/2012 2:30:36 PM10/31/2012 2:30:36 PM
10
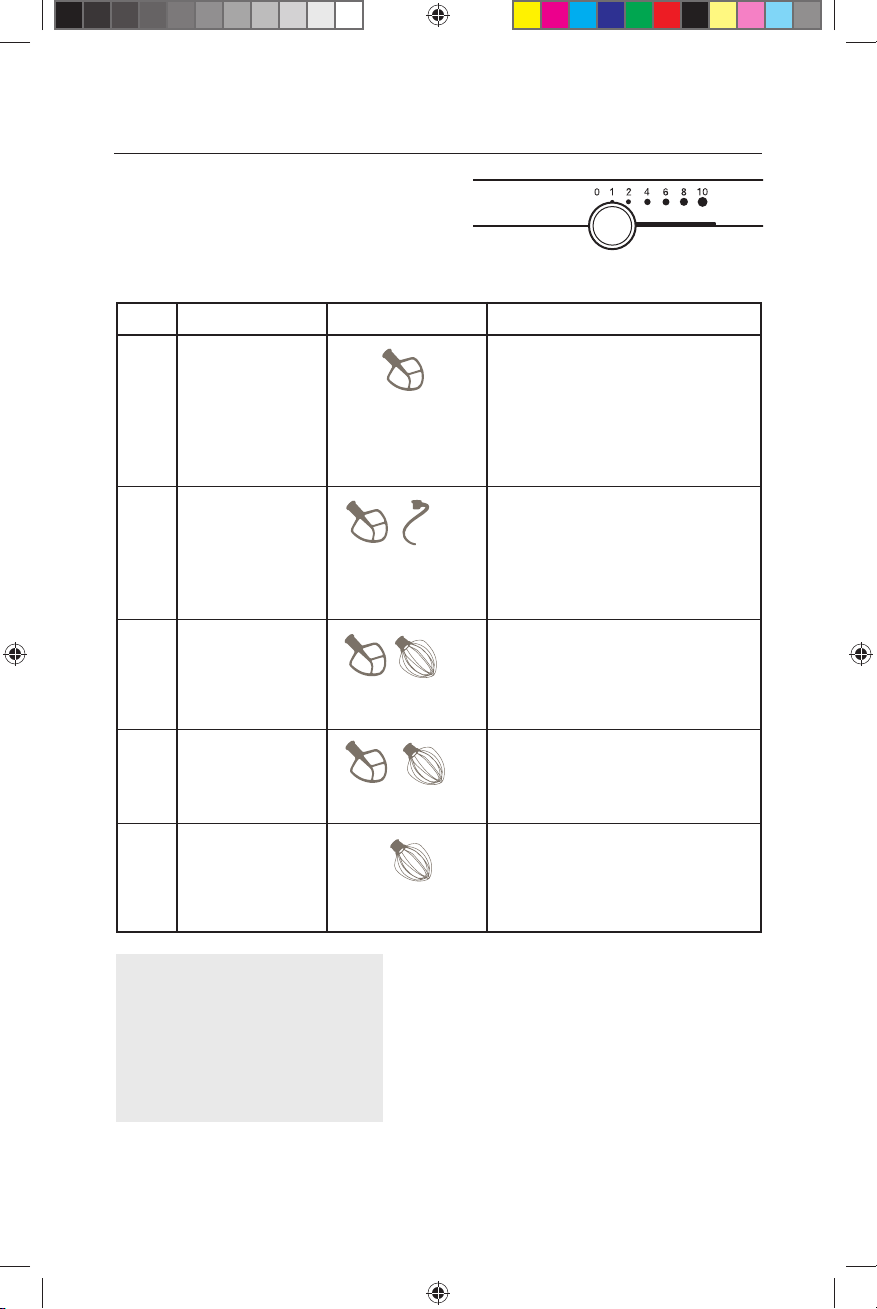
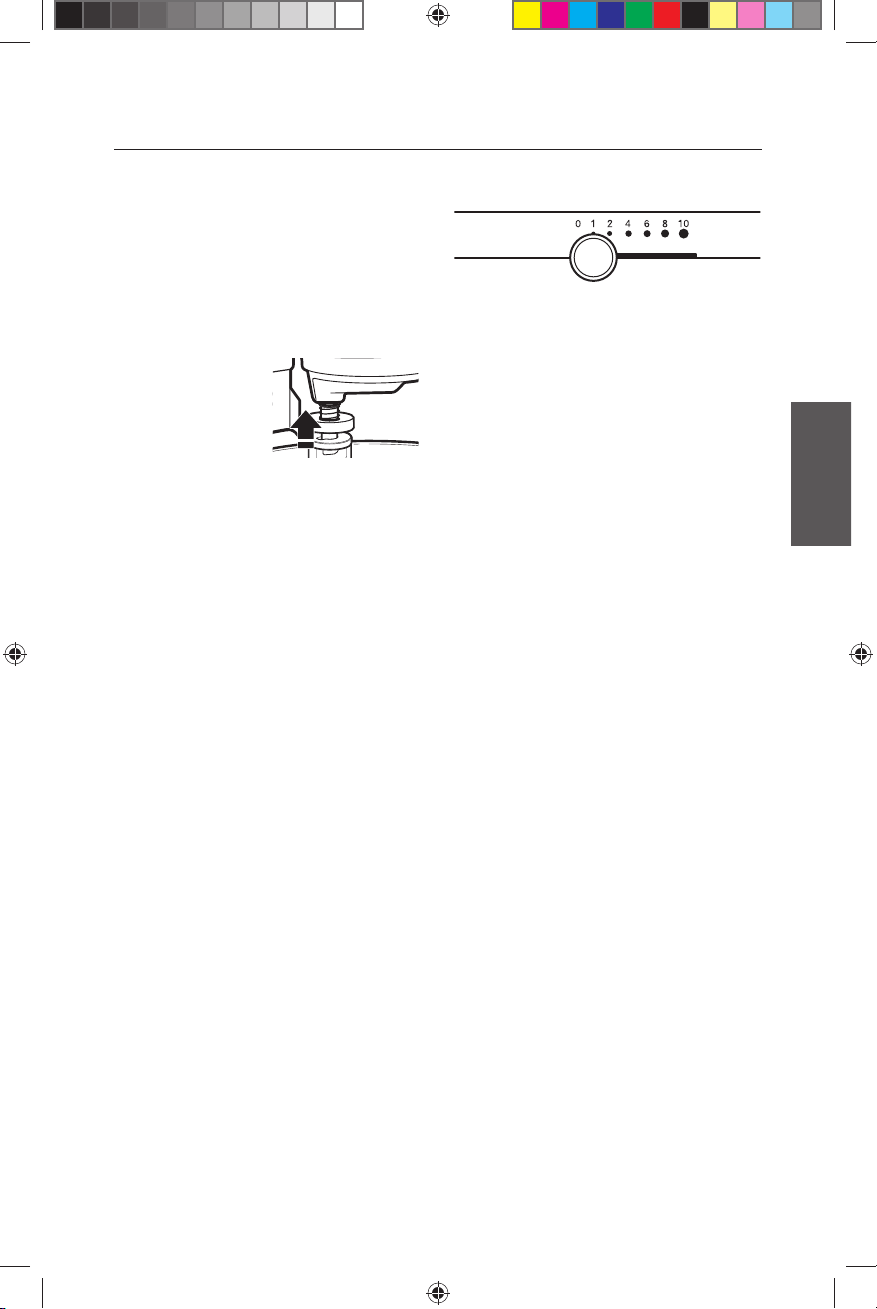
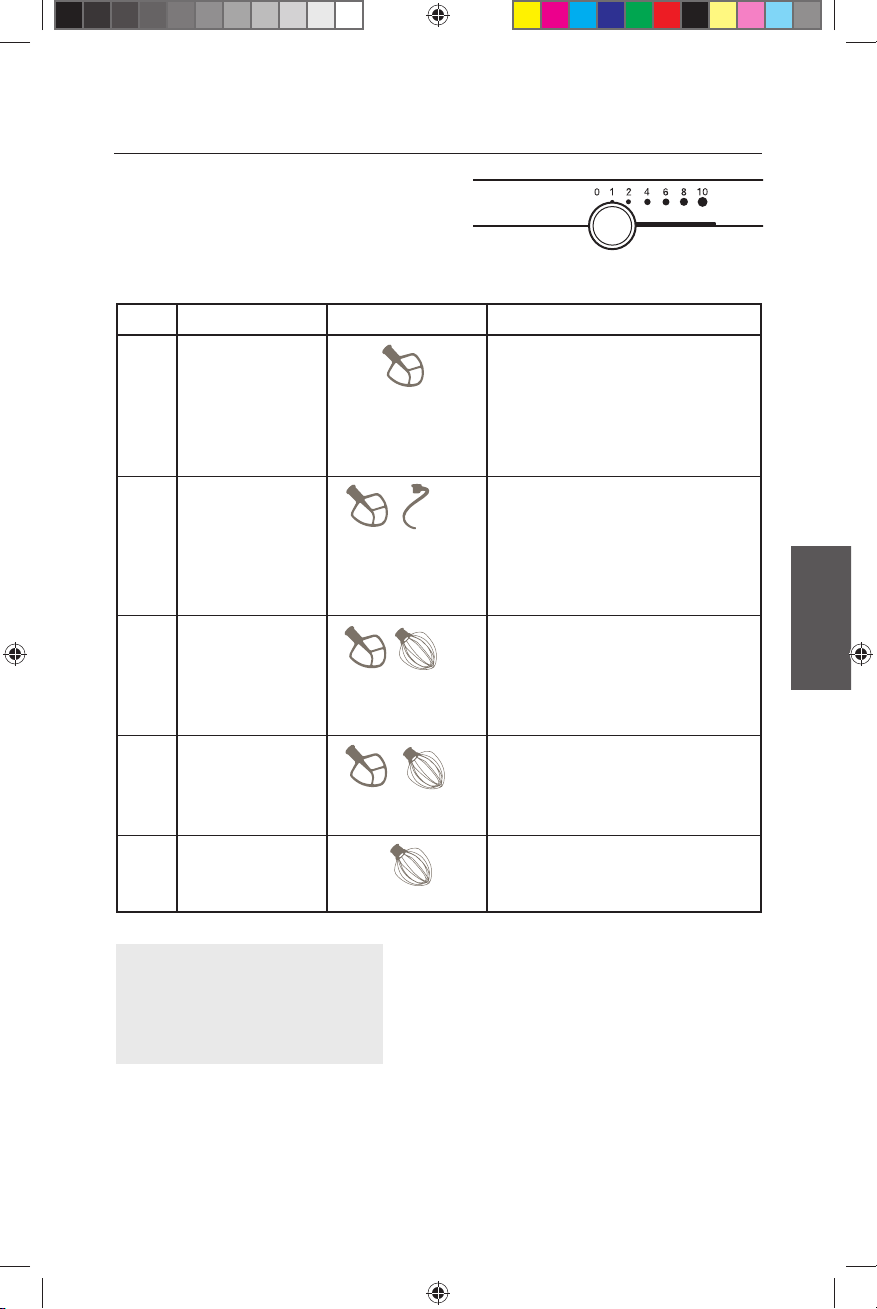
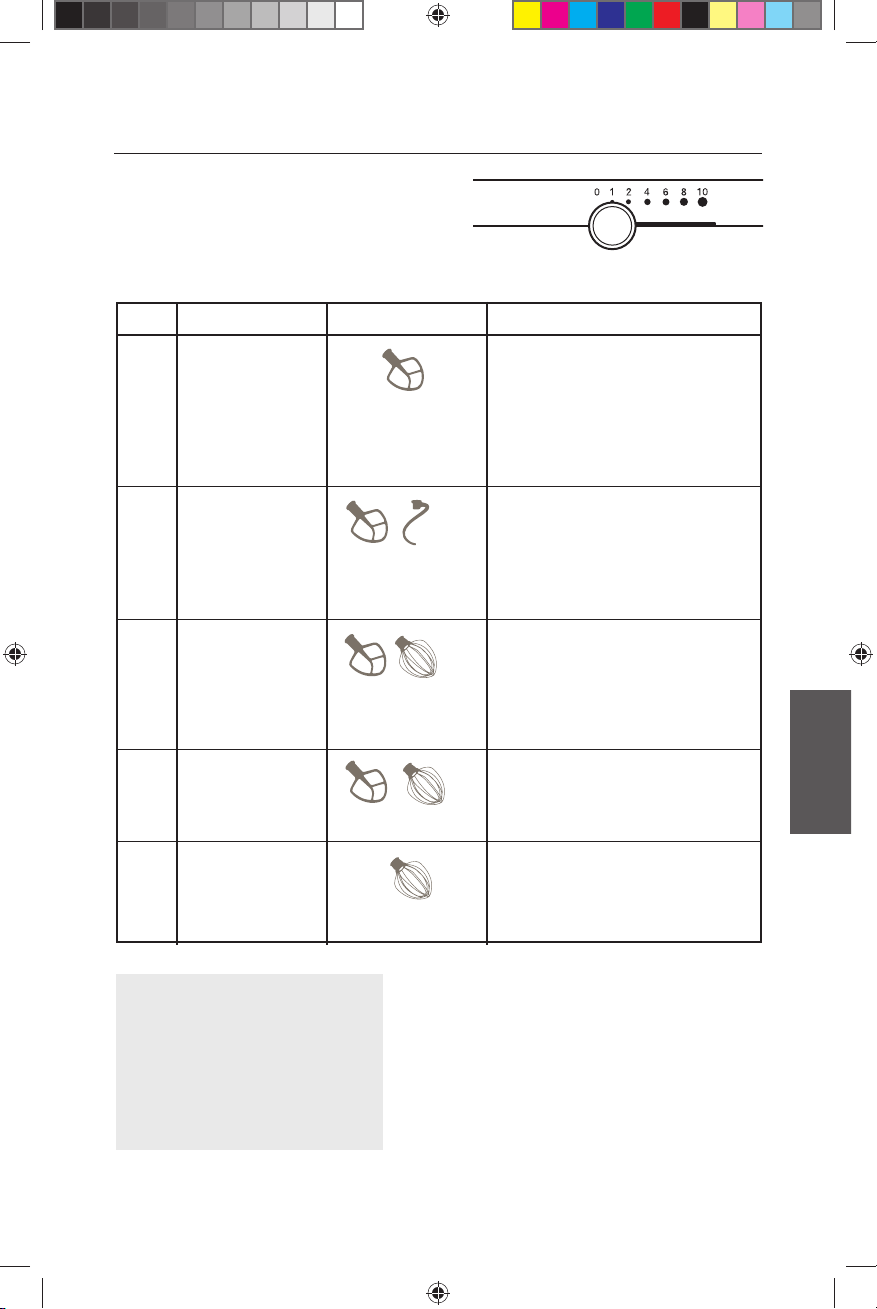
Speed Control Guide – 10 Speed Stand Mixers
All speeds have a feature that automatically
starts the Stand Mixer at a lower speed to
help avoid ingredient splash-out and “flour
puff” at start-up, then quickly increases to
the selected speed for optimal performance.
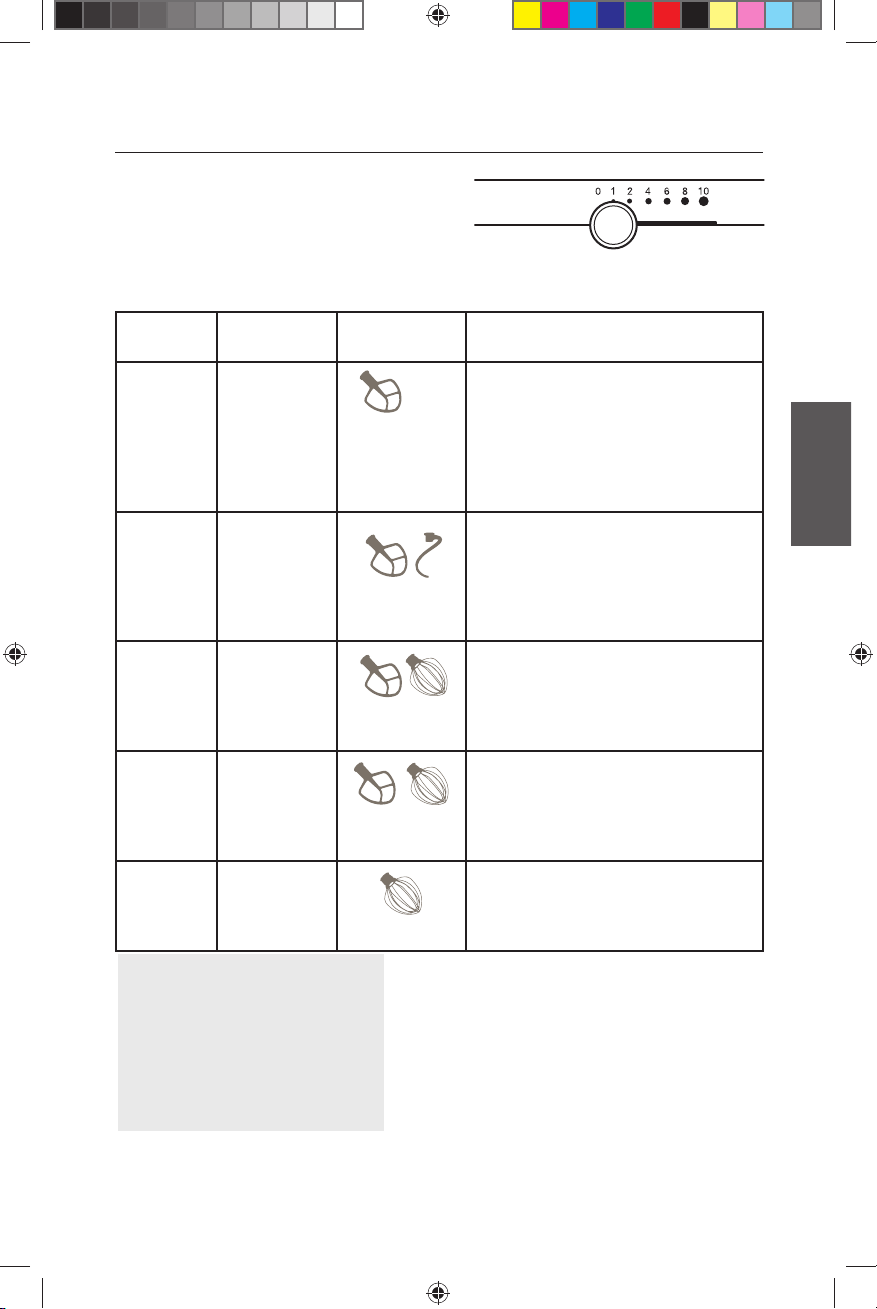
Speed Used for Accessories Description
1 Stirring For slow stirring, combining,
mashing, starting all mixing
procedures. Use to add flour and
dry ingredients to batter, and add
liquids to dry ingredients. Do not
use Speed 1 to mix or knead yeast
doughs.
2 Slow Mixing, For slow mixing, mashing, faster
Kneading stirring. Use to mix and knead yeast
doughs, heavy batters, and candies;
start mashing potatoes or other
vegetables; cut shortening into flour;
mix thin or splashy batters.
4 Mixing, For mixing semi-heavy batters, such
Beating as cookies. Use to combine sugar
and shortening and to add sugar to
egg whites for meringues. Medium
speed for cake mixes.
6 Beating, For medium-fast beating (creaming)
Creaming or whipping. Use to finish mixing
cake, doughnut, and other batters.
High speed for cake mixes.
8-10 Fast Beating, For whipping cream, egg whites,
Whipping, and boiled frostings. For whipping
Fast Whipping small amounts of cream, egg
whites or for final whipping of
mashed potatoes.
NOTE: Use Speed 2 to mix or
knead yeast doughs. Use of any
other speed creates high potential
for Stand Mixer failure. The
Spiral Dough Hook efficiently
kneads most yeast dough within
4 minutes.
W10523279B.indd 10W10523279B.indd 10 10/31/2012 2:30:36 PM10/31/2012 2:30:36 PM
11
English
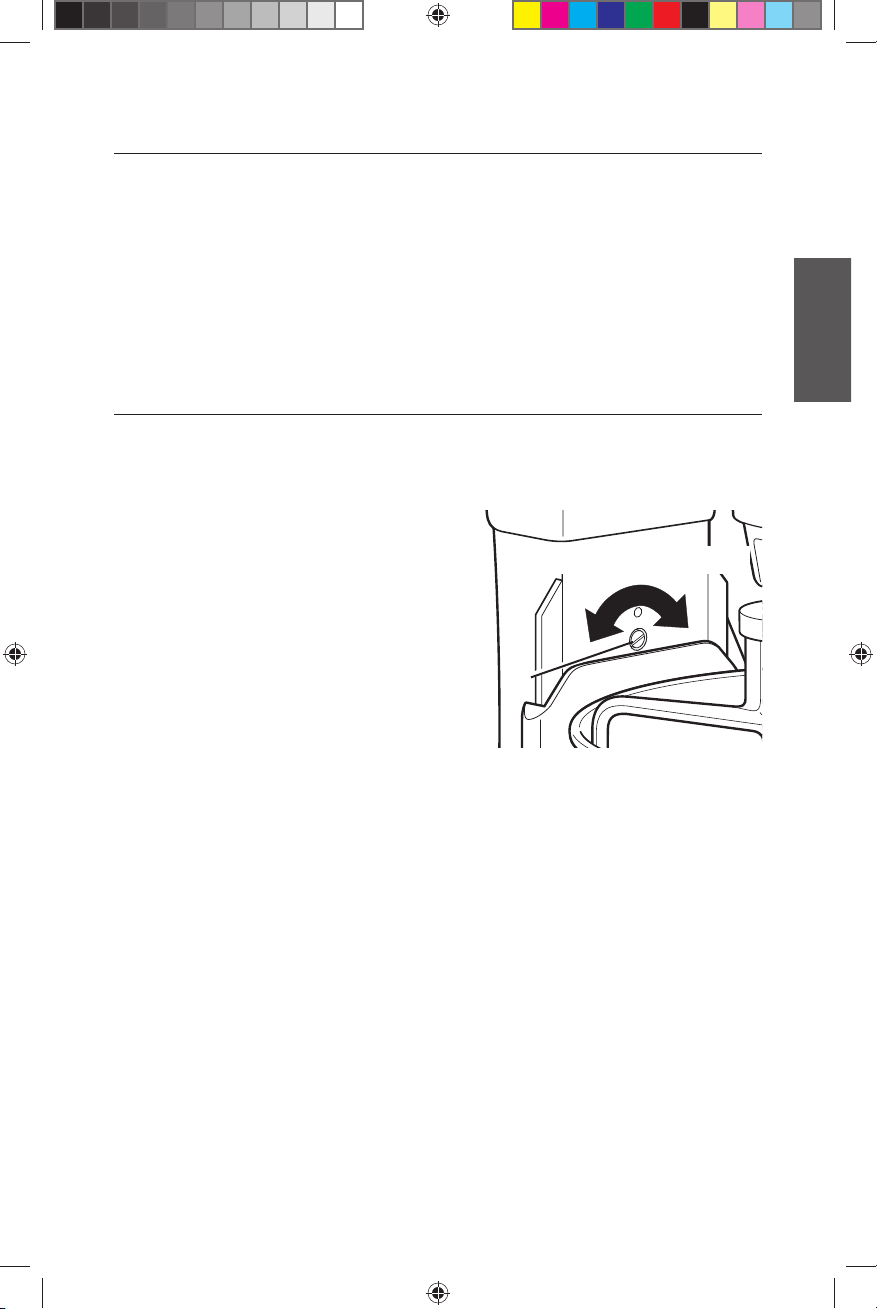
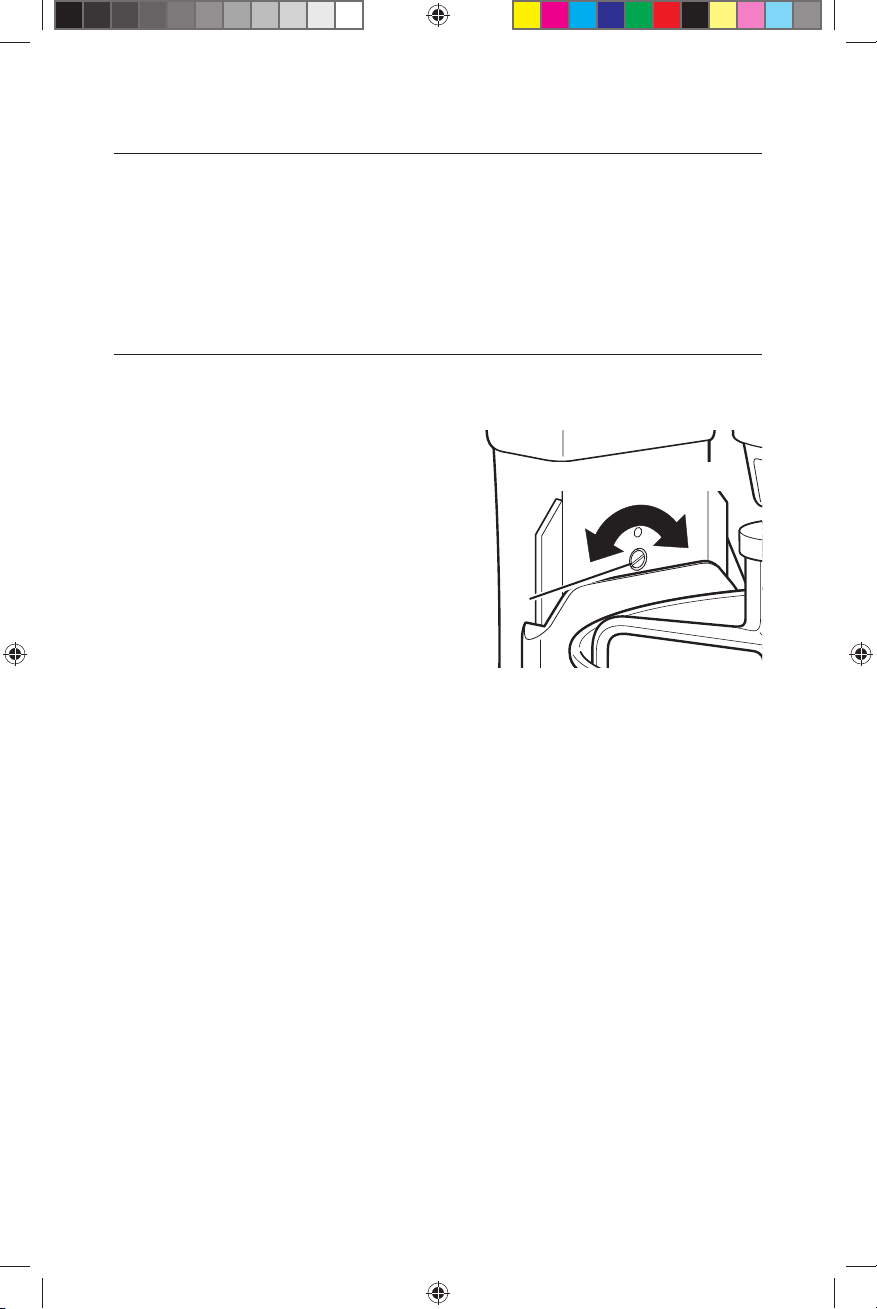
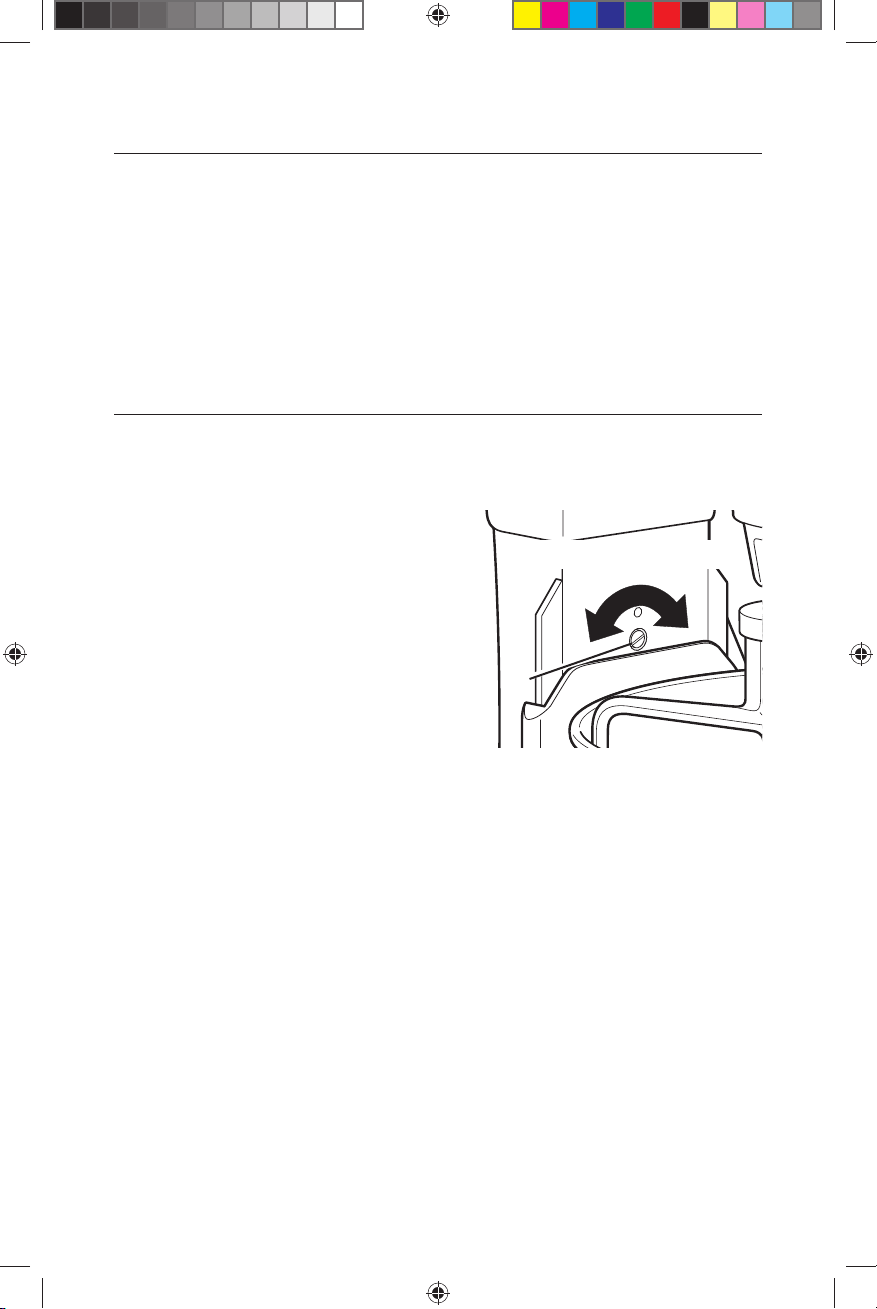
Beater to Bowl Clearance
Your Stand Mixer is adjusted at the factory so the flat beater just clears the bottom of
the bowl. If, for any reason, the flat beater hits the bottom of the bowl or is too far away
from the bowl, you can correct the clearance easily.
1. Unplug Stand Mixer or disconnect
power.
2. Place bowl lift lever in down position.
3. Attach flat beater.
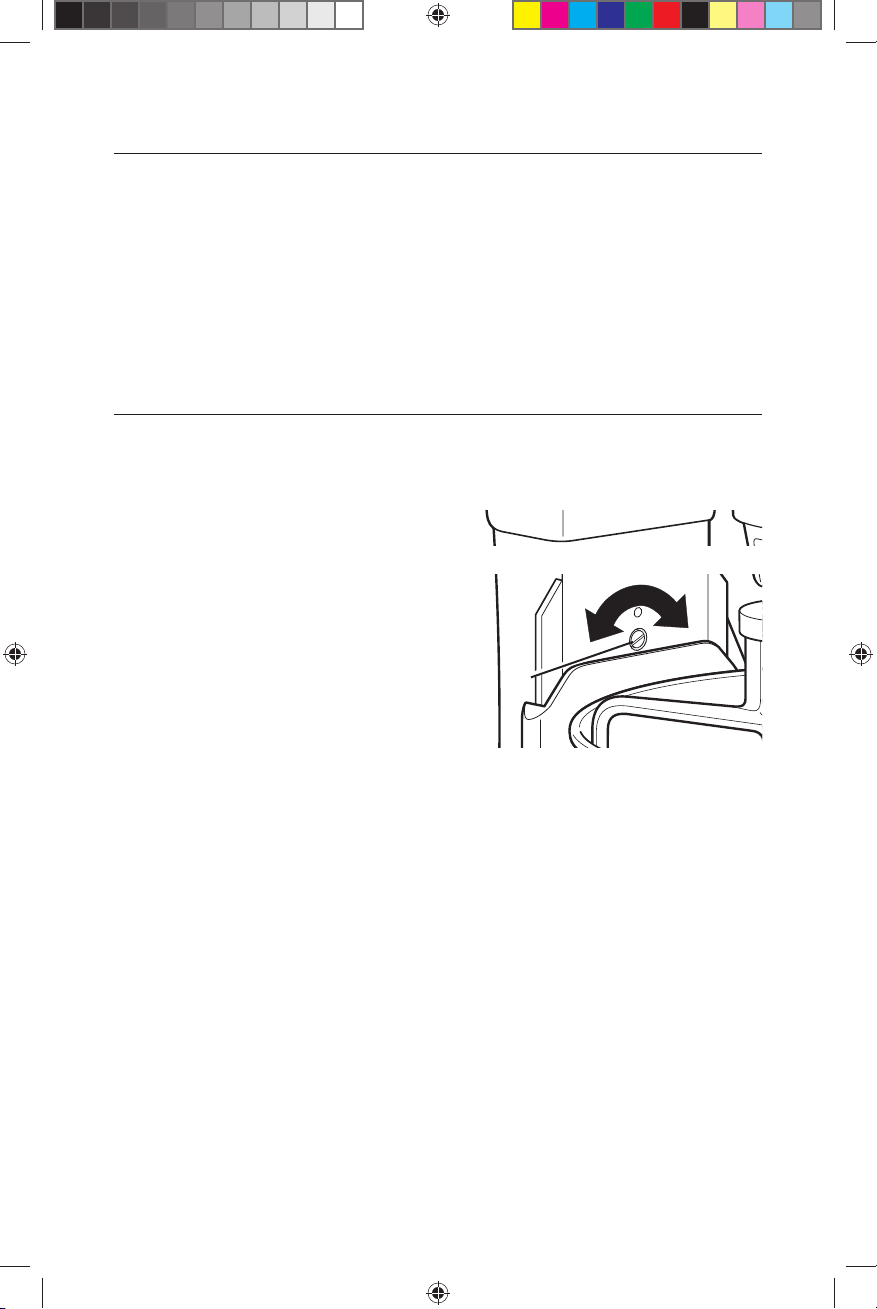
4. Adjust so flat beater just clears bottom
surface of bowl when in lifted position
by turning screw counterclockwise
to raise the bowl and clockwise to
lower the bowl. Just a slight turn is all
that is required: the screw will not
rotate more than 1/4 turn (90 degrees)
in either direction. (The full range of
adjustment is 1/2 turn, or 180 degrees.)
5. Place bowl lift lever in up position
to check clearance.
6. Repeat steps 4 and 5 if necessary.
Care and Cleaning
Bowl, stainless steel flat beater, wire
whip, and spiral dough hook may be
washed thoroughly with soap and hot
water and rinsed completely before
drying. Do not store beaters on shaft.
NOTE: Always be sure to unplug stand
mixer before cleaning. Wipe stand mixer
with a soft, damp cloth. Do not use
household/commercial cleaners. Do not
immerse in water. Wipe off beater shaft
frequently, removing any residue that
may accumulate.
NOTE: When properly adjusted,
the flat beater will not strike on the
bottom or side of the bowl. If the flat
beater or the wire whip is so close
that it strikes the bottom of the bowl,
the beater or whip may wear.
A
Lower BowlRaise Bowl
W10523279B.indd 11W10523279B.indd 11 10/31/2012 2:30:37 PM10/31/2012 2:30:37 PM

12
Mixing Tips
Using Your Recipes with the Mixer
There are a number of methods that
can be used for making cake with your
KitchenAid Stand Mixer.
For example, the “quick mix” method
(sometimes referred to as the “dump”
method) is ideal for simple cakes, such as
yellow cake and white cake. This method
calls for combining dry ingredients with
most or all liquid ingredients in one step.
More elaborate cakes, such as a torte,
should be prepared using the traditional
cake mixing method. With this method,
sugar and the shortening, butter,
or margarine are thoroughly mixed
(creamed) before other ingredients are
added. For all cakes, mixing times may
change because your KitchenAid Stand
Mixer works more quickly than other
mixers. In general, mixing a cake with
the KitchenAid Stand Mixer will take
about half the time called for in most
cake recipes.
To help determine the ideal mixing time,
observe the batter or dough and mix
only until it has the desired appearance
described in your recipe, such as “smooth
and creamy.”
To select the best mixing speeds, see
“Speed Control Guide.”
Adding Ingredients
Always add ingredients as close to side
of bowl as possible, not directly into
moving beater.
NOTE: If ingredients in very bottom of
bowl are not thoroughly mixed, then the
beater is not far enough into the bowl.
See “Beater to Bowl Clearance.”
Cake Mixes
When preparing packaged cake mixes,
use Speed 2 for low speed, Speed 4
for medium speed, and Speed 6 for high
speed. For best results, mix for the time
stated on the package directions.
Adding Nuts, Raisins,
or Candied Fruits
In general, solid materials should be
folded in the last few seconds of mixing
on Stir Speed. The batter should be thick
enough to prevent the fruit or nuts from
sinking to the bottom of the pan during
baking. Sticky fruits should be dusted
with flour for better distribution in
the batter.
Liquid Mixtures
Mixtures containing large amounts of
liquid ingredients should be mixed at
lower speeds to avoid splashing.
Increase speed only after mixture
has thickened.
W10523279C
© 2012. All rights reserved.
11/12
W10523279B.indd 12W10523279B.indd 12 10/31/2012 2:30:38 PM10/31/2012 2:30:38 PM
13
Português
Avisos de segurança........................................................................................................................ 14
Requistos elétricos para Brasil somente......................................................................................... 15
Solução de problemas .................................................................................................................... 16
Conhecendo do produto................................................................................................................ 17
Montando sua batedeira................................................................................................................. 18
Usando seus acessórios.................................................................................................................. 20
Tempo de mistura........................................................................................................................... 20
Usando o produto.......................................................................................................................... 20
Controle de velocidade.................................................................................................................. 21
Limpeza e manutenção................................................................................................................... 22
Ajustando o batedor....................................................................................................................... 22
Dicas de Mistura............................................................................................................................. 23
Termo de Garantia.......................................................................................................................... 24
Índice
W10523279B.indd 13W10523279B.indd 13 10/31/2012 2:30:38 PM10/31/2012 2:30:38 PM
14
GUARDE ESTAS INSTRUÇÕES
Quando utilizar eletroportáteis, precauções básicas de segurança sempre
devem serseguidas, incluindo as que seguem:
1. Leia todas as instruções.
2. Não colocar a batedeira na água ou em outro líquido, para proteger contra risco
de choque elétrico.
3. Fique atento sempre que este aparelho ou outro instrumento for usado próximo
a crianças.
4. Retire o plugue da tomada antes de efetuar qualquer manutenção ou limpeza
do produto. Recoloque todos os componentes antes de ligar o produto.
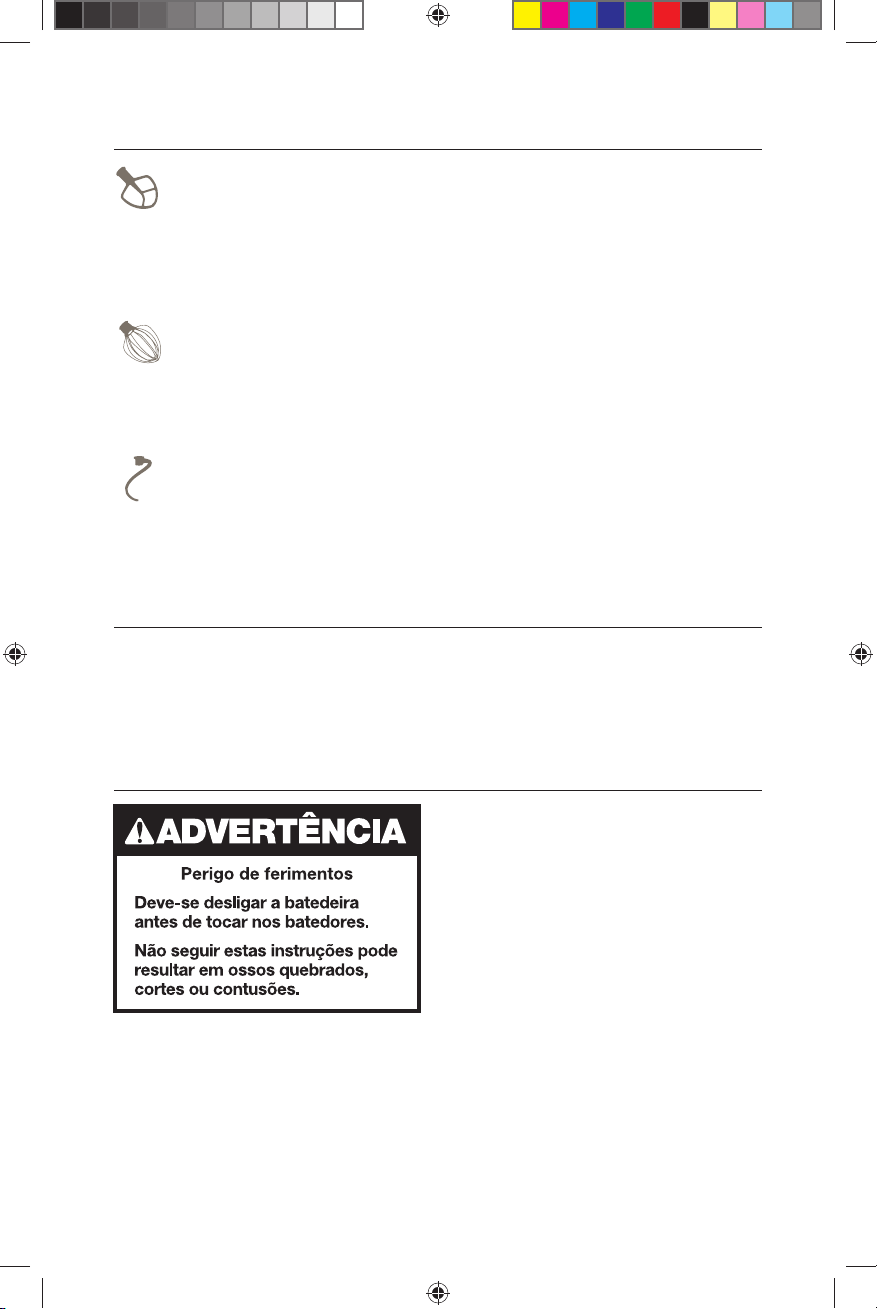
5. Evite o contato com as peças móveis. Mantenha as mãos, o cabelo, as roupas, assim
como as espátulas e outros utensílios distantes dos batedores durante a operação
para reduzir o risco de ferimento a pessoa e/ou avaria de batedeira.
6. Não opere qualquer eletroportátil com o cabo de alimentação danificado, após
mau funcionamento ou após uma queda ou se, de alguma forma, estiver danificado.
Leve o eletroportátil à Assistência Técnica Autorizada mais próxima para que seja
examinado, consertado ou para ajustes elétricos ou mecânicos.
7. O uso de acessórios não-recomendados ou vendidos pela KitchenAid pode causar
incêndio, choque elétrico ou ferimento.
8. Não use a batedeira ao ar livre.
9. Não deixe o cabo de alimentação pender da borda da mesa ou do balcão.
10. Remova os batedores da batedeira antes de lavar.
11. Este aparelho não se destina à utilização por pessoas (inclusive crianças) com
capacidades físicas, sensoriais ou mentais reduzidas, ou por pessoas com falta de
experiência e conhecimento, a menos que tenham recebido instruções referentes à
utilização do aparelho ou estejam sob a supervisão de uma pessoa responsável pela
sua segurança.
12. Tome muito cuidado quando usar qualquer eletroportátil próximo de crianças.
13. Desligue o produto e tire da tomada antes de trocar qualquer acessório ou se
aproximar de qualquer parte que se movimente quando em uso.
INSTRUÇÕES IMPORTANTES DE SEGURANÇA
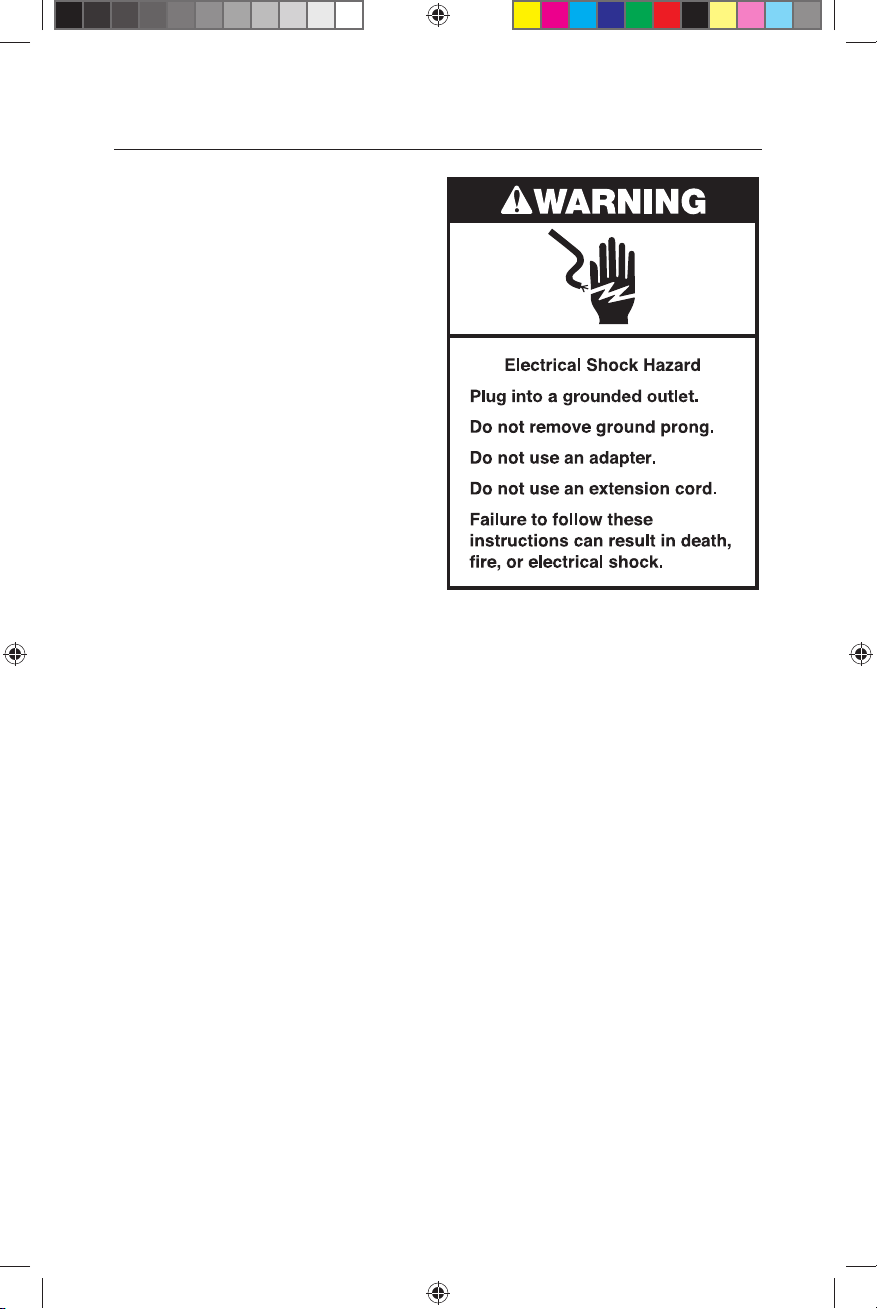
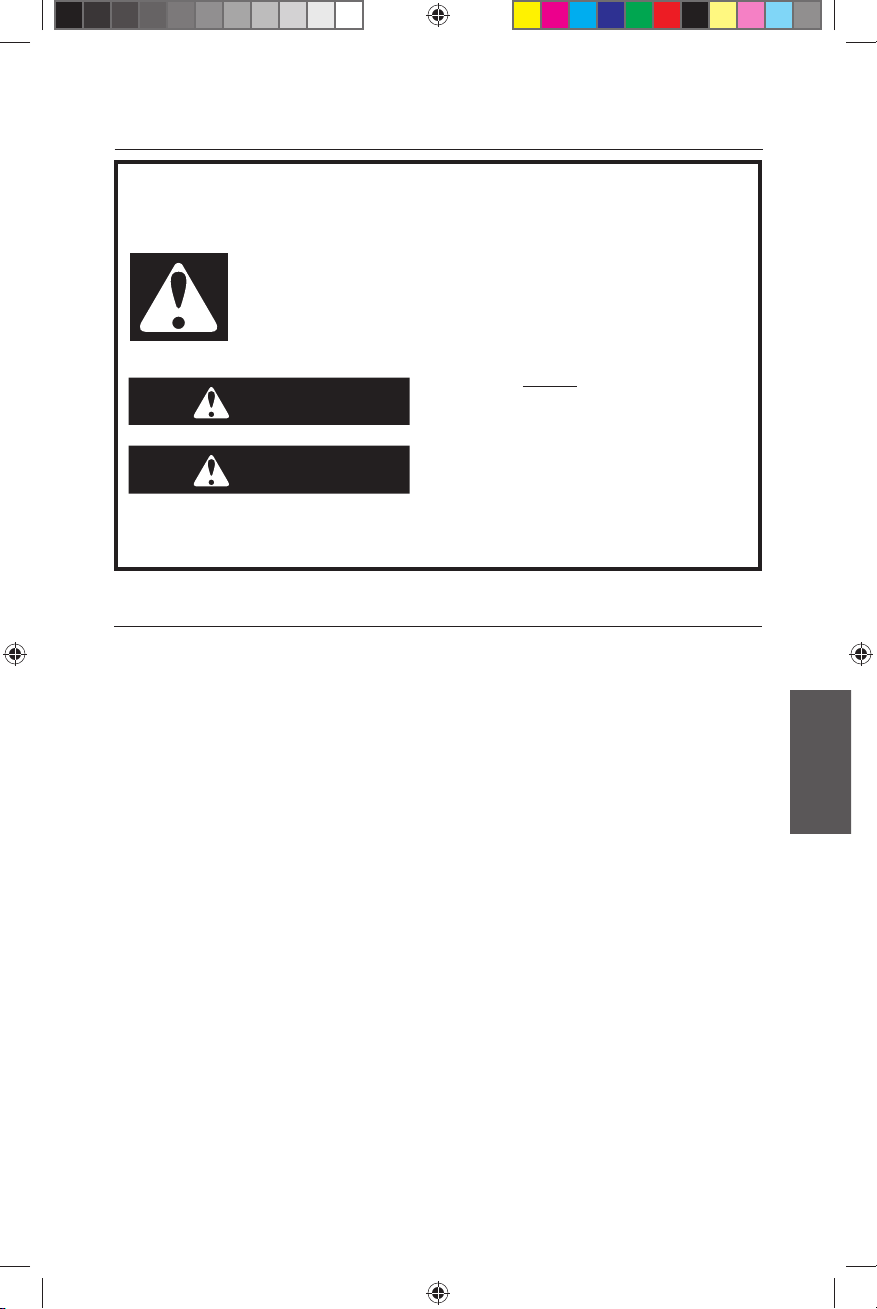
A sua segurança e a dos outros é muito importante.
Este manual e o electrodoméstico contêm várias mensagens de segurança importantes.
Deve sempre ler e respeitar todas as mensagens de segurança.
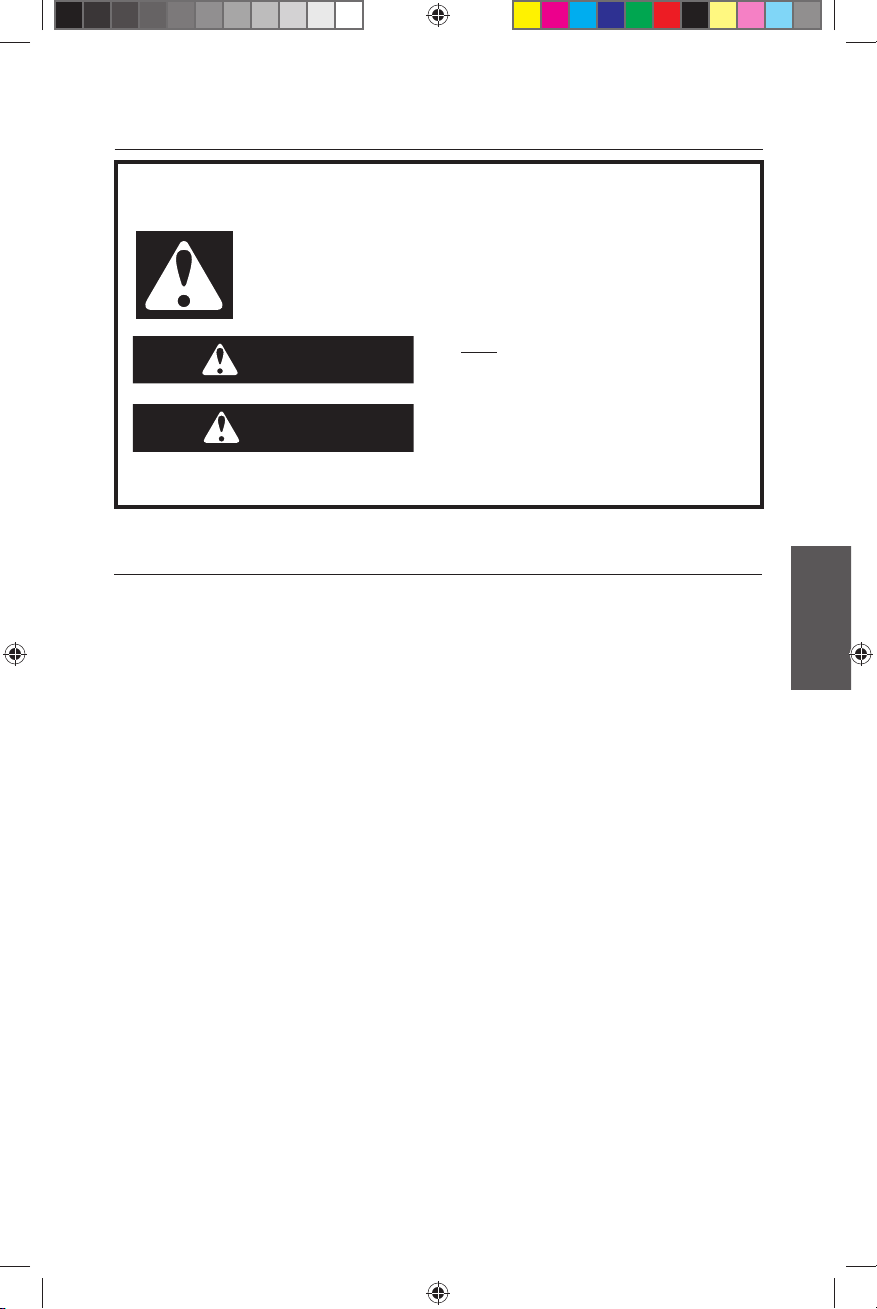
Este é o símbolo de aviso de segurança.
Este aviso alerta-o para perigos potenciais que podem causar a morte
ou ferimentos a si e aos outros.
Todas as mensagens de segurança são fornecidas a seguir ao símbolo de aviso
de segurança e às palavras “PERIGO” OU “AVISO”. Estas palavras significam:
Corre risco de morte ou ferimentos graves
se não seguir imediatamente as instruções.
Corre risco de morte ou ferimentos graves
se não seguir as instruções.
Todas as mensagens de segurança indicar-lhe-ão qual o potencial perigo, como evitar
a possibilidade de ser ferido e o que acontece caso as instruções não sejam respeitadas.
PERIGO
AVISO
Avisos de Segurança
W10523279B.indd 14W10523279B.indd 14 10/31/2012 2:30:38 PM10/31/2012 2:30:38 PM
15
Português
Requistos elétricos para Brasil somente
Rede elétrica da residência:
Os fios da rede elétrica devem ser de
cobre e ter seções mínimas conforme
ABNT (NBR-5410).
Para a proteção do produto e da rede
elétrica contra sobrecorrentes, o
circuito onde o produto será ligado
deve estar conectado a um disjuntor
termomagnético.
Caso não exista este disjuntor em
sua residência, consulte um eletricista
especializado para instalá-lo.
Conexão à tomada:
O plugue do cabo de alimentação do seu
mixer é de 3 pinos em formato sextavado,
conforme ABNT (NBR-14136).
A instalação elétrica da sua residência deve
ter uma tomada de força apropriada para
este tipo de plugue. Se não tiver, providencie
a instalação de uma por um eletricista
habilitado.
Utilize o tipo de tomada adequado
ao plugue de seu dispositivo, conforme
imagem abaixo:
Antes de ligar seu
dispositivo, verifique
se a tensão da rede
elétrica no local de
instalação é a mesma
indicada na etiqueta
de dados técnicos
do produto.
Esta mesma informação está indicada
na etiqueta fixada próxima ao plugue
do cabo de alimentação de seu mixer.
IMPORTANTE:
• Caso seja necessário ligar o modelo
da seu dispositivo 127V em tensão
220V, utilize um estabilizador
de 1,0 VA.
• Caso seja necessário ligar o modelo
da seu dispositivo 220V em tensão
127V, utilize um estabilizador
de 1,0 KVA.
• Nunca conecte
o seu dispositivo
através de
extensões
duplas ou triplas
com outro
eletrodoméstico
na mesma tomada. Não use extensões.
Este tipo de ligação pode na rede
elétrica, prejudicando o funcionamento
da seu dispositivo e resultando em
acidentes com fogo. Use uma tomada
exclusiva.
• Em caso de oscilação na tensão da
rede elétrica, instale um estabilizador
automático de tensão com potência
mínima de 1500 watts, entre o mixer
e a tomada.
• Se o cabo de alimentação estiver
danificado, ele deve ser substituído.
Entre em contato com a Central
de Relacionamento KitchenAid.
W10523279B.indd 15W10523279B.indd 15 10/31/2012 2:30:38 PM10/31/2012 2:30:38 PM
16
Solução de problemas
Por favor, leia as informações
seguintes antes de ligar para
a Central de Relacionamento
KitchenAid.
1. A batedeira pode aquecer durante
o uso. Batendo misturas pesadas
durante um longo tempo, você pode
sentir desconforto ao tocar o topo
da batedeira. Isto é normal.
2. A batedeira pode emitir um odor
diferente, especialmente quando
nova. Isto é comum aos motores
elétricos.
3. Se o batedor atinge a tigela, pare
a batedeira. Consulte “A j u s t a n d o
o batedor”.
Se a sua batedeira agir de maneira
incomum ou parar de funcionar, por
favor verifique os seguintes itens:
- A batedeira está ligada?
- O fusível que mantém a batedeira
funcionando está trabalhando
corretamente? Se você tem
um circuito na caixa de disjuntor,
verifique se o circuito está fechado.
- Desligue a batedeira por 10 a 15
segundos, mantenha o produto
na posição OFF. Após esse tempo
ligue-a novamente. Caso a batedeira
não ligue, deixa-a esfriar por
30 minutos antes de tentar ligá-la
novamente.
Se o problema não for resolvido através
dos itens acima, entre em contato com
a Central de Relacionamento KitchenAid.
Lembrando que o varejista não pode lhe
oferecer a garantia, já que esse serviço
é fornecido pela KitchenAid.
W10523279B.indd 16W10523279B.indd 16 10/31/2012 2:30:38 PM10/31/2012 2:30:38 PM
17
Português
Conhecendo o produto
Alavanca
de controle
de velocidade
Alavanca de
levantamento da tigela
Eixo do batedor
Batedor de claras
em aço inoxidável
Tigela com
capacidade
de 6,9L
Batedor tipo
“gancho”
para massas
Batedor
plano
Pinos de
fixação
Suporte
da tigela
Parafuso para
ajuste da altura
Motor
Alça para
manuseamento
da tigela
Tampa do bocal
para encaixe de
acessórios
Parafuso para fixação
dos acessórios
Protetor de respingos
W10523279B.indd 17W10523279B.indd 17 10/31/2012 2:30:38 PM10/31/2012 2:30:38 PM
18
Montando sua batedeira
Para colocar a tigela na batedeira:
1. Coloque a alavanca de controle
de velocidade na posição OFF/0
(desligado).
2. Desconecte a batedeira da tomada.
3. Coloque a alavanca de levantamento
da tigela para baixo.
4. Posicione a tigela no suporte,
encaixando-a nos pinos de encaixe
da tigela.
5. Pressione a tigela para baixo, de forma
a garantir o perfeito encaixe dos pinos
e do trinco para fixação da tigela.
6. Levante a tigela.
7. Conecte a batedeira na tomada.
Para remover a tigela da batedeira:
1. Coloque a alavanca de controle
de velocidade na posição OFF/0
(desligado).
2. Desconecte a batedeira da tomada.
3. Coloque a alavanca de levantamento
da tigela para baixo.
4. Remova o batedor que você utilizou.
5. Com a ajuda da alça da tigela, levante
a tigela e a retire dos pinos de fixação.
Para levantar a tigela
1. Coloque a alavanca de levantamento
da tigela para cima.
2. A tigela sempre deve estar levantada e
a alavanca travada quando a batedeira
estiver em funcionamento.
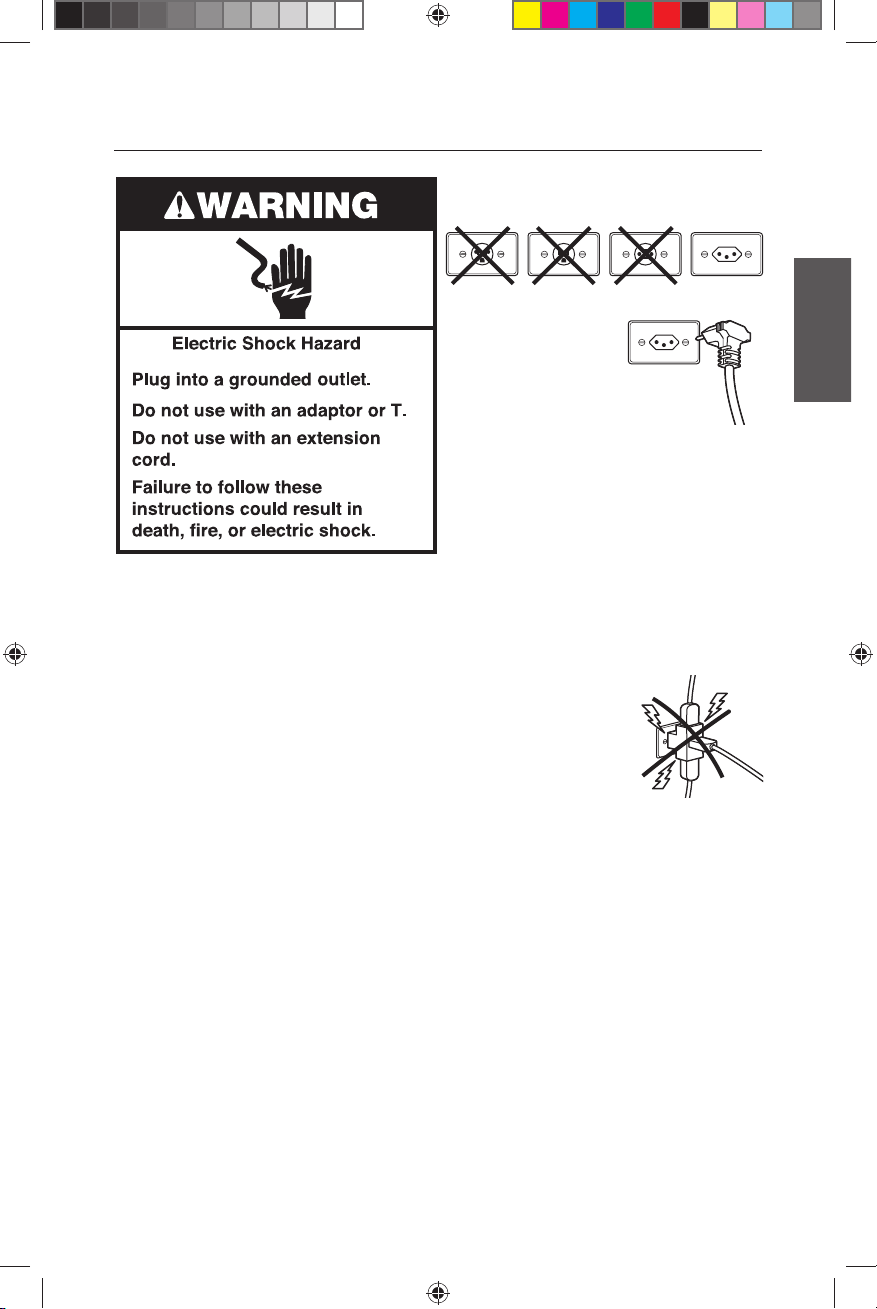
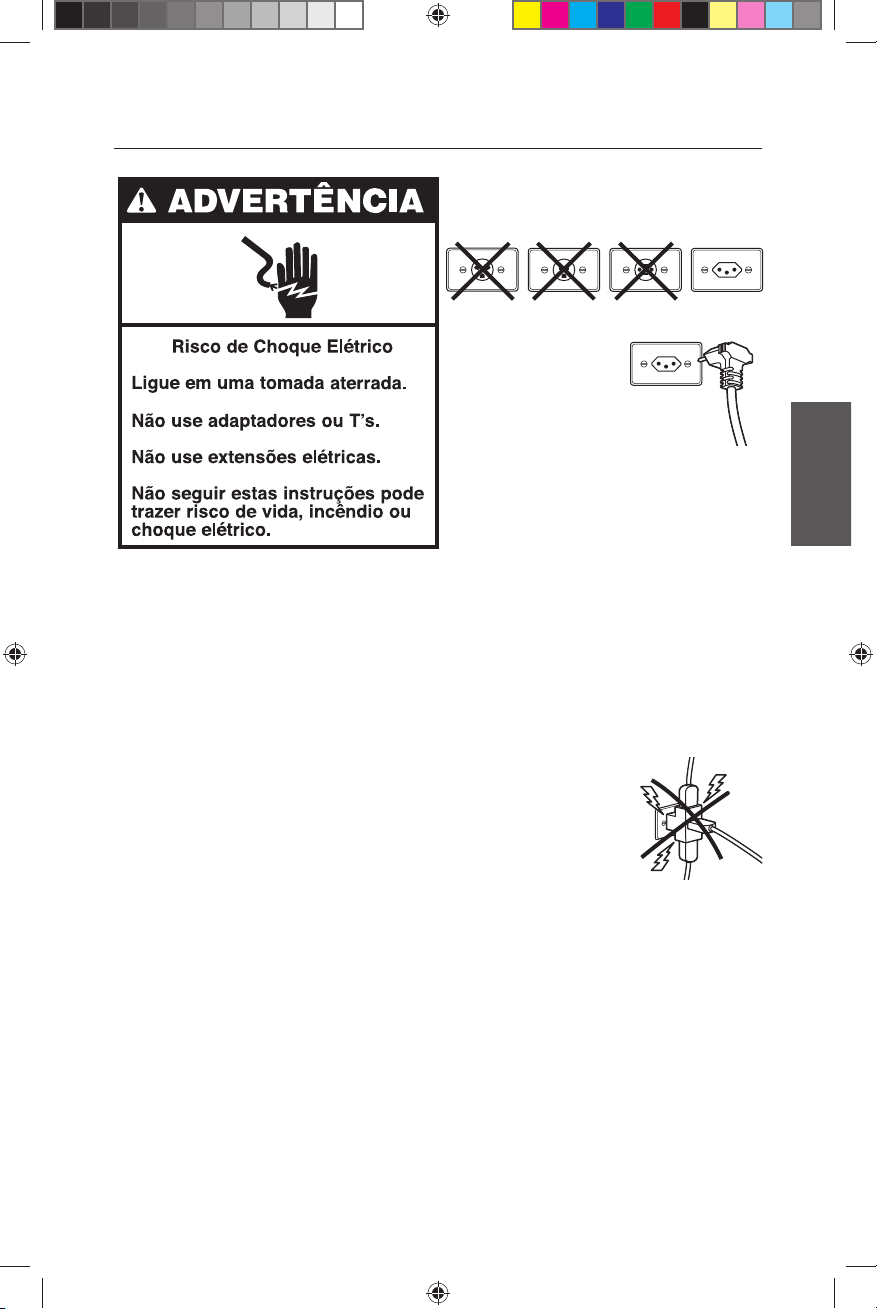
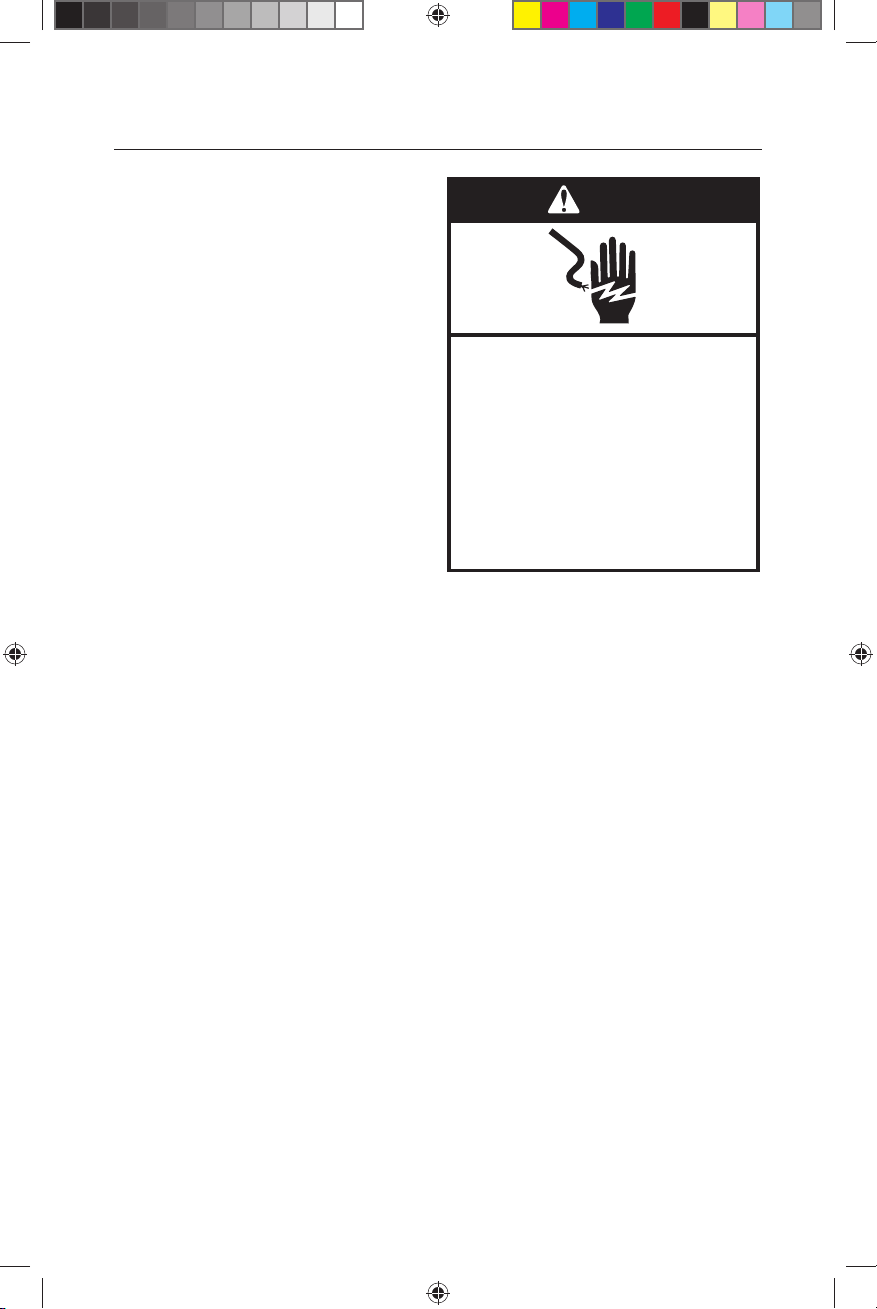
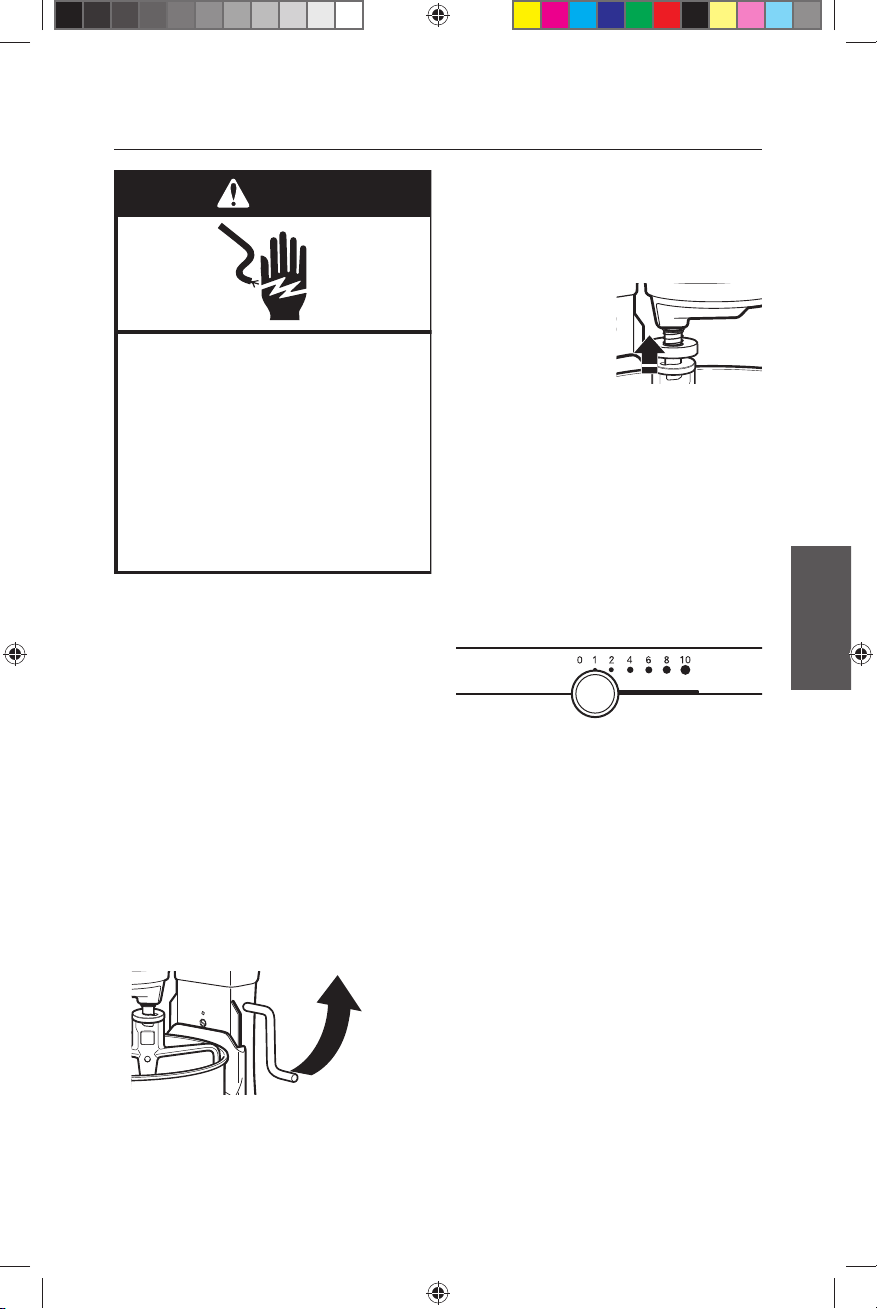
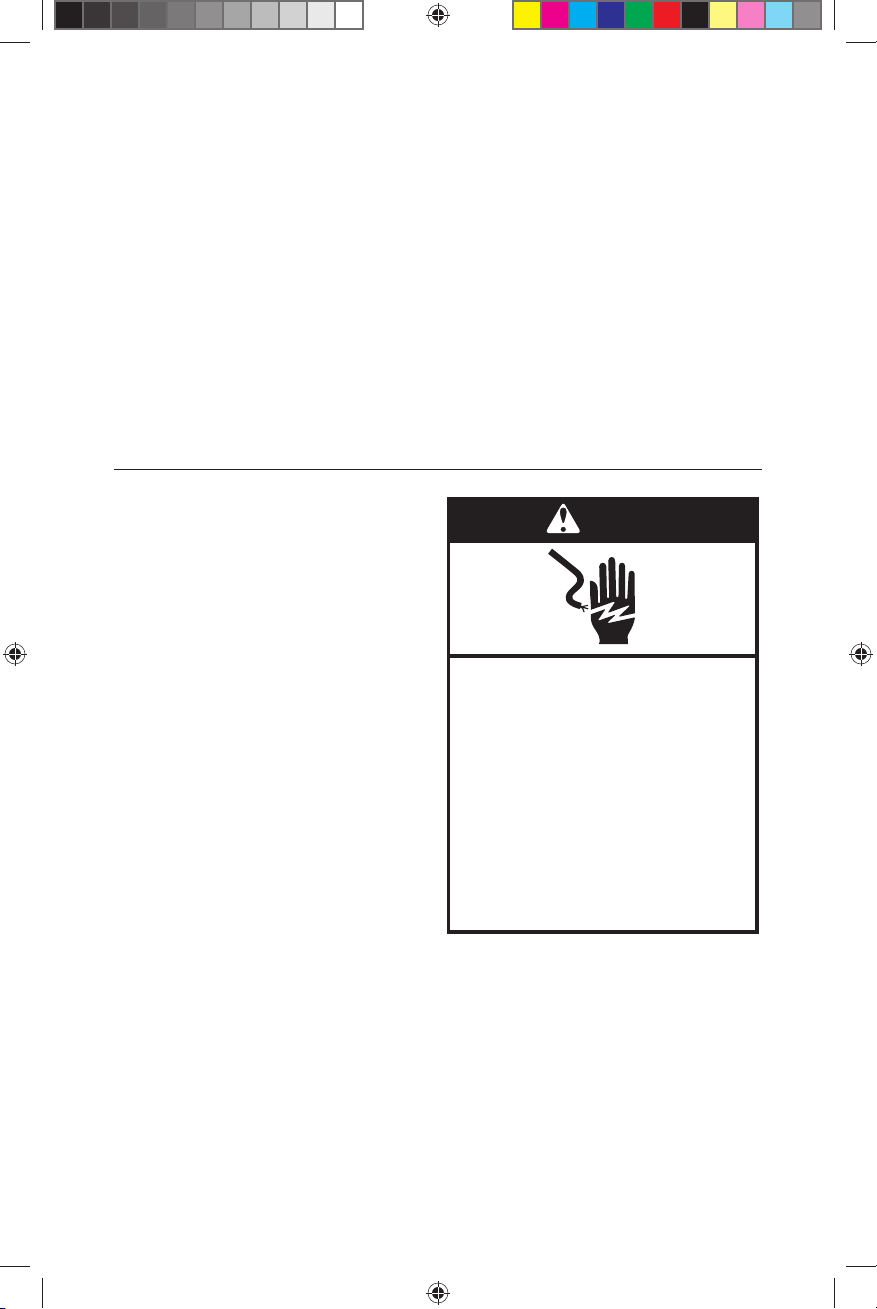
Perigo de choque eléctrico
Ligue a uma tomada com ligação
à terra.
Não retire o contacto de ligação à terra.
Não utilize um adaptador.
Não utilize uma extensão.
A não observação destas instruções
pode resultar em morte, incêndio ou
choque eléctrico.
AVISO
W10523279B.indd 18W10523279B.indd 18 10/31/2012 2:30:39 PM10/31/2012 2:30:39 PM
19
Português
Montando sua batedeira
Para abaixar a tigela:
1. Gire a alavanca de levantamento
de tigela para baixo.
Para fixar o batedor:
1. Coloque a alavanca de controle
de velocidade na posição OFF/0
(desligado).
2. Desconecte a batedeira da tomada.
3. Deslize o batedor
plano para cima no
eixo do batedor,
tanto quanto for
possível.
4. Gire o batedor para a direita sobre
o pino do eixo do batedor.
5. Conecte sua batedeira novamente
na tomada.
Para remover o batedor:
1. Coloque a alavanca de controle
de velocidade na posição OFF/0
(desligado).
2. Desconecte a batedeira da tomada.
3. Pressione o batedor para cima o
quanto for possível e gire-o para
esquerda.
4. Retire o batedor do eixo do batedor.
5. Conecte sua batedeira novamente
na tomada.
Controle de velocidade
A batedeira tem um recurso que
minimiza respingo, basta iniciar o
processo de bater na velocidade
mínima e ir aumentando aos poucos
até chegar na velocidade desejada.
Consulte “Controle de Velocidade”.
Auto-Reset de proteção do motor
Se a Batedeira pára devido a sobrecarga,
deslize a alavanca de velocidades para
“0” (desligado). Depois de alguns
minutos, a batedeira irá reiniciar
automaticamente. Deslize a alavanca
de velocidades para a velocidade
desejada e continue o processo. Se
a batedeira não reiniciar, consulte
“Solução de Problemas”.
W10523279B.indd 19W10523279B.indd 19 10/31/2012 2:30:39 PM10/31/2012 2:30:39 PM
20
Usando seus acessórios
Batedor plano para massas normais e pesadas:
Bolos Biscoitos
Glacês Pães rápidos
Balas Bolo de carne
Cookies Purê de batatas
Tortas
Batedor de claras para massas que exigem incorporação de ar:
Ovos Pão-de-ló
Claras em neve Bolo esponja
Creme de leite Maionese
Merengues Balas
Batedor tipo ”gancho” para massas pesadas e com fermento:
Pães Roscas
Pizza Macarrão
Tempo de mistura
Sua batedeira KitchenAid irá misturar
mais rápido e mais homogeneamente que
a maioria das outras batedeiras elétricas.
Portanto, o tempo de mistura da maioria
das receitas deve ser ajustado para evitar
erros. Com bolos, por exemplo, o tempo
de mistura pode ser a metade do tempo
utilizado pelas outras batedeiras.
Usando o produto
NOTA: Não raspar a tigela enquanto
batedeira está em funcionamento.
A tigela e o batedor são projetados para
oferecer uma mistura homogênea sem a
necessidade de muitas raspagens. Raspar
a tigela uma ou duas vezes durante o
processo, normalmente, é suficiente.
Desligue a batedeira antes de raspar.
A batedeira pode aquecer durante
o uso. Batendo misturas pesadas
durante um longo tempo, você pode
sentir desconforto ao tocar o topo da
batedeira. Isto é normal.
Se a batedeira se sobrecarregar, ela será
desligada automaticamente para evitar
danos. Consulte “Proteção do motor”.
W10523279B.indd 20W10523279B.indd 20 10/31/2012 2:30:39 PM10/31/2012 2:30:39 PM
21
Português
Velocidade
Utilizada
para
Acessórios Descrição
1Agitando Para misturas lentas, combinando,
triturando, iniciando a mistura. Use
para adicionar farinha e ingredientes
secos a massa, e adicionar líquidos
aos ingredientes secos. Não use
velocidade 1 para misturar ou
amassar o fermento a massa.
2Misturando
lentamente,
amassando
Para misturas lentas, triturar,
adicionar movimentos rápidos. Use
para misturar e amassar o fermento
a massa, massas pesadas e doces;
comece amassando batatas ou outros
vegetais; misturar massas finas.
4Misturando,
batendo
Para misturas semi-pesadas, tais
como cookies. Use para combinar
açúcar e adicionar açúcar as claras
para fazer suspiros. Velocidade
média de misturas para bolos.
6Batendo,
desnatando
Por meio de batidas rápidas
(desnatar) ou poucas batidas mais
fortes. Use para finalizar misturas
de bolo, rosca, e outras massas. Alta
velocidade para misturas para bolos.
8-10 Batendo
rapidamente,
chicoteando.
Para creme de leite, ovos brancos,
e coberturas. Para pequenas
quantidades de ovo, creme brancos
ou para finalizar o purê de batatas.
Controle de velocidade
Todas as velocidades tem um recurso que
liga, automaticamente, a batedeira em uma
velocidade menor para evitar respingos e
sujeiras, em seguida, rapidamente aumenta
a velocidade selecionada para o funcionamento
ideal.
NOTA: Use a velocidade 2 para
misturar ou adicionar fermento
a massa. O uso de qualquer outra
velocidade pode levar ao fracasso
da receita. O batedor tipo
“gancho” é eficiente para amassar
a massa com o fermento dentro
de 4 minutos.
W10523279B.indd 21W10523279B.indd 21 10/31/2012 2:30:40 PM10/31/2012 2:30:40 PM
22
Ajustando o batedor
A sua batedeira é ajustada na fábrica de modo que o batedor apenas limpe o fundo da
tigela. Se, por qualquer razão, o batedor atingir o fundo da tigela ou estiver muito longe
da tigela, você pode corrigir facilmente.
1. Desconecte a batedeira da tomada.
2. Coloque a alavanca de levantamento
da tigela para baixo.
3. Encaixe o batedor.
4. Ajuste de modo que o batedor apenas
limpe o fundo da tigela, basta girar o
parafuso de ajuste de altura no sentido
horário para abaixar a tigela e no sentido
anti-horário para levantar a tigela. O
parafuso não irá rodar mais de 1/4 de
volta (90 graus) em qualquer direção.
(O completo ajuste corresponde a
1/2 volta, ou 180 graus.)
5. Coloque a alavanca de levantamento da
tigela para cima para verificar se há folga.
6. Repetir os passos 4 e 5, se necessário.
Limpeza e manutenção
Tigela e batedores devem ser lavados
com água quente e sabão, o enxágüe deve
ser realizado completamente antes de
secar as peças. Não guarda a batedeira
com algum dos batedores encaixado no
eixo do batedor.
NOTA: Certifique-se de desligar sempre
a batedeira antes de limpar. Limpe a
batedeira com um pano macio e limpo.
Não mergulhe a batedeira em água.
Limpe o eixo do batedor freqüentemente,
removendo qualquer resíduo acumulado.
NOTA: Quando ajustado
corretamente, o batedor não irá
atingir o fundo nem as laterais da
tigela.
A
Coloque tigelaLevante tigela
W10523279B.indd 22W10523279B.indd 22 10/31/2012 2:30:41 PM10/31/2012 2:30:41 PM

23
Português
Dicas de Mistura
Usando suas receitas com a batedeira
Há um certo número de métodos que
podem ser usados para fazer um bolo
na sua batedeira KitchenAid.
Por exemplo, o modo rápido é ideal para
bolos simples. Este método é utilizado
quando combinamos os ingredientes
secos com todos os ingredientes líquidos
ou em uma única etapa.
Bolos mais elaborados, tais como uma
torta, devem ser preparados utilizando
o método tradicional de mistura. Com
este método, açúcar e a gordura vegetal
hidrogenada , manteiga ou margarina
são completamente misturados (creme)
antes de outros ingredientes serem
adicionados. Para todos os bolos, tempos
de mistura podem mudar devido ao
funcionamento mais eficiente da batedeira
KitchenAid. Em geral, a mistura de um
bolo com a batedeira KitchenAid levará
cerca da metade do tempo.
Para ajudar a determinar o tempo ideal
de mistura, observe a massa ou misture
apenas até que tenha a aparência desejada
descrita em sua receita, como “suave
e cremosa”.
Para selecionar os melhores velocidades
de mistura, consulte “Controle de
Velocidade”.
Adição de ingredientes
Sempre adicione os ingredientes o mais
próximo da tigela possível, mas nunca
diretamente no movimento do batedor.
NOTA: Se os ingredientes no fundo da
tigela não são bem misturados. Consulte
“Ajustando o batedor”.
Misturas para bolos
Ao preparar um bolo pré-pronto, use
velocidade 2 para baixa velocidade,
velocidade 4 para velocidade média e
velocidade 6 para alta velocidade. Para
melhores resultados, misture durante
o tempo indicado nas instruções da
embalagem.
Adicionando nozes, passas,
ou frutas cristalizadas
Em geral, os ingredientes sólidos devem
ser colocados nos últimos segundos
de mistura em velocidade 1. A massa
deve ser suficientemente espessa para
impedir que o fruto afunde para o fundo
da panela durante o cozimento. Frutos
pegajosos devem ser polvilhados com
farinha para uma melhor distribuição
na massa.
Misturas de líquidos
Ao adicionar líquidos as misturas,
a velocidade deve estar baixa para
evitar respingos e sujeiras. Aumente
a velocidade somente depois que a
mistura engrossar.
W10523279B.indd 23W10523279B.indd 23 10/31/2012 2:30:41 PM10/31/2012 2:30:41 PM

24
Termo de Garantia
O seu produto KitchenAid é garantido
contra defeitos de fabricação, pelo prazo
de 12 meses, contado a partir da data da
emissão da Nota Fiscal ou da entrega do
produto, ao primeiro adquirente, sendo:
• Os 03 (três) primeiros meses, -
garantia legal;
• Os 09 (nove) últimos meses, - garantia
especial, concedida pela Whirlpool
S.A.;
A garantia compreende a substituição
de peças e mão-de-obra no reparo de
defeitos devidamente constatados, pelo
fabricante ou pelo Serviço Autorizado
KitchenAid, como sendo de fabricação.
Durante o período de vigência da
garantia, o produto terá assistência
técnica do Serviço Autorizado
KitchenAid. As garantias legal e/ou
especial ficam automaticamente
invalidadas se:
• O uso do produto não for
exclusivamente doméstico;
• Não forem observadas as orientações
e recomendações do Manual do
Consumidor quanto a utilização
do produto;
• Na instalação do produto não
forem observadas as especificações
e recomendações do Manual do
Consimidor quanto às condições
para instalação do produto, tais como,
nivelamento do produto, adequação
do local para instalação, tensão elétrica
compativel com o produto, etc;
• Na instalação, as condições elétricas
e/ou hidráulicas e/ou de gás não forem
compativeis com a recomendada no
Manual do Consumidor do produto;
• Tenha ocorrido mau uso, uso
inadequado ou se o produto tiver
sofrido alterações ou modificações
estéticas e/ou funcionais, bem como,
tiver sido realizado conserto por
pessoas ou entidades não credenciadas
pela Whirlpool S.A.;
• Houver sinais de violação do
produto, remoção e/ou adulteração
do número de série ou da etiqueta
de indentifacação do produto.
As garantias legal e/ou especial
não cobrem:
• Despesas decorrentas e conseqüentes
de instalação de peças e acessórios
que não pertençam ao produto,
mesmo aqueles comercializados
pela Whirlpool S.A., salvo os
especificados para daca modelo
no Manual do Consumidor;
• Despesas com mão-de-obra,
materiais, peças e adaptações
necessárias à preparação do local
para instalação do produto, ou seja:
rede elétrica, de gás ou hidráulica,
alvenaria, aterramento, esgoto, etc;
• Falhas no funcionamento do produto
decorrentes da falta de fornecimento
ou problemas e/ou insuficiência no
fornecimento de energia elétrica,
água ou gás na residência, tais
como: oscilações de energia elétrica
superiores ao estabelecido no
Manual do Consumidor, pressão
de água insuficiente para o ideal
funcionamento do produto;
• Serviços e/ou despesas de manutençao
e/ou limpeza do produto;
• Falhas no funcionamento normal
do produto decorrentes da falta
de limpeza e excesso de residuos,
ou ainda, decorrentes da existência
de objetos em seu interior, estranhos
ao seu funcionamento e finalidade
de utilização;
• Produtos ou peças que tenham sido
danificados em conseqüência de
remoção, manuseio, quedas ou atos
e efeitos decorrentes da natureza,
tais como relâmpago, chuva,
inundação, etc.;
W10523279B.indd 24W10523279B.indd 24 10/31/2012 2:30:41 PM10/31/2012 2:30:41 PM

25
Português
A garantia especial não cobre:
• Deslocamentos para atendimentos
de produtos instalados fora da
área de comertura dos Serviços
Autorizados KitchenAid, o qual
poderá cobrar taxa de locomoção
do técnico, previamemte aprovada
pelo consumidor;
• Peças sujeitas ao desgaste natural,
descaráveis ou consumíveis, peças
móveis ou removiveis em uso normal,
tais como, lâmpadas, filtros, botöes
de comando, puxadores, bem como,
a mão-de-obra utilizada na aplicação
das peas e as conseqüências advindas
dessas ocorrências.
Consideraçöes Gerais:
A Whirlpool S.A. não autoriza nenhuma
pessoa ou entidade a assumir em seu
nome, qualiquer outra responsabilidade
relativa à garantia de seus produtos
além das aqui explicitadas.
A Whirlpool S.A. reserva-se o direito
de alterar caracteristicas gerais, técnicas
e estéticas de seus produtos, sem
aviso prévio.
Este Termo de Garantia é válido para
produtos vendidos e instalados no
território brasileiro.
Para a sua tranquilidade, preserve
e mantenha este Manual com o
Termo de Garantia, e Nota Fiscal
de Compra do produto sempre
à mão.
Whirlpool S.A.
Unidade de Eletrodomésticos
Atendimento ao Consumidor
Rua Olympia Semeraro n° 675 - Jardim Santa Emilia
CEP 04183-901 - São Paulo - SP - Caixa postal 5171
Capitais e regiões metropolitanas: 4004 1759
Demais localidades: 0800 722 1759
Termo de Garantia
W10523279C
© 2012. Todos os direitos reservados.
11/12
W10523279B.indd 25W10523279B.indd 25 10/31/2012 2:30:41 PM10/31/2012 2:30:41 PM

26
ৄᓣ᧙ᢠᴎᅝܼ⊼ᛣџ乍 ............................................................................................................ 27
⫼⬉㽕∖ ........................................................................................................................................ 28
ᐌ㾕䯂乬ᣛ ................................................................................................................................ 29
ଚ⫼ৄᓣ᧙ᢠᴎⱘ㒧ᵘ ................................................................................................................ 30
㒘㺙ᙼⱘ䰡Ṋৄᓣ᧙ᢠᴎ ........................................................................................................ 31
Փ⫼ KitchenAid ᑇ᧙఼ǃᠧ㲟఼䴶ಶ䩽 ................................................................................. 32
㸠᯳ᓣ᧙ᢠࡼ ............................................................................................................................ 32
ৄᓣ᧙ᢠᴎⱘ⫼⊩ ........................................................................................................................ 32
䗳ᑺࠊᣛ- 10 䗳᧙ᢠᴎ......................................................................................................... 33
㓈ᡸ⏙⧚ .................................................................................................................................... 34
᧙ᢠᴎϢṊⱘ䎱⾏ ........................................................................................................................ 34
᧙ᢠᦤ⼎ ........................................................................................................................................ 35
ⳂᔩⳂᔩ
W10523279B.indd 26W10523279B.indd 26 10/31/2012 2:30:41 PM10/31/2012 2:30:41 PM
27
Ё᭛Ё᭛
ৄᓣ᧙ᢠᴎᅝܼ⊼ᛣџ乍ৄᓣ᧙ᢠᴎᅝܼ⊼ᛣџ乍
ԴҪҎⱘᅝܼ䛑ᕜ䞡㽕DŽԴҪҎⱘᅝܼ䛑ᕜ䞡㽕DŽ
ᴀݠᴎ఼Ϟ䞡㽕ᅝֵܼᙃഛᏆᯢ⼎DŽᭀ䇋䯙䇏ᑊ䙉ᅜ乍ᅝܼџ乍DŽ
ℸЗᅝܼ䄺⼎ᖫDŽ
ℸᖫЗ䄺⼎᳝ᇐ㟈ᙼҪҎӸѵⱘ┰亢䰽DŽ
᠔᳝ᅝܼ⊼ᛣџ乍ৢഛ⏙њᅝܼ䄺⼎ᖫ᳝þ䰽ÿ
þ䄺ÿᄫḋDŽ䖭ѯᄫⱘᛣᗱᰃ˖
㢹ϡ㢹ϡゟゟ䙉ᅜ䇈ᯢкⱘ᪡㾘߭ˈԴӮ䙉ᅜ䇈ᯢкⱘ᪡㾘߭ˈԴӮ
ϻϹ䞡Ӹ⅟DŽϻϹ䞡Ӹ⅟DŽ
䰽䰽
䄺䄺
㢹ϡ䙉ᅜ䇈ᯢкⱘ᪡㾘߭ˈԴӮϻ㢹ϡ䙉ᅜ䇈ᯢкⱘ᪡㾘߭ˈԴӮϻ
Ϲ䞡Ӹ⅟DŽϹ䞡Ӹ⅟DŽ
ϔߛᅝֵܼᙃഛᦤ䝦Դ⊼ᛣ┰䰽ˈ䆝ᙼབԩ䰡ԢܡফᛣӸᆇП亢䰽
ҹঞϡ䙉ᅜ䇈ᯢⱘৢᵰDŽ
䇋ֱᄬ䖭ѯ䇈ᯢ䇋ֱᄬ䖭ѯ䇈ᯢ
Փ⫼⬉఼ᯊˈᙼᑨ䙉ᅜᴀᅝܼ乘䰆ᮑˈࣙᣀ˖Փ⫼⬉఼ᯊˈᙼᑨ䙉ᅜᴀᅝܼ乘䰆ᮑˈࣙᣀ˖
1. 䯙䇏᠔᳝䇈ᯢDŽ
2. Ўњ䰆ℶ⬉ߏˈϡ㽕ᇚৄᓣ᧙ᢠᴎᬒ∈Ё݊Ҫ⎆ԧЁDŽ
3.བᵰ᮴Ҏⲥⴷˈ⽕ℶᇣᄽԧᔅ㗙Փ⫼ᴀ⬉఼DŽ
4.བᵰϡݡՓ⫼ˈ䇋ܜҢᦦᑻЁᢨߎৄᓣ᧙ᢠᴎⱘᦦ༈ˈ✊ৢݡ㺙ǃ䚼ӊ
䖯㸠⏙⋕DŽ
5.䙓ܡ㾺䖤ࡼ䚼ӊDŽ᪡ᳳ䯈ˈ䅽ǃ༈থǃ㸷᳡ǃࠂ䫆ঞ݊Ҫ఼ⲓ䖰
⾏᧙ᢠ఼ˈҹ䰡ԢҎফӸৄᓣ᧙ᢠᴎফᤳⱘ亢䰽DŽ
6.བᵰৄᓣ᧙ᢠᴎ⬉⑤㒓ᦦ༈ᤳണˈ᧙ᢠᴎߎ⦄ᬙ䱰ˈ᧙ᢠᴎ㹿ᨨ㨑ҹ
݊Ҫᮍᓣ㹿ᤳണˈ䇋࣓Փ⫼ℸ᧙ᢠᴎDŽ
7.བᵰՓ⫼ᑊ䴲KitchenAid㤤ߎଂⱘ䰘ӊˈৃ㛑Ӯᇐ㟈☿♒ǃ⬉ߏফӸDŽ
8.䇋࣓ᅸՓ⫼ৄᓣ᧙ᢠᴎDŽ
9.䇋࣓ᇚ⬉⑤㒓ᣖḠᄤ᪡ৄⱘ䖍㓬DŽ
10.⏙⋫ࠡˈ䇋Ңৄᓣ᧙ᢠᴎϞϟᑇ᧙఼ǃᠧ㲟఼䴶ಶ䩽DŽ
11.ᴀ䆒ϡᕫ⬅ԧ㛑ǃᛳᅬ㛑ᖗᱎ㛑Ԣϟˈ㔎У㒣偠ⶹ䆚ⱘҎ
˄ࣙᣀܓス˅Փ⫼ˈ䰸䴲ҪӀՓ⫼䆹䆒ᮍ䴶ᕫࠄњ䋳䋷ҪӀᅝܼⱘҎ
ⱘⲥⴷᣛᇐDŽ
12.ᑨᇍܓス䖯㸠ⲥⴷҹ⹂ֱҪӀϡӮᣓᴀ䆒⥽㗡DŽ
13.ᤶ䜡ӊ㾺⿏ࡼՓ⫼ⱘ䜡ӊࠡˈ㽕݇䯁ᥝᴀ䆒ᑊߛᮁ⬉⑤DŽ
䞡㽕ᅝܼᮑ䞡㽕ᅝܼᮑ
W10523279B.indd 27W10523279B.indd 27 10/31/2012 2:30:41 PM10/31/2012 2:30:41 PM
28
⫼⬉㽕∖⫼⬉㽕∖
⬉ҙ220-240VAC
䌿ݍ50/60
ৄᓣ᧙ᢠᴎⱘࡳ⥛ଚⱘ䖍㓬
ϞѻકᑩⲬⱘᑣ߫োϞDŽ
ϡᕫᓊ䭓⬉⑤㒓DŽབᵰ᠔ᦤկⱘ
⬉⑤㒓ⷁˈ䇋䅽ড়Ḑ⬉ᎹᡔᏜᅝ
㺙䰘ࡴᦦᑻDŽ
䄺䄺
⬉ߏ䰽⬉ߏ䰽
ᦦ༈ᦦܹഄᦦᑻᦦ༈ᦦܹഄᦦᑻDŽDŽ
䇋࣓ϟഄᦦ㛮DŽ䇋࣓ϟഄᦦ㛮DŽ
䇋࣓Փ⫼䗖䜡఼DŽ䇋࣓Փ⫼䗖䜡఼DŽ
䇋࣓Փ⫼ᓊ䭓⬉㒓DŽ䇋࣓Փ⫼ᓊ䭓⬉㒓DŽ
བᵰϡ䙉ᅜ䖭ѯ䇈ᯢˈӮᇐ㟈བᵰϡ䙉ᅜ䖭ѯ䇈ᯢˈӮᇐ㟈
⅏ѵǃ☿♒⬉ߏDŽ⅏ѵǃ☿♒⬉ߏDŽ
W10523279B.indd 28W10523279B.indd 28 10/31/2012 2:30:41 PM10/31/2012 2:30:41 PM

29
Ё᭛Ё᭛
ᐌ㾕䯂乬ᣛᐌ㾕䯂乬ᣛ
䇋㟈⬉᳡ࡵЁᖗࠡ䯙䇏ҹϟݙᆍDŽ䇋㟈⬉᳡ࡵЁᖗࠡ䯙䇏ҹϟݙᆍDŽ
1. ৄᓣ᧙ᢠᴎՓ⫼䖛Ёৃ㛑Ӯ
থ⛁DŽབᵰ䋳㥋ˈ䳔㽕ᓊ䭓᧙
ᢠᯊ䯈ˈ᧙ᢠᴎ乊䚼ৃ㛑Ӯথ⚿DŽ
䖭ᰃℷᐌ⦄䈵DŽ
2.ৄᓣ᧙ᢠᴎৃ㛑Ӯথߎࠎ唏⇨ˈ
ᮄᴎ఼ᇸ݊ᯢᰒDŽᇍ⬉ᴎ㗠㿔ˈ
䖭ᰃᐌ㾕⦄䈵DŽ
3.བᵰᑇ᧙఼⺄ᩲṊຕˈ䇋ذℶৄ
ᓣ᧙ᢠᴎDŽ䇋খ䯙Ā᧙ᢠ఼ϢṊ
ⱘ䎱⾏āDŽ
བᵰৄᓣ᧙ᢠᴎ᳝ᬙ䱰ϡ㛑䖤䕀ˈབᵰৄᓣ᧙ᢠᴎ᳝ᬙ䱰ϡ㛑䖤䕀ˈ
䇋Ẕᶹҹϟџ乍˖䇋Ẕᶹҹϟџ乍˖
- ᰃ৺ᏆᦦϞৄᓣ᧙ᢠᴎⱘᦦ༈˛
- ৄᓣ᧙ᢠᴎ᠔䖲⬉䏃Ёⱘֱ䰽ϱᰃ
৺ℷᐌ˛བᵰ᳝ᮁ䏃ᓔ݇Ⲧˈ䇋⹂ֱ
⬉䏃ᰃ䯁ড়ⱘDŽ
- ᇚৄᓣ᧙ᢠᴎᮟ䕀ࠄ “0”݇ԡ㕂
10-15⾦ˈ✊ৢ䞡ᮄᠧᓔDŽབᵰৄ
ᓣ᧙ᢠᴎҡϡ㛑ࡼˈ䅽ᅗދ
30ߚ䩳ˈ✊ৢݡ䞡ᮄᠧᓔDŽ
བᵰϡᰃҹϞᇐ㟈ˈ䇋ⳟKitchenAid
ֱׂDŽϡ㽕ᡞৄᓣ᧙ᢠᴎᣓ㒭䳊ଂଚ
໘⧚ˈЎ䳊ଂଚϡᦤկଂৢ᳡ࡵDŽ
W10523279B.indd 29W10523279B.indd 29 10/31/2012 2:30:42 PM10/31/2012 2:30:42 PM

30
ଚ⫼ৄᓣ᧙ᢠᴎⱘ㒧ᵘଚ⫼ৄᓣ᧙ᢠᴎⱘ㒧ᵘ
䗳ᑺ䗳ᑺ
ࠊᮟ䪂ࠊᮟ䪂
Ṋ䰡ᴚᰒ⼎Ṋ䰡ᴚᰒ⼎
᧙ᢠ䕈᧙ᢠ䕈
ϡ䫜䩶ᠧϡ䫜䩶ᠧ
㲟఼㲟఼
6.9(7Q)
ϡ䫜䩶Ṋϡ䫜䩶Ṋ
㶎ᮟ䴶㶎ᮟ䴶
ಶ䩽ಶ䩽
ᑇ᧙఼ᑇ᧙఼
ᅮԡ䫕ᅮԡ䫕
ṊᬃᶊṊᬃᶊ
Ṋ催ᑺᖂ䇗㶎䩝Ṋ催ᑺᖂ䇗㶎䩝
⬉ࡼ༈⬉ࡼ༈
ṊᶘᣝϡṊᶘᣝϡ
ৠൟো㗠᳝ৠൟো㗠᳝
᠔ϡৠ᠔ϡৠ
䰘ӊᵶ㒑䰘ӊᵶ㒑
ⳟĀ䰘ӊā䚼ߚⳟĀ䰘ӊā䚼ߚ
䜡ӊᮟ䪂䜡ӊᮟ䪂
ᇐ⌕㔽ᇐ⌕㔽
W10523279B.indd 30W10523279B.indd 30 10/31/2012 2:30:42 PM10/31/2012 2:30:42 PM
31
Ё᭛Ё᭛
㒘㺙ᙼⱘ䰡Ṋৄᓣ᧙ᢠᴎ㒘㺙ᙼⱘ䰡Ṋৄᓣ᧙ᢠᴎ
ᅝ㺙Ṋᅝ㺙Ṋ
1.ᇚ䗳ᑺࠊ఼ᮟ䕀ࠄ“0”݇DŽ
2.ᢨߎৄᓣ᧙ᢠᴎⱘᦦ༈ˈᮁᓔ⬉⑤DŽ
3.ᇚṊ䰡ᶘ㕂ѢԢԡDŽ
4.ᇚṊᬃᶊᬒࠄᅮԡ䫔ϞDŽ
5.ϟᣝṊ㚠䴶ˈϟᣝṊ㚠䴶ˈ
ⳈࠄṊ䫔䩝ܹᔍㇻ䫕ЎℶDŽ
6.᧙ᢠࠡᇚṊϞᢀϔϟDŽ
7.ᦦ༈ᦦܹഄᦦᑻݡϞ⬉⑤DŽ
ᢚṊᢚṊ
1.ᇚ䗳ᑺࠊ఼ᮟ䕀ࠄ“0”݇DŽ
2.ᢨߎৄᓣ᧙ᢠᴎⱘᦦ༈ˈᮁᓔ⬉⑤DŽ
3.ᇚṊ䰡ᶘ㕂ѢԢԡDŽ
4.ϟᑇ᧙఼ǃᠧ㲟఼䴶ಶ䩽DŽ
5.ᡧԣṊᶘˈⳈϞᢀˈՓ݊㜅
⾏ᅮԡ䫔DŽ
ϞᢀṊϞᢀṊ
1. ᇚᶘᮟ䕀ࠄⳈゟԡ㕂DŽ
2. ᧙ᢠᯊˈṊᖙ乏ྟ㒜໘Ѣᢀ䍋ⱘ䫕
ᅮԡ㕂DŽ
䰡ԢṊ䰡ԢṊ
1.ৢǃϟᮟ䕀ᶘDŽ
ᅝ㺙ᑇ᧙఼ǃᠧ㲟఼䴶ಶ䩽ᅝ㺙ᑇ᧙఼ǃᠧ㲟఼䴶ಶ䩽
1.ᇚ䗳ᑺࠊ఼ᮟ䕀ࠄ“0”݇DŽ
2.ᢨߎৄᓣ᧙ᢠᴎⱘᦦ༈ˈᮁᓔ
⬉⑤DŽ
3. ⒥ࡼ᧙ᢠẦ
ࠄ᧙ᢠ䕈Ϟ
ᑊᣝϞࠄ乊
䍞催䍞དDŽ
4. ে䕀᧙ᢠẦ䩽ԣ᧙ᢠẦ Ѣ䕈
Ϟⱘᅮ䩜DŽ
5. ᦦ༈ᦦܹഄᦦᑻݡϞ⬉⑤DŽ
ᢚᑇ᧙఼ǃᠧ㲟఼䴶ಶ䩽ᢚᑇ᧙఼ǃᠧ㲟఼䴶ಶ䩽
1. ᇚ䗳ᑺࠊ఼ᮟ䕀ࠄ“0”݇DŽ
2. ᢨߎৄᓣ᧙ᢠᴎⱘᦦ༈ˈᮁᓔ
⬉⑤DŽ
3. Ϟᣝ᧙ᢠẦሑৃ㛑ࠄ乊✊ৢᎺ䕀DŽ
4. Ң᧙ᢠ䕈Ϟᣓϟ᧙ᢠ఼DŽ
5. ᦦ༈ᦦܹഄᦦᑻݡϞ⬉⑤DŽ
ଚ⫼ৄᓣ᧙ᢠᴎ䗳ᑺࠊଚ⫼ৄᓣ᧙ᢠᴎ䗳ᑺࠊ
ৄᓣ᧙ᢠᴎⱘ⡍⚍Пϔᰃ䗮䖛᜶ࡼˈ
ҹՓ⑶ߎ᳔ᇣ࣪ˈ✊ৢݡ䇗催㟇䗝ᅮ
䗳ᑺDŽЎњ䰡Ԣ䜡᭭ߎṊⱘৃ
㛑ᗻˈᓔྟ᧙ᢠᯊᑨྟ㒜Փ⫼᳔Ԣ䗳ˈ
1ḷ䗳ᑺˈ✊ৢ䗤⏤⿏ࡼࠄ᠔䳔ⱘ
催䗳ᑺDŽ䇋খ䯙Ā䗳ᑺࠊᣛāDŽ
㞾ࡼ䞡䆒⬉ᴎֱᡸ㞾ࡼ䞡䆒⬉ᴎֱᡸ
བᵰৄᓣ᧙ᢠᴎ⬅Ѣ䋳㥋䖛㗠ذᴎˈ
ᡞ䗳ᑺ䇗ࠄ“0” ݇DŽ᧙ᢠᴎӮ᭄
ߚ䩳ৢ㞾ࡼ䞡䆒ˈПৢ߭ৃ㒻㓁ᎹDŽ
⒥ࡼ䗳ᑺࠊᴚࠄড়䗖䗳ᑺᑊ㒻㓁
᧙ᢠDŽབᵰ᧙ᢠᴎϡ㛑䞡䆒ˈ䇋ⳟ
Āᐌ㾕䯂乬ᣛāDŽ
䄺䄺
㾺⬉䰽㾺⬉䰽
ᦦ༈ᦦܹഄᦦᑻDŽᦦ༈ᦦܹഄᦦᑻDŽ
䇋࣓ϟഄᦦ㛮DŽ䇋࣓ϟഄᦦ㛮DŽ
䇋࣓Փ⫼䗖䜡఼DŽ䇋࣓Փ⫼䗖䜡఼DŽ
䇋࣓Փ⫼ᓊ䭓⬉㒓DŽ䇋࣓Փ⫼ᓊ䭓⬉㒓DŽ
བᵰϡ䙉ᅜ䖭ѯ䇈ᯢˈӮᇐ㟈བᵰϡ䙉ᅜ䖭ѯ䇈ᯢˈӮᇐ㟈
⅏ѵǃ☿♒⬉ߏDŽ⅏ѵǃ☿♒⬉ߏDŽ
W10523279B.indd 31W10523279B.indd 31 10/31/2012 2:30:42 PM10/31/2012 2:30:42 PM
32
䄺䄺
ফӸ䰽ফӸ䰽
ܜᢨϟ᧙ᢠᴎᦦ༈ˈ✊ৢݡ㾺᧙ܜᢨϟ᧙ᢠᴎᦦ༈ˈ✊ৢݡ㾺᧙
ᢠ఼DŽᢠ఼DŽ
৺߭ˈӮᇐ㟈偼ᡬǃࡆӸӸDŽ৺߭ˈӮᇐ㟈偼ᡬǃࡆӸӸDŽ
Փ⫼Փ⫼ KitchenAid ᑇ᧙఼ǃᠧ㲟఼䴶ಶ䩽ᑇ᧙఼ǃᠧ㲟఼䴶ಶ䩽
ᇍѢ᱂䗮ⱘ⿴⏋ড়⠽ˈՓ⫼ᑇ᧙఼˖
㲟㊩佐ᑆ
ཊ⊍㊪䳰䗳ࠊ䴶佐
㊪ᵰ㙝㊩
᳆༛ೳ䈚⊹
余佐Ⲃ
ᔧ⏋ড়⠽䳔㽕⏋ড়ぎ⇨ᯊˈՓ⫼ᠧ㲟఼˖
叵㲟ᵒ㊩
㲟ⱑⱑ㲟㊩
催㛖ཊ⊍㲟咘䝅
❳⚐㊪䳰ᶤѯ㊪ᵰ
㢹ᰃ᧙ᢠᦝ᧧থ䝉䴶ಶˈՓ⫼䴶ಶ䩽˖
䴶ࣙᮽ令⚍ᖗ
䴶ࣙᇣ䴶ࣙ
㸠᯳ᓣ᧙ᢠࡼ㸠᯳ᓣ᧙ᢠࡼ
ԴⱘKitchenAid ৄᓣ᧙ᢠ఼↨݊Ҫৠ
㉏ѻકⳕᯊⳕˈ᧙ᢠܙߚDŽℸˈ
ᇍѢ᭄亳䈅㗠㿔ˈᖙ乏䗖ᔧ䇗ᭈ᧙
ᢠᯊ䯈ˈҹܡ᧙ᢠ䖛DŽ՟བخ
㲟㊩ˈ᧙ᢠᯊ䯈ৃ㛑া䳔݊Ҫৠ
㉏ѻકⱘϔDŽ
ৄᓣ᧙ᢠᴎⱘ⫼⊩ৄᓣ᧙ᢠᴎⱘ⫼⊩
⊼ᛣ˖⊼ᛣ˖ৄᓣ᧙ᢠᴎᎹᳳ䯈ˈ䇋࣓
ࠂṊDŽ
Ṋ᧙ᢠ఼䆒䅵⣀⡍ˈ᮴䳔㒣ᐌࠂ
ৃᅲ⦄ᕏᑩ᧙ᢠDŽϔ㠀ᚙމϟˈ᧙ᢠᳳ
䯈ᇚṊࠂϔϸህ䎇њDŽܜ݇ᥝ᧙
ᢠᴎˈ✊ৢݡࠂDŽ
ৄᓣ᧙ᢠᴎՓ⫼䖛Ёৃ㛑Ӯথ⛁DŽ
བᵰ䋳㥋ˈ䳔㽕ᓊ䭓᧙ᢠᯊ䯈ˈ᧙ᢠ
ᴎ乊䚼ৃ㛑Ӯথ⚿DŽ䖭ᰃℷᐌ⦄䈵DŽ
བᵰৄᓣ᧙ᢠᴎᎹ䋳㥋䖛ˈᴎ఼Ӯ
㞾ࡼذᴎҹܡফᤳDŽⳟĀ㞾ࡼ䞡䆒⬉
ᴎֱᡸāDŽ
W10523279B.indd 32W10523279B.indd 32 10/31/2012 2:30:43 PM10/31/2012 2:30:43 PM
33
Ё᭛Ё᭛
䗳ᑺࠊᣛ䗳ᑺࠊᣛ - 10 䗳᧙ᢠᴎ䗳᧙ᢠᴎ
ᔧᴀ᧙ᢠ఼᳝ϔϾ⡍㡆ˈϡ䆎ᰃ䇗ࠄા
Ͼ䗳ᑺˈ᧙ᢠ఼䛑Ӯ㓧᜶ᓔྟˈ✊ৢᠡ䖙
䗳䖒ࠄᣛᅮⱘ䗳ᑺDŽ䖭ᰃЎњ䙓ܡ亳ᴤ⑶
ߎ䴶㉝Ā京ᬷāDŽ
䗳ᑺՓ⫼䰘ӊ䇈ᯢ䗳ᑺՓ⫼䰘ӊ䇈ᯢ
1 ᧙ᢠ䗖ড়Ѣ㓧᜶ⱘ᧙ࡼǃ⏋ড়ǃᤷ
᪡ˈЎ᠔᳝᧙ᢠ䖛ⱘ
ϔℹDŽ⫼Ѣ㊞⌚Ё⏏ࡴ䴶㉝
ᑆ䜡᭭ˈҹঞᑆ䜡᭭Ё⏏ࡴ
⎆ԧDŽ䇋࣓Փ⫼䗳ᑺ1ᣵ᧙ᢠ
ᦝ᧧থ䝉䴶ಶDŽ
2㓧᜶᧙ᢠˈ䗖ড়Ѣ㓧᜶ⱘ᧙ᢠǃᤷ䕗ᖿⱘ
ᦝ᧧᧙ࡼ᪡DŽ⫼Ѣ᧙ᢠᦝ᧧থ䝉
䴶ಶǃ㉬⿴ⱘ㊞⌚㊪ᵰˈࡼ
ೳ䈚݊Ҫ㬀㦰ⱘᤷ䖛ˈᇚ䍋
䜹⊍ߛࠄ䴶㉝Ёˈ᧙ᢠ⿔㭘ᯧ
ⱘ㊞⌚DŽ
4᧙ᢠˈ⫼Ѣ᧙ᢠЁㄝ⿴ᑺⱘ㊞⌚ˈབ᳆
ᠧ⌚༛ⱘ㊞DŽ⫼Ѣ⏋ড়㊪Ϣ䍋䜹⊍ˈ
ҹঞ㲟ⱑЁࡴ㊪˄⫼Ѣࠊ
㲟ⱑ䜹Ⲃ˅DŽᇍ㲟㊩㉝㗠㿔
ᰃЁ䗳DŽ
6ᠧ⌚ˈ䗖ড়ѢЁ䗳ᠧ⌚˄чᵤ˅ᠧথDŽ
чᵤЎ㲟㊩ǃ⫰⫰݊Ҫ㊞⌚ⱘ
᧙ᢠ᪡ⱘ᳔ৢϔℹDŽᇍ㲟㊩㉝
㗠㿔ᰃ催䗳DŽ
8-10ᖿ䗳ᠧ⌚ˈ䗖ড়Ѣᠧথཊ⊍ˈ㲟ⱑ❳⚐
ᠧথ㊪䳰DŽᠧথᇥ䞣ཊ⊍ǃ㲟ⱑˈ
ᖿ䗳ᠧথЎೳ䈚⊹ᠧথ᪡ⱘ᳔ৢϔℹDŽ
⊼ᛣ˖⊼ᛣ˖⫼䗳ᑺ2 ḷ᧙ᢠᦝ䝉
↡䴶Փ⫼݊Ҫ䗳ᑺḷৄᓣᴎᕜ
ৃ㛑⅏ᴎDŽϔ㠀ᚙމϟˈ㶎ᮟ
䴶ಶ䩽ᑨৃಯߚ䩳ݙᅠ៤ᦝ
᧧䴶ಶDŽ
W10523279B.indd 33W10523279B.indd 33 10/31/2012 2:30:43 PM10/31/2012 2:30:43 PM
34
᧙ᢠᴎϢṊⱘ䎱⾏᧙ᢠᴎϢṊⱘ䎱⾏
ᴀৄᓣ᧙ᢠᴎߎᯊᏆ䇗དˈᑇ᧙఼ᙄདϡӮ㾺ṊᑩDŽབᵰ⬅Ѣᶤ⾡ˈ
ᑇ᧙఼㾺њṊᑩ⾏Ṋ䖛䖰ˈᙼৃҹ䕏ᵒℷ䯈䎱DŽ
1. ᢨߎৄᓣ᧙ᢠᴎⱘᦦ༈ˈᮁᓔ⬉⑤DŽ
2.ᇚṊ䰡ᶘ㕂ѢԢԡDŽ
3.㺙Ϟᑇ᧙఼DŽ
4.䇗᧙ᢠẦ߮ད ᑩ㸼䴶ˈᮍ⊩ᰃ
䗚ᯊ䩜䕀ᡁ催ԡˈ乎ᯊ䩜ᰃ䇗Ԣ
ԡDŽҙᖂᡁᡁህ㸠˖䇗ᭈᣝ䪂ϡ
㛑Ꮊেᮟ䕀䍙䖛1/4 90 ᑺDŽ᳔ᐙ
ᑺЎϔϾ 180 ᑺDŽ
5. ᇚṊ䰡ᶘ㕂Ѣ催ԡˈᶹⳟ䯈䎱DŽ
6. ᖙ㽕ᯊ䞡ℹ偸45DŽ
A
䰡Ԣ䰡Ԣ催催
㓈ᡸ⏙⧚㓈ᡸ⏙⧚
Ṋˈᑇ᧙఼ˈᠧ㲟఼䴶ಶ䩽䛑ৃҹ
⫼⛁∈⋫⍸ࠖ⏙⋫DŽབ⫼⋫⍸ࠖৢˈ
䇋⫼⏙∈ކᑆޔˈ✊ৢᓘᑆDŽϡ㽕ᡞ
ᑇ᧙఼⬭᧙ᢠ䕈ϞDŽ
⊼ᛣ˖⊼ᛣ˖ࡵᖙܜᢨߎৄᓣ᧙ᢠᴎⱘᦦ༈ˈ
✊ৢݡ⏙⋕DŽ⫼ᶨ䕃ⱘᏗᣁৄᓣ
᧙ᢠᴎDŽ䇋࣓Փ⫼ᆊ⫼ᎹϮ⏙⋕ࠖDŽ
䇋࣓⍌⊵∈ЁDŽ㒣ᐌᣁ᧙ᢠ䕈ˈ
এᥝϞ䴶⿃㘮ⱘ᠔᳝⅟⏷DŽ
⊼ᛣ˖⊼ᛣ˖བᵰ䇗ᭈᙄᔧˈᑇ᧙఼ϡӮ
⺄ࠄṊᑩṊຕDŽབᵰᑇ᧙఼ᠧ
㲟఼䖛Ѣ䖥Ṋˈᔧᅗ⺄ࠄṊᑩᯊˈ
Ӯ⺼ᥝᤳᑇ᧙఼Ϟⱘ⍖ሖᠧ㲟
఼Ϟⱘ䞥ሲϱDŽ
W10523279B.indd 34W10523279B.indd 34 10/31/2012 2:30:44 PM10/31/2012 2:30:44 PM
35
Ё᭛Ё᭛
᧙ᢠᦤ⼎᧙ᢠᦤ⼎
䗖ᔧᬍব亳䈅ˈҹ䗖ড়ᴀৄᓣ᧙ᢠᴎ䗖ᔧᬍব亳䈅ˈҹ䗖ড়ᴀৄᓣ᧙ᢠᴎ
ৃҹḍᴀкЁⱘ᧙ᢠ䇈ᯢᬍবᙼ୰
⠅ⱘ亳䈅ˈҹ֓䗖ড়KitchenAid ৄᓣ
᧙ᢠᴎDŽ
՟བĀᖿ䗳᧙ᢠāᮍ⊩᳝ᯊг⿄Ў
Āؒ䫔ā⊩ᰃ⧚ᛇⱘЎㅔ㲟㊩བ咘
㲟㊩ⱑ㲟㊩ⱘᭈ᭭⊩DŽℸᮍ⊩ৃ⏋
ܼ⎆ԧᑆⱘ亳ᴤDŽ
ᔧ㽕ࠊ↨䕗ᴖⱘ㲟㊩ᯊˈ䖬ᕫ⫼
Ӵ㒳᧙ᢠ⊩໘⧚DŽܜᡞ㊪ˈ䍋䜹⊍
咘⊍Ҏ䗴ཊ⊍ഛࣔഄ᧙ᢠ៤㊞⢊ˈ
✊ৢݡ⏏ࡴ݊Ҫ䜡᭭DŽЎᴀѻકᰃ
KitchenAidˈϢ݊Ҫ᧙ᢠᴎࠊᓣ
㲟㊩ⱘ᠔䳔ⱘᯊ䯈Ӯ᳝᠔ϡৠDŽϔ㠀
ᴹ䇈ˈKitchenAidࠊ㲟㊩᠔䳔ⱘᯊ
䯈ᰃ݊Ҫક⠠ⱘϔDŽ
ᙼ䳔㽕߽⫼㞾Ꮕⱘ㾖ᆳ㒣偠ˈᴹ⹂ᅮ
᧙ᢠ䖛DŽ㾖ᆳ㊞⌚䴶ಶˈা㽕ᅗ
᳝亳䈅Ёᦣ䗄ⱘ㾖˄՟བĀܝ⒥ⱘڣ
ཊϔḋā˅ˈህذℶ᧙ᢠDŽ
߽⫼Ā䗳ᑺࠊᣛāˈ⹂ᅮ䗖ᔧⱘ᧙
ᢠ䗳ᑺDŽ
⏏ࡴ䜡᭭⏏ࡴ䜡᭭
ӏԩᯊ䛑ᑨሑ䞣䌈䖥Ṋຕ⏏ࡴ䜡᭭ˈ
ϡ㽕Ⳉᇚ䜡᭭צ䕀ࡼⱘ᧙ᢠ఼ϞDŽ
⊼ᛣ˖⊼ᛣ˖བᵰṊ᳔ᑩ䚼ⱘ䜡᭭᧙ᢠϡ
ܙߚˈ߭㸼ᯢ᧙ᢠ఼ṊЁԌᕫϡ
⏅DŽ䇋খ䯙Ā᧙ᢠ఼ϢṊⱘ䯈䎱āDŽ
㲟㊩㉝㲟㊩㉝
⫼ᏺࣙ㺙ⱘ㲟㊩㉝ޚ䴶㊞ᯊˈ᜶䗳
Փ⫼2 ḷˈЁ䗳Փ⫼4ḷ䗳ᑺˈ催䗳
Փ⫼6ḷ䗳ᑺDŽЎњ㦋ᕫ᳔Շᬜᵰˈ
䇋ᣝࣙ㺙䇈ᯢϞ⊼ᯢⱘᯊ䯈䖯㸠᧙ᢠDŽ
⏏ࡴമᵰǃ㨵㧘ᑆ㳰佃∈ᵰ⏏ࡴമᵰǃ㨵㧘ᑆ㳰佃∈ᵰ
ᑨᔧ᧙ᢠ䖛ⱘ᳔ৢ⾦䩳ˈҹ᧙
ᢠ䗳ᑺ⏋ܹԧ᭭DŽ㊞⌚ᑨᔧ䎇
⿴ˈҹܡ⚬⛭䖛Ё∈ᵰമ
ᵰ≝ࠄᑇᑩ䫙ⱘᑩ䚼DŽ㉬ⱘ∈ᵰᑨ
ᔧᠥϞ䴶㉝ˈҹ֓ഛࣔഄߚᏗ㊞
⌚ЁDŽ
⿔㭘⏋ড়⠽⿔㭘⏋ড়⠽
ࣙ䞣⎆ԧⱘ⏋ড়⠽ᑨᔧҹ䕗Ԣⱘ
䗳ᑺ᧙ᢠˈҹܡ⋐DŽা᳝⏋ড়⠽
ব⿴ৢݡᦤ䗳DŽ
W10523279C
© 2012. ֱ⬭᠔᳝ᴗ߽DŽ
11/12
W10523279B.indd 35W10523279B.indd 35 10/31/2012 2:30:45 PM10/31/2012 2:30:45 PM

36
㓺䌶✲G⹏㍲G㞞㩚 ......................................................................................................................... 37
㩚₆㩗G㣪ῂG㌂䟃 ......................................................................................................................... 38
ⶎ㩲G䟊ἆ ...................................................................................................................................... 39
㓺䌶✲G⹏㍲㦮G䔏㰫 ..................................................................................................................... 40
㓺䌶✲G⹏㍲㦮G㣿₆G⏨㧊G㫆㩞₆G㫆Ⱃ䞮₆ ............................................................................. 41
KitchenAid ㏣䛞G㌂㣿䞮₆ ........................................................................................................ 42
⹏㕇G㔲Ṛ ...................................................................................................................................... 42
⹏㍲G㌂㣿 ...................................................................................................................................... 42
㏣☚G㫆㩞G㞞⌊ - 10 Ṗ㰖G㏣☚⯒GṖ㰚G㓺䌶✲G⹏㍲ ............................................................... 43
ὖⰂGG㎎㻯 ................................................................................................................................. 44
ᾦ₆㢖G㣿₆㦮GṚỿ ................................................................................................................. 44
⹏㕇G䕗 .......................................................................................................................................... 45
⳿G㹾⳿G㹾
W10523279B.indd 36W10523279B.indd 36 10/31/2012 2:30:45 PM10/31/2012 2:30:45 PM
37
䞲ῃ㠊䞲ῃ㠊
⽎G㌂㣿G㍺ⳛ㍲⯒G㧮G⽊ὖ䞮㕃㔲㡺⽎G㌂㣿G㍺ⳛ㍲⯒G㧮G⽊ὖ䞮㕃㔲㡺
㩚₆G₆₆G㌂㣿G㔲G┺㦢G㌂䟃㦚G䙂䞾䞮㡂G₆⽎㩗㧎G㞞㩚G㡞G㌂䟃㦚G㠎㩲⋮㩚₆G₆₆G㌂㣿G㔲G┺㦢G㌂䟃㦚G䙂䞾䞮㡂G₆⽎㩗㧎G㞞㩚G㡞G㌂䟃㦚G㠎㩲⋮
㭖㑮䟊㟒G䞿┞┺a㭖㑮䟊㟒G䞿┞┺a
1. ⳾✶G㌂㣿G㍺ⳛ㦚G㑯☛䞮㕃㔲㡺U
2. Ṧ㩚G㥚䠮㦚G㰖䞮₆G㥚䟊SG㓺䌶✲G⹏㍲⯒Gⶒ㧊⋮G㞷㼊㠦G╊⁎㰖GⰞ㕃㔲㡺U
3. 㠊Ⰶ㧊ṖG㌂㣿䞮Ệ⋮G㠊Ⰶ㧊G㭒⼖㠦㍲GṖ㩚G㩲䛞㦚G㌂㣿䞶G➢⓪G㻶㩖䞲G
Ṧ☛㧊G䞚㣪䞿┞┺U
4. ㌂㣿䞮㰖G㞠㦚G➢SG䛞㦚G㧻䂮G⡦⓪G㩲Ệ䞮₆G㩚㠦G⁎ⰂἶG㎎㻯㦚G䞮₆G
㩚㠦G㩚₆G䆮㎒䔎㠦㍲G䝢⩂⁎⯒Gヒ㕃㔲㡺U
5. 㤖㰗㧊⓪G㠦G╕㰖G㞠☚⪳G䞮㕃㔲㡺UG㧎㼊G㌗GV⡦⓪G㓺䌶✲G⹏㍲G㏦㌗G
㥚䠮㦚G㭚㧊₆G㥚䟊G㧧☯䞮⓪G☯㞞G㏦SGⲎⰂ䃊⧓SG㭒ệ㦚G゚⫅䞲G₆䌖G㣿ῂṖG
ᾦ₆㠦G╕㰖G㞠☚⪳G䞮㕃㔲㡺U
6. 㩚₆G䆪✲G⡦⓪G䝢⩂⁎ṖG㏦㌗♮㠞Ệ⋮G㓺䌶✲G⹏㍲ṖG㡺㧧☯䞲G⛺S
⡦⓪G㠊⟺G㔳㦒⪲⧒☚G⟾㠊⥾⪎Ệ⋮G㏦㌗㦚G㧛䧢Gἓ㤆㠦⓪G㓺䌶✲G⹏㍲⯒G
㧧☯㔲䋺㰖GⰞ㕃㔲㡺UG
7. KitchenAidṖGῢ㧻䞮Ệ⋮G䕦ⰺ䞮㰖G㞠⓪G㏣䛞㦚G㌂㣿䞮Ⳋ 䢪㨂SGṦ㩚G⡦⓪G
㌗㦚G㽞⧮䞶G㑮G㧞㔋┞┺U
8. 㓺䌶✲G⹏㍲⯒G㔺㣎㠦㍲G㌂㣿䞮㰖GⰞ㕃㔲㡺U
9. 㩚₆G䆪✲⯒G䌗㧦G⡦⓪G㫆Ⰲ╖G⳾㍲Ⰲ㠦GỎ㼦⚦㰖GⰞ㕃㔲㡺U
㭧㣪G㞞㩚G㰖䂾㭧㣪G㞞㩚G㰖䂾
㓺䌶✲G⹏㍲G㞞㩚㓺䌶✲G⹏㍲G㞞㩚
㌂㣿㧦㦮G㞞㩚ὒG┺⯎G㌂⧢㦮G㞞㩚㦖G⳾⚦G㭧㣪䞿┞┺U㌂㣿㧦㦮G㞞㩚ὒG┺⯎G㌂⧢㦮G㞞㩚㦖G⳾⚦G㭧㣪䞿┞┺U
⽎㌂⓪G㧊GⰺⓊ㠒㠦㍲G⽎G⹏㍲㠦Gὖ䟊G┺㑮㦮G㭧㣪䞲G㞞㩚GⲪ㔲㰖⯒G㩲Ὃ䞮ἶG
㧞㔋┞┺UG䟃㌗G⳾✶G㞞㩚GⲪ㔲㰖⯒G㧮G㧓ἶG⁎╖⪲G➆⧒G㭒㕃㔲㡺U
㧊ộ㦖G㞞㩚GἓἶG₆䢎㧛┞┺U
㧊G₆䢎⓪G㌂㣿㧦GG┺⯎G㌂⧢✺㠦ỢG㌂ⰳG⡦⓪G㌗㠦G㧊⯊ỢG
䞶G㑮G㧞⓪G㧶㨂㩗㧎G㥚䠮㦚Gἓἶ䞿┞┺U
⳾✶G㞞㩚GⲪ㔲㰖⓪G㞞㩚GἓἶG₆䢎㢖Gˈ㥚䠮ˉG⡦⓪GˈἓἶˉG
⧒⓪G㣿㠊㠦G⛺㧊㠊G䚲㔲♿┞┺UG㣿㠊㦮G㦮⹎a
㰖㔲G㌂䟃㦚G㰖㔲G㌂䟃㦚G⁎╖⪲⁎╖⪲G➆⯊㰖G㞠㦚Gἓ㤆SGG➆⯊㰖G㞠㦚Gἓ㤆SG
㌂ⰳ䞮Ệ⋮G㕂ṗ䞲G㌗㦚G╏䞶G㑮G㌂ⰳ䞮Ệ⋮G㕂ṗ䞲G㌗㦚G╏䞶G㑮G
㧞㔋┞┺U㧞㔋┞┺U
㥚䠮㥚䠮
ἓἶἓἶ
G㰖㔲G㌂䟃㦚G㭖㑮G䞮㰖G㞠㦚Gἓ㤆SG㌂ⰳGG㰖㔲G㌂䟃㦚G㭖㑮G䞮㰖G㞠㦚Gἓ㤆SG㌂ⰳG
⡦⓪G㕂ṗ䞲G㌗㦚G╏䞶G㑮G㧞㔋┞┺U⡦⓪G㕂ṗ䞲G㌗㦚G╏䞶G㑮G㧞㔋┞┺U
⳾✶G㞞㩚GⲪ㔲㰖⓪G㧶㨂㩗㧎G㥚䠮㦚G㞢⩺㭒ἶSG㌗GṖ⓻㎇㦚G㭚㧊⓪G⻫㦚G
㞢⩺㭒ἶSG㰖㔲G㌂䟃㦚G㭖㑮䞮㰖G㞠㦚Gἓ㤆㠦G㠊⟺G㧒㧊G㌳䞶G㑮G㧞⓪㰖⯒G
㞢⩺㭣┞┺U
W10523279B.indd 37W10523279B.indd 37 10/31/2012 2:30:45 PM10/31/2012 2:30:45 PM
38
㩚₆㩗G㣪ῂG㌂䟃㩚₆㩗G㣪ῂG㌂䟃
㩚₆㩗G㣪ῂ㌂䟃
㩚㞫aG
220VACG㩚㣿
㭒䕢㑮aG
60Hz
㩫ỿ㏢゚㩚⩻aG500W
㓺䌶✲G⹏㍲㦮G㩚⩻G㏢㣪⨟㦖
㌗䚲G⡦⓪G㧒⩾⻞䢎䕦㠦G㧎㐚♮㠊G
㧞㔋┞┺U
㡆㧻G䆪✲⯒G㌂㣿䞮㰖GⰞ㕃㔲㡺UG
㩚₆G䆪✲ṖG⍞ⶊG㰽㦖Gἓ㤆㠦⓪G
㧦ỿ㦚GṖ㰚G㩚₆G₆㌂G⡦⓪G
㍲゚㓺G₆㌂㠦ỢG⹏㍲GṖ₢㤊GὉ㠦G
㩚₆G䆮㎒䔎⯒G㍺䂮䟊G㭚Gộ㦚G
䌗䞮㕃㔲㡺U
ἓἶἓἶ
Ṧ㩚G㥚䠮Ṧ㩚G㥚䠮
㩧㰖♲G䆮㎒䔎㠦G䝢⩂⁎⯒G㩧㰖♲G䆮㎒䔎㠦G䝢⩂⁎⯒G
↘㦒㕃㔲㡺U↘㦒㕃㔲㡺U
㩧㰖G䞖㦚G㩲Ệ䞮㰖GⰞ㕃㔲㡺U㩧㰖G䞖㦚G㩲Ệ䞮㰖GⰞ㕃㔲㡺U
㠊╧䎆⯒G㌂㣿䞮㰖GⰞ㕃㔲㡺U㠊╧䎆⯒G㌂㣿䞮㰖GⰞ㕃㔲㡺U
㡆㧻G䆪✲⯒G㌂㣿䞮㰖GⰞ㕃㔲㡺U㡆㧻G䆪✲⯒G㌂㣿䞮㰖GⰞ㕃㔲㡺U
㌂㣿G㍺ⳛ㦚G➆⯊㰖G㞠㦚Gἓ㤆SG㌂㣿G㍺ⳛ㦚G➆⯊㰖G㞠㦚Gἓ㤆SG
㌂ⰳ㧊⋮G䢪㨂G⡦⓪GṦ㩚㦚G㌂ⰳ㧊⋮G䢪㨂G⡦⓪GṦ㩚㦚G
㽞⧮䞶G㑮G㧞㔋┞┺U㽞⧮䞶G㑮G㧞㔋┞┺U
10. ㎎㻯㦚G䞮₆G㩚㠦G㓺䌶✲G⹏㍲㠦㍲G䘟䕦Gᾦ₆SG㍶㨂G䢒䞿₆G⡦⓪G㭓G
ἶⰂ⯒G㩲Ệ䞮㕃㔲㡺U
11. 㞞㩚㦚G㺛㧚㰖ἶG㧞⓪G㌂⧢㧊G㩚₆G㣿䛞㦮G㌂㣿㠦G╖䞮㡂GṦ☛䞮Ệ⋮G
㰖䂾㦚G㩲Ὃ䞮㰖G㞠㦚Gἓ㤆SG⽎G㩚₆G㣿䛞㦖GⶒⰂ㩗SGṦṗ㩗SG㩫㔶㩗G⓻⩻㧊G
㫇䞮Ệ⋮Gἓ䠮㧊⋮G㰖㔳㧊G㫇䞲G㌂⧢O㠊Ⰶ㧊G䙂䞾P㧊G㌂㣿䞶G㑮G㧞☚⪳G
ἶ㞞♮㰖G㞠㞮㔋┞┺U
12. 㠊Ⰶ㧊ṖG㩚₆G㣿䛞㦚GṖ㰖ἶG⏖㰖G㞠☚⪳GṦ☛♮㠊㟒G䞿┞┺U
13. ㏣䛞㦚Gᾦ䢮䞮Ệ⋮G㌂㣿G㔲G㤖㰗㧊⓪G䛞㠦G㩧⁒䞮₆G㩚G㩚₆G㣿䛞㦮G
㓺㥚䂮⯒G⊚ἶG㩚㤦㦚GⰂ䞮㕃㔲㡺U
ˈ㩚㤦䆪✲ṖG䕢㏦♲Gἓ㤆㠦⓪G㥚䠮㧊G㌳₆㰖G㞠☚⪳G䞮₆G㥚䞮㡂G✲㔲G
㩲㫆㧦⋮G⁎G╖Ⰲ㩦G⡦⓪G㥶㧦ỿG₆㑶㧦㠦G㦮䟊G䆪✲⯒Gᾦ䢮G䞮㕃㔲㡺Uˉ
⽎G㌂㣿G㍺ⳛ㍲⯒G㧮G⽊ὖ䞮㕃㔲㡺⽎G㌂㣿G㍺ⳛ㍲⯒G㧮G⽊ὖ䞮㕃㔲㡺
W10523279B.indd 38W10523279B.indd 38 10/31/2012 2:30:45 PM10/31/2012 2:30:45 PM

39
䞲ῃ㠊䞲ῃ㠊
ⶎ㩲G䟊ἆⶎ㩲G䟊ἆ
㍲゚㓺G㎒䎆㠦G㩚䢪⯒G䞮₆G㩚㠦G㍲゚㓺G㎒䎆㠦G㩚䢪⯒G䞮₆G㩚㠦G
┺㦢G㌂䟃㦚G㧓㠊G⽊㕃㔲㡺UG┺㦢G㌂䟃㦚G㧓㠊G⽊㕃㔲㡺UG
1. 㓺䌶✲G⹏㍲⯒G㌂㣿䞮⓪G☯㞞G
㡊㧊G㌳䞶G㑮G㧞㔋┞┺UGὒ䞮G
㌗䌲㠦㍲G⹏㕇G㔲Ṛ㧊G₎㠊㰞Gἓ㤆SG
㡊⪲G㧎䟊G㓺䌶✲G⹏㍲㦮G㌗⯒G
䘎㞞䞮ỢGⰢ㰞G㑮G㠜㦚G㑮☚G
㧞㔋┞┺UG㧊⩂䞲G䡚㌗㦖G
㩫㌗㧛┞┺U
2. 㓺䌶✲G⹏㍲⓪G䔏䧞G㔶䛞㧒Gἓ㤆㠦SG
㧦⁏㩗㧎G⌚㌞⯒G㿲䞶G㑮G
㧞㔋┞┺UG㧊⓪G㩚₆G⳾䎆G㔳㠦㍲G
Ὃ䐋㩗㧎G䡚㌗㧛┞┺U
3. 䘟䕦Gᾦ₆ṖG㣿₆㠦G➀䧦Gἓ㤆SG
㓺䌶✲G⹏㍲㦮G㧧☯㦚GⲞ㿪㕃㔲㡺UG
ˈᾦ₆㢖G㣿₆㦮GṚỿˉG䟃㦚G
㺎㫆䞮㕃㔲㡺U
㓺䌶✲G⹏㍲ṖG㡺☯㧧䞮Ệ⋮G㧧☯㦚G㓺䌶✲G⹏㍲ṖG㡺☯㧧䞮Ệ⋮G㧧☯㦚G
䞮㰖G㞠㦚Gἓ㤆SG┺㦢G㌂䟃㦚G䞮㰖G㞠㦚Gἓ㤆SG┺㦢G㌂䟃㦚G
䢫㧎䞮㔲₆G⧣┞┺a䢫㧎䞮㔲₆G⧣┞┺a
- 㓺䌶✲G⹏㍲㦮G䝢⩂⁎ṖG↘䡖G
㧞⓪Ṗf
- 㩫㌗㩗㧎G㓺䌶✲G⹏㍲㠦G㡆ἆ♲
㩚₆G䣢⪲㠦G䜾㯞ṖG㧞⓪ṖfG
䣢⪲㹾┾₆G㌗㧦ṖG㧞㦚Gἓ㤆S
䣢⪲ṖG╁䡖G㧞⓪㰖G䢫㧎䞮㕃㔲㡺U
- 㓺䌶✲G⹏㍲⯒ ˈ0ˉGOℒ㰦PG㥚䂮㠦
10-15㽞GṖ⨟G⚪G┺㦢㠦G┺㔲G
䅲㕃㔲㡺UG⹏㍲ṖG㡂㩚䧞G㧧☯㦚G
㔲㧧䞮㰖G㞠㦚Gἓ㤆SG┺㔲G䅲₆G
㩚㠦 30GṖ⨟G⌟ṗG䞮㕃㔲㡺U
ⶎ㩲ṖG㌗₆G䟃⳿G㭧㦮G䞮⋮㠦G
䟊╏♮㰖G㞠㦚Gἓ㤆SGKitchenAid
⽊㯳㍲⯒G㧓㠊⽊㕃㔲㡺UG㏢ⰺ㩦㦖G
㍲゚㓺⯒G㩲Ὃ䞮㰖G㞠㦒⸖⪲G㓺䌶✲G
⹏㍲⯒G㏢ⰺ㩦㦒⪲G䛞䞮㰖G
Ⱎ㕃㔲㡺U
W10523279B.indd 39W10523279B.indd 39 10/31/2012 2:30:45 PM10/31/2012 2:30:45 PM
40
㓺䌶✲G⹏㍲㦮G䔏㰫㓺䌶✲G⹏㍲㦮G䔏㰫
㣿₆G⏨㧊G㫆㩞G㣿₆G⏨㧊G㫆㩞G
⩞⻚GO⽊㧊㰖G㞠㦢P⩞⻚GO⽊㧊㰖G㞠㦢P
ᾦ₆G㿫ᾦ₆G㿫
㓺䎢㧎Ⰲ㓺G㓺䕎G㓺䎢㧎Ⰲ㓺G㓺䕎G
䢒䞿₆䢒䞿₆
6,9L (7 qt)
㓺䎢㧎Ⰲ㓺G㓺䎢㧎Ⰲ㓺G
㓺䕎G㣿₆㓺䕎G㣿₆
⋮㍶䡫G㭓G⋮㍶䡫G㭓G
ἶⰂἶⰂ
䘟䕦Gᾦ₆䘟䕦Gᾦ₆
ἶ㩫G䞖ἶ㩫G䞖
㣿₆㰖㰖╖㣿₆㰖㰖╖
ᾦ₆G⏨㧊ᾦ₆G⏨㧊
㫆㩞G⋮㌂㫆㩞G⋮㌂
⳾䎆G䠺✲⳾䎆G䠺✲
㣿₆G㏦㧷㧊㣿₆G㏦㧷㧊
O⳾◎㠦G➆⧒GO⳾◎㠦G➆⧒G
┺⯒G㑮G㧞㦢P┺⯒G㑮G㧞㦢P
㧻㹿㣿G䠞ぢ㧻㹿㣿G䠞ぢ
Oˈ㧻㹿ˉG㩞G㺎㫆POˈ㧻㹿ˉG㩞G㺎㫆P
㧻㹿㣿G㏦㧷㧊㧻㹿㣿G㏦㧷㧊
㿲G㰖╖㿲G㰖╖
㏣☚㏣☚
㫆㩞㫆㩞
⩞⻚⩞⻚
W10523279B.indd 40W10523279B.indd 40 10/31/2012 2:30:45 PM10/31/2012 2:30:45 PM
41
䞲ῃ㠊䞲ῃ㠊
㓺䌶✲G⹏㍲㦮G㣿₆G⏨㧊G㫆㩞₆G㫆Ⱃ䞮₆㓺䌶✲G⹏㍲㦮G㣿₆G⏨㧊G㫆㩞₆G㫆Ⱃ䞮₆
㣿₆G㧻㹿䞮₆㣿₆G㧻㹿䞮₆
1. ㏣☚G㫆㩞₆⯒ “0” (Off) 㦒⪲G☢Ⰲ㕃㔲㡺U
2. 㓺䌶✲G⹏㍲㦮G䝢⩂⁎⯒GㆧỆ⋮G㩚₆G
Ὃ 㦚G㭧┾䞮㕃㔲㡺U
3. 㣿₆G⏨㧊G㫆㩞₆G⩞⻚⯒G㞚⧮㴓G
㥚䂮㠦G⚦㕃㔲㡺U
4. 㣿₆G㰖㰖╖⯒Gἶ㩫G䞖㠦Gⰴ㿪㕃㔲㡺U
5. 㣿₆G䞖㧊G㓺䝚ⰗGỎ㐶㠦GỎⰂ☚⪳G㣿₆G
✍㦚G㞚⧮㴓㦒⪲G③⩂㭒㕃㔲㡺U
6. ⹏㕇㦚G䞮₆G㩚㠦G㣿₆⯒G㥚⪲G
㢂Ⰲ㕃㔲㡺U
7. 䝢⩂⁎⯒G㩧㰖♲G䆮㎒䔎㠦G↘Ệ⋮G
㩚₆⯒G┺㔲GὋ 䞮㕃㔲㡺U
㣿₆G䌞㹿䞮₆㣿₆G䌞㹿䞮₆
1. ㏣☚G㫆㩞₆⯒ “0” (Off) 㦒⪲G☢Ⰲ㕃㔲㡺U
2. 㓺䌶✲G⹏㍲㦮G䝢⩂⁎⯒GㆧỆ⋮G㩚₆G
Ὃ 㦚㭧┾䞮㕃㔲㡺.
3. 㣿₆G⏨㧊G㫆㩞₆G⩞⻚⯒G㞚⧮㴓G
㥚䂮㠦G⚦㕃㔲㡺U
4. 䘟䕦Gᾦ₆SG㍶䡫G䢒䞿₆G⡦⓪
G㭓GἶⰂ⯒Gℒ⌊㕃㔲㡺U
5. 㣿₆G㏦㧷㧊⯒G㧷ἶG㑮㰗G㥚㴓㦒⪲G
✺㠊㢂⩺㍲Gἶ㩫㣿G䞖㠦㍲Gヒ⌊㕃㔲㡺U
㣿₆G⏨㧊₆㣿₆G⏨㧊₆
1. ⩞⻚⯒G㑮㰗G㥚㴓㦒⪲G☢Ⰲ㕃㔲㡺U
2. ⹏㕇㦚G䞶G➢G㣿₆⓪G䟃㌗G⏨㡂㪎㍲G
㧶⁞G㥚䂮㠦G㧞㠊㟒G䞿┞┺U
㣿₆G⌄㿪₆㣿₆G⌄㿪₆
1. ⩞⻚⯒G⛺㴓G㞚⧮⪲G☢Ⰲ㕃㔲㡺U
䘟䕦Gᾦ₆SG㍶䡫G䢒䞿₆SG䘟䕦Gᾦ₆SG㍶䡫G䢒䞿₆SG
⡦⓪G㭓GἶⰂG㧻㹿䞮₆⡦⓪G㭓GἶⰂG㧻㹿䞮₆
1. ㏣☚㫆㩞₆⯒ “0” (Off) 㦒⪲G☢Ⰲ㕃㔲㡺U
2. 㓺䌶✲G⹏㍲㦮G㩚₆G䝢⩂⁎⯒GㆧỆ⋮G
㩚₆GὋ 㦚G㭧┾䞮㕃㔲㡺U
3. 䘟䕦Gᾦ₆⯒G
ᾦ₆G㿫㠦Gⰴ㿮G
┺㦢GṖ⓻䞲G䞲G
㥚㴓㦒⪲G₠㧊G
⯊㕃㔲㡺U
4. ᾦ₆⯒G㡺⯎㴓㦒⪲G☢⩺㍲Gᾦ₆G
㿫㦮G䞖㠦GỎⰂ☚⪳G䞮㕃㔲㡺U
5. 䝢⩂⁎⯒G㩧㰖♲G䆮㎒䔎㠦G↘Ệ⋮G
㩚₆⯒G┺㔲GὋ 䞮㕃㔲㡺U
䘟䕦Gᾦ₆SG㍶䡫G䢒䞿₆SG䘟䕦Gᾦ₆SG㍶䡫G䢒䞿₆SG
⡦⓪G㭓GἶⰂG䌞㹿䞮₆⡦⓪G㭓GἶⰂG䌞㹿䞮₆
1. ㏣☚㫆㩞₆⯒ “0” (Off) 㦒⪲G☢Ⰲ㕃㔲㡺U
2. 㓺䌶✲G⹏㍲㦮G䝢⩂⁎⯒GㆧỆ⋮G㩚₆G
Ὃ 㦚G㭧┾䞮㕃㔲㡺U
3. ᾦ₆⯒GṖ⓻䞲G䞲G㥚㴓㦒⪲G₠㧊G
⯎G┺㦢㣒㴓㦒⪲G☢Ⰲ㕃㔲㡺U
4. ᾦ₆⯒Gᾦ₆G㿫㠦㍲Gヒ⌊㕃㔲㡺U
5. 䝢⩂⁎⯒G㩧㰖♲G䆮㎒䔎㠦G↘Ệ⋮G
㩚₆⯒G┺㔲GὋ 䞮㕃㔲㡺U
㌗㠛㣿G㓺䌶✲G⹏㍲㦮G㏣☚㫆㩞₆㢖G㌗㠛㣿G㓺䌶✲G⹏㍲㦮G㏣☚㫆㩞₆㢖G
⩞⻚G㰖㰖╖⩞⻚G㰖㰖╖
㓺䌶✲G⹏㍲⓪G㨂⬢ṖG䓖㠊⋮㡺⓪Gộ㦚G
㾲㏢䢪䞮₆G㥚䟊SG㍶䌳䞲G㏣☚㠦G☚╂䞶G
➢₢㰖G⹏㍲⯒G㻲㻲䧞G㔲☯䞮⓪G₆⓻㦚G
Ṗ㰖ἶG㧞㔋┞┺UG㨂⬢ṖG䓖㠊⋮㢂G
Ṗ⓻㎇㦚G▪㤇G㭚㧊₆G㥚䟊SG䟃㌗G㏣☚G1
㠦㍲G⹏㕇㦚G㔲㧧䞲G┺㦢SG䞚㣪㠦G➆⧒G
㩦㹾G▪G⏨㦖G㏣☚⪲G㢄₆㕃㔲㡺UG
ˈ㏣☚G㫆㩞G㞞⌊ˉG䟃㦚G㺎㫆䞮㕃㔲㡺UG
㧦☯G㨂㍺㩫G⳾䎆G⽊䢎G₆⓻㧦☯G㨂㍺㩫G⳾䎆G⽊䢎G₆⓻
㓺䌶✲G⹏㍲ṖGὒ䞮⪲G㧎䟊Gṧ㧦₆G
Ⲟ㿲Gἓ㤆SG㏣☚㫆㩞₆G⩞⻚⯒G“0” (Off)
㦒⪲G⹎㕃㔲㡺UGⳝG㧊G㰖⋮ⳊG㓺䌶✲G
⹏㍲⓪G㧦☯㦒⪲GⰂ㎡♿┞┺UG㏣☚㫆㩞₆G
⩞⻚⯒G㤦䞮⓪G㏣☚⪲G⹖㠊㍲G⹏㕇㦚G
Ἒ㏣䞮㕃㔲㡺UG㓺䌶✲G⹏㍲ṖG㨂㔲☯♮㰖G
㞠㦚Gἓ㤆SGˈⶎ㩲G䟊ἆ䞮₆ˉG䟃㦚G
㺎㫆䞮㕃㔲㡺U
ἓἶἓἶ
Ṧ㩚G㥚䠮Ṧ㩚G㥚䠮
㩧㰖♲G䆮㎒䔎㠦G䝢⩂⁎⯒G㩧㰖♲G䆮㎒䔎㠦G䝢⩂⁎⯒G
↘㦒㕃㔲㡺U↘㦒㕃㔲㡺U
㩧㰖G䞖㦚G㩲Ệ䞮㰖GⰞ㕃㔲㡺U㩧㰖G䞖㦚G㩲Ệ䞮㰖GⰞ㕃㔲㡺U
㠊╧䎆⯒G㌂㣿䞮㰖GⰞ㕃㔲㡺U㠊╧䎆⯒G㌂㣿䞮㰖GⰞ㕃㔲㡺U
㡆㧻G䆪✲⯒G㌂㣿䞮㰖GⰞ㕃㔲㡺U㡆㧻G䆪✲⯒G㌂㣿䞮㰖GⰞ㕃㔲㡺U
㌂㣿G㍺ⳛ㦚G➆⯊㰖G㞠㦚Gἓ㤆SG㌂㣿G㍺ⳛ㦚G➆⯊㰖G㞠㦚Gἓ㤆SG
㌂ⰳ㧊⋮G䢪㨂G⡦⓪GṦ㩚㦚G㌂ⰳ㧊⋮G䢪㨂G⡦⓪GṦ㩚㦚G
㽞⧮䞶G㑮G㧞㔋┞┺U㽞⧮䞶G㑮G㧞㔋┞┺U
W10523279B.indd 41W10523279B.indd 41 10/31/2012 2:30:46 PM10/31/2012 2:30:46 PM
42
KitchenAid ㏣䛞G㌂㣿䞮₆㏣䛞G㌂㣿䞮₆
⽊䐋G¥GỎ㶟䞲G䢒䞿ⶒ㦚G㥚䞲G䘟䕦Gᾦ₆a
G䅖㧊䋂G゚㓺䌍
G䋂ⰒG䝚⪲㓺䕛G㯟㍳Gニ
G䃪❪GG⹎䔎G⪲䝚
G䈶䋺G㦒GṦ㧦
G䕢㧊G㭓
Ὃ₆⯒G䞾㥶䞶G䞚㣪ṖG㧞⓪G䢒䞿ⶒ㦚G㥚䞲G㍶䡫G䢒䞿₆a
G╂ẖGG㓺䙆㰖G䅖㧊䋂
G╂ẖG䧆㧦GG㠪㩺G䛎✲G䅖㧊䋂
GỎ㶟䞲G䋂ⰒGGⰞ㣪⍺㯞
G⽊㧒✲G䝚⪲㓺䕛G㏢⨟㦮G䃪❪
㧊㓺䔎G㭓㦮G䢒䞿ὒG㭓㦚G㥚䞲G㭓GἶⰂ
GニGG䄺䞒G䅖㧊䋂
G⪺ニGG㏢䡫G⪺ニ
⹏㕇G㔲Ṛ⹏㕇G㔲Ṛ
KitchenAid 㓺䌶✲G⹏㍲⓪G╖┺㑮㦮G
┺⯎G㩚₆㔳G㓺䌶✲G⹏㍲⽊┺G▪G
ザ⯊ἶG㢚㩚䞮ỢG⹏㕇㦚G㑮䟟䞿┞┺UG
⁎⩂⸖⪲G╖┺㑮㦮G㫆Ⰲ⻫㠦㍲G㰖⋮䂲G
ᾦ㦚G䞒䞮₆G㥚䟊G⹏㕇G㔲Ṛ㦚G
㫆㩞䟊㟒G䞿┞┺UG㡞⯒G✺ⳊSG䅖㧊䋂G
㭓㦚G䞶G➢G⹏㕇 㔲Ṛ㦖G┺⯎G㓺䌶✲G
⹏㍲㦮G㩞㧊ⳊG♿┞┺U
⹏㍲G㌂㣿⹏㍲G㌂㣿
㺎ἶa㺎ἶaG㓺䌶✲G⹏㍲ṖG㧧☯䞮⓪G
☯㞞G㣿₆⯒G⁗㰖GⰞ㕃㔲㡺U
㣿₆㢖Gᾦ₆⓪G㧦㭒G⁗㰖G
㞠㞚☚G㢚㩚䞲G䢒䞿㦚G㩲Ὃ䞮☚⪳G
❪㧦㧎♮㠊G㧞㔋┞┺UG㧒㩗㦒⪲G
⹏㕇㦚G䞮⓪G☯㞞G㣿₆⯒G䞲⚦G⻞G
⁗⓪Gộ㦒⪲G㿿䞿┞┺UG⁗₆G㩚㠦G
㓺䌶✲G⹏㍲⯒Gℒ㭒㕃㔲㡺UG
㓺䌶✲G⹏㍲⓪G㌂㣿䞮⓪G☯㞞G㡊㧊G
㌳䞶G㑮G㧞㔋┞┺UGὒ䞮G㌗䌲㠦㍲G
⹏㕇G㔲Ṛ㧊G₎㠊㰞Gἓ㤆SG㡊⪲G㧎䟊G
㓺䌶✲G⹏㍲㦮G㌗⯒G䘎㞞䞮ỢGⰢ㰞G
㑮G㠜㦚G㑮☚G㧞㔋┞┺UG㧊⩂䞲G䡚㌗㦖G
㩫㌗㧛┞┺U
㓺䌶✲G⹏㍲㠦Gὒ䞮ṖGỎⰊGἓ㤆SG
㏦㌗㦚GⰟ₆G㥚䟊G⹏㍲ṖG㧦☯㦒⪲G
ℒ㰧┞┺UGˈ㧦☯G㨂㍺㩫G⳾䎆G⽊䢎G
₆⓻ˉG䟃㦚G㺎㫆䞮㕃㔲㡺U
ἓἶἓἶ
㌗G㥚䠮㌗G㥚䠮
ᾦ₆⯒GⰢ㰖₆G㩚㠦G⹏㍲㦮Gᾦ₆⯒GⰢ㰖₆G㩚㠦G⹏㍲㦮G
㩚₆G䝢⩂⁎⯒Gㆧ㦒㕃㔲㡺U㩚₆G䝢⩂⁎⯒Gㆧ㦒㕃㔲㡺U
㫆㕂䞮㰖G㞠㦒ⳊGἾ㩞SG㧦㌗G⡦⓪G㫆㕂䞮㰖G㞠㦒ⳊGἾ㩞SG㧦㌗G⡦⓪G
䌖㌗㦚G㧛㦚G㑮G㧞㔋┞┺U䌖㌗㦚G㧛㦚G㑮G㧞㔋┞┺U
W10523279B.indd 42W10523279B.indd 42 10/31/2012 2:30:46 PM10/31/2012 2:30:46 PM
43
䞲ῃ㠊䞲ῃ㠊
㏣☚G㫆㩞G㞞⌊㏣☚G㫆㩞G㞞⌊ - 10GṖ㰖G㏣☚⯒GṖ㰚G㓺䌶✲G⹏㍲GGṖ㰖G㏣☚⯒GṖ㰚G㓺䌶✲G⹏㍲G
㔲☯G㔲㠦G㨂⬢ṖG䓖㠊⋮㡺Ệ⋮GⰦ㧊G
㏵㞚㡺⯊⓪Gộ㦚G䞒䞮₆G㥚䟊SG㓺䌶✲G
⹏㍲⓪G㩖㏣㠦㍲G㧦☯㦒⪲G㔲☯♲G┺㦢SG
㾲㩗G㎇⓻㦚G㥚䟊G㔶㏣䞮ỢG㍶䌳䞲G
㏣☚⪲G⏨㞚㰖⓪G䔏㰫㦚GṖ㰖ἶG
㧞㔋┞┺UG
㏣☚G㣿☚G㏣䛞G㍺ⳛ㏣☚G㣿☚G㏣䛞G㍺ⳛ
1 䥮㩩₆ ⓦⰆG䥮㩩₆SG䢒䞿䞮₆SG㦒₾₆SG
⳾✶G⹏㕇Gὒ㩫㦮㔲㧧UG㭓㠦G
ⰦὒGⰞ⯎G㨂⬢G㿪Ṗ䞮₆GG
Ⱎ⯎G㨂⬢㠦G㞷㼊⯒G㿪Ṗ䞶G➢G
㌂㣿䞮㕃㔲㡺UG㏣☚G1㦚G㧊㓺䔎G
㭓㦚G⹏㕇䞮Ệ⋮G㭓䞶G
➢G㌂㣿䞮㰖GⰞ㕃㔲㡺U
2 ⓦⰆG⹏㕇GGGⓦⰆG⹏㕇SG㦒₾₆SGザ⯎G㭓䞮
₆䥮㩩₆G㧊㓺䔎G㭓SGỎ㶟䞲G
㭓ὒG䃪❪G⹏㕇SGṦ㧦G⡦⓪G┺⯎G
㺚㏢G㦒₾₆G㔲㧧SG⹖Ṗ⬾㠦G
㑒䔎┳G㧮⧒G⍹₆SGⶓỆ⋮G㰞䗓䞲G
㭓㦚G⹏㕇䞮⓪G◆G㌂㣿䞮㕃㔲㡺U
4 ⹏㕇SG 䈶䋺㢖Gṯ㧊G㭧ṚG㩫☚⪲GỎ㶟䞲GG
ᾦ䞮₆GG㭓G⹏㕇㣿ᾦ䞮₆UGⲎ⨃㦚G
GGGG㥚䟊G㍺䌫ὒ 㑒䔎┳㦚Gἆ䞿㔲䋺ἶG
GGGGἶG╂ẖG䧆㧦㠦G㍺䌫㦚G㿪Ṗ䞶G
GGGG➢G㌂㣿䞮㕃㔲㡺UG䅖㧊䋂G⹏㕇㣿G
GGGG㭧ṚG㏣☚UG
6 ᾦ䞮₆S 㭧ṚG㏣☚㦮Gᾦ䞮₆O䋂ⰒG⍹₆P
䋂ⰒG⍹₆GG⡦⓪G䥮㩩₆G䅖㧊䋂SG☚⍱GG
GGGG₆䌖G㭓㦮G⹏㕇㦚GⰞⶊⰂ䞶G➢GG
GGGG㌂㣿䞮㕃㔲㡺UG䅖㧊䋂G⹏㕇㣿Gἶ㏣UG
8-10 ザ⯎Gᾦ䞮₆ 䋂ⰒSG╂ẖG䧆㧦SG⽊㧒✲
䥮㩩₆S 䝚⪲㓺䕛G䥮㩩₆G㣿 ㏢⨟㦮G
ザ⯎G䥮㩩₆ 䋂ⰒSG╂ẖ 䧆㧦G䥮㩩₆G㣿G⡦⓪G
GGGG㦒GṦ㧦㦮GⰞⶊⰂG䥮㩩₆G㣿U
㺎ἶaG㺎ἶaG㧊㓺䔎G㭓㦚G⹏㕇䞮Ệ
⋮G㭓䞶G➢G㏣☚G2 ⯒G㌂㣿䞮
㕃㔲㡺UG┺⯎G㏣☚⯒G㌂㣿䞮ⳊG
㓺䌶✲G⹏㍲ṖGἶ㧻G⋶GṖ⓻㎇
㧊G⏨㞚㰧┞┺UG⋮㍶䡫G㭓Gἶ
Ⰲ⓪ 4 G㧊⌊㠦G╖┺㑮㦮G㧊
㓺䔎G⹖Ṗ⬾G㭓㦚G䣾㥾㩗㦒
⪲G㭓䞿┞┺U
W10523279B.indd 43W10523279B.indd 43 10/31/2012 2:30:47 PM10/31/2012 2:30:47 PM
44
ᾦ₆㢖G㣿₆㦮GṚỿᾦ₆㢖G㣿₆㦮GṚỿ
⽎G㓺䌶✲G⹏㍲⓪G䘟䕦Gᾦ₆ṖG㣿₆G┻㠦㍲G㞚㭒G㧧㦖GṚỿ㦚G㥶㰖䞮☚⪳G
Ὃ㧻㠦㍲G㫆㩫♮㠊G㧞㔋┞┺UG㠊⟺G㤦㧎㦒⪲SG䘟䕦Gᾦ₆ṖG㣿₆㦮G┻㠦G
╕Ệ⋮G㣿₆㠦㍲G⍞ⶊG⟾㠊㪎G㧞⓪Gἓ㤆SG㓓ỢGṚỿ㦚G㫆㩫䞶G㑮G㧞㔋┞┺UG
1. 㓺䌶✲G⹏㍲㦮G㩚₆G䝢⩂⁎⯒GㆧỆ⋮G
㩚₆GὋ 㦚G㭧┾䞮㕃㔲㡺U
2. 㣿₆G⏨㧊G㫆㩞₆G⩞⻚⯒G㞚⧮㴓G
㥚䂮㠦G⚦㕃㔲㡺U
3. 䘟䕦Gᾦ₆⯒G㧻㹿䞮㕃㔲㡺U
4. ⋮㌂ (A)⯒G㔲ἚG╖G䟻㦒⪲G☢⩺㍲G
㣿₆⯒G㢂ⰂỆ⋮G㔲ἚG䟻㦒⪲G
☢⩺㍲G㣿₆⯒G⌄㿪⓪G㔳㦒⪲SG
䘟䕦Gᾦ₆ṖG✺㠊㢂⩺㰚G㣿₆㦮G
┻G䚲Ⳋ㠦G╕㰖G㞠㦚G㩫☚⪲ⰢG
㫆㩞䞮㕃㔲㡺UG㟓ṚG☢Ⰲ₆ⰢG䞮ⳊG
♿┞┺aG⋮㌂⓪ 㠊ⓦG䟻㦒⪲☚G
1/4G䣢㩚G(90☚) 㧊㌗G☢㞚Ṗ㰖G
㞠㔋┞┺UGO㩚㼊G㫆㩫G⻪㥚⓪G
1/2 䣢㩚G⡦⓪ 180☚G㧛┞┺UP
5. Ṛỿ㦚G䢫㧎䞮⩺ⳊG㣿₆G⏨㧊G㫆㩞₆G
⩞⻚⯒G㥚㴓G㥚䂮㠦G⚦㕃㔲㡺U
6. 䞚㣪䞶Gἓ㤆SG┾Ἒ 4㢖 5⯒G
♮䛖㧊䞮㕃㔲㡺U
A
㣿₆G⌄㿪₆㣿₆G⌄㿪₆㣿₆G⏨㧊₆㣿₆G⏨㧊₆
ὖⰂGG㎎㻯ὖⰂGG㎎㻯
㣿₆SG㓺䎢㧎Ⰲ㓺G㓺䕎G䘟䕦Gᾦ₆SG
㍶㨂G䢒䞿₆㢖G⋮㍶䡫G㭓GἶⰂ⓪G
゚㢖G▪㤊ⶒ⪲G㻶㩖䧞G㞑㦖G┺㦢㠦G
Ⱎ⯊₆G㩚㠦G㧮G䡏ῂ㠊G㭒㕃㔲㡺UG
ᾦ₆⯒Gᾦ₆G㿫㠦G⏩㞚⚦㰖G
Ⱎ㕃㔲㡺UG
㺎ἶaG㺎ἶaG㎎㻯䞮₆G㩚㠦G䟃㌗G
㓺䌶✲G⹏㍲㦮G䝢⩂⁎⯒Gュ⓪㰖G
䢫㧎䞮㕃㔲㡺UG㓺䌶✲G⹏㍲⯒G
✲⩓ἶG㩬㦖G㻲㦒⪲G┼㞚G㭒㕃㔲㡺UG
Ṗ㩫㣿V㌗㠛㣿G㎎㩲⯒G㌂㣿䞮㰖G
Ⱎ㕃㔲㡺UGⶒ㠦G╊⁎㰖GⰞ㕃㔲㡺UG
㧦㭒Gᾦ₆G㿫㦚G┼㞚⌊㠊㍲G㿫㩗♶G
㑮G㧞⓪G㹢ℒ₆⯒G㩲Ệ䞮㕃㔲㡺U
㺎ἶa㺎ἶaG㩗㩞䞮ỢG㫆㩞♮ⳊSG䘟䕦G
ᾦ₆⓪G㣿₆㦮G┻㧊⋮G㡜Ⳋ㠦G
╕㰖G㞠ỢG♿┞┺UG䘟䕦Gᾦ₆G
⡦⓪G㍶䡫G䢒䞿₆ṖG㣿₆㦮G┻㦚G
⚦✲ⰊG㩫☚⪲GṖ₢㤎Gἓ㤆SGᾦ₆G
⡦⓪G䢒䞿₆ṖGⰞ⳾♶G㑮G㧞㔋┞┺U
W10523279B.indd 44W10523279B.indd 44 10/31/2012 2:30:48 PM10/31/2012 2:30:48 PM
45
䞲ῃ㠊䞲ῃ㠊
⹏㕇G䕗⹏㕇G䕗
⽎G⹏㍲⪲G㫆Ⰲ䞮₆⽎G⹏㍲⪲G㫆Ⰲ䞮₆
KitchenAid 㓺䌶✲G⹏㍲⪲G䅖㧊䋂⯒G
Ⱒ✺G㑮G㧞⓪G㡂⩂GṖ㰖G⻫㧊G
㧞㔋┞┺UG
㡞⯒G✺ⳊSGˈザ⯎G⹏㕇ˉG⻫GO➢➢⪲G
ˈ►䝚ˉG⻫㧊⧒ἶ☚G䞾PG㦖G䢿㌟G
䅖㧊䋂⋮G⺇㌟G䅖㧊䋂㢖Gṯ㦖GṚ┾䞲G
䅖㧊䋂⯒GⰢ✺₆㠦G㧊㌗㩗㧛┞┺UG㧊G
⻫㠦㍲⓪G䞲G┾Ἒ㠦㍲GⰞ⯎G㨂⬢㢖G
╖G⡦⓪G⳾✶G㞷㼊G㎇㦚G䢒䞿䞶G
䞚㣪ṖG㧞㔋┞┺UG
䏶⯊䎢㢖Gṯ㦖G▪G㩫㎇㧊G䞚㣪䞲G
䅖㧊䋂⓪G㩚䐋㩗㧎G䅖㧊䋂G⹏㕇G
⻫㦚G㌂㣿䟊㍲G㫆Ⰲ䟊㟒G䞿┞┺UG
㍺䌫ὒG㑒䔎┳SG⻚䎆G⡦⓪GⰞṖⰆ㦖G
┺⯎G㨂⬢⯒G㿪Ṗ䞮₆G㩚㠦G㧊G
⻫㦒⪲G㢚㩚䞮ỢG䢒䞿GO䋂Ⱂ䢪PG
㧊G♿┞┺U KitchenAid 㓺䌶✲G⹏㍲ṖG
┺⯎G⹏㍲⽊┺GゾⰂG㧧☯䞮₆G➢ⶎ㠦G
⳾✶G䅖㧊䋂㦮G⹏㕇G㔲Ṛ㧊G≪G㑮☚G
㧞㔋┞┺UG㧒㩗㦒⪲SGKitchenAid
㓺䌶✲G⹏㍲⪲G䅖㧊䋂⯒G⹏㕇䞮⓪G
ἓ㤆㠦G╖┺㑮㦮G䅖㧊䋂G㫆Ⰲ⻫㠦㍲G
䞚㣪⪲G䞮⓪G㔲Ṛ㦮G㟓G㩞㧊G
㏢㣪♿┞┺U
㧊㌗㩗㧎G⹏㕇G㔲Ṛ㦚Gἆ㩫䞮⓪G◆G
☚㤖㧊G♶G㑮G㧞☚⪳SG⚦✲Ⰲ₆G⡦⓪G
㭓㦚Gὖ㺆䞮Ⳋ㍲Gˈ✲⩓ἶG䋂Ⱂ㧊G
Ⱔ㦖ˉG㫆Ⰲ⻫㠦G㍺ⳛ♲G⧢㰗䞲G
⳾㟧㧊G♶G➢₢㰖ⰢG⹏㕇㦚G䞮㕃㔲㡺U
㾲㌗㦮G⹏㕇G㏣☚⯒G㍶䌳䞮⩺ⳊG
ˈ㏣☚G㫆㩞G㞞⌊ˉG䟃㦚G㺎㫆䞮㕃㔲㡺UG
㨂⬢G㿪Ṗ䞮₆㨂⬢G㿪Ṗ䞮₆
Ṗ⓻䞮ⳊG䟃㌗G㨂⬢⯒G㧧☯䞮⓪G
ᾦ₆㠦G㰗㩧G㿪Ṗ䞮㰖GⰦἶG
㣿₆G㡜ⳊG⁒㻮㠦G㿪Ṗ䞮㕃㔲㡺UG
㺎ἶa㺎ἶaG㣿₆G┻㠦G⏩㧎G㨂⬢⓪G
㢚㩚䧞G䢒䞿♮㰖G㞠㦒ⳆSGᾦ₆ṖG
㣿₆G㏣㦒⪲G㿿䧞G✺㠊Ṗ㰖G
㞠㔋┞┺UGˈᾦ₆㢖G㣿₆㦮GṚỿˉG
䟃㦚G㺎㫆䞮㕃㔲㡺U
䅖㧊䋂G䢒䞿ⶒ䅖㧊䋂G䢒䞿ⶒ
㧒㼊䡫G䅖㧊䋂G䢒䞿ⶒ㦚G㭖゚䞶G
ἓ㤆SG⌄㦖G㏣☚㠦⓪G㏣☚ 2⯒SG㭧ṚG
㏣☚㠦⓪G㏣☚ 4⯒SG⁎ⰂἶG⏨㦖G
㏣☚㠦⓪G㏣☚ 6㦚G㌂㣿䞮㕃㔲㡺UG
㾲㌗㦮Gἆὒ⯒G㥚䟊SG䕾䋺㰖G㰖䂾㠦G
㍺ⳛ♲G㔲ṚG☯㞞G⹏㕇䞮㕃㔲㡺UG
ἂὒ⮮SGỊ䙂☚G⡦⓪G㍺䌫㠦Gἂὒ⮮SGỊ䙂☚G⡦⓪G㍺䌫㠦G
㩞㧎Gὒ㧒G㿪Ṗ䞮₆㩞㧎Gὒ㧒G㿪Ṗ䞮₆
㧒㩗㦒⪲SG┾┾䞲G㨂⬢⓪G䥮㩩₆G
㏣☚㠦㍲G⹏㕇㦮GⰞ㰖ⰟGⳝG㽞G
☯㞞㠦G㿪Ṗ䞮㡂㟒G䞿┞┺UG㭓㦖G
ΐ⓪G☯㞞Gὒ㧒G⡦⓪Gἂὒ⮮ṖG䖂㦮G
┻㦒⪲GṖ⧒㞟㰖G㞠㦚G㩫☚⪲G
㿿䧞G⚦ℒ㤢㟒G䞿┞┺UG⊞㩗⊞㩗䞲G
ὒ㧒㦖G㭓㠦G▪G㧮G㌆♶G㑮G
㧞☚⪳G⹖Ṗ⬾⯒Gⶑ䡖㟒G䞿┞┺UG
㞷㼊G䢒䞿ⶒ㞷㼊G䢒䞿ⶒ
┺⨟㦮G㞷㼊G㎇㦚G䙂䞾䞮ἶG㧞⓪G
䢒䞿ⶒ㦖G䓖㠊⋮㡺⓪Gộ㦚GⰟ₆G
㥚䟊G▪G⌄㦖G㏣☚⪲G⹏㕇䟊㟒G
䞿┞┺UG䢒䞿ⶒ㧊G⚦ℒ㤢㰚G┺㦢㠦G
㏣☚⯒G⏨㧊㕃㔲㡺U
W10523279C
© 2012. ⳾✶Gῢ䞲G⽊㥶U
11/12
W10523279B.indd 45W10523279B.indd 45 10/31/2012 2:30:48 PM10/31/2012 2:30:48 PM


W10523279C
© 2012. All rights reserved.
© 2012. Todos os direitos reservados.
© 2012. ֱ⬭᠔᳝ᴗ߽DŽ
© 2012. ⳾✶Gῢ䞲G⽊㥶U
11/12
W10523279B.indd 46W10523279B.indd 46 10/31/2012 2:30:48 PM10/31/2012 2:30:48 PM