Loading ...
Loading ...
Loading ...
Select 10 Series Installation Details:
MODELS MODELS MODELS MODELS
1900T-10 1900PS-10 1900PSB-10 1900TB-10
(B INDICATES BAFFLE FILTERS)
CABINET: Be sure that the cabinet bottom is level, side to
side and front to rear. T & PS models: Cut an 8” x 8” hole
in the bottom of the cabinet, 3/4” in from the rear wall and
on center line. Shelves and top to be cut to clear 7” round
pipe to line up with the bottom cabinet cut out. Also, cut
holes for electrical wires. The location of the cut out
determined by the model you are installing.
ELECTRICAL: Bring enough wire into cabinet to reach in
front of vent pipe. Enter cabinet 2” left (facing hood) of
center and 1-1/8” from wall. Remove splice box cover
before mounting.
MOUNTING: Remove black tape holding dampers
closed. *It is NOT recommended to use 2 dampers
during installation. You have the option to put a
external damper or use the existing damper already
on the unit. Insert canopy below the cabinet, being sure
your vent opening and electrical cut outs line up with
cabinet cut outs. Use the Key Hole mounting holes to secure the canopy.
After hood is mounted attach house wires to leads in the hood. Secure
locknut to conduit and check wiring for compliance to local
building codes.
FINISH: Replace electrical box cover. Connect duct and tape all joints.
Replace Filters.
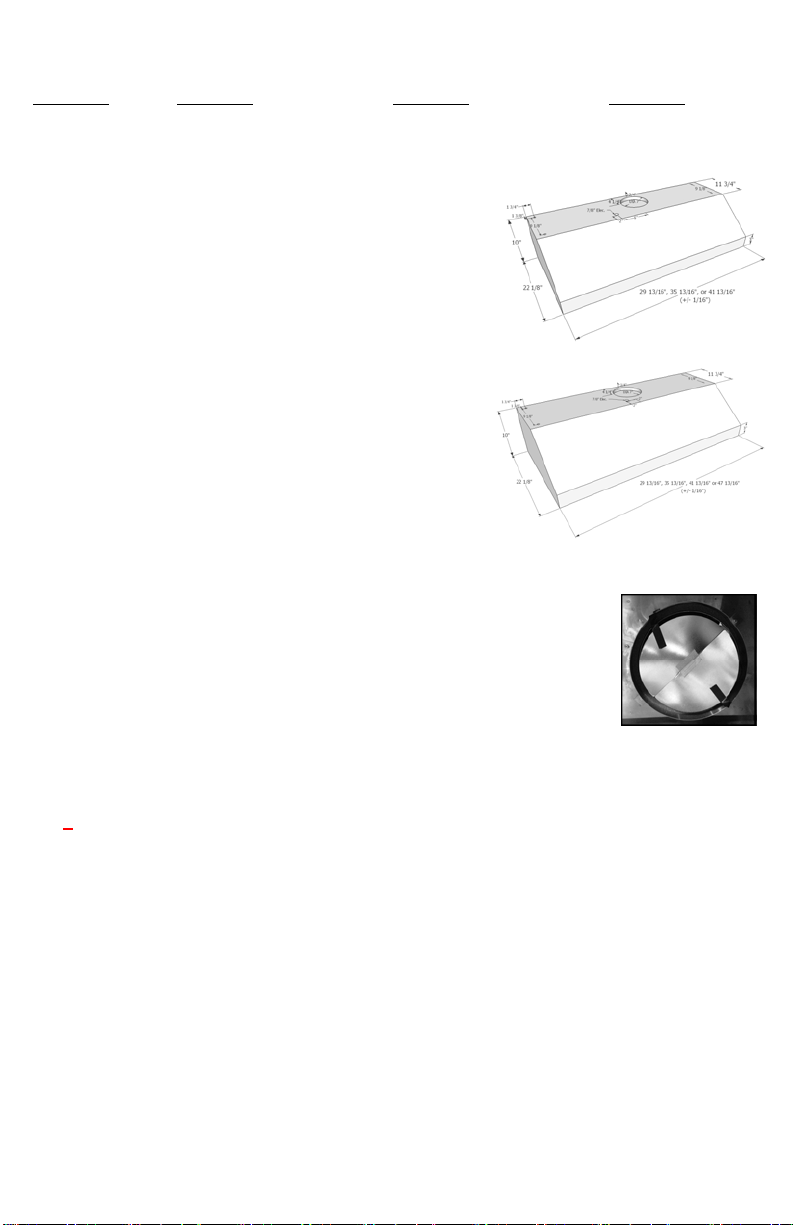
NOTE: On 1900T-10 model only, blower is offset to the right with a
center duct. Majority of airflow will be on right side of hood.
Duct Sizes Indicated in Model # (Ex: 1942PS-10-8)
** - 8
= 8” DUCT PIPE
1900T-10 & 1900TB-10
1900PS-10 & 1900PSB-10
Black Tape on Damper
Loading ...
Loading ...
Loading ...