Loading ...
Loading ...
3
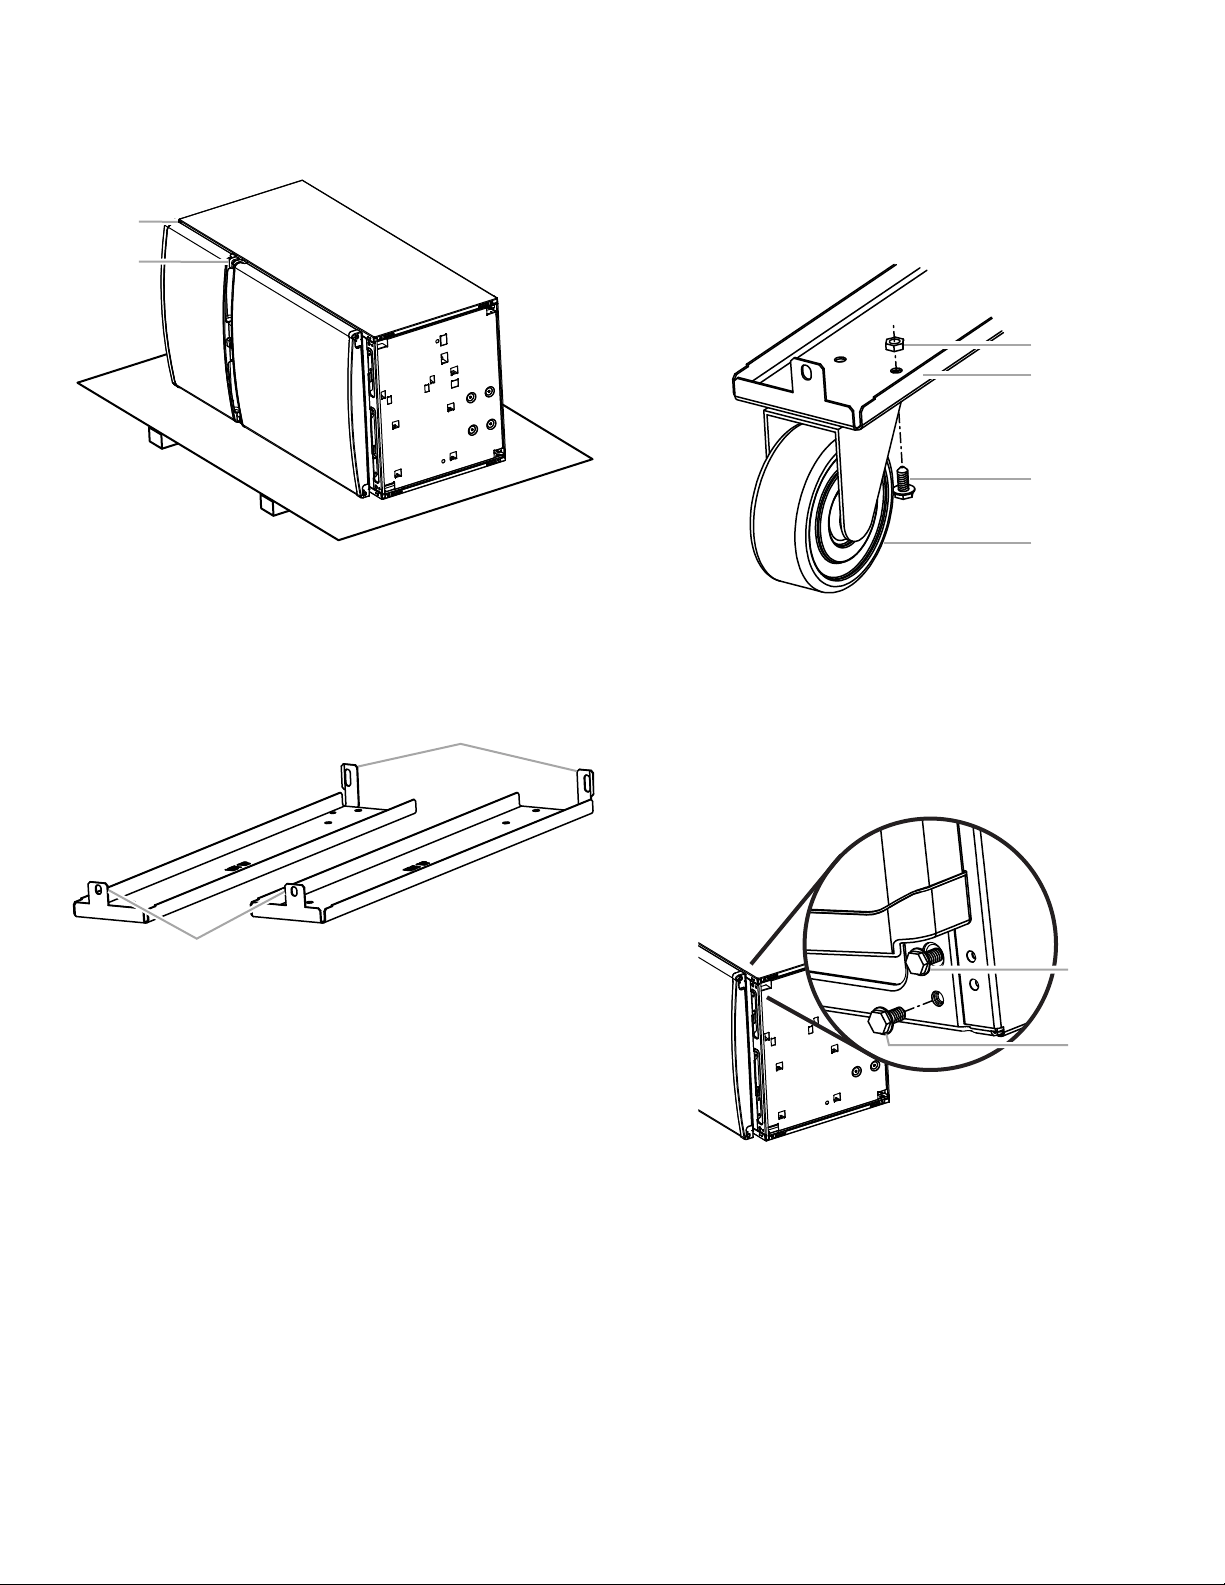
3. Place the refrigerator/freezer on its side on top of the cardboard
or protective material. Make sure the door hinge is facing
upward.
IMPORTANT: It is important that the door hinge face upward
during the entire caster installation.
4. Remove the casters and fasteners from the box.
5. Locate and remove the caster brackets from the FeaturePak.
6. Using ⁵⁄₁₆–18 hex-head bolts, attach one rigid caster and one
swivel caster to each caster bracket. The rigid caster fits the front
of the bracket, and the swivel caster fits on the rear.
7. Insert the hex-head bolts from the bottom and start the self-
locking nuts for each caster.
NOTES:
■ The caster bracket must remain on a flat surface while you
are installing the casters.
■ Install the casters to the front of each bracket so that the
wheel protrudes from the front of the bracket. The caster is
correctly installed when the bottom of the bracket makes a
90° angle with the caster mounting plate, as shown.
8. Hold the head of the hex-head bolt with a wrench while
tightening the self-locking nuts with a socket wrench.
9. Using a ¹⁄₂" socket wrench, remove the four unit bolts (two on
each side) from the lower front and rear of the refrigerator/freezer.
NOTE: Do not remove the leveling bolt.
Lower Front Corner
10. Place the slot in the rear of the caster bracket over the unit hole
in the rear of the refrigerator/freezer. Align the front hole of the
caster bracket with the unit hole in the front of the
refrigerator/freezer.
A. Top Hinge
B. Center Hinge
A. Rear edge of the caster bracket
B. Front edge of the caster bracket
A
B
A
B
A. Self-locking nut
B. Caster bracket
C. 90° Angle
D.
⁵⁄₁₆
–18 x
⁷⁄₈
" Hex-head bolt
E. Caster
A. Leveling bolt (do not remove)
B. Refrigerator/freezer unit bolt
B
A
C
D
A
B
Loading ...
Loading ...
Loading ...