Loading ...
Loading ...
Loading ...
branchorthesawwhenthetension
inthewoodfibersisreleased.
• Frequentlyclearbranchesoutofthe
waytoavoidtrippingoverthem.
LIMBING
• Limbatreeonlyafteritiscutdown.
• Leavethelargerlimbsunderneath
thefelledtreetosupportthetreeas
youwork.
• Startatthebaseofthefelledtree
andworktowardthetop,cutting
branchesandlimbs.Removesmall
limbswithonecut.
• Keepthetreebetweenyouandthe
chain.
• Removelargerbrancheswiththe
cuttingtechniquesdescribedin
BUCKINGWITHOUTASUPPORT,
• Alwaysuseanovercuttocutsmall
andfreelyhanginglimbs.Undercut-
tingcouldcauselimbstofalland
pinchthesaw.
CUSTOMERRESPONSIBILITIES
PRUNING
_IIWARNING: Limit pruning to limbs
shoulder height or below. Do not cut if
branches are higher than your shoul-
der. Get a professional to do the job.
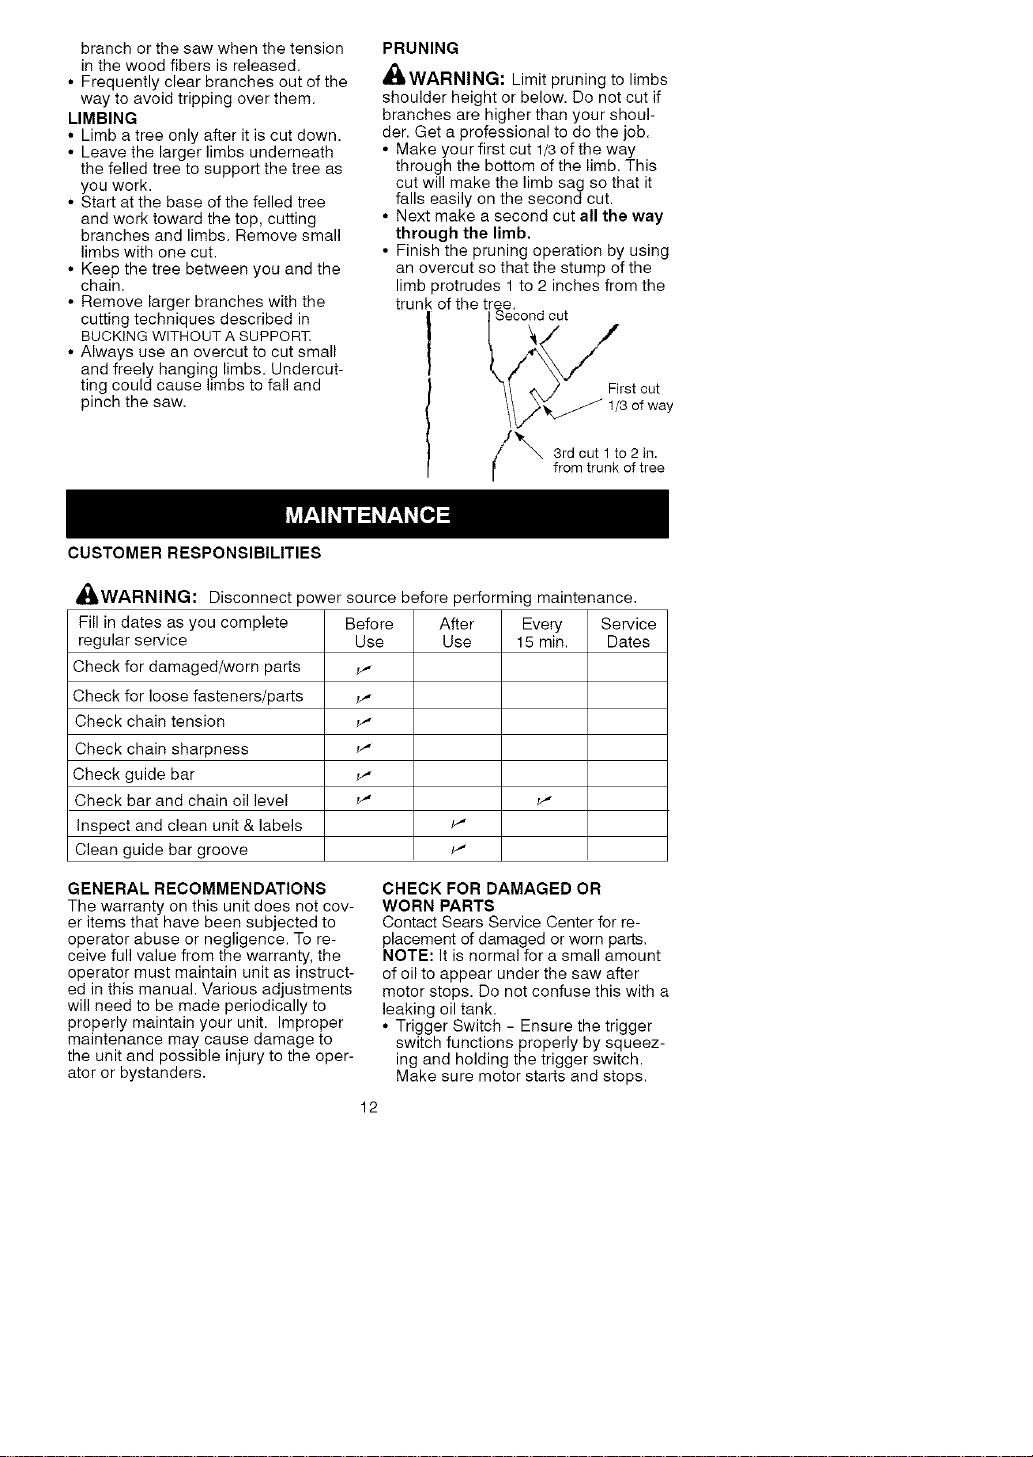
• Make your first cut 1/3of the way
through the bottom of the limb. This
cut will make the limb sag so that it
falls easily on the second cut.
• Next make a second cut all the way
through the limb.
• Finish the pruning operation by using
an overcut so that the stump of the
limb protrudes 1 to 2 inches from the
trunk of the tree.
Second cut
t Firstcut
1/3of way
_ 3rd out 1 to 2 in.
from trunk of tree
_IWARNING: Disconnect power source before performing maintenance.
Fill in dates as you complete Before After Every Service
regular service Use Use 15 rain. Dates
Check for damaged/worn parts _,-
Check for loose fasteners/parts _,,
Check chain tension _,"
Check chain sharpness _"
Check guide bar _,"
Check bar and chain oil level _" _"
Inspect and clean unit & labels
Clean guide bar groove _"
GENERAL RECOMMENDATIONS
The warranty on this unit does not cov-
er items that have been subjected to
operator abuse or negligence. To re-
ceive full value from the warranty, the
operator must maintain unit as instruct-
ed in this manual. Various adjustments
will need to be made periodically to
properly maintain your unit. Improper
maintenance may cause damage to
the unit and possible injury to the oper-
ator or bystanders=
CHECK FOR DAMAGED OR
WORN PARTS
Contact Sears Service Center for re-
placement of damaged or worn parts.
NOTE: It is normal for a small amount
of oil to appear under the saw after
motor stops. Do not confuse this with a
leaking oil tank.
• Trigger Switch - Ensure the trigger
switch functions properly by squeez-
ing and holding the trigger switch.
Make sure motor starts and stops.
12
Loading ...
Loading ...
Loading ...