Loading ...
Loading ...
Loading ...
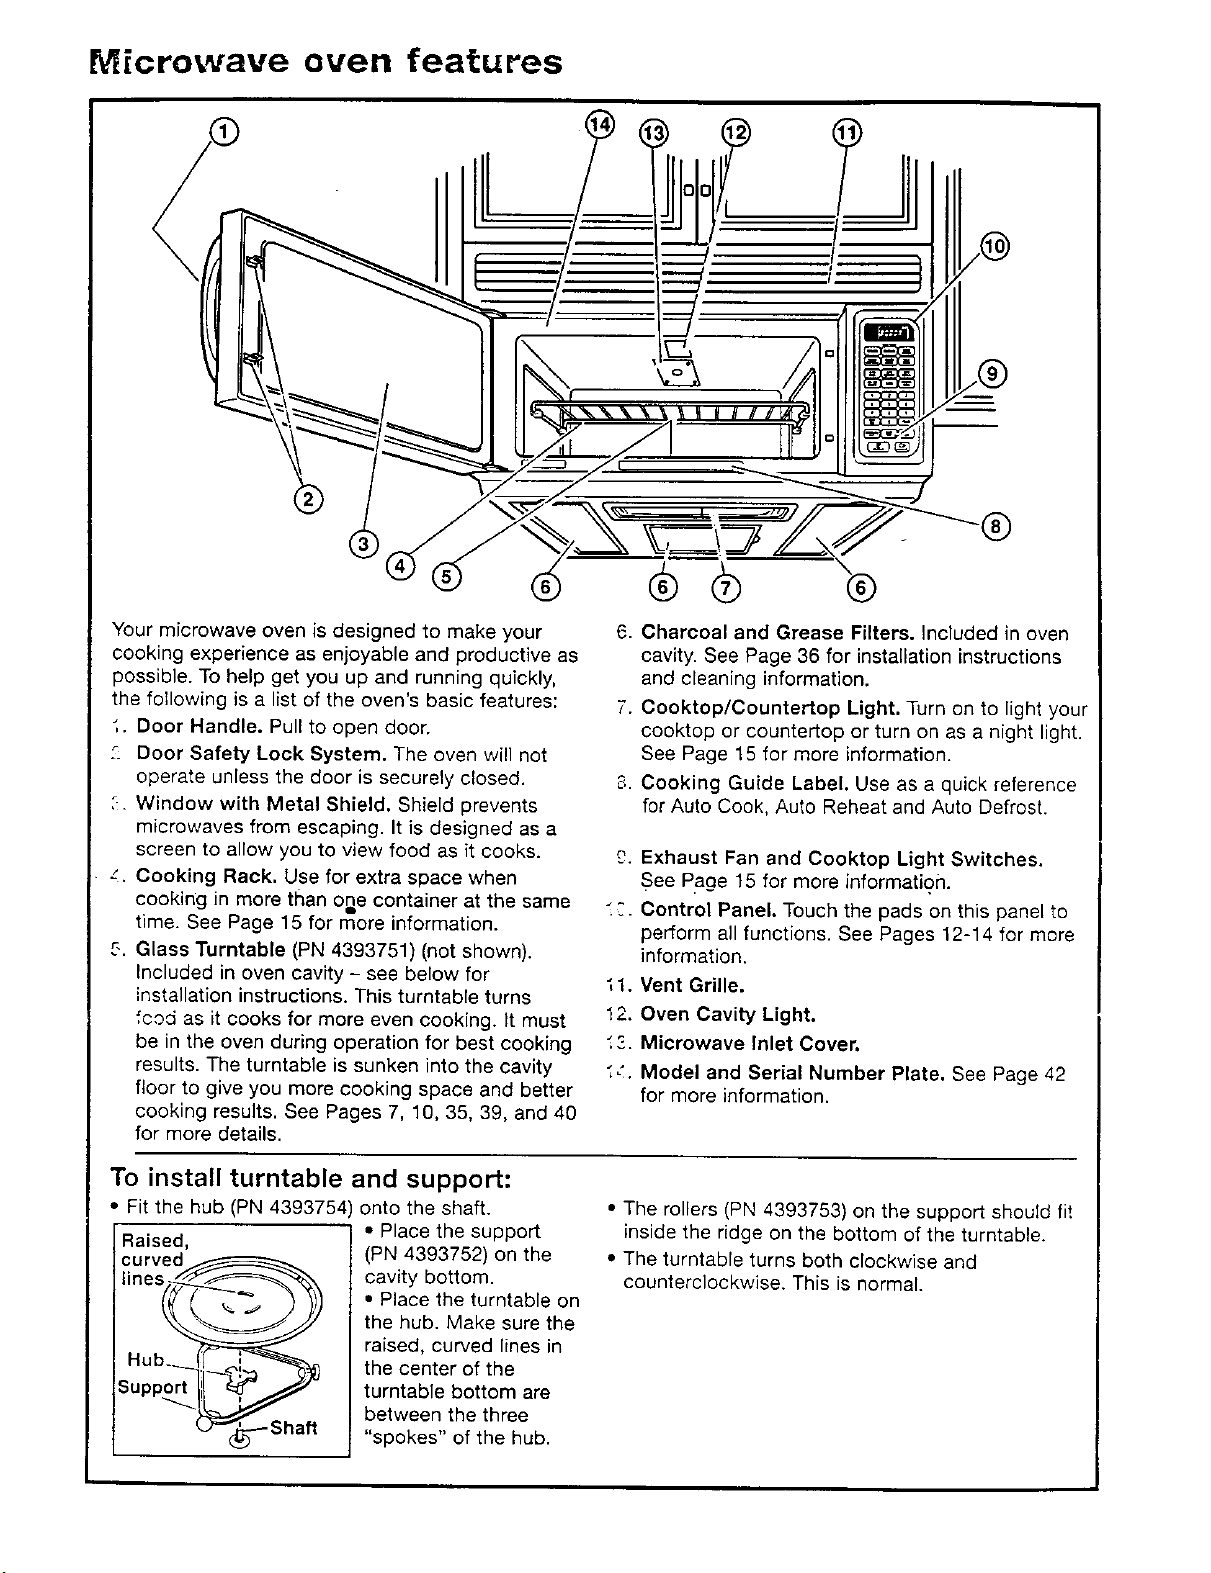
NHcrowave oven features
Your microwave oven is designed to make your 6.
cooking experience as enjoyable and productive as
possible. To help get you up and running quickly,
the following is a list of the oven's basic features: 7.
,. Door Handle. Pull to open door,
_. Door Safety Lock System. The oven will not
operate unless the door is securely closed. _,
_. Window with Metal Shield. Shield prevents
microwaves from escaping. It is designed as a
screen to allow you to view food as it cooks. £,.
z. Cooking Rack. Use for extra space when
cooking in more than ode container at the same -:_.
time. See Page 15 for more information.
5. Glass Turntable (PN 4393751) (not shown).
Included in oven cavity - see below for
11.
installation instructions. This turntable turns
food as it cooks for more even cooking. It must 12.
be in the oven during operation for best cooking ";3.
results. The turntable is sunken into the cavity -;_,
floor to give you more cooking space and better
cooking results. See Pages 7. 10, 35, 39, and 40
for more details.
Charcoal and Grease Filters. Included in oven
cavity. See Page 36 for installation instructions
and cleaning information.
Cooktop/Countertop Light. Turn on to light your
cooktop or countertop or turn on as a night light.
See Page 15 for more information.
Cooking Guide Label. Use as a quick reference
for Auto Cook, Auto Reheat and Auto Defrost.
Exhaust Fan and Cooktop Light Switches.
See Page 15 for more information.
Control Panel. Touch the pads on this panel to
perform all functions. See Pages 12-14 for more
information.
Vent Grille.
Oven Cavity Light.
Microwave Inlet Cover.
Model and Serial Number Plate. See Page 42
for more information.
To install turntable and support:
• Fit the hub (PN 4393754) onto the shaft.
Raised,
curved_
lines --___,_,___,
s"u;oor,qi-- )J
L2"_(_--- Shaft
• Place the support
(PN 4393752) on the
cavity bottom.
• Place the turntable on
the hub. Make sure the
raised, curved lines in
the center of the
turntable bottom are
between the three
"spokes" of the hub.
• The rollers (PN 4393753) on the support should fit
inside the ridge on the bottom of the turntable.
• The turntable turns both clockwise and
counterclockwise. This is normal.
Loading ...
Loading ...
Loading ...