Loading ...
Loading ...
Loading ...
Setting Surface Controls (cont'd)
To Operate Dual Radiant Surface Elements (some models)
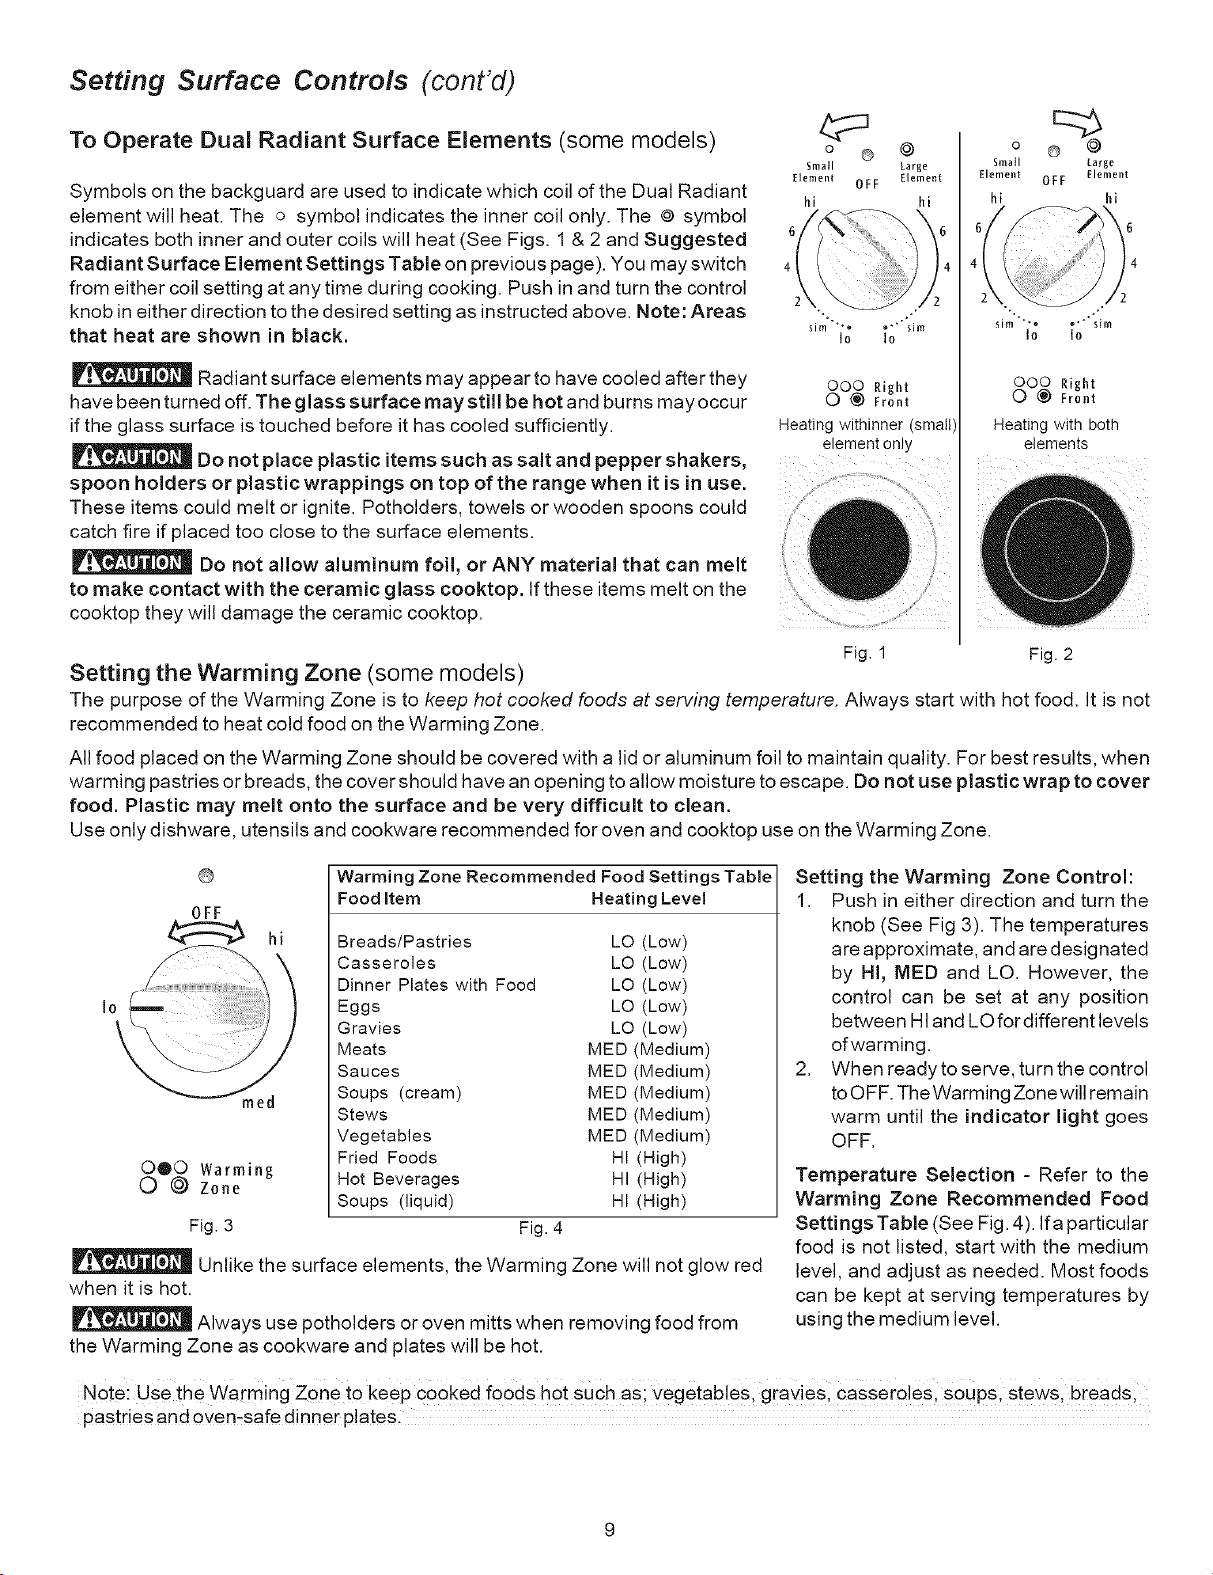
Symbols on the backguarct are used to indicate which coil of the Dual Radiant
element will heat. The o symbol indicates the inner coil only. The @ symbol
indicates both inner and outer coils will heat (See Figs. 1 & 2 and Suggested
Radiant Surface Element Settings Table on previous page). You may switch
from either coil setting at any time during cooking. Push in and turn the control
knob in either direction to the desired setting as instructed above. Note: Areas
that heat are shown in black.
Radiant surface elements may appear to have cooled after they
have been turned off. The glass surface may still be hot and burns may occur
if the glass surface is touched before it has cooled sufficiently.
Do not place plastic items such as salt and pepper shakers,
spoon holders or plastic wrappings on top of the range when it is in use.
These items could melt or ignite. Potholders, towels or wooden spoons could
catch fire if placed too close to the surface elements.
Do not allow aluminum foil, or ANY material that can melt
to make contact with the ceramic glass cooktop. If these items melt on the
cooktop they will damage the ceramic cooktop.
o ® @
Small Large
Element OFF Element
hi hi
ooo Right
O _) Front
Heating withinner (small)
element only
Small Large
Element OFF Element
hi M
/
ooo Right
0 @ Front
Heating with both
elements
Fig. 1 Fig. 2
Setting the Warming Zone (some models)
The purpose of the Warming Zone is to keep hot cooked foods at serving temperature. Always start with hot food. It is not
recommended to heat cold food on the Warming Zone.
All food placed on the Warming Zone should be covered with a lid or aluminum foil to maintain quality. For best results, when
warming pastries or breads, the cover should have an opening to allow moisture to escape. Do not use plastic wrap to cover
food. Plastic may melt onto the surface and be very difficult to clean.
Use only dishware, utensils and cookware recommended for oven and cooktop use on the Warming Zone.
©
OFF
reed
O@O Warming
O @ Zone
hi
Warming Zone Recommended Food Settings Table
Food Item Heating Level
Fig. 3
Breads/Pastries LO (Low)
Casseroles LO (Low)
Dinner Plates with Food LO (Low)
Eggs LO (Low)
Gravies LO (Low)
Meats MED (Medium)
Sauces MED (Medium)
Soups (cream) MED (Medium)
Stews MED (Medium)
Vegetables MED (Medium)
Fried Foods HI (High)
Hot Beverages HI (High)
Soups (liquid) HI (High)
Fig. 4
Unlike the surface elements, the Warming Zone will not glow red
when it is hot.
Always use potholders or oven mitts when removing food from
the Warming Zone as cookware and plates will be hot.
Setting the Warming Zone Control:
1. Push in either direction and turn the
knob (See Fig 3). The temperatures
are approximate, and are designated
by HI, MED and LO. However, the
control can be set at any position
between HIand LOfordifferent levels
of warming.
2. When ready to serve, turn the control
to OFF. The Warming Zone will remain
warm until the indicator light goes
OFF.
Temperature Selection - Refer to the
Warming Zone Recommended Food
Settings Table (See Fig. 4). Ifa particular
food is not listed, start with the medium
level, and adjust as needed. Most foods
can be kept at serving temperatures by
using the medium level.
Note: use the Warming Z0ne to keep cooked foods hot Such as; vegetablesl gravieSl casseroles, SOups, Stews, breads;
pastdes and oven-safe dinner p!ates:
Loading ...
Loading ...
Loading ...