
_J E N N-AI R
_mm °
Useand Care Manual
Convertible and
Non-_nver_ible C_n_ol_ps
MODELS G102- C101 - C202- C221 - C301

SAFETY
PRECAUTIONS
Read before operating your cooktop
All appliances -- regardless of the manufacturer -- have the
potential through improper or careless use to create safety prob-
lems. Therefore the following safety precautions should be
observed:
1. Be sure your appliance is properly installed and grounded
by a qualified technician.
2. Never use your appliance for warming or heating the room.
3. Children should not be left alone or unattended in area
where appliance is in use. They should never be allowed to
sit or stand on any part of the appliance.
4. Wear proper apparel. Loose-fitting or hanging garments
should never be worn while using the appliance.
5. Do not repair or replace any part of the appliance unless
specifically recommended in this manual. All other servicing
should be referred to an authorized Jenn-Air Service
Contractor.
6. Flammable materials should not be stored near surface
units.
7. Do not use water on grease fires. Smother fire or flame or
use dry chemical or foam-type extinguisher.
8. Use only dry potholders. Moist or damp potholders on hot
surfaces may result in burns from steam. Do not let
potholder touch hot heating elements. Do not use a towel
or other bulky cloth.
9. Use proper pan size. Many appliances are equipped with
one or more surface units of different size. Select utensils
having flat bottoms large enough to cover the surface unit
heating element. The use of undersized utensils will expose
a portion of the heating element to direct contact and may
result in ignition of clothing. Proper relationship of utensil
to heating element will also improve efficiency and perfor-
mance.
2
10. Never leave surface units unattended at high heat settings.
Boil over causes smoking and greasy spillovers that may
ignite.
11. On conventional element ranges make sure that drip pans
are in place. Absence of these pans during cooking may
-subject wiring or components underneath to damage.
12. Do not use aluminum foil to line surface unit drip pans or
grill basin. Installation of these liners may result in an elect-
ric shock or fire hazard.
13. Glazed cooking utensils -- only certain types of glass,
glass-ceramic, ceramic, earthenware, or other glazed uten-
sils are suitable for cooktop surface without breaking due
to the sudden change in temperature. Use only such uten-
sils as you know have been approved for this purpose.
14. Utensil handles should be turned inward and not extend
over adjacent surface heating elements to avoid burns,
ignition of flammable materials and spillage due to uninten-
tional contact with the utensil.
15. Do not soak or immerse removable heating elements in
water.
16. CAUTION -- Do not store items of interest to children in
cabinets above a cooktop-- children climbing on the cook-
top to reach items could be seriously injured.
17. Do not touch surface units or areas near units. Surface
units or heating elements may be hot even though they are
dark in color. Areas near surface units maybecome hot
enough to cause burns. During and after use, do not touch
or let clothing or other flammable materials contact these
areas until they have had sufficient time to cool. Other
surfaces may become hot enough to cause burns-- among
these surfaces are the cooktop.
18. Do not cook on glass-ceramic cooking surface if the cook-
top is broken. Cleaning solutions and spillovers may pene-
trate the broken cooktop and create a shock hazard.
Contact an authorized Jenn-Air Service Contractor.
19. Clean glass-ceramic cooktops with caution. If wet sponge
or cloth is used to wipe spills on a hot cooking area, be
careful to avoid steam burns. Some cleansers can produce
noxious fumes if applied to a hot surface.
20. Do not operate with damaged cooking element after any
product malfunction until proper repair has been made.
21. Keep all switches "OFF" when unit is not in use.
About your
Jenn-Air
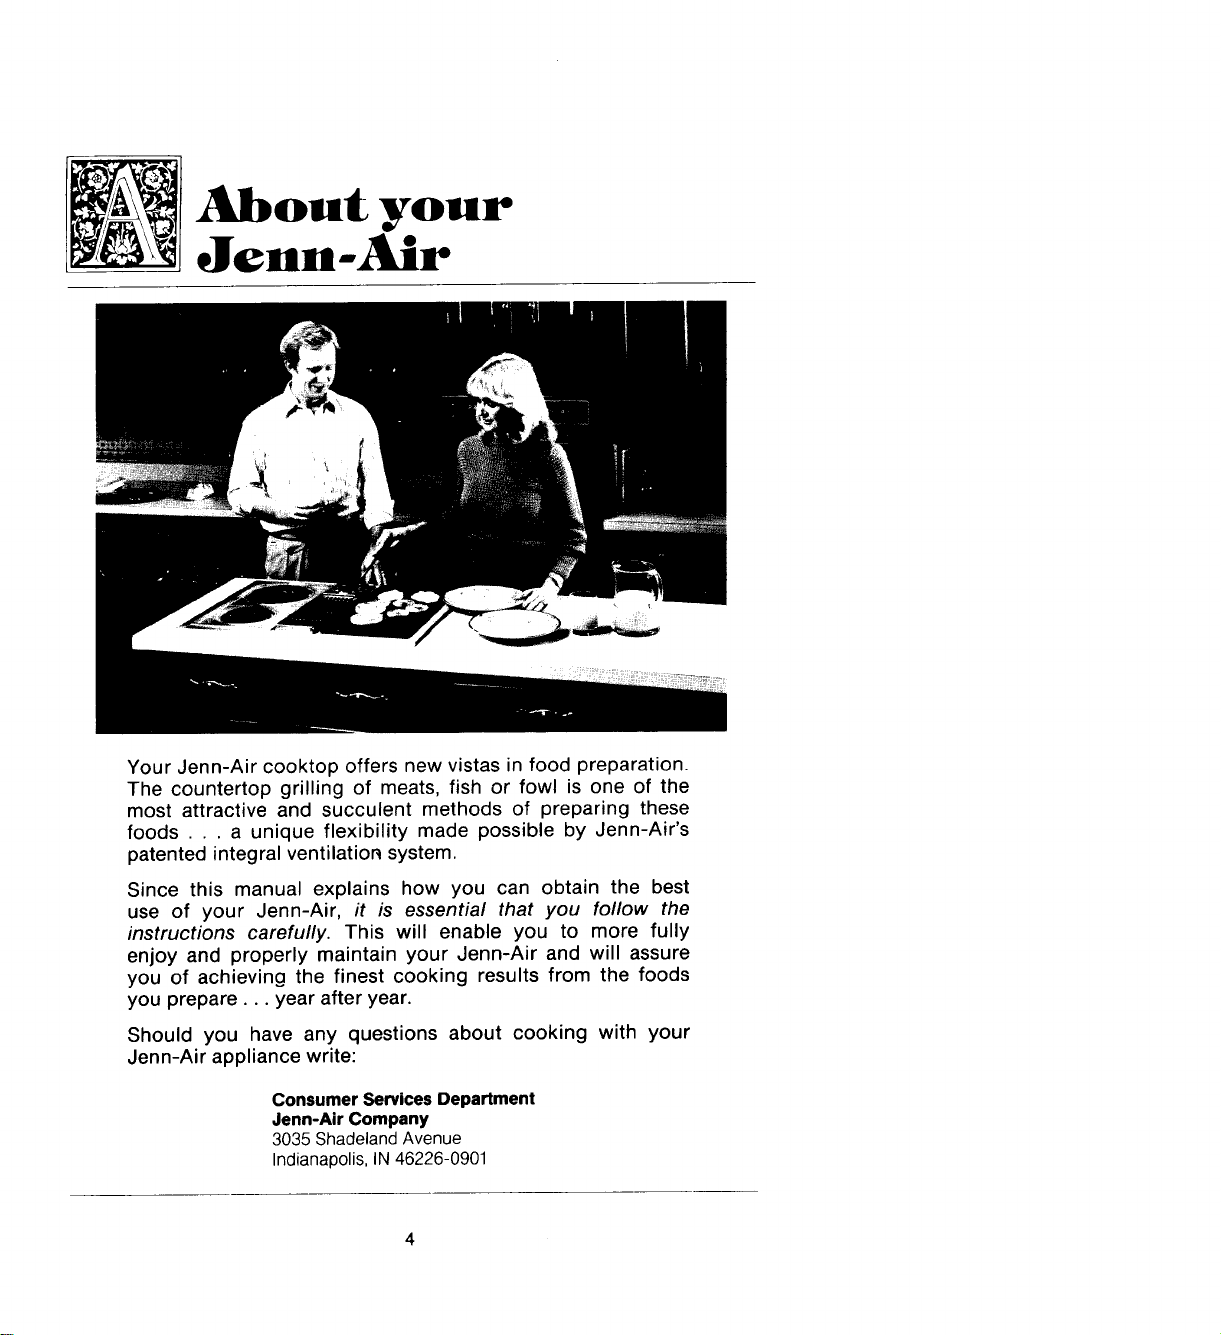
Your Jenn-Air cooktop offers new vistas in food preparation.
The countertop grilling of meats, fish or fowl is one of the
most attractive and succulent methods of preparing these
foods . . . a unique flexibility made possible by Jenn-Air's
patented integral ventilation system.
Since this manual explains how you can obtain the best
use of your Jenn-Air, it is essential that you follow the
instructions carefully. This will enable you to more fully
enjoy and properly maintain your Jenn-Air and will assure
you of achieving the finest cooking results from the foods
you prepare.., year after year.
Should you have any questions about cooking with your
Jenn-Air appliance write:
ConsumerServicesDepartment
Jenn-AirCompany
3035ShadelandAvenue
Indianapolis,IN 46226-0901

Ventilation System
The built-in ventilation system removes cooking vapors, odors and smoke from foods
prepared on the cooktop, grill and grill accessories.
Regular use of this system will insure amore comfortable and less humid kitchen which
is free of heavy cooking odors and fumes that normally create a frequent need for
cleaning and redecorating.
Using the Ventilation System
• To operate the ventilation system manually, push the on/off switch located in
front of the ventilation grille.
• The ventilation system will operate automatically when the grill element is in
use.
• Besides using the ventilation system to remove cooking vapors and fumes, it
can be used to cool baked pies, cakes or hot utensils. To cool an item, set it on
the ventilation grille and turn on the fan. The air being pulled over the item will
quickly cool it. Be careful not to cover the entire ventilation grille.
• The fan can be used to remove strong odors from the kitchen as when chopping
onions near the fan.
Cleaning the Ventilation System
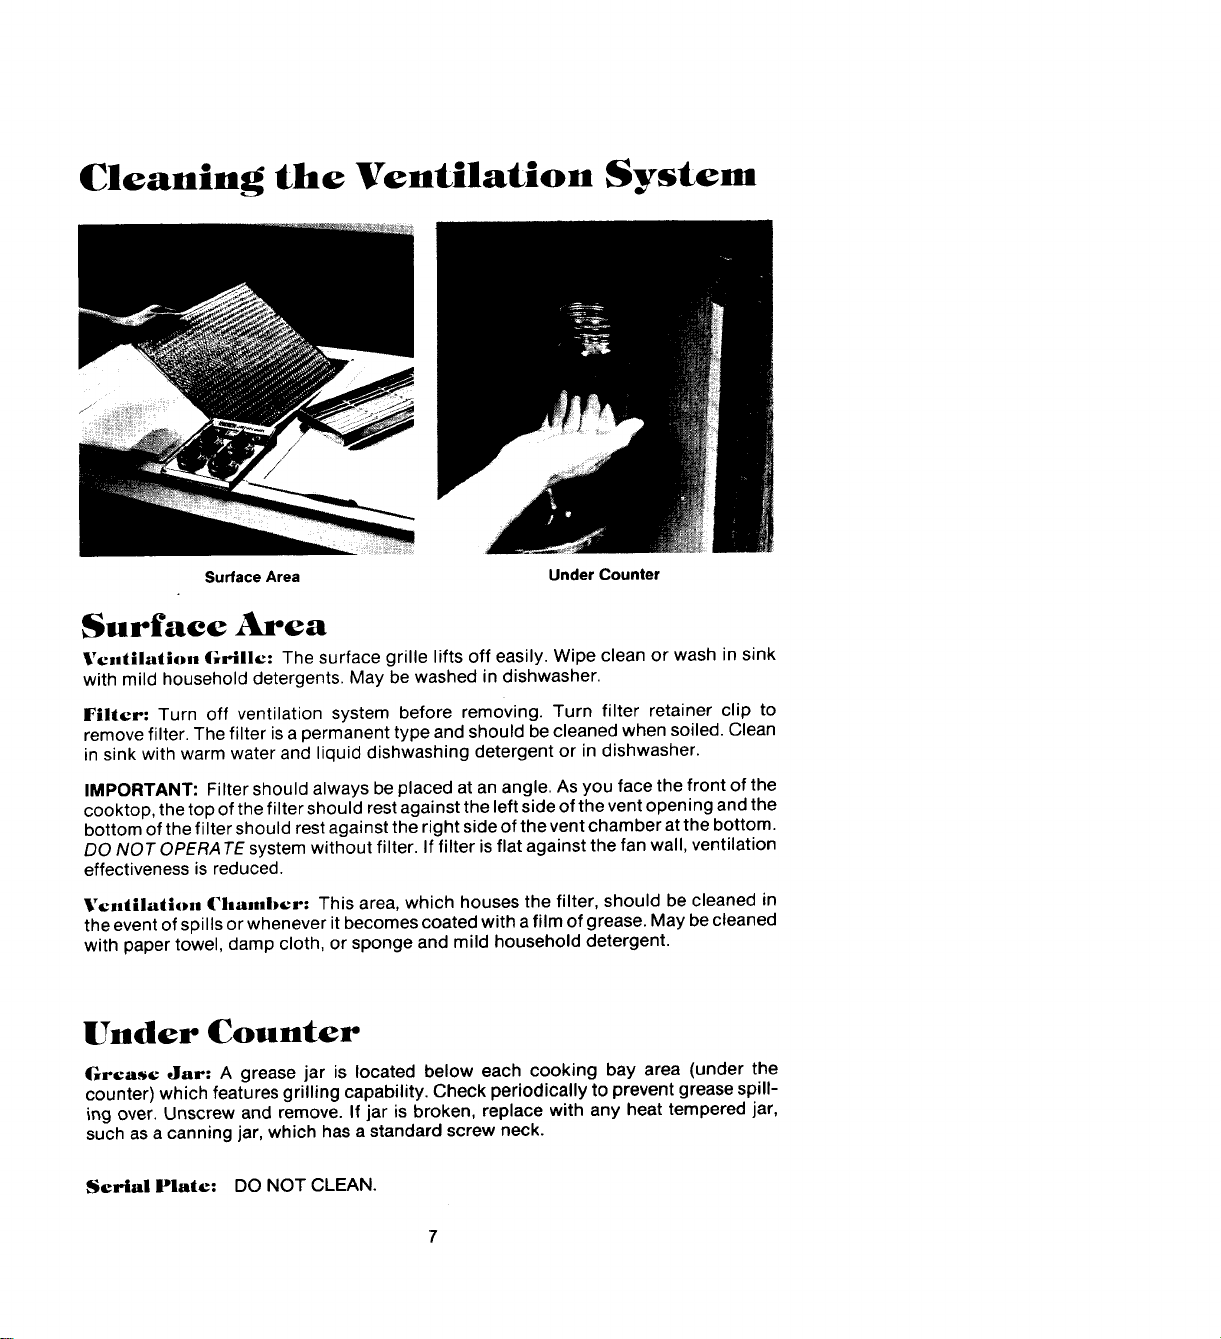
Surface Area Under Counter
Surface Area
Ventilation Grille: The surface grille lifts off easily. Wipe clean or wash in sink
with mild household detergents. May be washed in dishwasher.
Filter: Turn off ventilation system before removing. Turn filter retainer clip to
remove filter. The filter is apermanent type and should be cleaned when soiled. Clean
in sink with warm water and liquid dishwashing detergent or in dishwasher.
IMPORTANT: Filter should always be placed at an angle. As you face the front of the
cooktop, the top of the filter should rest against the left side of the vent opening and the
bottom of the filter should rest against the right side of the vent chamber at the bottom.
DO NOT OPERA TE system without filter. If filter is flat against the fan wall, ventilation
effectiveness is reduced.
Ventilation Chan.ber: This area, which houses the filter, should be cleaned in
the event of spills or whenever it becomes coated with a film of grease. May be cleaned
with paper towel, damp cloth, or sponge and mild household detergent.
Under Counter
Grease Jar: A grease jar is located below each cooking bay area (under the
counter) which features grilling capability. Check periodically to prevent grease spill-
ing over. Unscrew and remove. If jar is broken, replace with any heat tempered jar,
such as a canning jar, which has a standard screw neck.
Serial Plate: DO NOT CLEAN.
Surface Controls
The variable heat controls for the cooktop cartridges and grill element provide flexibility in heat
setting selection.
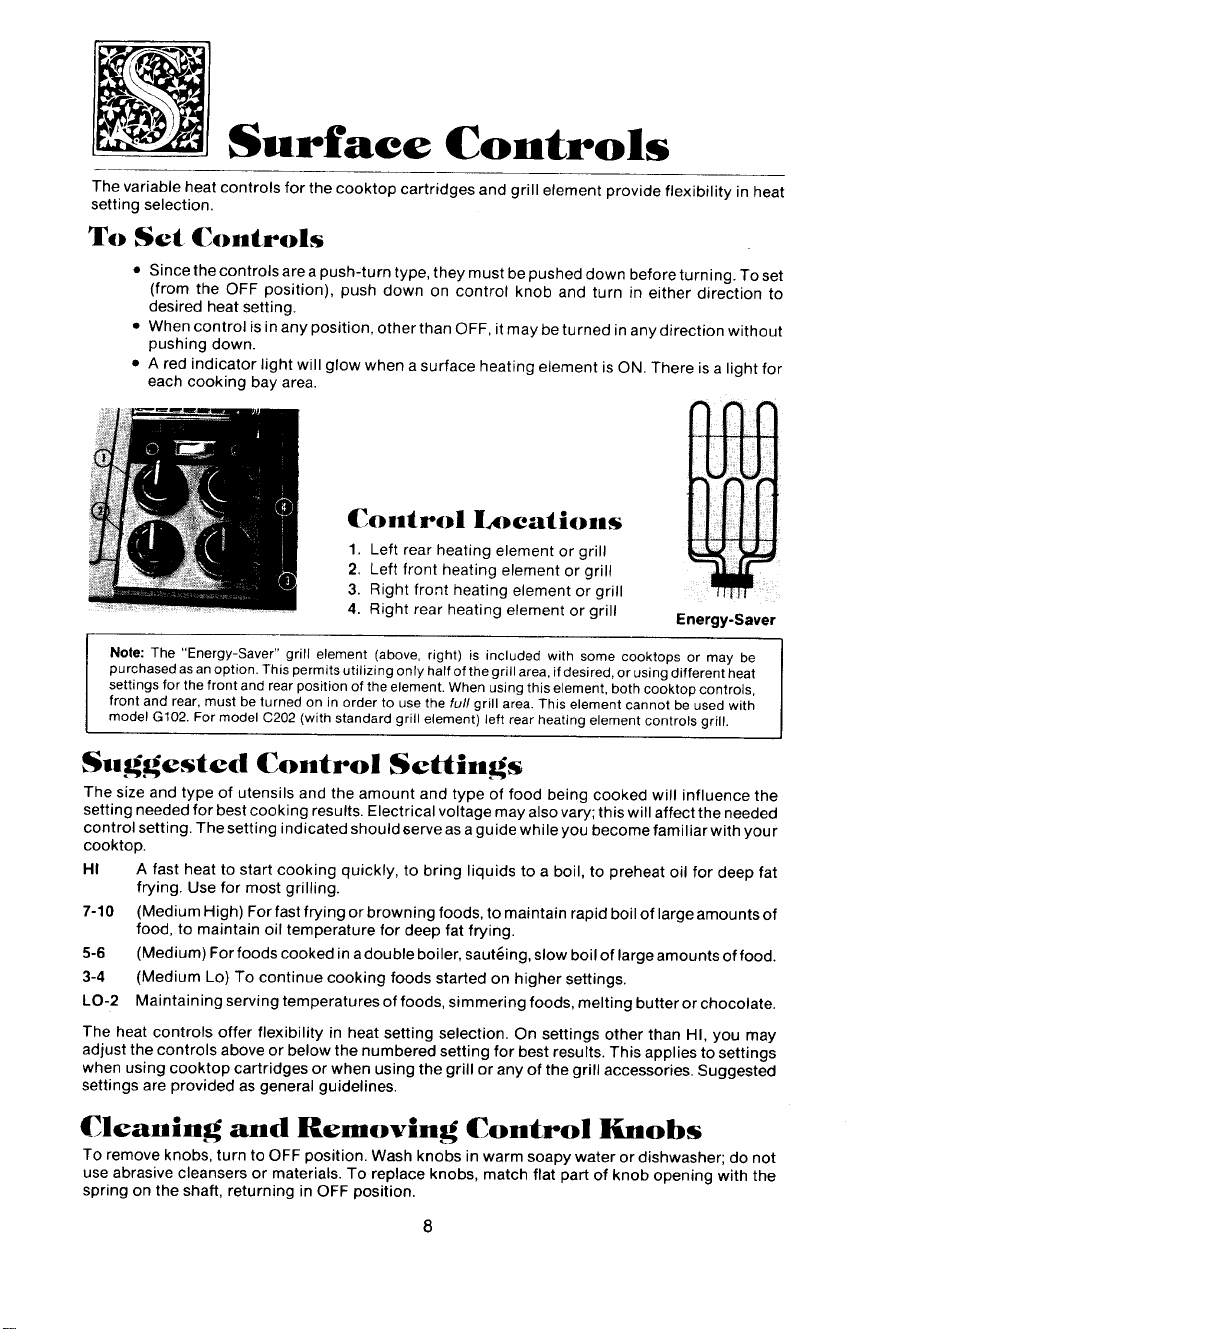
To Set Controls
• Since the centre s are a push,turn type, they must be pushed down before turning. To set
(from the OFF position), push down on control knob and turn in either direction to
desired heat setting.
• When control is in any position, other than OFF, it may be turned in any direction without
pushing down.
• A red indicator light will glow when a surface heating element is ON. There is a light for
each cooking bay area.
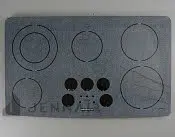
Control l n eatlons
1. Left rear heating element or grill _
2, Left front heating element or grill
3. Right front heating element or grill
4. Right rear heating element or grill Energy-Saver
Note: The "Energy-Saver" grirl element (above, right) is included with some cooktops or may be
purchased as anoption. This permits utilizing only half of the grill area,if desired, or usingdifferent heat
settings for the front and rear position of the element. When using this element, both cooktop controls,
front and rear, must be turned on in order to use the full grill area. This element cannot be used with
model G102. Formodel C202 (with standard grill element) left rear heating element controls grill.
Suggested Control Settings
The size and type of utensils and the amount and type of food being cooked will influence the
setting needed for best cooking results. Electrical voltage may also vary; this will affect the needed
control setting. The setting indicated should serve as a guide while you become familiar with your
cooktop.
HI A fast heat to start cooking quickly, to bring liquids to a boil, to preheat oil for deep fat
frying. Use for most grilling.
7-10 (Medium High) For fast frying or browning foods, to maintain rapid boil of large amounts of
food, to maintain oil temperature for deep fat frying.
5-6 (Medium) For foods cooked in a double boiler, saut6ing, slow boil of large amounts of food.
3-4 (Medium Lo) To continue cooking foods started on higher settings.
LO-2 Maintaining serving temperatures of foods, simmering foods, melting butter or chocolate.
The heat controls offer flexibility in heat setting selection. On settings other than HI, you may
adjust the controls above or below the numbered setting for best results. This applies to settings
when using cooktop cartridges or when using the grill or any of the grill accessories. Suggested
settings are provided as general guidelines.
Cleaning and Removing Control Knobs
To remove knobs, turn to OFF position. Wash knobs in warm soapy water or dishwasher; do not
use abrasive cleansers or materials. To replace knobs, match flat part of knob opening with the
spring on the shaft, returning in OFF position.

Using Cooktop
Cartridges
Cooktop cartridges, either conventional coil, glass-ceramic, solid element or induc-
tion, can be installed in certain cooktops.
_i_ r_
To Install Cartridges
1. If the grill element, grill-rocks or grates are in. place, remove before installing
a cooktop cartridge. Clean grill basin of any grease accumulation. (See page 20
for cleaning recommendations.)
2. To install any of the optional cooktop cartridges, first be sure control knobs are
turned OFF. Position the cartridge terminal plug towards the terminal receptacle.
3. Slide the cartridge towards the receptacle until the cartridge terminal plug is
completely engaged.
4. Lower the opposite end of the cartridge into the cooktop until it is flush with the
surface. Your cooktop is now ready to use.
To Remove Cartridges
1. Control knobs must be in the OFF position and the cartridge should be cool.
2. Lift upon the "tab" located on the cartridge until top of cartridge clears the opening
on the cooktop by about 2 inches. Lifting the cartridge too high while still engaged
in the receptacle could damage the terminal plug.
3. To disengage terminal, hold cartridge by the sides and slide away from the
terminal receptacle. Lift out when fully unplugged.
To Store Cartridges
1. A storage tray, Model A350, is available and can be used for storing a cartridge.
2. Do not stack cartridges where they may fall or be damaged. Never store other
materials on top of the glass-ceramic cartridges since this could damage or mar
the surface.
9
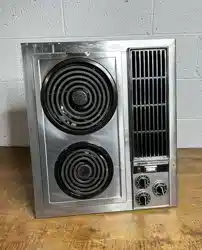
Conventional
Coil Cooktop
For best results, most efficient use of electricity and to prevent damage to the conven-
tional coil elements, select cookware as described below.
The variable control setting allows flexibility in selecting desired heat. The HI setting
should be used only to start cooking. The control should then be turned to a lower
setting. Energy can be saved by avoiding unnecessary rapid boiling of foods and
covering utensils when bringing water to a boil. Use the lowest setting possible to
maintain correct frying temperature to avoid excessive splattering. Use a tight fitting lid
on utensils to speed cooking.
Retained heat in the elements can be used to finish cooking.
Do not allow pans to boil dry as this could damage both the cooktop and pan.
Selecting Proper Cooking Utensils
• Select cookware with flat bottoms. Flat bottom pans are the fastest and best
conductors of heat and provide the most consistent and satisfactory results. The
entire bottom of the utensil should touch the heating element evenly. Avoid using
utensils with convex, concave or irregular bottoms. A utensil which is not flat
receives the most heat at the point of contact, which causes "hot spots" and
uneven heat distribution. Hot spots can result in scorching or burning of the food.
Uneven heat distribution slows the cooking process and wastes energy.
• To determine if a utensil is flat, lay a straight edge ruler against the bottom.
• Do not use a wire trivet or any kind of heat retarding pad between the utensil and
element. Reduce the heat control setting instead.
• Do not use utensils that extend more than 1 inch on either side of the element.
(See exceptions for canning on page 11.) Use the correct size pan for the size of
the heating element.
• Do not use large diameter canners or utensils except when boiling water or
canning. Sauce mixtures, syrups and fried foods all cook at much higher tempera-
tures than boiling water and could eventually reflect damaging heat to the adja-
cent component parts of the cooktop, shorten life span of heating element,
damage and discolor drip pans or cause impossible to clean spots on metal
surfaces. These problems are increased when the HI setting is used excessively
with oversized cooking utensils.
• Do not use any vessel with a turned down flange around the bottom.
• Special cooking equipment without flat bottoms, such as the Oriental wok,
should not be used on the cooktop. Only use the Jenn-Air accessory, Model
A140, on the cooktop. It has a special heating element designed to eliminate
problems associated with using traditional round bottom woks on the conven-
tional coil cartridge, such as shortening the life of the heating element.
10
Cleaning the Conventional Coil Cooktop
The cooktop cartridge does not need to be removed for normal cleaning.
Never immerse cartridge in water to clean. This can damage wiring. A drain hole within
the cartridge permits drainage of normal spills into the porcelain drain pan where it will
drain into the grease container. Interior and bottom of cartridge may be wiped clean with
detergent solution if necessary.
Cartridge terminals, if dirty, may be polished with S.O.S. pad, but must be cleaned
thoroughly of soap and dried thoroughly before being inserted into the cooktop.
Heating Elements: Under normal conditions, most soil will burn off elements. The
heating elements unplug for your convenience in cleaning the drip pans. Lift slightly
and pull away from receptacle. DO NOT IMMERSE IN WATER. To replace elements,
push completely into the receptacle. Make sure the elements fit flat inside the chrome
bowl.
Drip Pans: To keep the like-new appearance, clean frequently and never allow
anything to burn on twice. Remove soiled pans (first remove heating element). Clean
lightly soiled pans with soap and water or clean in dishwasher. Difficult to remove spots
can be cleaned by rubbing lightly with soapy S.O.S. pads or nonabrasive cleansers
such an Bon Ami. To help release burned on soil, soak in asolution of 1/2 cup ammonia
and 1gallon warm water or boil in 2quarts of water for 20 minutes. (All drip pans cannot
be boiled at once because element being used must have a drip pan in place.) Do not
use abrasive cleansers, steel wool or cleansers not recommended for use on chrome. A
bluing of the drip pans indicates improper utensil selection and/or using excessively
high heat and cannot be removed.
Stainless Steel #eaL,_: See page 12 for cleaning instructions for stainless steel
areas.
NOTE:Ifexcessivespill-overoccurs,checkthegreasecontainer.
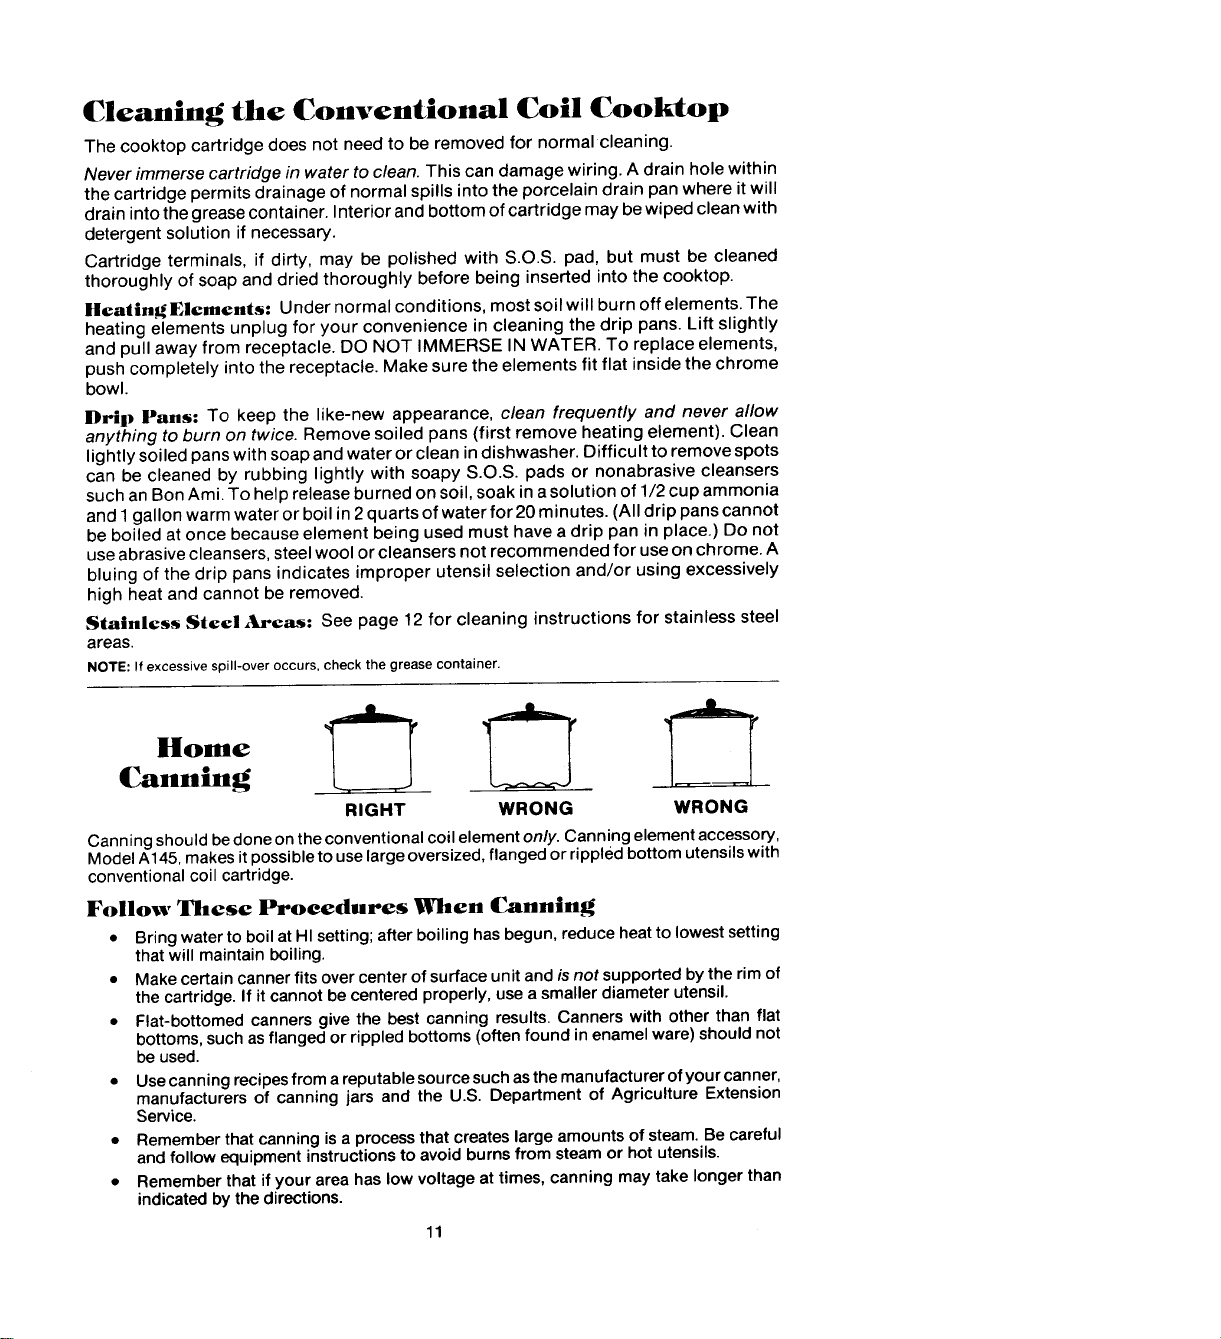
RIGHT WRONG WRONG
Canning should be done on the conventional coil element only. Canning element accessory,
Model A145, makes it possible to use large oversized, flanged or rippled bottom utensils with
conventional coil cartridge.
Follow These Procedures When Canning
• Bring water to boil at HI setting; after boiling has begun, reduce heat to lowest setting
that will maintain boiling.
• Make certain canner fits over center of surface unit and is not supported by the rim of
the cartridge. If it cannot be centered properly, use a smaller diameter utensil.
• Flat-bottomed canners give the best canning results. Canners with other than flat
bottoms, such as flanged or rippled bottoms (often found in enamel ware) should not
be used.
• Usecanningrecipesfromareputablesourcesuchasthemanufacturerofyourcanner,
manufacturers of canning jars and the U.S. Department of Agriculture Extension
Service.
• Remember that canning is a process that creates large amounts of steam. Be careful
and follow equipment instructions to avoid burns from steam or hot utensils.
• Remember that if your area has low voltage at times, canning may take longer than
indicated by the directions.
11
Cleanln your Stainless
Steel Cooktop
Stainless steel tends to more readily show heat discoloration than other cooktop
materials, but this discoloration is removable. Heat discoloration is caused by using
oversized utensils, such as canners or stock pots that extend more than one-inch
beyond the edge of the heating element, or by using utensils that are not flat, such as
ones having rippled or warped bottoms, along with the prolonged use of the high heat
setting. Follow the directions below for removing the golden discoloration. A really
good cleaning with recommended cleansers such as Zud tends to reduce the tendency
to discolor.
Cleaning instructions for stainless steel areas:
• Before using the cooktop, remove all pieces of plastic covering the top. Use a glass
cleaner to remove any film residue from the top and inside the rim area suporting
the drip pan. If residue is left on cooktop, it can be burned onto cooktop and be
difficult to remove.
• To clean light soil, wipe with soapy cloth or nonabrasive cleanser, such as Soft
Scrub. Rinse, buff with soft cloth; polish with glass cleaner if necessary.
• To clean moderate soil or discoloration of the surface (excessive heat will cause a
golden discoloration), clean with Shiny Sinks, Zud, Bar Keepers Friend, or Luneta
(Jenn-Air Model A912, Part No. 712191 ). With asponge or cloth, rub cleanser with
the grain to avoid streaking the surface. Rinse well, buff dry; polish with a glass
cleaner if necessary to remove cleanser residue and smudge marks.
• Heavy soil, such as burned on food soil, can be removed by first cleaning as per the
instructions for moderate soil. Stubborn stains can be removed with a damp
Scotch-Brite scour-pad; rub evenly with the grain to avoid streaking the surface.
Rinse well, buff with dry cloth; polish with glass cleaner if necessary to remove
cleanser residue and smudge marks. Scotch-Brite is also useful in buffing and
removing minor scratches.
• Stubborn food stains may also b_ removed by spraying with Easy-Off oven
cleaner. Allow to set overnight, then rinse. If stains remain, clean with recom-
mended cleansers such asZud, Luneta (Jenn-Air Model A912, Part No. 712191 ), or
Scotch-Brite scour-pad. CAUTION: When using Easy-Off, avoid spraying areas
other than the stainless steel such as the area under drip pans, ventilation air grille,
control knob area, areas around cooktop. Immediately wipe up any spray from
these areas with adamp cloth. Read the manufacturer's precautions on using oven
cleaners. The caustic materials in these products will discolor materials such as
aluminum, brushed or chrome plate. Hint: Easy-Off can be used to clean the
porcelain grill basin area.
• Be very careful not to get cleanser or water into the wiring in the receptacle area.
• Hint: for ease in cleaning the stainless steel cooktop cartridge when it is moder-
ately or heavily soiled, remove cartridge from cooktop and work near the sink area.
Do not immerse the cartridge or heating elements in water. Be very careful not to
get cleanser or water into the wiring in the receptacle area.
12
Glass-Ceramic
Cooktop
For best results, always use proper cookware as described below. Utensils should
match the size of the heating element. The utensils should be made of a material which
conducts heat well and does not warp after heating, such as heavy duty aluminum and
stainless steel.
Different utensils and different amounts of food being prepared will affect the tempera-
ture control setting. (See page 8 for typical control settings.) For fastest cooking, start
with the surface control on HI for one minute; then turn the control to the lower desired
setting. Covering utensils, whenever possible, speeds cooking and is more energy
efficient.
Glass-ceramic retains heat for a longer period of time than a conventional coil element.
Consequently, if water is brought to a boil at the HI setting, it will continue to boil
rapidly for a minute or so after being turned to a lower heat setting. In the event of a
potential boil over, move the utensil to a cool element or from the cooking surface.
A benefit of the retained heat feature of glass-ceramic cooktops is that the heating
element can be turned off several minutes before the food is done and the retained
heat can be used to finish cooking the food or for keeping the food warm until ready to
serve.
Selecting Proper Cooking Utensils
• Select cookware with flat bottoms. Flat bottom pans are the fastest and best
conductors of heat and provide the most consistent and satisfactory results.
• To determine if the utensil is flat, place the edge of a ruler on the bottom. Hold up
to the light. No light should be visible between the edge of the ruler and the pan.
Reject any pans that do not fit flush against ruler's edge.
• Avoid utensils with convex, concave, or those that have irregular bottoms, such
as those with rims or ripples. These utensils not only cause the element to cycle
off but can also cause stains which may be difficult or impossible to remove.
• Test cast ironware since all are not flat. Also be cautioned against possible
"impact damage" should the heavy utensil be dropped on the glass-ceramic
surface.
• Donotuseutensilsofadiameterthatpermitseithersideofthebottomtoreston
any rim portion of the cooktop cartridge. Large utensils, such as pressure
canners or oversized skillets, should be used only on conventional coil or induc-
tion cartridges if they do not meet this test. For tips on canning, see page 11.
13
Cleaning the Glass-Ceramic Cooktop
Save on Clean-up Time
• Make sure bottomsof cookware utensils are always clean and dry. Before using
utensils on the glass-ceramic cooktop for the first time, and periodically as
needed,clean the bottoms with scouring pads or other cleansers. Rinse and dry
thoroughly. Soil from the utensil bottom can be transferred to the cooktop
surface.
• Make it apractice towipe cooktop surface with a clean damp cloth or paper towel
before each use; dry thoroughly. Invisible spatters, dust specks, cleansers or
water can cause stains that appear after unit is heated. A sponge or dishcloth
which isnot clean will leavefilm and soil laden detergent water which may cause
stains on surface after area is heated.
• Use correct heat settings and cookware large enough to hold food and liquid to
prevent boil overs and spattering.
• When frying, use a spatter shield to reduce spattering.
• If a bad spillover occurs while cooking, spills may be cleaned from the cooktop
while it is hot to prevent a tough cleaning chore later. Using extreme care, wipe
with aclean damp towel. Be careful to avoid burns from steamor hand touching
the hot cooktop.
IMPORTANT
• Do not use the glass-ceramic cooktop as a cutting board.
• Do not use or place plastic items anywhere on the cooktop.
• Do not use cartridge in the event a break has occured. Call an authorized Jenn-Air
Service Contractor.
• Do not slide or scrape aluminum utensils across the cooktop since this may cause
marks or pits in surface which are permanent.
• Do not slide heavy metal utensils across surface since these may scratch the surface.
• Do not cook foods directly on cooktop.
• Do not use aluminum foil, disposable foil pans (such as those packaged with popcorn)
or foil wrapped food bundles on cooktop since this can permanently mark the surface.
• Do not allow pan to boil dry as this could damage the cooktop and the pan.
• Do not use trivets or any kind of heat retarding pad under cooking utensils.
14
Daily Care
• After cooktop has cooled, remove any spillover or spatter.
• The cartridge does not need to be removed from the cooktop for normal cleaning.
If removed, bottom may be wiped clean with damp cloth. If electrical terminals
on cartridge are cleaned, dry them thoroughly before using.
• For general daily cleaning and light surface soil, wash surface with solution of
water'and any of these cleansers: dishwashing liquid such as Ivory or Joy, baking
soda, fine polishing powders such as Bon Ami, or commercial ceramic cooktop
cleansers. Wipe with clean damp cloth or paper towel. Rinse and dry thoroughly.
• To remove residue from burned on spills, make apaste of water and baking soda
or Bon Ami, Bar Keepers Friend, Comet, Shiny Sinks or nonabrasive soft scrub-
bing cleansers. Scrub with paper towels, nylon or plastic scrubber, such asTuffy.
Rinse and dry thoroughly. If stain is not removed easily, allow paste to remain on
surface for 30 to 40 minutes. Keep moist by covering with wet paper towel.
• To remove burned on spot, use a single edge razor blade. Place blade edge on
cooktop at 30° angle; scrape off spot. Clean remainder of soil with method
described above.
• To remove moderate to heavy stains, remove cartridge from cooktop (to prevent
unit from being turned on). Make a paste of Bar Keepers Friend and water. Apply
to stained area. To keep paste moist, cover with clear polyester sheet, such as
Reveal and Glad. Allow to remain overnight. Rinse surface and dry thoroughly. If
stain is not completely removed, repeat procedure.
• See page 12 for cleaning instructions for stainless steel trim.
• For cleaning: Do Not use soap pads containing metal fibers such as steel wool or
S.O.S.pads,ovencleaning compounds, rust stain removers,abrasive cleansers or other
cleansers not specifically recommended for use on glass-ceramic.
• Never immerseyour cooktop cartridge in water. This could damage internal wiring.
15
Grilling
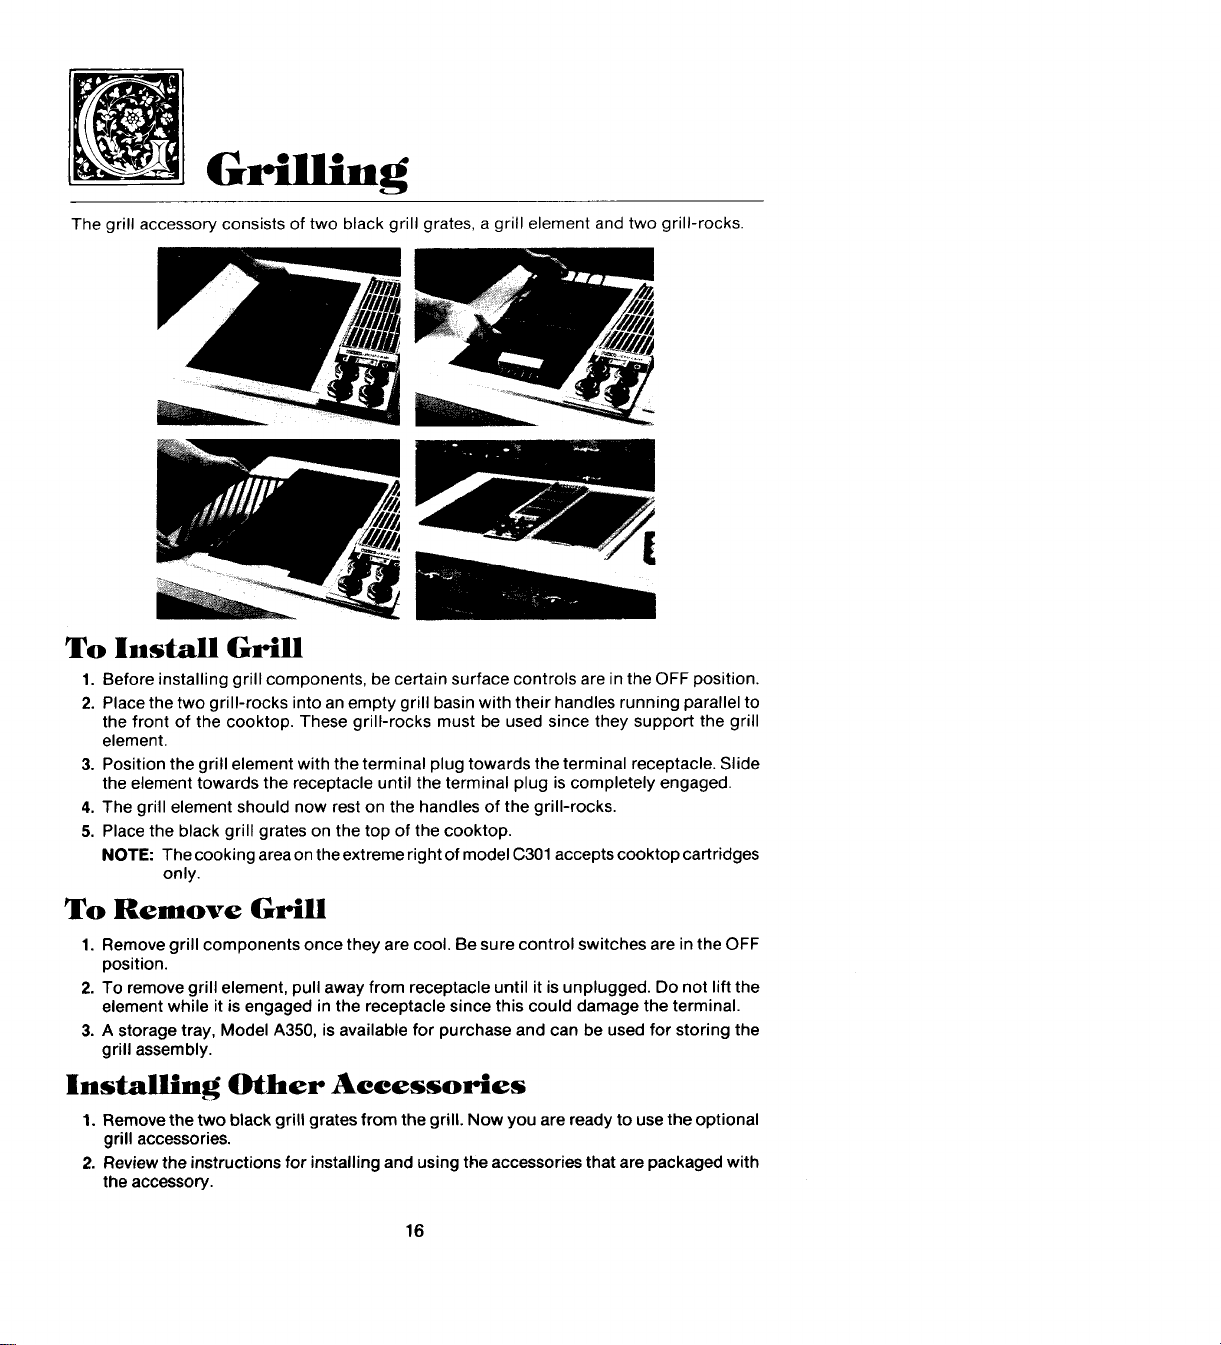
The grill accessory consists of two black grill grates, a grill element and two grill-rocks.
To install Grill
1. Before installing grill components, be certain surface controls are in the OFF position.
2. Place the two grill-rocks into an empty grill basin with their handles running parallel to
the front of the cooktop. These grill-rocks must be used since they support the grill
element.
3. Position the grill element with the terminal plug towards the terminal receptacle. Slide
the element towards the receptacle until the terminal plug is completely engaged.
4. The grill element should now rest on the handles of the grill-rocks.
5. Place the black grill grates on the top of the cooktop.
NOTE: The cooking area on the extreme right of model C301 accepts cooktop cartridges
only.
To Remove Grill
1. Remove grill components once they are cool. Be sure control switches are in the OFF
position.
2. To remove grill element, pull away from receptacle until it is unplugged. Do not lift the
element while it is engaged in the receptacle since this could damage the terminal.
3. A storage tray, Model A350, is available for purchase and can be used for storing the
grill assembly.
Installing Other Accessories
1. Remove the two black grill grates from the grill. Now you are ready to usethe optional
grill accessories.
2. Review the instructions for installing and using the accessories that are packaged with
the accessory.
16
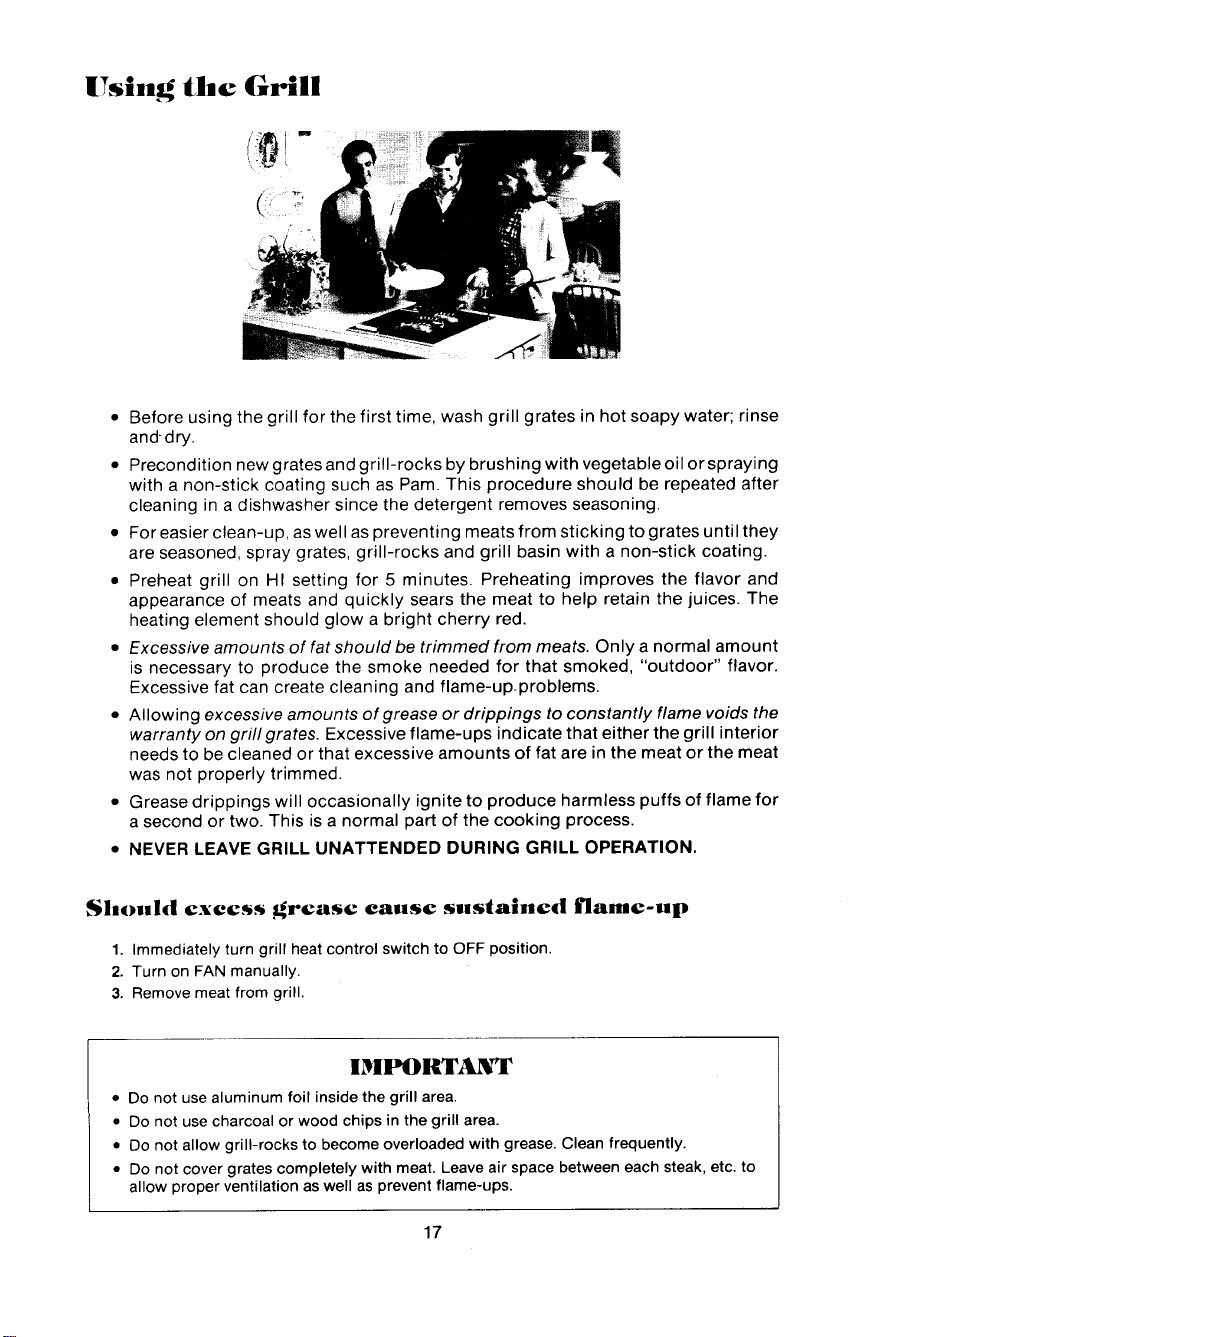
• Before using the grill for the first time, wash grill grates in hot soapy water; rinse
anddry.
• Precondition new grates and grill-rocks by brushing with vegetable oil or spraying
with a non-stick coating such as Pam. This procedure should be repeated after
cleaning in a dishwasher since the detergent removes seasoning.
• For easier clean-up, as well as preventing meats from sticking to grates until they
are seasoned, spray grates, grill-rocks and grill basin with a non-stick coating.
• Preheat grill on HI setting for 5 minutes. Preheating improves the flavor and
appearance of meats and quickly sears the meat to help retain the juices. The
heating element should glow a bright cherry red.
• Excessive amounts of fat should be trimmed from meats. Only a normal amount
is necessary to produce the smoke needed for that smoked, "outdoor" flavor.
Excessive fat can create cleaning and flame-up.problems.
• Allowing excessive amounts of grease or drippings to constantly flame voids the
warranty on grill grates. Excessive flame-ups indicate that either the grill interior
needs to be cleaned or that excessive amounts of fat are in the meat or the meat
was not properly trimmed.
• Grease drippings will occasionally ignite to produce harmless puffs of flame for
a second or two. This is a normal part of the cooking process.
• NEVER LEAVE GRILL UNATTENDED DURING GRILL OPERATION.
Should excess grease cause sustained flame-up
1. Immediately turn grill heat control switch to OFF position.
2. Turn on FAN manually.
3. Removemeat from grill.
IMPORTANT
• Do not usealuminum foil inside the grill area.
• Do not use charcoal or wood chips in the grill area.
• Do not allow grill-rocks to become overloaded with grease. Clean frequently.
• Do not cover grates completely with meat. Leave air space between each steak,etc. to
allow proper ventilation as well as prevent flame-ups.
17
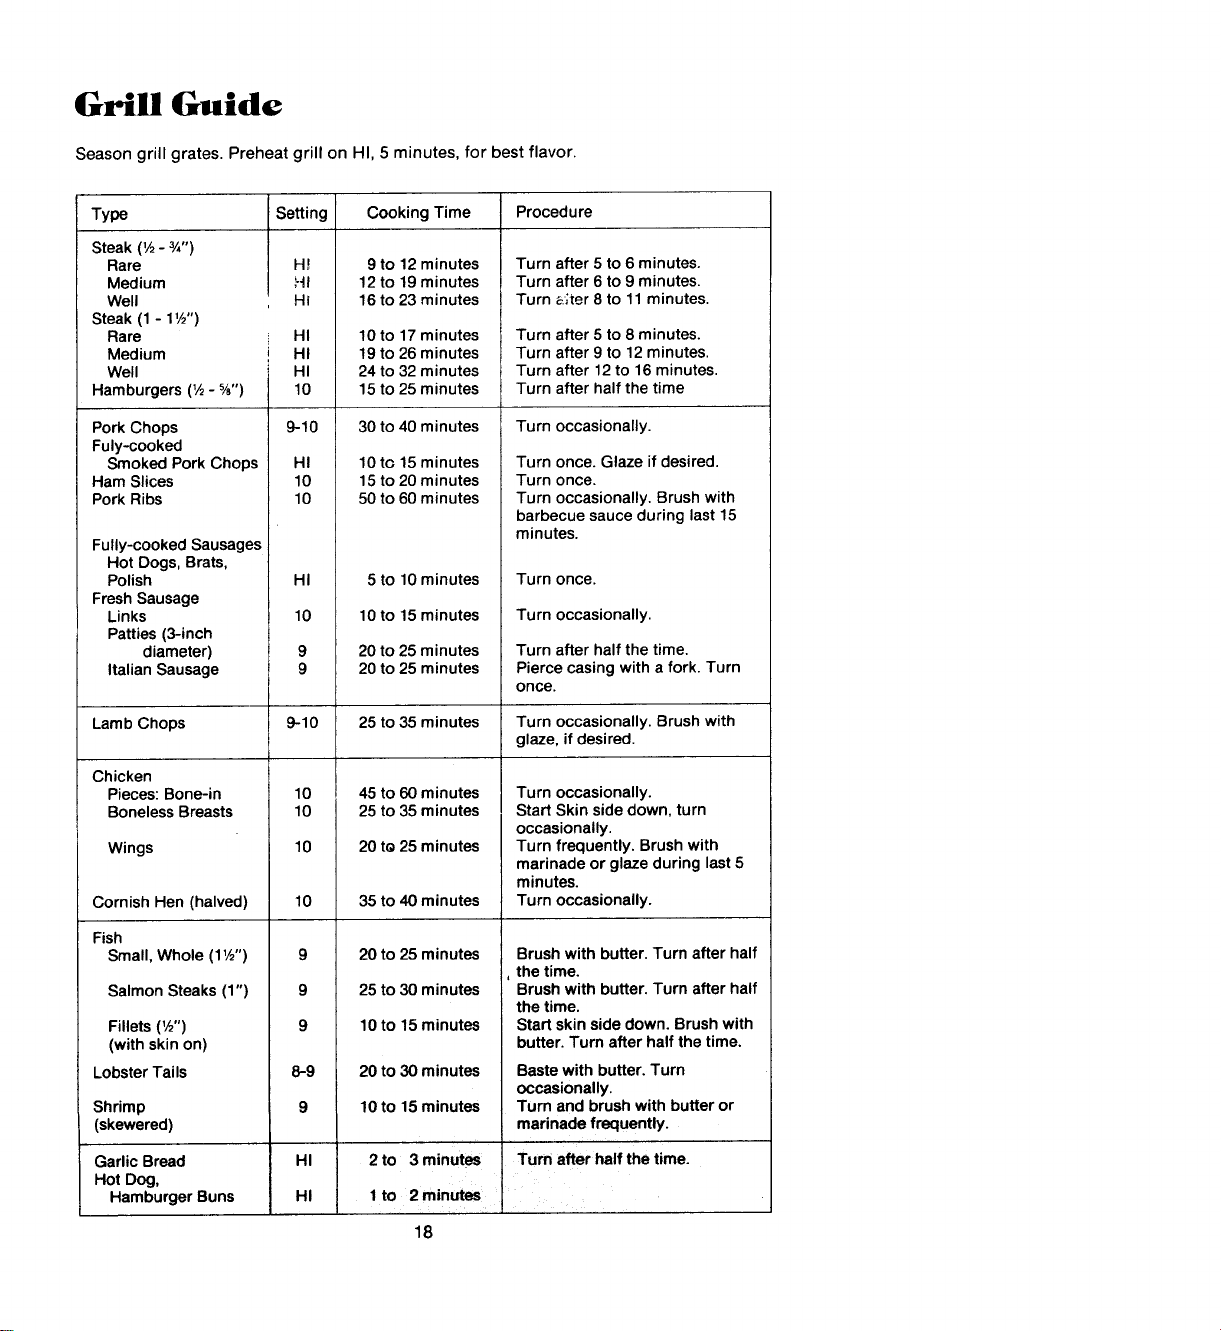
Grill Guide
Season grill grates. Preheat grill on HI, 5 minutes, for best flavor.
Type Setting CookingTime Procedure
Steak (1/2- 3,_,,)
Rare H! 9 to 12minutes Turnafter 5 to 6 minutes.
Medium HI 12 to 19minutes Turnafter 6 to9 minutes.
Well Hi 16 to23 minutes Turn &;ter8 to 11minutes.
Steak(1 - 11h'')
Rare HI 10 to 17minutes Turnafter 5 to8 minutes.
Medium HI 19to 26 minutes Turnafter 9 to 12minutes.
Well HI 24 to32 minutes Turnafter 12to 16 minutes.
Hamburgers(1/2- %") 10 15 to25 minutes Turn after halfthe time
PorkChops 9-10 30 to40 minutes Turnoccasionally.
Fuly-cooked
Smoked PorkChops HI 10to 15minutes Turn once.Glaze ifdesired.
Ham Slices 10 15to20 minutes Turn once.
PorkRibs 10 50 to60 minutes Turn occasionally.Brushwith
barbecuesauceduring last15
Fully-cookedSausages minutes.
Hot Dogs,Brats,
Polish HI 5 to 10minutes Turn once.
FreshSausage
Links 10 10to 15minutes Turn occasionally.
Patties(3-inch
diameter) 9 20 to25 minutes Turnafter halfthe time.
ItalianSausage 9 20 to25 minutes Piercecasingwith a fork. Turn
once.
Lamb Chops 9-10 25 to 35 minutes Turn occasionally. Brush with
glaze, if desired.
Chicken
Pieces: Bone-in 10 45 to 60 minutes Turn occasionally.
Boneless Breasts 10 25 to 35 minutes Start Skin side down, turn
occasionally.
Wings 10 20 te 25 minutes Turn frequently. Brush with
marinade or glaze during last5
minutes.
Cornish Hen (halved) 10 35 to 40 minutes Turn occasionally.
Fish
Small,Whole (11/2'') 9 20 to25 minutes Brushwith butter. Turn after half
, the time.
Salmon Steaks (1") 9 25 to 30 minutes Brush with butter. Turn after half
the time.
Fillets (1/2") 9 10to 15minutes Start skin side down. Brush with
(with skin on) butter. Turn after half the time.
LobsterTails 8-9 20 to 30minutes Bastewith butter. Turn
occasionally.
Shrimp 9 10to 15minutes Turn and brushwith butteror
(skewered) marinadefrequently.
GarlicBread HI 2to 3 minutes Turn after half thetime.
Hot Dog,
HamburgerBuns HI 1to 2 minutes
18
Grilling Tips
With your Jenn-Air grill and accessories, literally any food you've considered "at its
best" when prepared outdoors over charcoal can now be prepared indoors with less
fuss and great flavor.
Many grilling ideas are contained in Jenn-Air's Cookbook, Complete Cooking With Jenn-
Air. There are also many cookbooks containing recipes for outdoor grilling which
can be used on a Jenn-Air.
The following suggestions are good rules to follow and will increase your enjoyment of
the equipment.
• Be sure to follow directions on page 17 for using the grill.
• Suggested cooking times and control settings are approximate due to variations
in meats and electrical voltage. Experience will quickly indicate cooking times as
well as which settings work best.
• Use the Energy-saver grill element for grilling small amounts of food on half of the
grill or for keeping cooked foods warm or preparing foods requiring different
heat control settings.
• For best results, buy top grade meat. Meat that is at least 3/4-inch will grill better
than thinner cuts.
• Score fat on edges of steak, but do not cut into meat, to prevent curling while
cooking.
• For the attractive "branded" look on steaks, be sure grill is preheated. Allow one
side of meat to cook to desired doneness, or until juices appear on the top
surface, before turning. It takes fewer minutes to cook the second side. Turn
steaks and hamburgers just once. Manipulating food causes loss of juices.
• When basting meats or applying sauces to foods, remember that excessive
amounts wind up inside your grill and do not improve the food flavor. Apply
sauces during the last 15 to 20 minutes of cooking time unless recipe specifies
otherwise. Sugar-based sauces, excessively used, will caramelize on the grill-
rocks and will create a cleaning chore.
• There are many meat marinades which will help tenderize less expensive cuts of
meat for cooking on the grill.
• Certain foods, such as poultry and non-oily fish, may need some extra fat. Brush
with oil or melted butter occasionally while grilling.
• Use tongs with long handles or spatulas for turning meats. Do not use forks as
these pierce the meat, allowing juices to be lost.
• To help retain meat juices, salt after turning meat or after cooking is completed.
• Should grilled foods be prepared and ready before you're ready to serve, turn
heat control to a low setting and cover meat with asingle sheet of foil. Food will
continue to cook.
19
Cleaning the Grill
Grill Grates: These are made from cast aluminum which have been anodized. This
coating will fade with use.
• The grates should be cleaned after each use. They can be cleaned with detergent
and a plastic scrubber, such as Tufty, or washed in the dishwasher if burned on
residue is first removed. For heavy soil, grates can be soaked in hot, soapy water
to which a cleanser, such as household ammonia, has been added.
• Donotusemetalbrushesorabrasivescouringpadsorotherscrubbersintended
to clean outdoor charcoal grills. These will remove the finish as well as scratch
the grates. Do not clean in the self-cleaning oven or use oven cleaners on the
grates.
Grill-Rocks: These are made from cast-iron which have been coated with porcelain
enamel.
• The grill-rocks should be cleaned frequently or after any excessive build up of
grease. To clean light soil, use detergent and a plastic scrubber, such asTufty, or
wash in the dishwasher if burned on residue is first removed. For heavy soil, soak
in hot, soapy water to which a cleanser, such as household ammonia, has been
added. Stubborn spots on grill-rocks, such as burned on residue from sauces,
can be scrubbed with a stiff bristle brush.
• An oven cleaner, such as Easy-Off, can be used for burned on soil. Follow
manufacturer's directions; spray on cleaner and let soak overnight. Do not clean
grill-rocks in the self-cleaning oven.
Grill Element: Follow instructions on page 16 for removing the grill element. The
grill element should never be immersed in water. Most soil will burn off during use. The
terminal block may be cleaned with soapy S.O.S. pad. Dry thoroughly before reinsert-
ing in the cooktop.
Porcelain Drain Pan: This area, located under the grill-rocks, should be cleaned
after each heavy use of the grill.
• To remove light soil, clean area with soapy water or spray with cleansers such as
409 or Grease Relief. For easier clean-up, soak paper towels in a household
cleanser, lay in drain pan, and soak for at least a half-hour or longer.
• To remove moderate soil, scrub with Comet, Bon Ami, a soft scrub cleanser or
plastic scrubber.
• To remove stubborn soil, spray with an oven cleaner such as Easy-Off; let soak
overnight, wipe clean, rinse and dry.
2O
Griddle
To Use
1. Before using the new griddle, wash in hot, soapy water; rinse and dry.
2. PI,acetwo clean grill-rocks (with handles parallel to cooktop front) into clean grill
basin. Insert grill element. Do not use surface grill grates.
3. Place griddle over grill element so that the drain holes are in front. This will permit
excess grease to be collected in the grease container.
4. Preheat the griddle as noted below. Settings above 10 during griddle operation are
unnecessary, can ruin the finish or cause seasonings or food to adhere to the
griddle.
5. After griddle is preheated, season griddle with butter or oil. DO NOT PREHEAT A
SEASONED GRIDDLE. Normally, the griddle needs to be seasoned for all but high
fat foods. If the griddle isseasoned during preheat, oil changes its chemical compo-
sition and forms a varnish-like finish on the griddle which is difficult to remove.
6. To maintain the finish, use nonmetallic spatulas or utensils while cooking.
Cleaning
1. THE GRIDDLE MUST BE CLEANED AFTER EACH USE IN ORDER TO PROPERLY
MAINTAIN THE FINt'SH. Any seasoning or food residue left on the griddle will
adhere to it during the next preheat. The residue will create avarnish-like or tacky
surface that will build up over a period of time. This built-up residue will tend to flake
off which creates a rough texture on the griddle surface, interfering with perfor-
mance and appearance of the griddle.
2. Once the griddle has cooled (DO NOT immerse a hot griddle in cold water), wash
with soap or detergent in hot water in the sink. Be sure to remove all food residue
before cooking on the griddle again. Any difficult to remove, cooked on residue can
be removed with a plastic scrubber.
3. In the event the griddle has not been cleaned sufficiently and has a light, tacky film of
oil or cooked on residue, remove with plastic scrubber and Bar Keepers Friend, Ajax,
or other nonabrasive cleansers.
4. DO NOT wash in dishwasher as strong detergents remove some of the natural
seasoning of the non-stick finish.
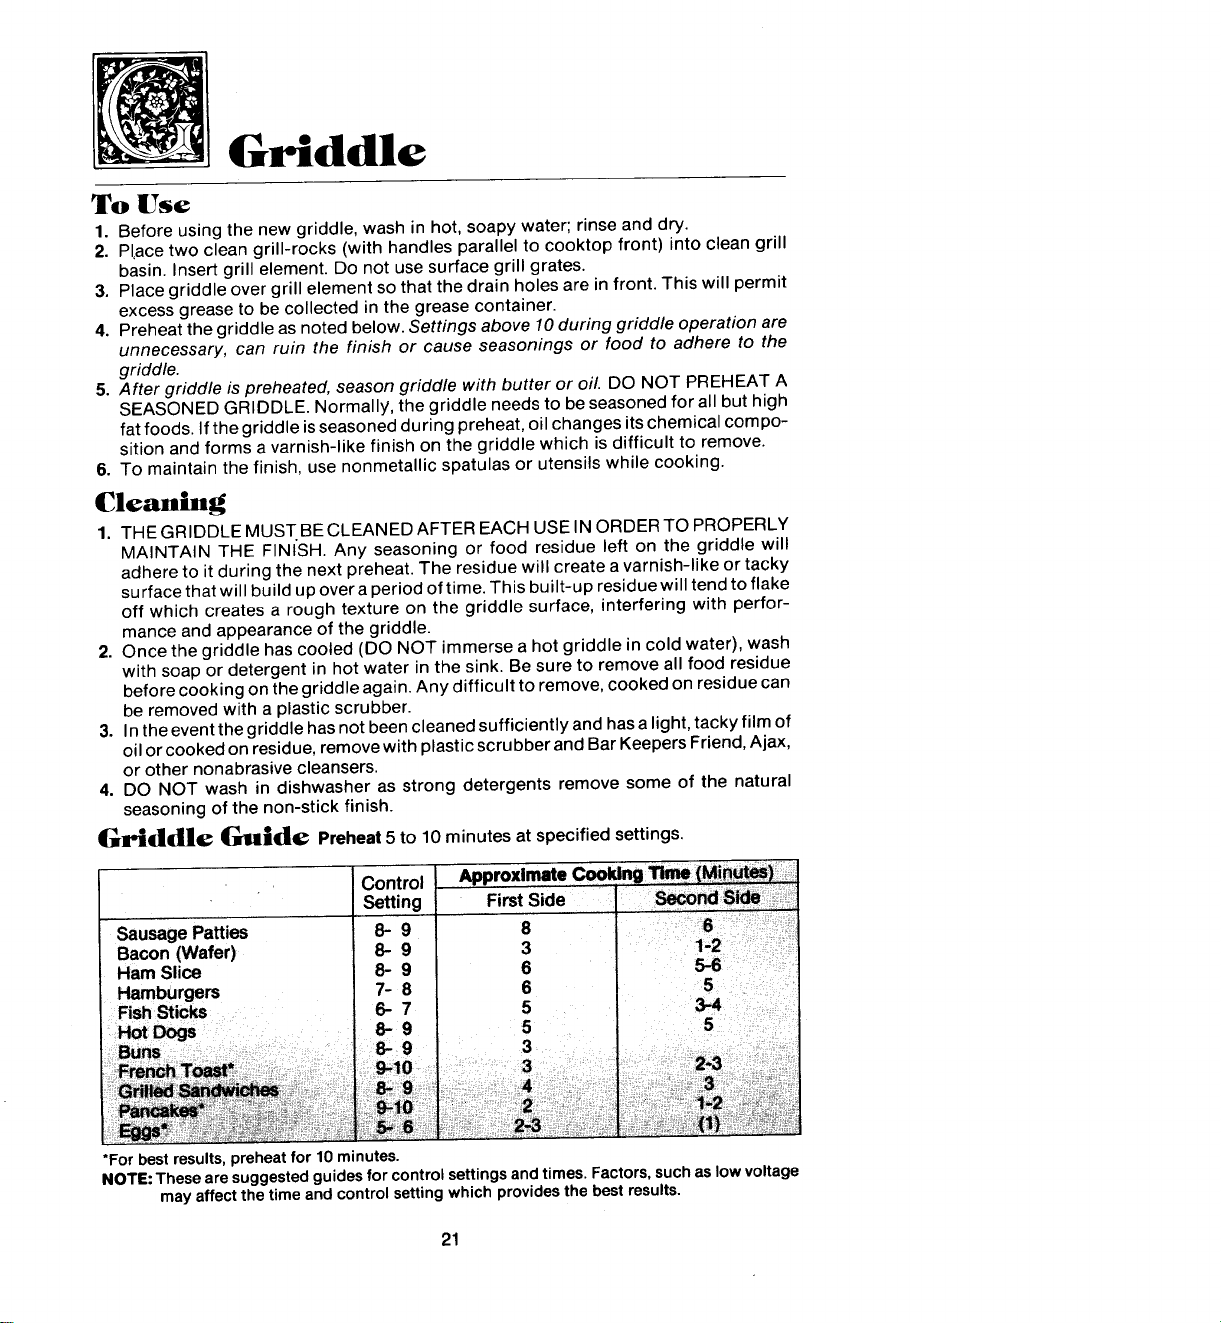
Griddle Guide Preheat 5 to 10 minutes at specified settings.
Cot trol Approximate Cooldng _ (Miflu_) i
,, " .
Set1mg First Side _ d S_
Sausage Patties 8- 9 8
Bacon (Wafer) 8- 9 3
Ham Slice 8- 9 6
Hamburgers 7- 8 6 _ 5 '
*For best results,preheat for 10 minutes.
NOTE: Theseare suggestedguidesfor controlsettingsand times. Factors,suchas lowvoltage
may affectthe timeand controlsettingwhich providesthe bestresults.
21
Plug-in Grill 2Vssembly
Grill assemblies include one plug-in
element, two grill-rocks and two black
anodized aluminum grates to convert
either side of your cooktop to a grill. A
storage tray is included. (Tray is not
included with grill shipped with your
cooktop.)
"Energy-Saver" Model. 2800 watt grill Standard Model, 2800 watt grill element
element permits you to control tempera- distributes heat under entire grill area.
tures under front and rear grills in- Model A150
dependently.
Model A151
Storage Tray
To store grill assemblies which came with
Coml)lcte Cooking cooktop cartridges except induction.
Model A350
vLtth Jenn-Air
} i, ,!
Plug-in Canning Element
Special canning element plugs into con-
This outstanding cookbook by Jenn-Air ventional coil cooktop cartridge (Model
features many invaluable recipes and cook- A100), raising the heating element above
ing tips when using your Jenn-Air grill, the cooking surface. Allows use of over-
accessories or selective-use convection sized utensils and those with warped or
oven. 192 pages, rippled bottoms.
Model A905 Model A145
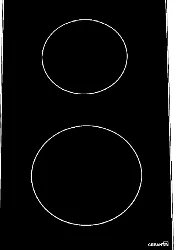
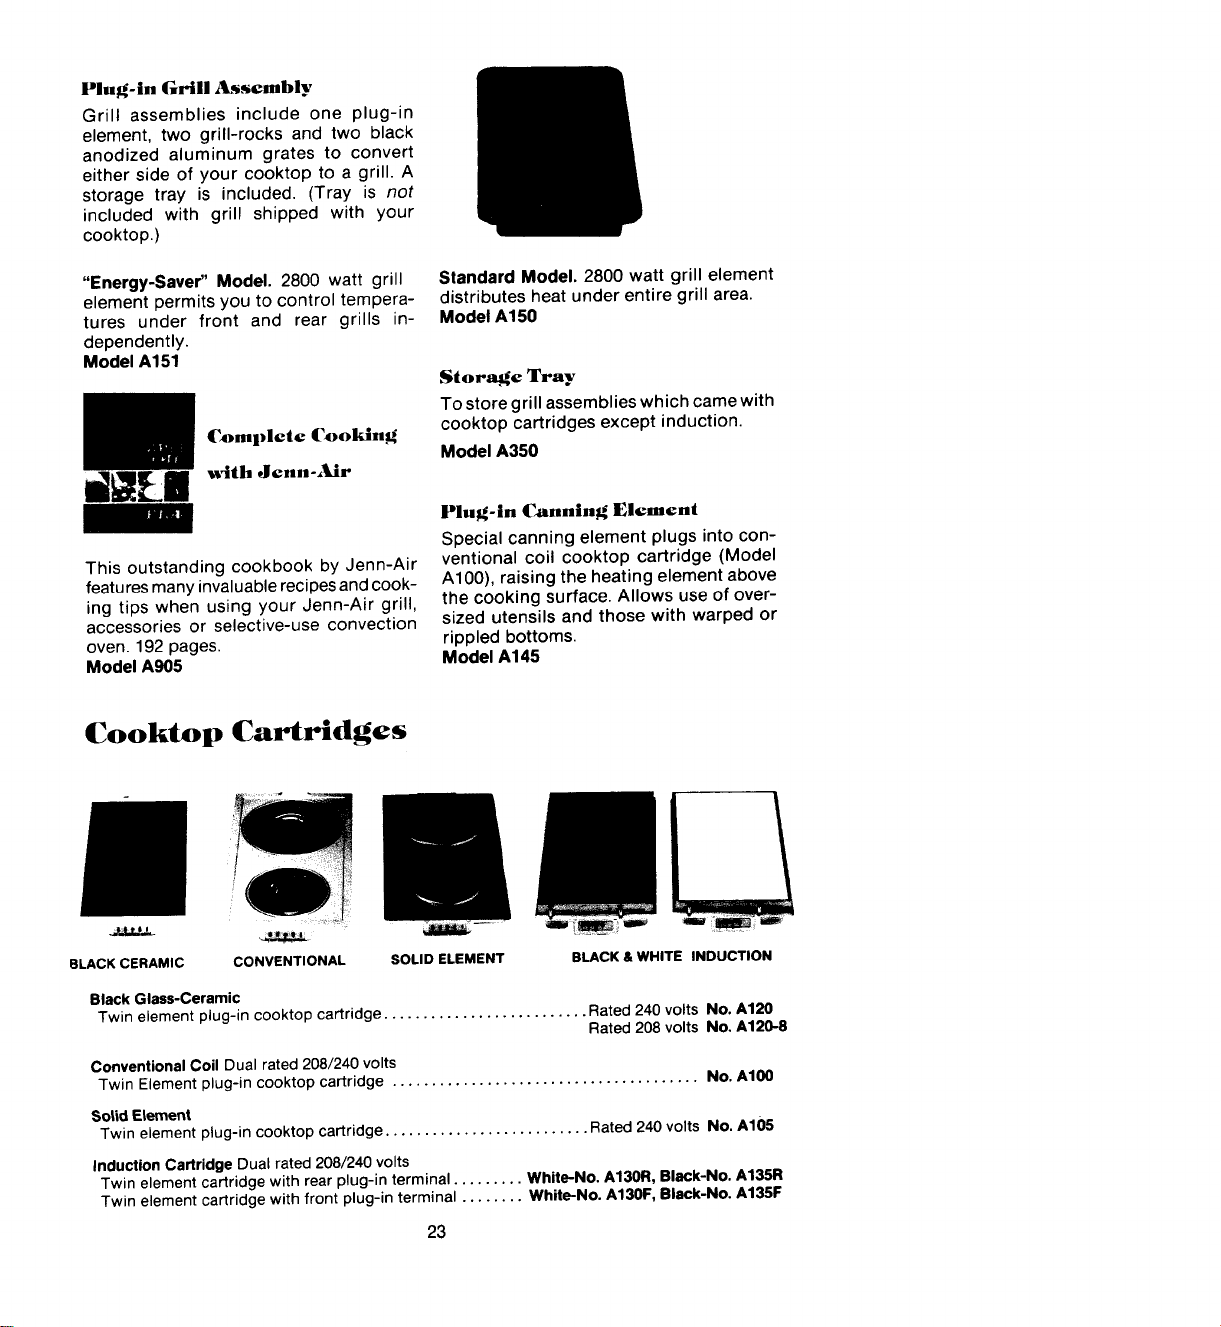
Cooktop Cartridges
LJ
_- J_-¢lr4,_ _ ..........
eLACKCERAMIC CONVENTIONAL SOLIDELEMENT BLACK&WHITEINDUCTION
Black Glass-Ceramic
Twin element plug-in cooktop cartridge.......................... Rated240 volts No.A120
Rated208 volts No.A120-8
ConventionalCoil Dual rated208/240volts
Twin Element plug-in cooktopcartridge ....................................... No. A100
Solid Element
Twin element plug-incooktop cartridge.......................... Rated240volts No. A105
InductionCartridgeDual rated208/240volts
Twin element cartridgewithrear plug-interminal......... White-No. A130R,Black-No.A135R
Twin elementcartridge withfrontplug-in terminal ........ White-No. A130F,Black-No. A135F
23