Loading ...
3. Remove the hex flange nut that secures the blade to the spindle.
IMPORTANT: The hex flange nuts have a right-handed (normal) thread pattern.
Do NOT attempt to force the nuts in the opposite direction. Doing so may damage the
nuts.
4. Repeat steps 2 and 3 on the other cutting blades.
5. Replace the blades with the blades included in the kit. Be sure to install each
blade with the side marked ‘‘Bottom’’ (or with a part number stamped in it)
facing the ground when the mower is in the operating position.
IMPORTANT: Use a torque wrench to tighten each blade spindle’s hex flange
nut to between 80 ft-lb and 100 ft-lb.
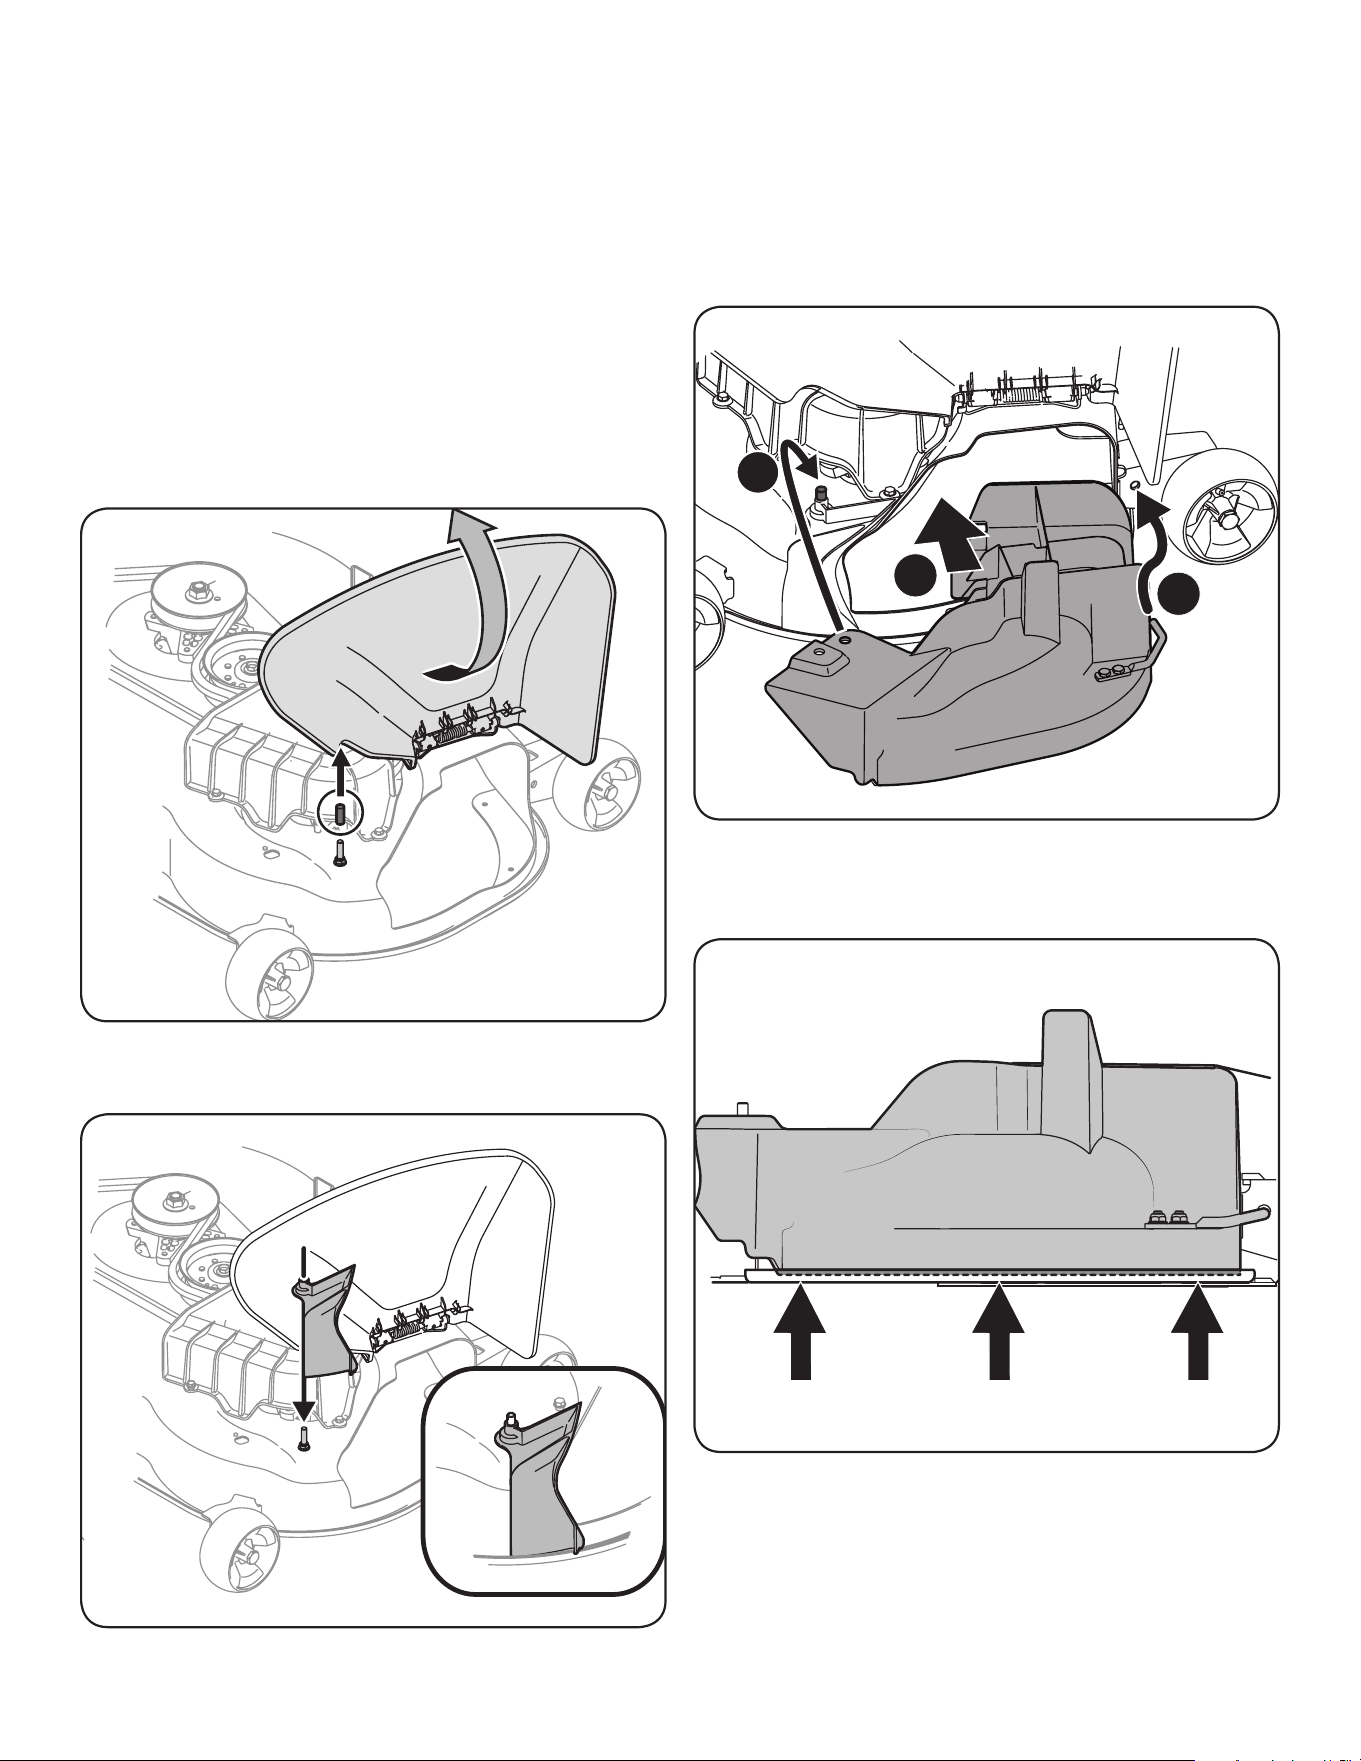
Installing the Mulch Plug
1. Pivot the chute deflector upward and remove the protective cover from the
pin found on the deck’s surface. See Figure 3.
Figure 3
2. Position the chute adapter over the pin. See Figure 4.
Figure 4
3. To install the mulch plug, pivot the discharge chute upward and refer to Figure
5:
a. Insert the mulch plug into the discharge chute opening.
b. Insert the mulch plug rod into the hole found on the front, right deck
wheel bracket.
c. Position the rear of the mulch plug over the pin found on the deck’s
surface.
c
b
a
Figure 5
Important: Be certain that the bottom of the mulch plug is installed down
inside of the lip of the deck opening, as shown in Figure 6.
Figure 6
Loading ...
Loading ...
Loading ...