Automatic Washing Machine User manual
This manual is for
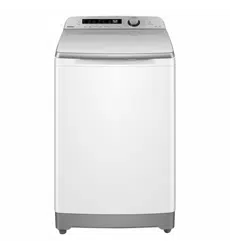
HWMP55-918
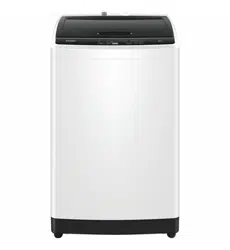
HWMP65-918
Please read this manual
carefully before using.
Retain for future
reference.
CONTENTS
1
Safety Precautions 2-3
Installation and Adjustment 4
Installation 5
Installation water inlet hose 6
Before washing 7
Detergent
9-13
4
Trouble-shooting 15
Packing list 17
Specifications 18
Product Overview
of drainage hose
of
usage guide
Operation & Wash Cycles
Loading your laundry 8
Maintenance 1
8
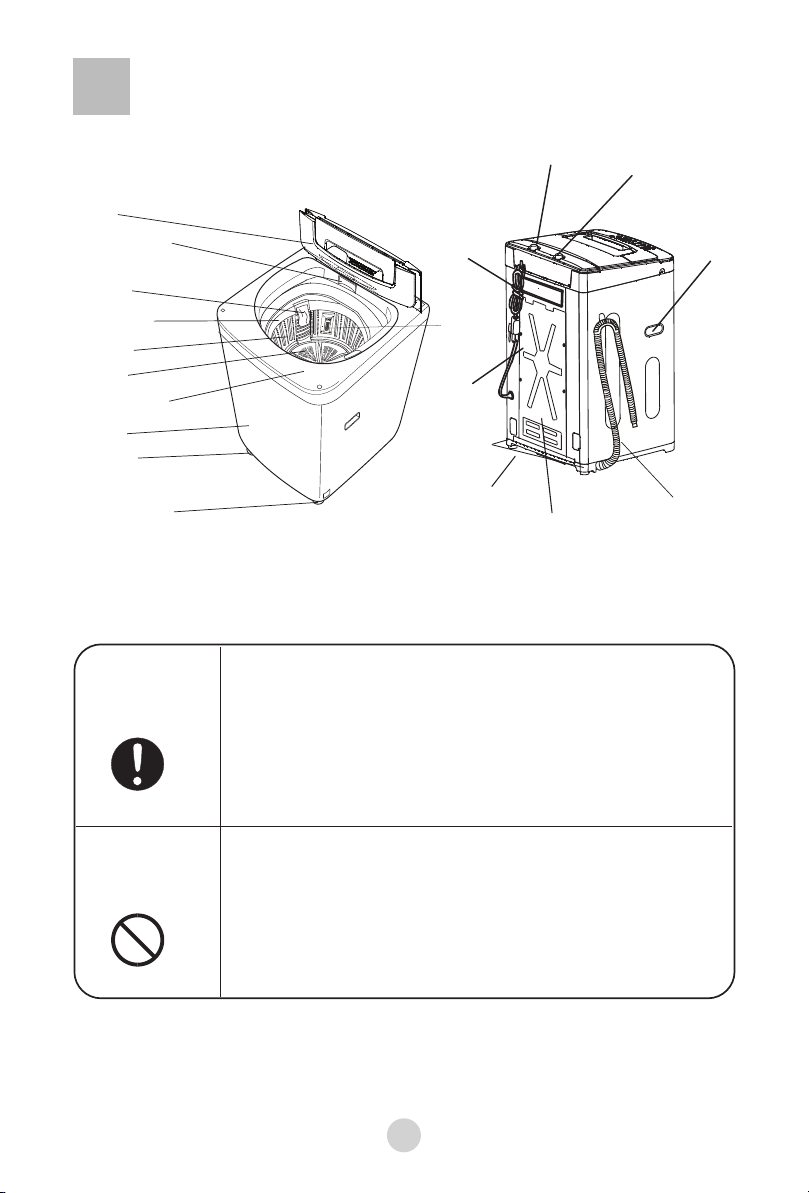
Drain connector
Inner tub
Detergent box
Top lid
Balance ring
Lint filter
(HWMP55-918)
Pulsator
Cabinet
Adjustable leg
Fixed leg
Back cover
1
Product Overview
Contents marked with this symbol are related to the
safe use of the product and the personal safety of the
user. Please operate in accordance to the contents of
this manual, to avoid harm to the user or damage to the
machine itself.
Contents marked with this symbol indicate operations
or actions that should not be undertaken by the user.
Performing of such actions may result in injury to the
user or damage to machine itself, and void warranty.
Description of symbols
Warning sign
Forbidden sign
Power cord
Cold water valve
Hot water valve
Handle
Drainage
hose
Back
cover
SAFETY WARNING
Please check power socket condition to ensure it has been earthed
correctly prior to installation to ensure your safety
Control panel
Lint filter
(HWMP65-918)
Safety Precautions
The ventilation
holes at the bottom
Soft object
Back
Front
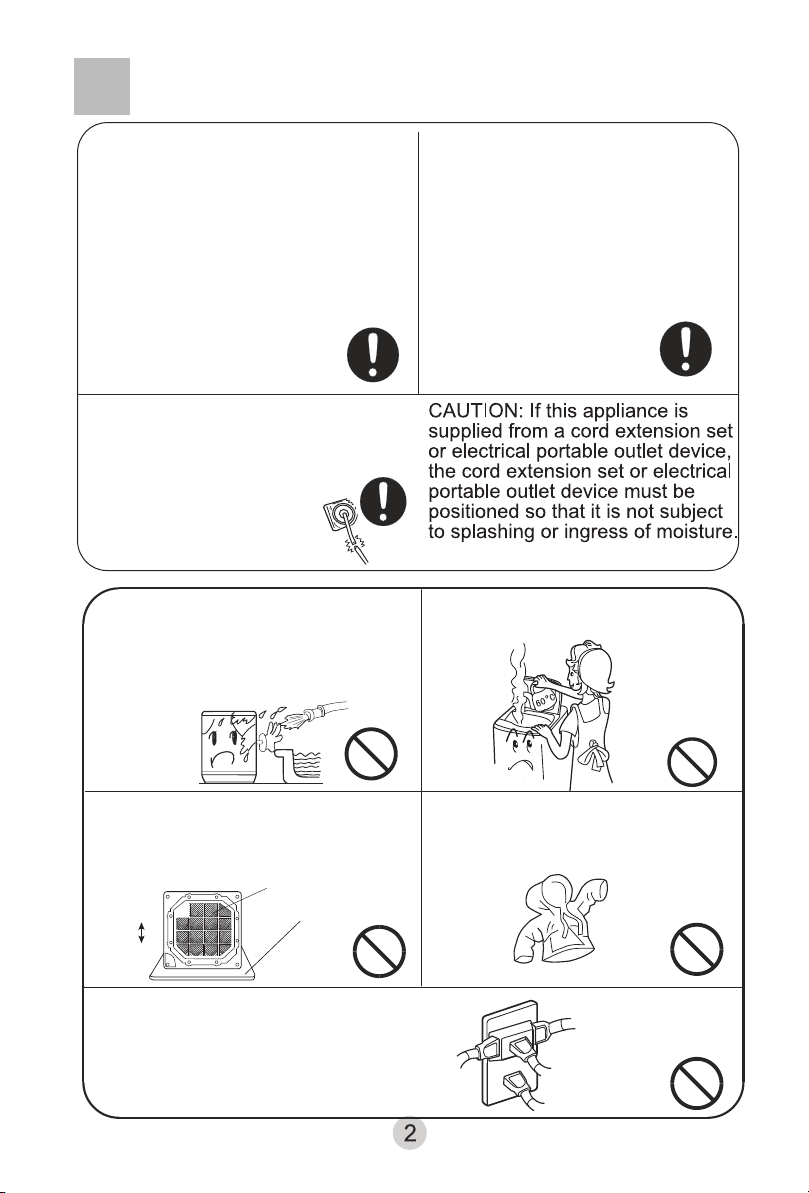
A separate, earthed power socket is
required for the power supply. Hold the
plug - NOT the electric cable - when
unplugging the washing machine. Do
not insert or remove the power plug
with wet hands.After installation of the
washing machine, the power plug
should be accessible.
Ensure the plug is removed and the
taps turned off in the following cases:
Power failure, cleaning, moving,
installation and when not in use.
Do not block the ventilation holes with
carpet. Ensure carpet does not obstruct
the opening under the base of the
cabinet
If power cord or other parts of this
machine become damaged or
faulty, please contact a technician
to have it repaired. DO NOT
attempt repairs yourself as this
may cause personal harm or
void warranty.
Do not install this appliance in a damp
or wet environment. Do not leave wet
laundry on the Control Panel or spray
water directly on to this appliance, as
this may cause the washer to
malfunction
or cause an
electrical
fault.
Do not wash water-proof clothing
as this may affect load balance
during spin cycle(s)
Do not connect to hot water higher
o
than 50 C temperature
If you are using an extension cord or a portable
electrical outlet device (not recommended),
ensure that it is positioned so that it does not
come into contact with water or moisture
Safety precautions
3
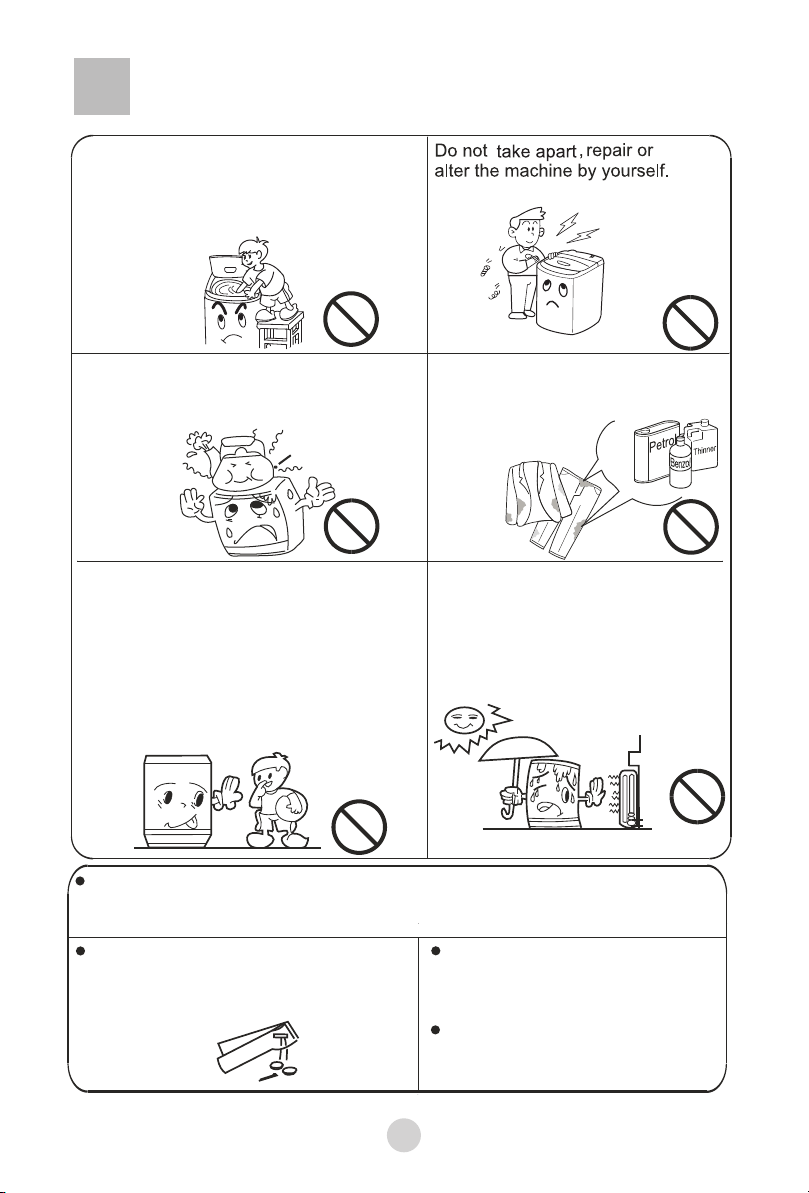
Do not leave hot or heavy items on lid
or control panel as this may cause
damage to the washer or make the
washer
unsafe to
operate
Do not attempt to move washing or
place hands inside washing machine
while in operation. Please ensure
children are supervised around
machine to avoid harm.
Do not wash laundry with chemicals
or other volatile materials (such as
petrol, solvents or thinners) as this
may cause damage
to the machine.
This clothes washer is not intended for use
by children and persons with reduced
physical,sensory or mental capabilities, or
lack of experience and knowledge, unless
they have been given supervision or
instruction concerning use of the appliance
by a person responsible for their safety.
Please remove items such as coins,
buttons, sand and other solid materials
from clothing before washing.
Check that water faucets are open
after connection to machine, prior
to operation and that pipes are
connected correctly.
Please use low suds/High
Efficiency washing powder.
Keep washer away from heat
sources such as heaters, stoves or
direct sunlight.
If power cord or other parts of this machine become damaged or faulty, please
contact a technician to have it repaired. DO NOT attempt repairs yourself as
this may cause personal harm or void warranty.
Install the bottom plate
4
Please install and adjust the machine according to the directions contained
in this manual. It is very important to follow these directions for the safe
operation of the machine, and to ensure your machine operates correctly.
Installation & Adjustment
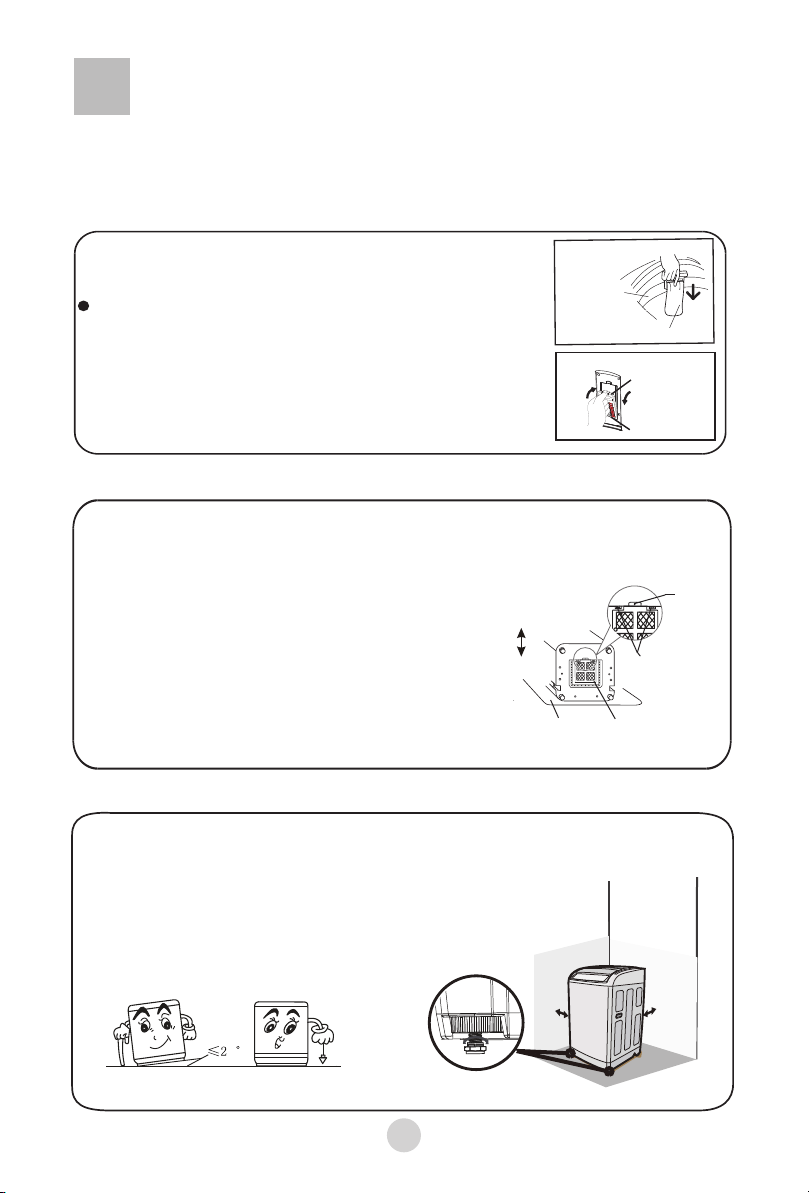
Balance washing machine
After removing washer from outer packaging, take
out the lint filter from the document bag, install it to
the inner tub. See the figure opposite
Install the lint filter
Inner tub
Lint filter
Please ensure the lint filter is installed correctly and
maintained in good condition to ensure the water outlet is
not blocked or the flow altered. If the lint filter is lost or
damaged, contact Customer Care.
The purpose of the bottom plate is to suppress noise
from the washing machine during operation.
Steps:
1. Lay the washer on its back, on a non-abrasive
surface.
2. Place the plate on to the bottom of the machine.
3. Use a screwdriver to tighten the screws ( in
accessory bag) securing the panel to bottom of
the washer.
4. Once all screws are tight and the panel is
secure, return the washer to its standing
position.
Screw
Two fasteners
Bottom plate
Cparpet
Front
Back
Down
Dismantle
Install
Up
Model HWMP55-918
Model HWMP65-918
Do not install this machine on an incline greater than 2° . Installing machine on an
angle or on rough ground will result in unstable running or stoppage of the
machine. Please adjust it by the following method:
1.Confirm it is level£»
2.Lift up the side of the leg slightly and twist the adjustable leg.
Note:The distance between the washing machine
and wall:at least 20 mm.
20mm
20mm
High
Low
5
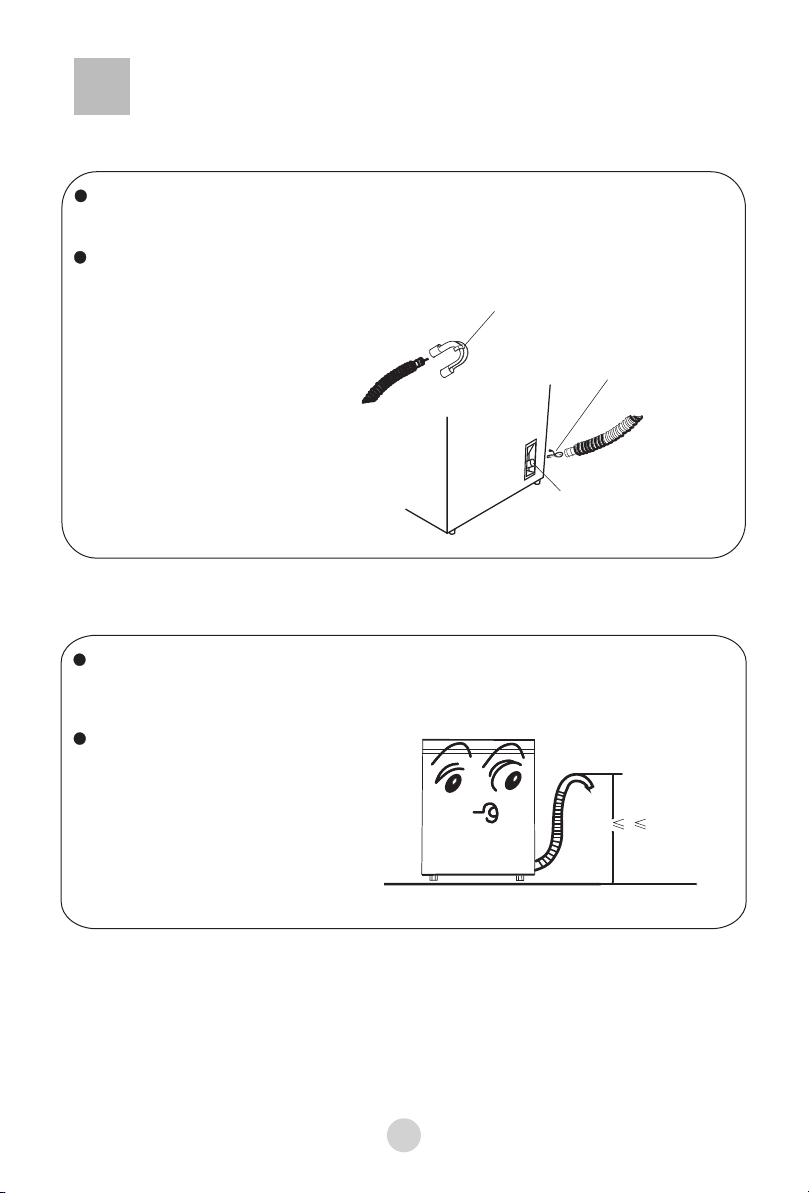
Installation of drainage hose
Install drainage hose
First connect the drainage hose to the connection point on the lower
left side of the cabinet, and fasten with drain hose hoop (provided).
Connect drain hose guide on to the outside of drainage hose. To guide
the drain hose over the tub or standpipe the hose guide MUST be fitted
to the drain hose
Drain hose neck guide
Drain hose joint
Drain hose hoop
Placement of Drainage Hose
0.85m h 1.2m
The height of the standpipe or tub should be between 850 - 1200 mm.
To avoid syphoning, the drain hose should not extend more than 20 mm
from the end of the guide.
Ensure drainage hose is held in place
to avoid leaks or spills.

6
1. Insert a new flat washer into each end of the inlet hose.
2. Connect the water inlet hose to the water faucet. You may have
to use pliers to tighten the coupling. Do not over tighten as this may
cause damage to the valve or hose fittings.
3. Connect the other ends to their respective cold and hot water inlet valves
located on the top of the washer.
Check the inlet hose connections
1. Turn off the water taps.
2. Loosen each connection at faucet and washer.
3. Carefully remove each hose separately, as they may contain residual water.
Removing the water inlet hoses
Installation of water inlet hoses
4. Fasten each hose on the washing machine, and ensure a tight connection.
1. Swing the hose gently to confirm that the hose is
securely fastened.
2. After installation, open the tap to check for leaks.
3. Do not bend the hose unduly.
4. Periodically check the hose connections are firm
at both ends. This is to ensure the connections
remain watertight over time.
Water absorption cushion
Nut of the water inlet hose
to Joiner of the water inlet valve
NOTE: Use the new inlet hoses supplied, do not reuse
old hoses.
7
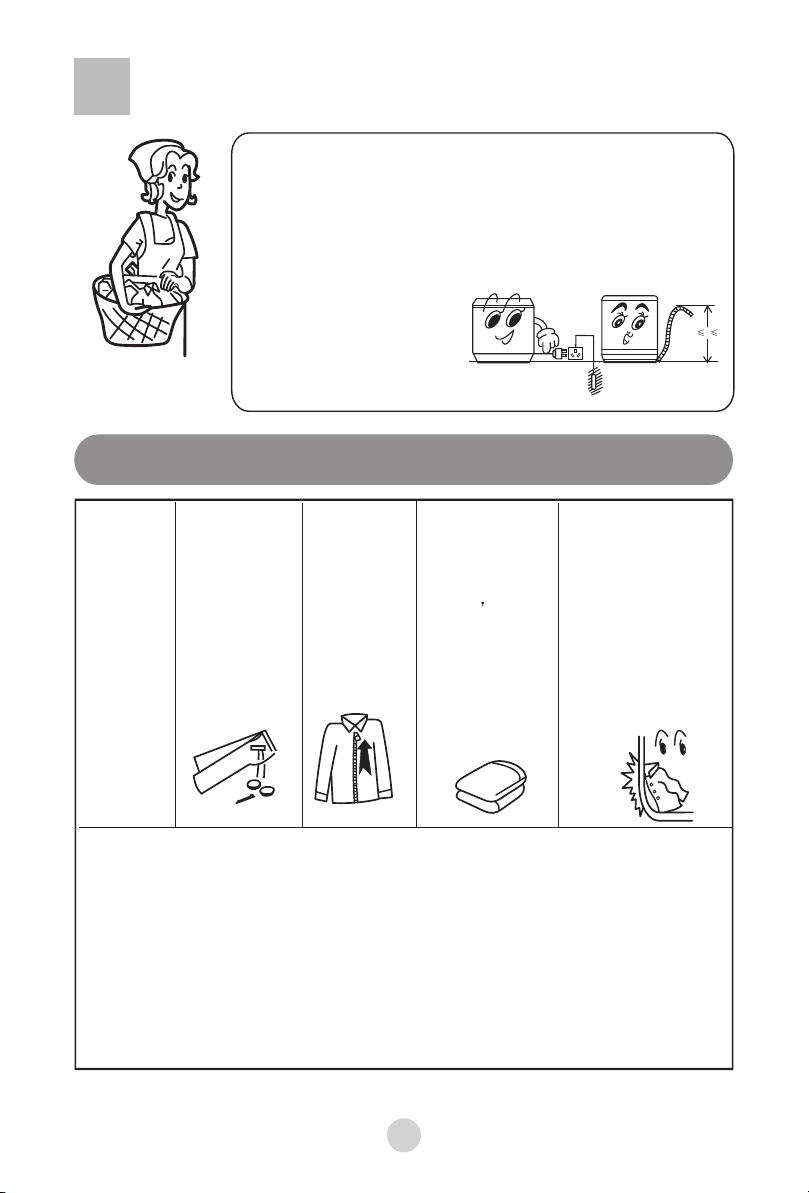
Before washing
Preparation
1. Ensure the water inlet hoses are correctly installed and
faucets are turned on.
2. Insert the power plug into the electrical socket.
3. Ensure the drain hose is mounted at the correct height.
4. Select a suitable location for the washer on a hard, even
Surface, away from direct sunlight or heat sources,
e.g. Radiators/heaters,
cooking, appliances etc.
5. Any floor unevenness may
result in unstable working or
abnormal noise. Please ensure
the machine is level.
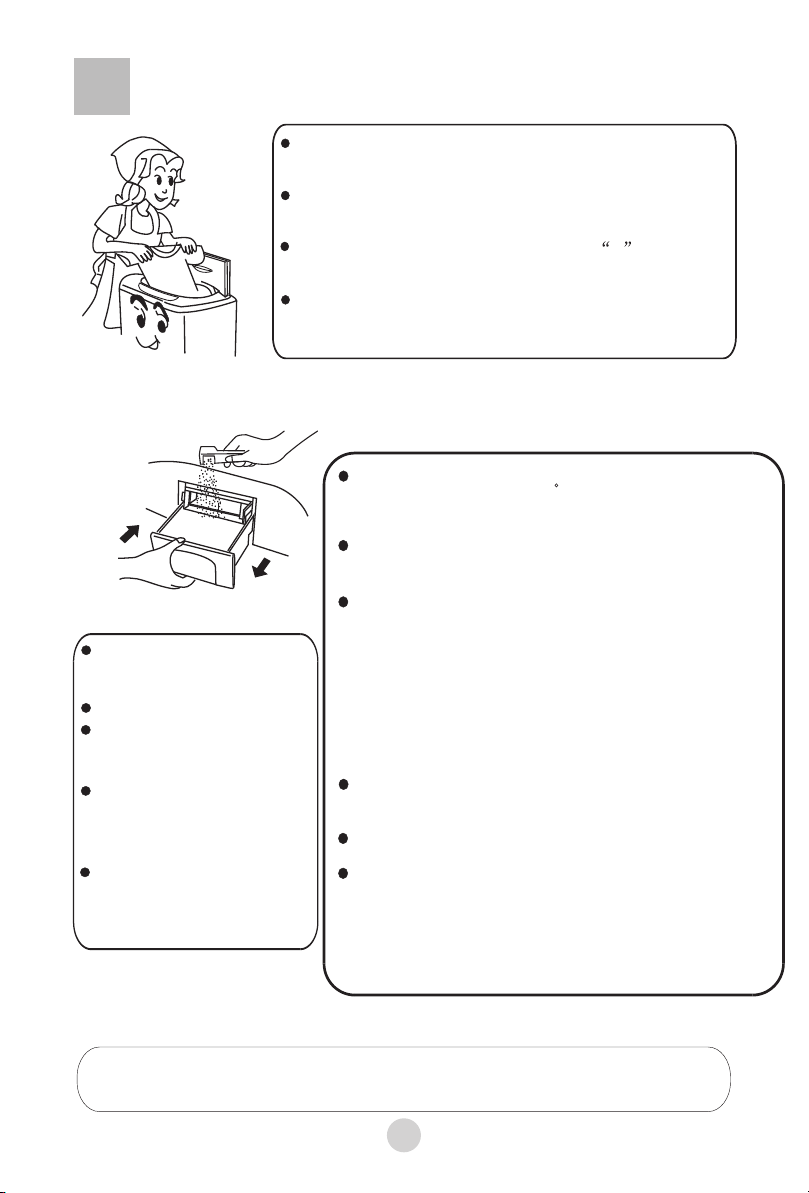
Check the following before washing
Check if the
laundry has
any special
washing
instructions
Clear the Pockets,
and take out loose
items such as
coins, sand,
hairpins etc.
Tie any long
Straps or strings,
fasten buttons
and close
zippers
When the machine is
running, buttons may
cause noise. To
reduce the noise, turn
clothes inside out or
place them in a laundry
bag.
The weight of the
laundry shall not
exceed the rated
capacity of your
machine Loosen
the laundry before
placing it evenly
in the tub
a. Check if the laundry is suitable for machine washing.
b. divide the laundry into colour fast and non-colour fast items.
c. separate items that do not absorb water easily and wash by hand.
d. for heavily soiled items, please first remove loose dirt, then apply detergent
directly (as per instructions on pack) to the stain before washing.
e. for those items that may attract lint or are furry or fluffy, please turn inside out before
washing.
f. do not put laundry soiled with chemicals or solvents into the washing machine
0.8m H 1.2m
Load the laundry
The rated washing capacity refers to the largest dry
weight of a load that can be washed.
The thickness, size and type of clothes will influence
the actual capacity.
Do not select more than Water Level 4 for clothes
less than 1.0kg, to avoid splashing of water.
It is recommended that low suds/High efficiency
detergent is used.
Detergent Usage Guide
If you open the lid during spin cycle the machine will stop and an audible
alarm will sound.
Close the lid
Adding washing powder
8
How to use Bleach/whitener
Always refer to the bleach/
whitener instructions prior
to usage
Fill water to desired level.
Dilute the bleach/whitener
in a container. Pour it
slowly into the washing tub.
Avoid using whitener on
laundry with colour or
patterns as they are prone
lose colour.
The bleach/whitener should
NOT be directly applied
to laundry directly.
Adding washing powder Fuzzy Logic Programs
Add washing powder/liquid into the detergent box directly
for "Fuzzy logic" programs and "Delay" program.
It is recommended that washing powder/liquid is dissolved
with water and then directly emptied into the washing
machine: (not applicable for Fuzzy Logic and Delay program)
1. Add some water (select the
2. Add washing powder/liquid. Run for about 30s to fully
dissolve the detergent. Then push the "Start/Pause" button
to pause the wash cycle.
3. Load laundry. Select suitable water level. Push the
"Start/Pause" button again to recommence washing cycle
Adding washing powder Normal Wash
"1" water level)
If you select "Quick"program, it is recommended to use
liquid detergent instead of washing powder to ensure the
most effective wash results.
Old or poor quality washing powder may causing caking in
tub or detergent dispenser.
Clean the detergent box periodically to ensure washing
power is evenly distributed and remove any detergent
buildup.
Note: For best wash performance, use low suds/High
Efficiency detergent and dissolve the detergent in <1L
warm water prior to mixing with laundry.
It is suggested to dissolve detergent before adding to
the tub, see as below:
1. Prepare warm water (<35 C) in a container.
2. Add washing powder, stirring to dissolve it completely.
Operation & Wash Cycles
9
G
F
E
DC
B
A
Long
Medium
Rapid
Express
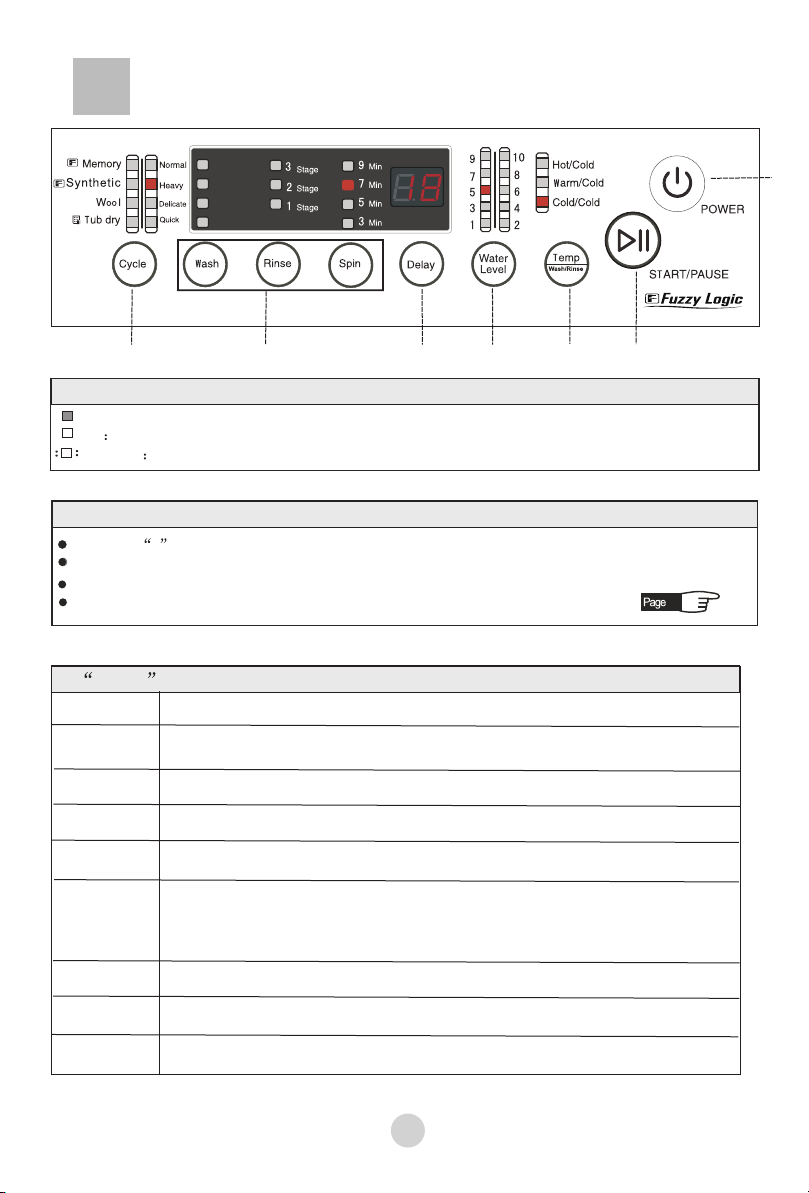
Indicator display
On Indicates the program is about to run and indicates the selected cycle and options
Flashing Indicates the program is running and indicates the selected cycle and options
Remaining time display
Displays - during Fuzzy Logic detection cycle until level is determined
Displays total remaining during current, in progress wash cycle
Displays remaining time when the "Delay" program is used (hours).
Displays error codes (see page 15)
15
Off
Delay(Hours)
Minutes Remaining
A Cycle button
Recommended for
Recommended for mixed fabrics and general clothing items
Normal
Program
Heavy
Items that are soiled or items that are heavy/big
Delicate
Delicate items that are machine washable
Lightly soiled or small laundry loads less then 1.5kg
Quick
This cycle setting remembers the last wash, rinse and spin settings
(Water level will not be remembered as it is determined by fuzzy
logic function).
Memory
Synthetic
Wool
Machine washable woollen items
Dries the inner and outer tub to avoid the growth of mildew
Tub dry
Ideal for synthetic fabrics
C Delay button
B Wash Rinse Spin button
The display shows the time remaining (in minutes) before the cycle will finish.
Push the "Delay" button and the display will show the remaining time for the cycle to
finish (in hours). The indicator flashes to indicate that the delay function is operating.
Delay start can be set for 2-24hr operation.
You may change the Wash, Rinse and Spin times when Memory , Heavy Normal and
Synthetic cycles are selected.
When the Wool cycle has been selected you cannot change the Wash, Rinse and
Spin times.
You can not change the Wash Rinse and Spin times when Tub dry and Quick cycles
are selected.
10
NOTE: The delay time is until the selected wash program finishes (you will need to
deduct wash time from this delay time to calculate when the wash will start).
D Water Level button
During the Memory and Synthetic programs the washing machine will detect the size
of the laundry and automatically select the water level between levels 4, 6, 8 or 10.
To change the water level, press the Start/Pause button and make your selection
by pressing the Water Level button until desired level is shown (1-10).
If there is water inside the tub and the machine cannot detect the laundry load, it will
display water level "6". If wet laundry is put in the machine, it will display level "3",
you can then manually adjust to the desired water level.
During operation of the wash, or rinse program, you can adjust the water level by
pressing the Water Level button.
The water level may vary due to the different moisture level of the laundry items.
If Tub Dry program is selected the water level cannot be manually overridden.
If Quick program is selected it will display water level 3 you can then manually
adjust to the desired water level.
Operation & Wash Cycles
11
Button Operation and Descriptions
1
2
Cycle
When the power is switched on "Normal" cycle is automatically set. To select
a different automatic cycle, press the "Cycle" button till the corresponding
indicator is on. Refer to the section on the "Cycle" button above.
E.g choose "Quick" cycle for a small load of lightly soiled laundry.
When the "Synthetic", Memory cycles are selected the Fuzzy
Logic program is run. The washing cycle is automatically set while the water
level and wash time can be selected according to the texture and size of the load.
Press the button to switch power on/off
POWER
Press the button to select automatic program
Operation & Wash Cycles
F START/PAUSE button
E Temp(Wash/Rinse button
During Quick cycle, the water temperature is preset. Temp button does not work
During wool cycle, the "hot/cold" water temperature cannot be chosen.
After the power is switched on press the Start/Pause button to start the machine.
During operation, push the Start/Pause button to pause the machine.
Push the Start/Pause button again to restart the machine.
Press the Temp(Wash/Rinse)" button to select your wash temperature.
To turn on/off the power, press the power button.
If the start pause button is not pushed within 5 minutes, the washing machine will automatically
switch off the power
G POWER button
12
3
Wash
Rinse
Spin
For the "Synthetic"and "Memory" cycles the machine will run a Fuzzy Logic program
that automatically detects the type of laundry in the tub. After detection
it will set the water level automatically.
The water level can only be changed once the machine has started by pushing the
"Start/Pause" button, then push the "Water Level" button to reset the water level.
Press the "Start/Pause" button to resume the wash cycle
4
Water
Level
Water
Level
Press the button to change the water level
5
Temp
Wash/Rinse
Press the button to select the the wash and rinse temperature
Press the buttons to customise the pre-set options
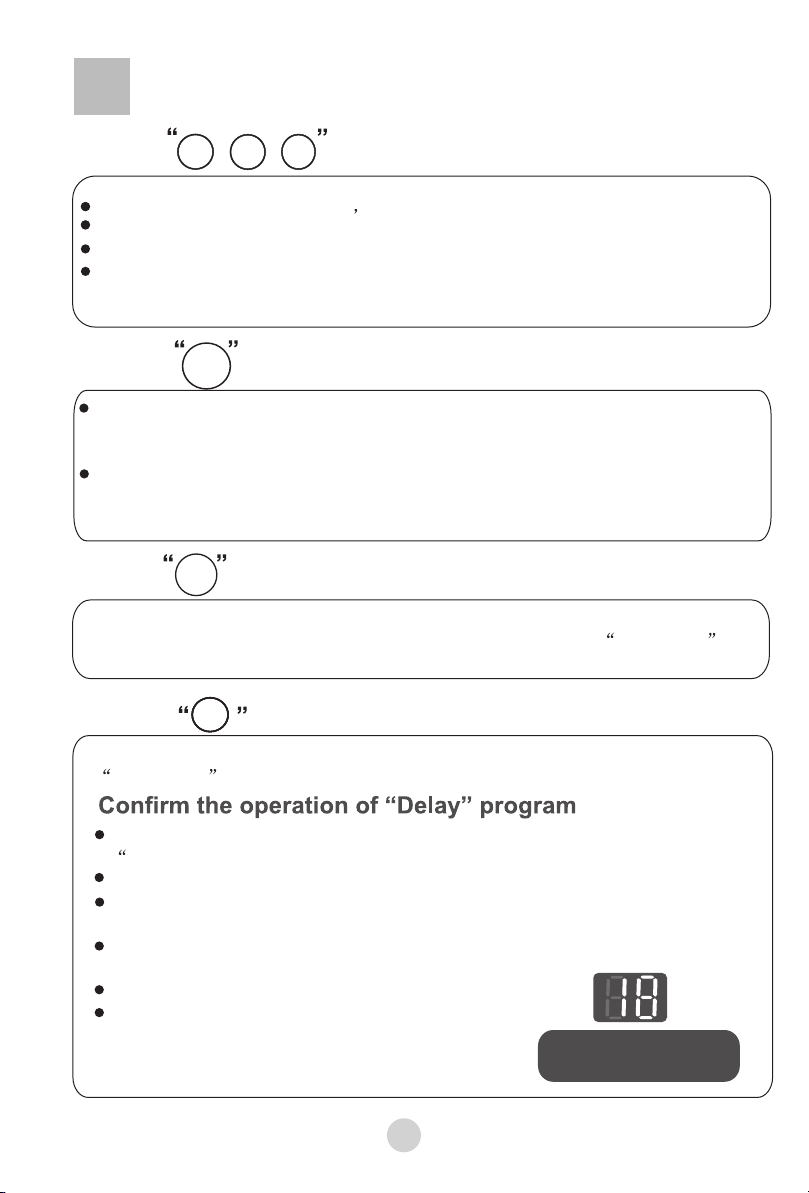
To set a delay time, first select the Cycle and options required and push the
Delay" button
The cycle indicator lights will go off and the "Delay (Hours) indicator light will be on.
During the delay program, press the "Delay" button to display the time remaining.
The delay time indicator shows the time remaining till the wash ends.
To cancel the delay program, switch the power off and back on, then make a new
selection.
Delay start (2-24hr) option
Delay time is to the end of washing washing cycle
6
Delay
Press the button to select the delay wash program
The delay time program is automatically off, and wash cycles will start as soon as
Start/Pause button is pushed.
The wash will finish
in about 18 hours
During Rinse cycle, only SPIN times can be set, all other wash functions are locked.
During Wool and Tub Dry cycles, these settings cannot be changed and buttons will
not function, as machine will only follow pre-programmed settings.
Set the wash and rinse temperatures in accordance to the requirements of each
load. The wash and rinse temperatures will be the same (i.e. if Warm/Cold
is selected, both wash and rinse cycles will be warm/cold).
Even there is no water in the tub a certain period is required before spinning
Separate colour fast clothes before loading washing machine.
Operation & Wash Cycles

Ãê
7
Press the button to start the cycle
If the top lid is opened while machine is in SPIN cycle, the machine will stop
and an audible alarm will sound.
˜Ñ
Cycle completed
The energy test program was performed using the "Normal"
cycle default setting of:
Wash "Long"
Rinse:1 Rinse
Spin:7 mins
Water level:10.
Please use low suds/high efficiency detergent.
13
Start/Pause
When the machine has completed the selected/current wash cycle an audible
alarm will sound and the machine will switch off automatically
Note
Operation & Wash Cycles
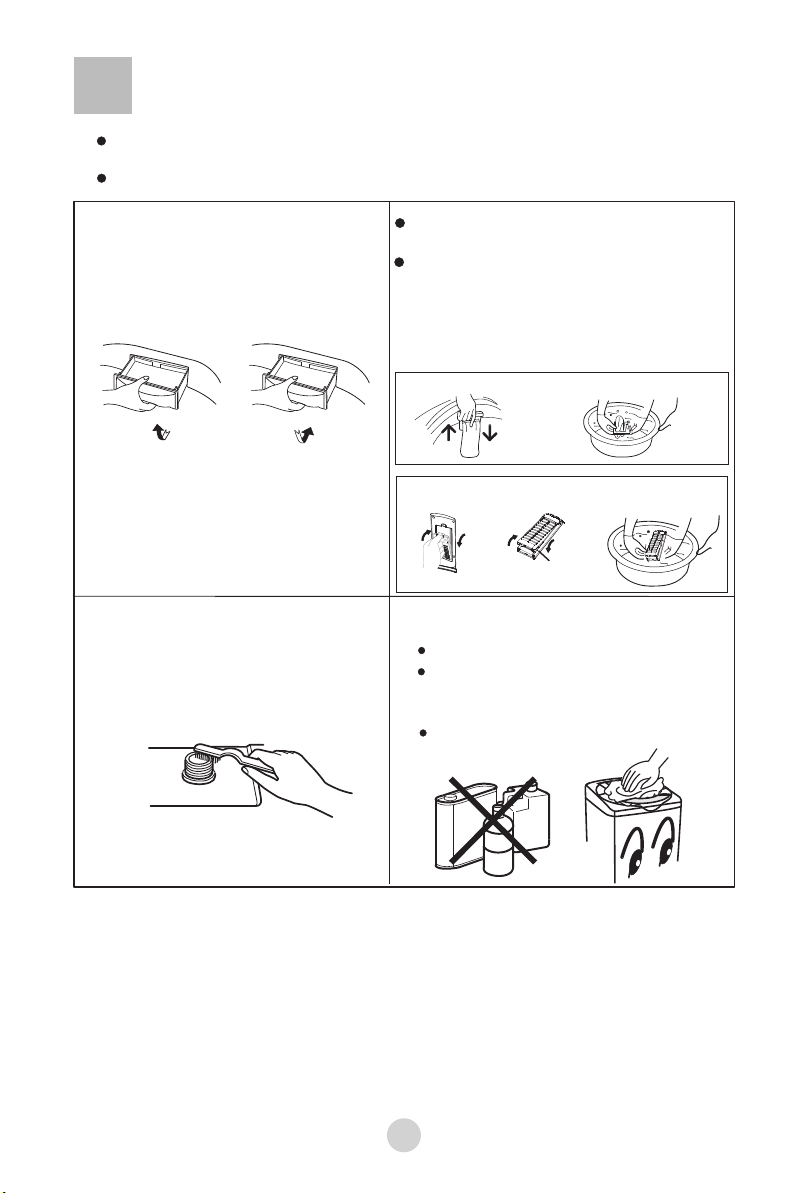
Remove and clean the detergent
box, replace after cleaning.
The lint filter must be used during
washing.
It must be cleaned after each use
Lint filter:
1. Slide upwards to remove.
2. Gently push it down to install;
ensuring it is in place before
next wash.
remove Install
Dismantle
Install
The filter at the water inlet valve may
become blocked by impurities in the
water supply. Clean it with a plastic
bristled brush every two months.
Maintenance
Remove the power plug before carrying out any cleaning or maintenance.
If the cabinet is dirty, wipe it with a damp
cloth.
Do not wash directly with water.
Wipe with a neutral detergent (please
check directions on detergent bottle
first).
Do not wipe machine with thinners,
petrol, alcohol or other harsh solvents.
Th
inne
r
P
et
rol
Alcohol
Clean the lint filter(s) and detergent box after each wash.
14
1. After washing cycle has finshed, turn off the water faucet. (If needed, you can
remove the water inlet hose).
2. Do not store water in the washing machine for a long period without completing
a wash cycle. Drain the water completely after each wash.
3. Hang up the power cord and drain hose.
4. Wipe up any drops of water on the surface of the machine and inside the tub.
Leave the lid open for about 1 hour after each wash to evaporate any residual
water.
Dismantle
Install
Install
Dismantle
The front cover of lint filter
Directions for cleaning lint filter on model HWMP55-918
Directions for cleaning lint filter on model HWMP65-918
15
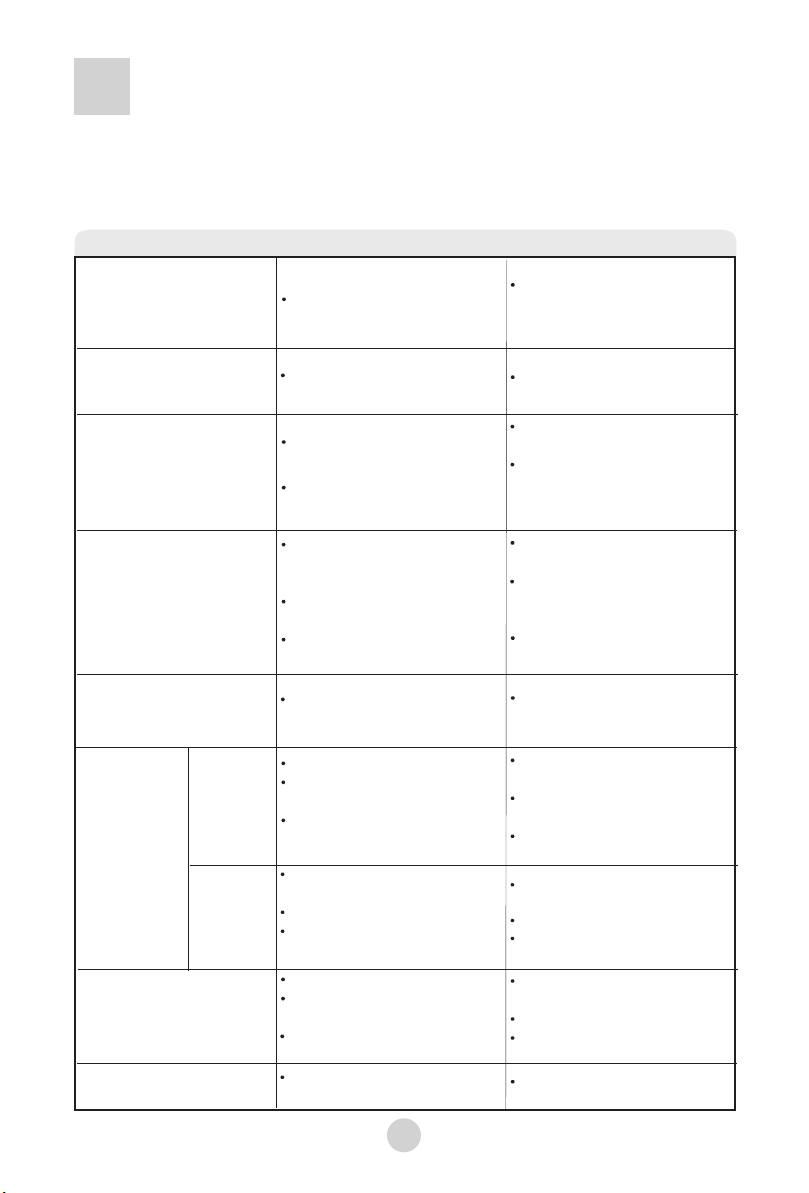
Trouble-shooting
If there is a fault or the machine does not operate correctly, remove the power plug
before checking the machine. Using diagnostic list below, please check the machine
requires repair. If a repair is required, please contact our Customer Care Team, do
not try to fix it yourself.
The machine does not
spin. The display shows
E3..
The display will show
E4.
The top lid is not closed.
Close the top lid.
Is the drain hose
blocked?
Has the laundry been
place unevenly in the
machine?
Is the machine level?
Open the water tap. Push
the Start/Pause button once.
Clean the water inlet valve
then push the Start/Pause
button once.
Use after the water pressure
is normal.
The water level sensor
has failed.
Please contact Customer
Care.
Fasten the inlet hose.
The water tap leaks.
The display shows E6.
There are abnormal
sounds inside the
machine.
Problem Possible causes What to do
The machine
does not
work.
Will not
wash
Will not
spin
Is there a power failure?
Is the power plug inserted
tightly?
Has the water level reached
preset position?
Wait for the power supply
to be restored.
Insert the power plug
tightly.
Wait for water to fill to the
preset level.
Is the power plug inserted
tightly?
Is the top lid closed ?
Is the laundry distributed
unevenly in the machine?
Insert the power plug
tightly.
Close the top lid.
Redistribute the laundry.
Is the machine level?
Has the laundry been placed
unevenly in the machine?
Are there any foreign objects
inside the bowl?
Is the water inlet hose
loose?
Redistribute the load evenly.
Close the top lid.
Level the machine.
Remove the foreign object.
Is the water tap closed or
has the water supply been
interrupted?
Is the water inlet valve
blocked?
Is the water pressure too
low?
The machine does not
drain or drains slowly.
The display shows E1.
The machine stops
running. The display
shows E2.
Remove the blockage.
Open and close the top
lid once.
Redistribute the load evenly.
Close the top lid.
Level the machine. The
machine will start 10.
seconds after being leveled
correctly.
There maybe water in the
drain hose in when first used.
It maybe residual water after performance
inspection by the factory.
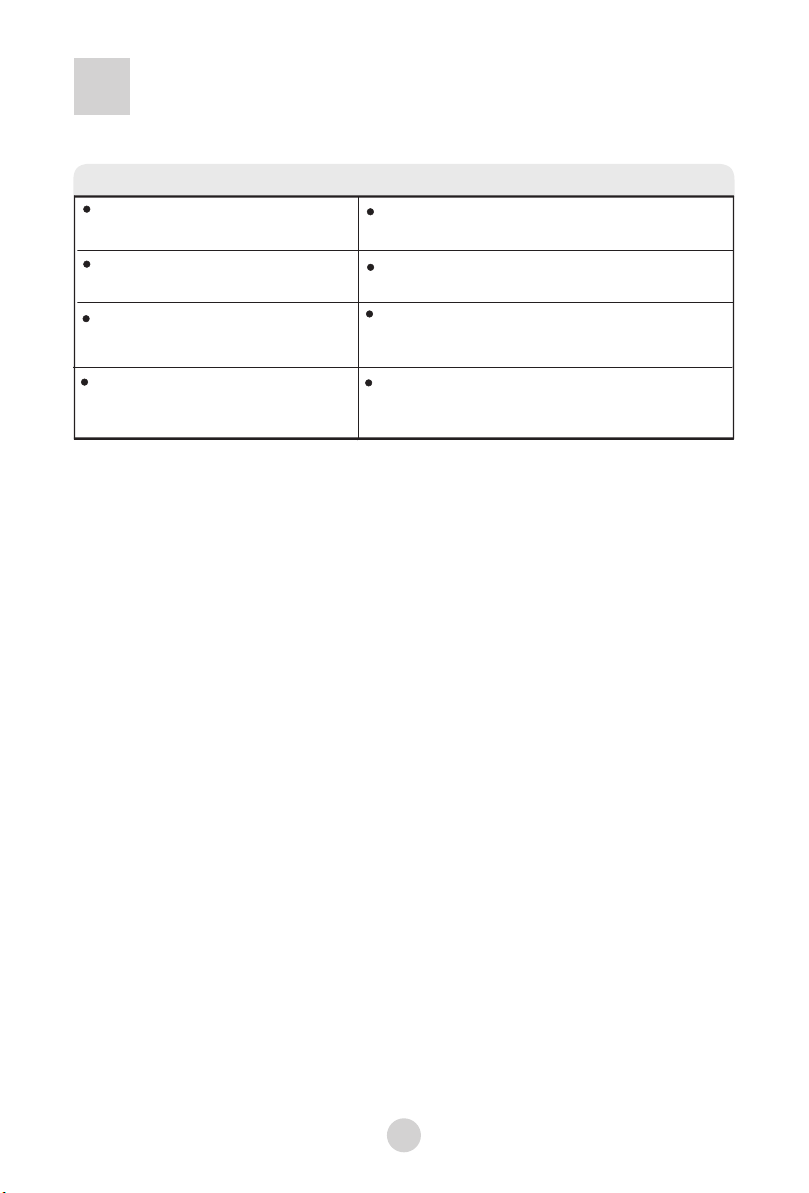
Common occurrences
Situation
Cause
The spinning is intermittent after
it starts.
The wash procedure pauses.
Select spin program, but it does
not work.
Redistribute the load evenly.
Close the top lid.
The cloth sensor is detecting , it will add
water after about 48 senconds.
16
The program is setting the drain time, there
will be a pause before the spin program
starts.
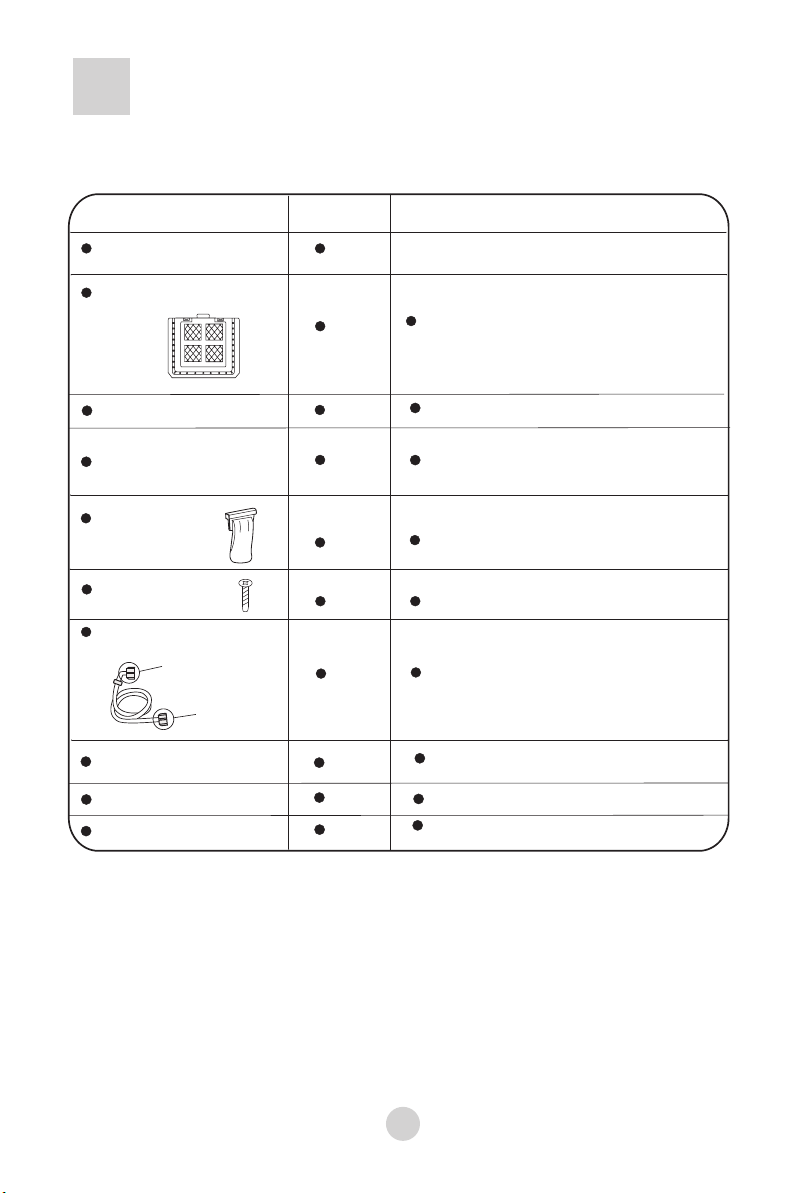
Packing list
17
Automatic washing
machine
Between the upper cushion of the
washing machine package and the
upper seal of the package carton.
Bottom plate
Inside Accessory bag
One
Tapping screws
User manual
Inside the document bag
One
Name
Quantity
Storage position
Drain hose
Drain hose Guide
Drain hose Clamp
Two
Components of the
water inlet hose
Connect to the
washing machine
Connect
to the tap
One
One
One
One
One
One
Inside the document bag
Inside Accessory bag
Inside Accessory bag
Inside Accessory bag
Inside Accessory bag
Inside the document bag
Warranty card
Lint filter
One
( HWMP55-918)
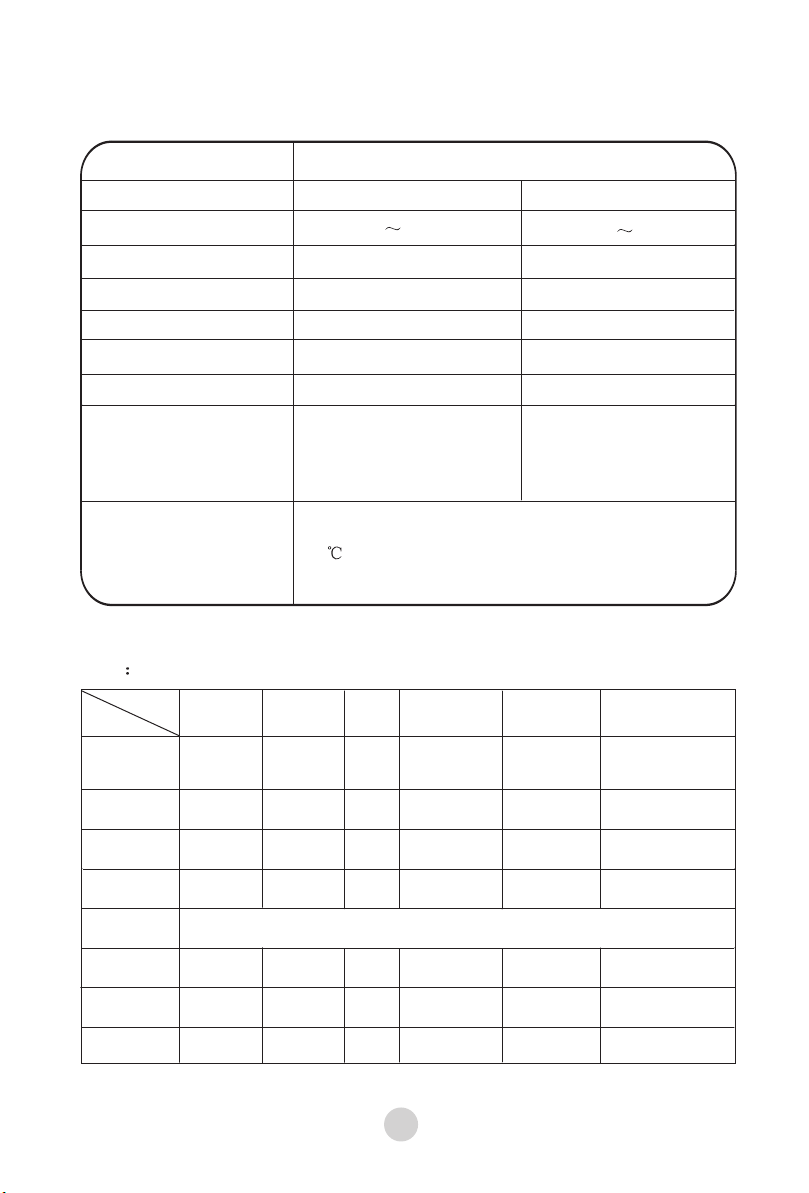
Specifications
Model
Rated voltage/frequency
Rated washing power
Rated spinning power
Net weight
Gross weight
Dimensions (mm)
HWMP55-918
220-240V 50Hz
380W
340W
About 32.5kg
About 37.5kg
L 520 W 530 H 900
Water inlet pressure
Type
Fully Automatic Washing Machine
Water level/Water
Quantity(approx)
1/14 L 2/18L 3/22L
4/26L 5/30L 6/34L
7/38L 8/43L 9/47L
10/52L
18
Wash
Rinse
Spin
Water level
Temp
Time
Normal
Synthetic
Delicate
Quick
Heavy
Memory
Wool
Tub dry
Long
Rapid
Express
Medium
/
1 Rinse
7 Min
10
97 Min(HWMP55-918)
Long
2 Rinses
7 Min
6
76 Min
2 Rinses
5 Min
6
34 Min
1 Rinse
3 Min
3
10 Min
6
1 Rinse
5 Min
6
Express
2 Rinse
3 Min
/
/
/
53 Min
/
Warm/Cold
Cycle
25 Min
Note Default settings when you choose this program after power on
Item
Warm/Cold
Warm/Cold
Warm/Cold
Cold/Cold
Warm/Cold
/
1/18L 2/24L 3/30L
4/36L 5/42L 6/48L
7/54L 8/60L 9/65L
10/70L
HWMP65-918
220-240V 50Hz
390W
350W
About 36.5kg
About 41.5kg
L 550 W 560 H 955
107Min(HWMP65-918)
This cycle setting remembers the last wash, rinse and spin settings
0.03MPa-1.0MPa (when water temperature is
50 , the water inlet pressure of hot water
shall not exceed 0.4MPa)