Loading ...
Loading ...
Loading ...

Supporting your digital lifestyle
™Supporting your digital lifestyle
™
5
WARNING
Never over-tighten a bolt into the projector body.
Step 2: Attach the Ceiling Plate
The P101/P101W ceiling plate (U) has 6 holes for
mounting options. This plate will mount the projector
within 3” of the ceiling. Secure the ceiling plate with
appropriate hardware ensuring the ceiling plate assembly
can support 4x the total weight of your projector.
Hardware to attach the ceiling mount plate is not included
in this kit due to the many mounting and ceiling variables.
If you are unsure of what hardware is required, please
contact a qualified installation contractor.
Diagram F
P
Diagram E
N
N
U
U
W
X
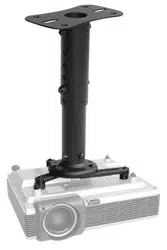
Step 3: Attach the Optional Extension Tubes
If you need your projector suspended 9” to 12” from the
ceiling, attach the two extension tubes included in the
P101/P101W box, referring to Diagram E.
Step 3.1: Assemble Outer Extension Tube (W) to Inner
Extension Tube (X) at the desired length using an M8 x
55mm bolt (N) and locking nut (N) as shown in Diagram E
Step 3.2: Use two Set Screws (P) to ensure the rods are
held firmly together as shown in Diagram F
Step 3.3: Install the assembled extension to the Ceiling
Plate (U) using an M8 x 55mm Bolt (N) and Locking Nut
(N) as shown in Diagram E.
Step 3.4: Use two Set Screws (P) to ensure the rods are
held firmly to the Ceiling Plate (U) as shown in Diagram F.
You are now ready to attach the projector and Projector
Adapter to the ceiling plate assembly.
CAUTION
Read this section carefully prior to install.
P
P
3.1
3.2
3.3
3.4
Loading ...
Loading ...
Loading ...
