Loading ...
Loading ...
Loading ...
9
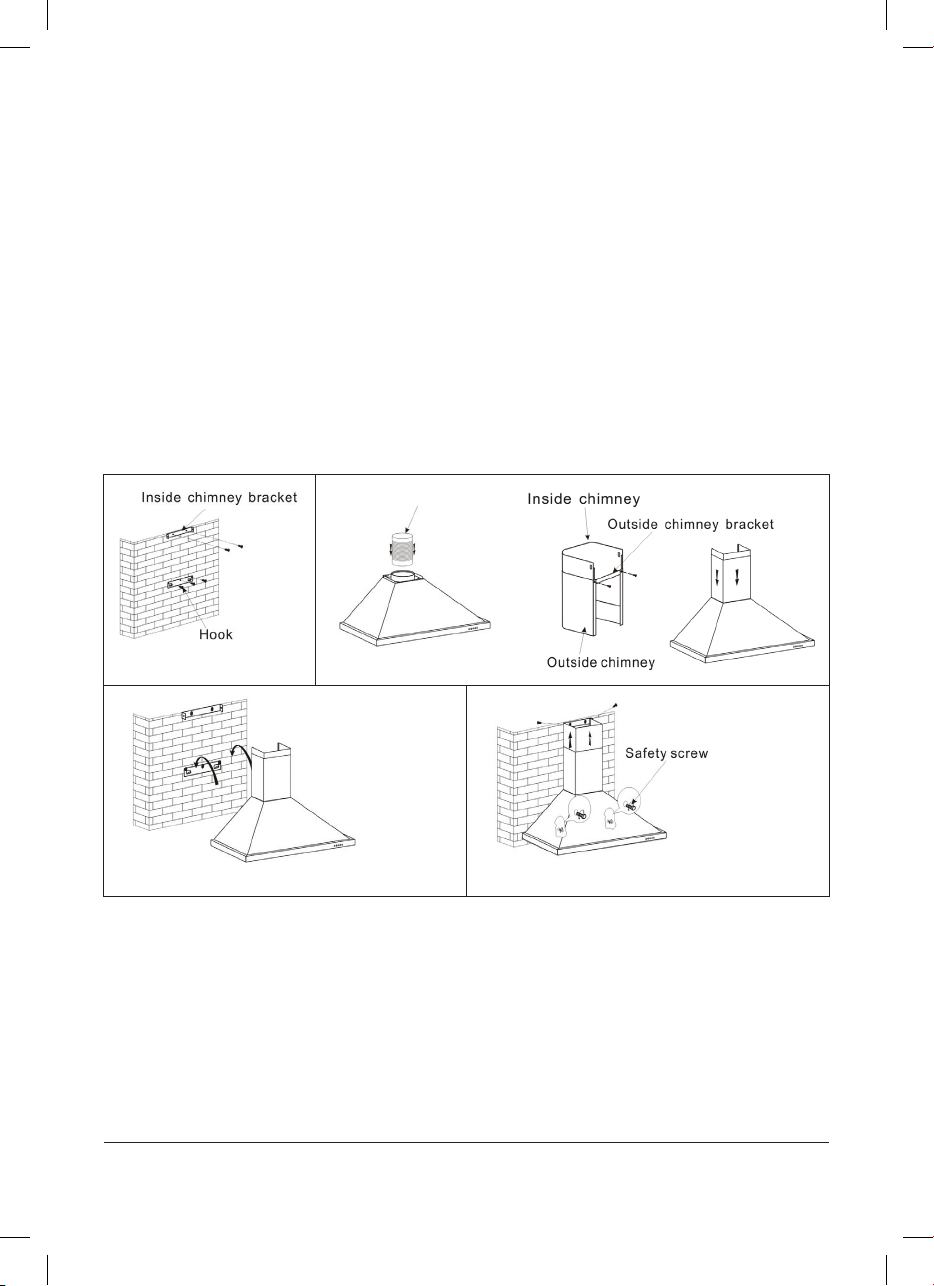
Installing the rangehood
– Once the installation height has been
determined, use the fasteners and wall plugs
to install the mounting bracket (hook) on to
the wall ensuring that it’s secured in a level
position. The mounting bracket connects to
the canopy at the top (i.e. where the chimney
connects into the canopy). Also using the
fasteners and wall plugs, install the wall bracket
for the chimney pieces. (Fig. 5)
– Using the screws provided, attach the
expandable 150mm ducting adapter to
the canopy. With the two Chimney pieces
together, fix the “outside chimney” bracket
onto the outside chimney (flue) piece. Ensure
that the inner chimney piece can move freely
inside. Now attach the chimney pieces to the
canopy. (Fig. 6)
– Lift the canopy (including the chimney pieces)
on to the wall bracket
(hook). (Fig. 7)
– Adjust the height of the inside chimney
piece and fix into place with the screws. After
adjusting the position of the canopy, fix into
place with the safety screws (Fig. 8) into the
wall (you’ll need to remove the grease filters
first).
Fig. 5 Fig. 6
Fig. 8
Expandable tube
Fig. 7
Loading ...
Loading ...
Loading ...