IMPORTANT SAFEGUARDS
When using electrical appliances, basic safety precautions should always be followed to
reduce the risk of fire, electric shock, and/or injury to persons, including the following:
1.
Read all instructions.
2.
This appliance is not intended for use by persons (including children) with reduced
physical, sensory, or mental capabilities, or lack of experience and knowledge, unless
they are closely supervised and instructed concerning use of the appliance by a person
responsible for their safety.
3.
Close supervision is necessary when any appliance is used by or near children.
Children should be supervised to ensure that they do not play with the appliance.
4.
Use appliance only for its intended use.
5.
To avoid the risk of electric shock, do not immerse the iron in water or other liquids.
6.
Always turn the iron to OFF ( ) before plugging or unplugging the iron from the
electrical outlet. To unplug, grasp the plug and pull from the outlet. Never pull from the
power cord.
7.
Do not let the cord touch hot surfaces. Let the iron cool completely before putting the
iron away. Coil the cord into the provided cord reel for storing.
8.
Always disconnect the iron from the electrical outlet before filling the iron with water,
emptying the water from the iron, and when the iron is not in use.
9.
Do not operate the iron with a damaged cord or in the event the iron has been dropped
or damaged or there are visible signs of damage or it is leaking. To avoid the risk of
electric shock, do not disassemble the iron. Supply cord replacement and iron repairs
must be conducted by a qualified serviceman or the manufacturer. Incorrect assembly
might result in a risk of electric shock when the iron is used after reassembly. Contact
Customer Service for information on examination, repair, or adjustment as set forth in
the Limited Warranty.
10.
The iron must be used and rested on a stable surface.
11.
When placing the iron on its stand, ensure that the surface on which the stand is
placed is stable.
12.
Do not leave the iron unattended while the iron is connected or on an ironing board.
13.
Burns can occur from touching hot metal parts, hot water, or steam. Use caution when
you turn a steam iron upside down—there might be hot water in the reservoir.
14.
To avoid a circuit overload, do not operate an iron on the same circuit with another
high-wattage appliance.
15.
If an extension cord is absolutely necessary, a cord with an ampere rating equal to
or greater than the maximum rating of the iron shall be used. A cord rated for less
amperage can result in a risk of fire or electric shock due to overheating. Care shall be
taken to arrange the cord so that it cannot be pulled or be tripped over.
16.
Always close the fill opening cover when operating the appliance.
SAVE THESE INSTRUCTIONS
Other Consumer Safety Information
This appliance is intended for household use only.
w WARNING
Electrical Shock Hazard: This appliance is provided with a
polarized plug (one wide blade) to reduce the risk of electric shock. The plug fits
only one way into a polarized outlet. Do not defeat the safety purpose of the plug by
modifying the plug in any way or by using an adapter. If the plug does not fit fully into
the outlet, reverse the plug. If it still does not fit, have an electrician replace the outlet.
The length of the cord used on this appliance was selected to reduce the hazards of
becoming tangled in or tripping over a longer cord. If a longer cord is necessary, an
approved extension cord may be used. The electrical rating of the extension cord must
be equal to or greater than the rating of the appliance. Care must be taken to arrange
the extension cord so that it will not drape over the countertop or tabletop where it
can be pulled on by children or accidentally tripped over.
To avoid an electrical circuit overload, do not use another high-wattage appliance on
the same circuit with this appliance.
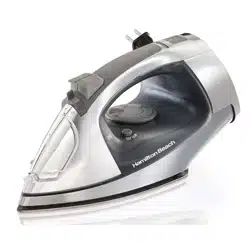
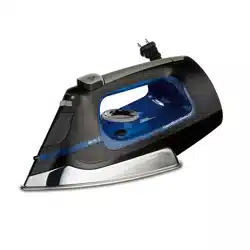
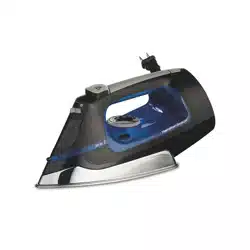
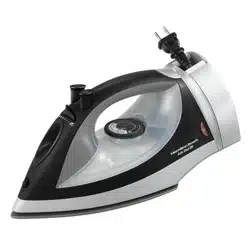
Parts and Features
How to Dry Iron
1. Plug into outlet. Power Light will blink until Power Button is pressed.
2. Press Power Button
( )
. Iron will begin heating to lit temperature setting. Temperature
Dial can be turned to desired setting. As Dial is turned Iron will beep with each setting
change.
3. After ironing press Power Button ( ) to enter Standby mode. Power Light will blink
until unplugged. Unplug Iron to turn off.
How to Steam Iron
If you have extremely hard water, mix 50% untreated tap water with 50% distilled or
demineralized water for use in the Iron.
1. Unplug. Then, using a measuring cup with a small pour spout, pour tap water into
Water Fill Opening and fill Iron to MAX Fill line.
2. Plug into outlet. Power Light will blink until Power Button is pressed.
3. Press Power Button
( )
. Iron will begin heating to lit temperature setting. Temperature
Setting Dial can be turned to desired setting. As Dial is turned Iron will beep with each
setting change.
4. Move Adjustable Steam Switch to desired steam setting.
5. After ironing press Power Button
( )
to enter Standby mode. Power Light will blink
until unplugged. Unplug Iron to turn off.
w WARNING
Burn Hazard. Attempting to steam iron on a lower temperature
setting or failing to allow the iron to preheat for 2 minutes can result in hot water
dripping from the soleplate.
Vertical Steam
1. Follow steps 1-4 in “How to Steam Iron.”
2. Hang garment in a location that is not susceptible to damage
from heat or moisture. Do not hang in front of wallpaper,
window or mirror.
3. Hold Iron about 6 inches away from garment and press and
release Steam Burst Button to steam out wrinkles. Do not
press Steam Burst Button more than once every 2 seconds.
4. After ironing press Power Button ( ) to enter standby mode.
Power Light will blink until unplugged. Unplug Iron to turn off.
5. Empty water from Iron following directions in “Care and
Cleaning.”
NOTE: Do not allow hot Soleplate to touch delicate garments.
Auto Shutoff
Iron will shut off automatically and beep 5 times when:
• Resting on Soleplate for 60 seconds.
• Resting on either side for 60 seconds or 30 minutes, depending on orientation.
• Resting on Heel for 30 minutes.
Retractable Cord
1. Pull Cord to desired length. Do not unwind Cord beyond
colored tape indicator on Cord.
2. To store Cord, press and hold Cord Release Button while
guiding Cord into storage area.
w WARNING
Eye Injury Hazard. Do not let cord retract
freely. Cord may jam on reel or loose cord may whip back
and forth and could cause injury.
Care and Cleaning
1. Press Power Button ( ). Unplug. Allow to cool.
2. Drain water and retract Cord.
3. Store in an upright position.
Soleplate
1. Never iron over zippers, pins, metal rivets, or snaps, since these may scratch Soleplate.
2. To clean buildup on Soleplate, wipe with a sudsy cloth. Do not use abrasive cleansers
or metal scouring pads.
3. Do not use chemical cleaners or hot cleaners, as this will damage Soleplate finish.
How to Self-Clean
To keep steam vents clear of any buildup, follow these instructions each time you iron using
steam.
1.
Ensure Iron is OFF and unplugged. Move Adjustable Steam Switch to no steam ( ). Fill
Iron with water to half of its maximum capacity.
2.
Plug into outlet. Press Power Button ( ) to turn on. Turn Temperature Dial to LINEN and
let Iron heat for 2 minutes.
3.
Press Power Button ( ) to turn off, then unplug. Hold over a sink with Soleplate facing
down.
4.
Press and hold Self-Clean Button. Once steaming stops, release Button and tilt Iron
forward and backward to ensure any remaining water exits vents on the Soleplate.
5.
If water remains inside of Soleplate, reheat Iron as indicated in Step 2. Boiling water and
steam could still flow out of steam vents.
Limited Warranty
T
his warranty applies to products purchased and used in the U.S. and Canada. This is the only
express warranty for this product and is in lieu of any other warranty or condition.
This product is warranted to be free from defects in material and workmanship for a period
of five (5) years from the date of original purchase in Canada and one (1) year from the date
of original purchase in the U.S. In addition, the Durathon™ nonstick covering on the soleplate
is warranted not to wear out for a period of ten (10) years from the date of original purchase.
During this period, your exclusive remedy is replacement of this product or any component
found to be defective, at our option; however, you are responsible for all costs associated with
our returning a product or component under this warranty to you. If the product or component
is unavailable, we will replace with a similar one of equal or greater value.
This warranty does not cover glass, filters, wear from normal use, use not in conformity with
the printed directions, or damage to the product resulting from accident, alteration, abuse, or
misuse. This warranty extends only to the original consumer purchaser or gift recipient. Keep
the original sales receipt, as proof of purchase is required to make a warranty claim. This
warranty is void if the product is used for other than single-family household use or subjected
to any voltage and waveform other than as specified on the rating label (e.g., 120 V ~ 60 Hz).
We exclude all claims for special, incidental, and consequential damages caused by breach of
express or implied warranty. All liability is limited to the amount of the purchase price. Every
implied warranty, including any statutory warranty or condition of merchantability or
tness for a particular purpose, is disclaimed except to the extent prohibited by law,
in which case such warranty or condition is limited to the duration of this written
warranty. This warranty gives you specific legal rights. You may have other legal rights
that vary depending on where you live. Some states or provinces do not allow limitations
on implied warranties or special, incidental, or consequential damages, so the foregoing
limitations may not apply to you.
To make warranty claim, do not return this appliance to the store. Please write Hamilton
Beach Brands, Inc., Customer Service Department, 4421 Waterfront Dr., Glen Allen, VA 23060,
or visit hamiltonbeach.com/customer-service in the U.S. or hamiltonbeach.ca/customer-
service in Canada. For faster service, locate the model, type, and series numbers on your
appliance.
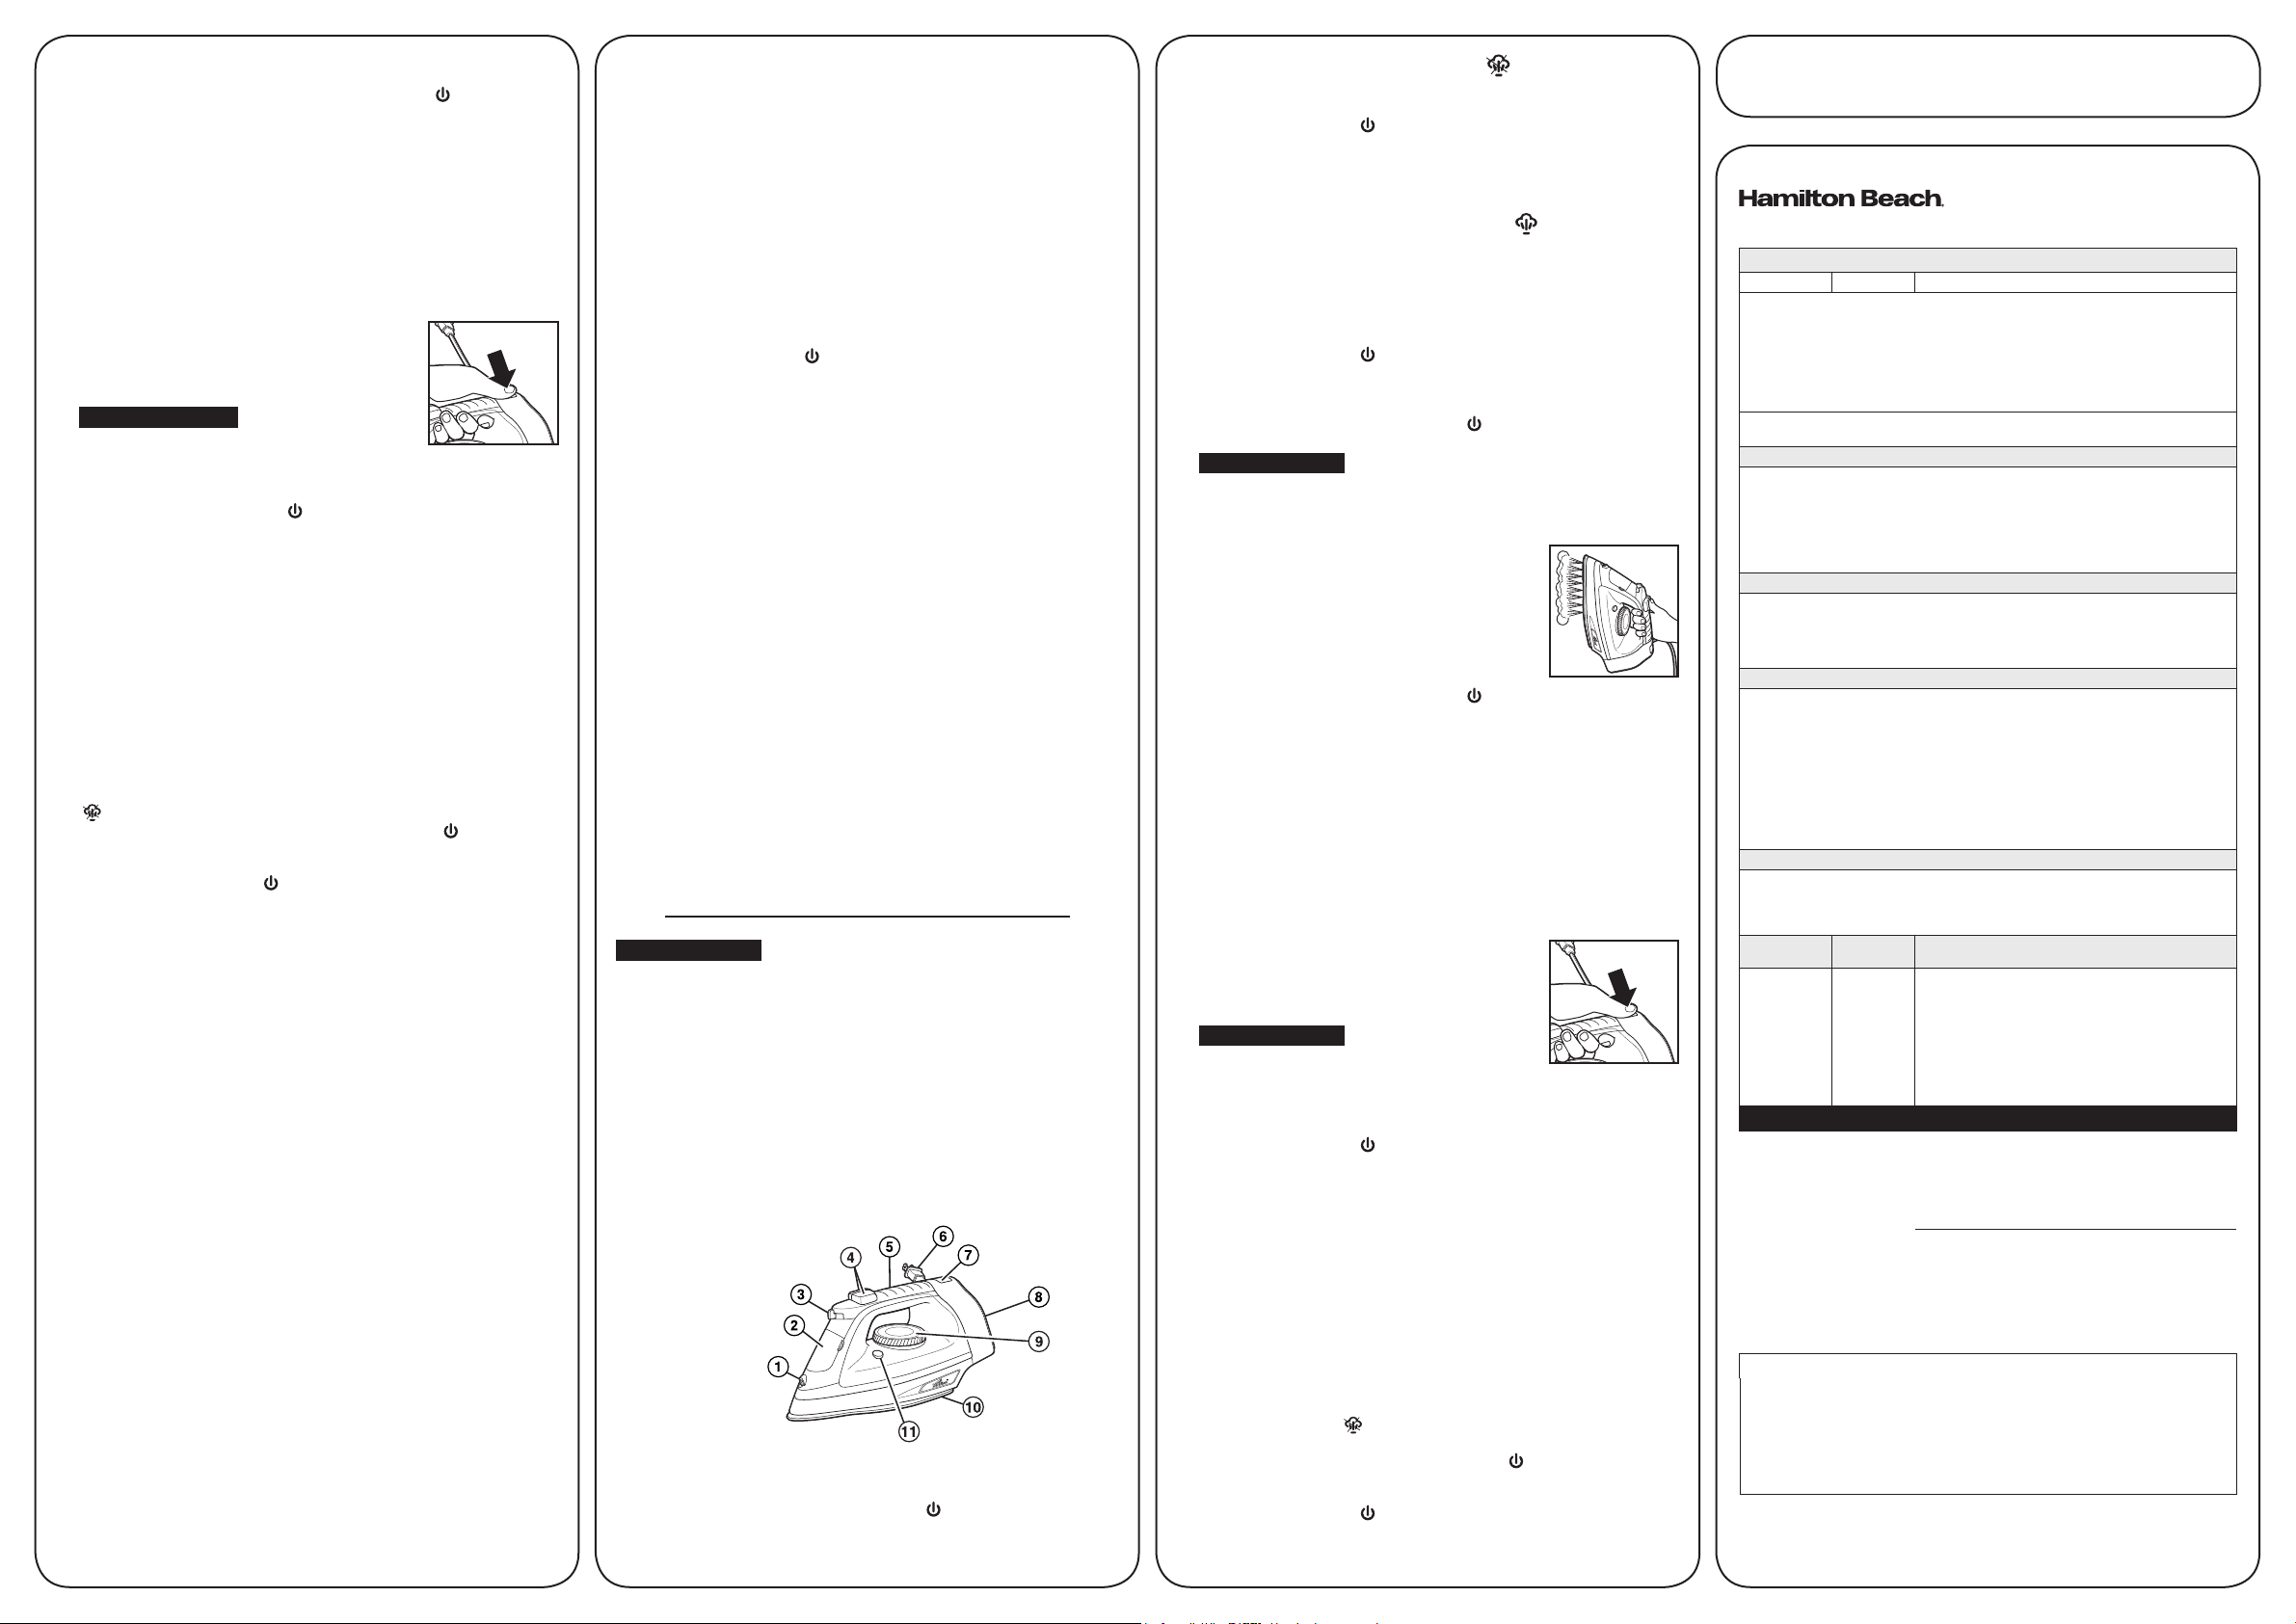
1.
Spray Nozzle
2.
Fill Opening Cover
3.
Adjustable Steam Switch
4.
Spray and Steam Burst Buttons
5.
Soft Touch Grip
6.
Retractable Cord
7.
Retractable Cord Button
8.
Heel Rest
9.
Temperature Setting Dial with
Center Power Button with Light ( )
10.
Durathon™ Nonstick Soleplate
11.
Self-Clean Button
To order parts, visit:
hamiltonbeach.com/parts
Read before use/Lire avant utilisation/Lea antes de usar.
For recipes, tips,
product information and
registration:
hamiltonbeach.com
Pour des recettes,
des conseils, des
renseignements sur le
produit et l’enregistrement:
hamiltonbeach.ca
Para recetas, consejos,
información del producto
y registro:
hamiltonbeach.com.mx
Le invitamos a leer cuidadosamente este instructivo antes de usar su aparato.
ENTER TO WIN $100 TO
SPEND ON WEBSITE
Visit:
register.hamiltonbeach.com
PARTICIPEZ POUR COURIR
LA CHANCE DE GAGNER UN
MONTANT DE 100 $ À DÉPENSER
SUR NOTRE SITE WEB
Visitez le
register.hamiltonbeach.com
INGRESE PARA TENER LA
OPORTUNIDAD DE GANAR
$100 PARA GASTAR EN
NUESTRO SITIO WEB
Visite
register.hamiltonbeach.com
Open to US customers only • Ce concours s’adresse aux clients
des États-Unis seulement • Este concurso está disponible sólo a
clientes de los Estados Unidos
PRÉCAUTIONS IMPORTANTES
Pour utiliser un appareil électroménager, vous devez toujours prendre des mesures élémentaires de
sécurité pour réduire le risque d’incendie, d’électrocution et/ou de blessure corporelle, en particulier
les mesures suivantes :
1.
Lire toutes les instructions.
2.
Cet appareil n’est pas destiné à être utilisé par des personnes (y compris les enfants) dont
les capacités physiques, sensorielles ou mentales sont réduites, ou manquant d’expérience
et de connaissance, sauf si elles sont étroitement surveillées et instruites sur l’utilisation de
l’appareil par une personne responsable de leur sécurité.
3.
Une surveillance étroite est requise pour tout appareil utilisé par ou près des enfants.
Surveiller que les enfants ne jouent pas avec l’appareil.
4.
Utiliser exclusivement le fer pour son usage prévu.
5.
Pour éviter le risque de choc électrique, ne pas plonger le fer dans l’eau ou d’autres liquides.
6.
Le fer doit toujours être éteint (réglé à OFF/ ) avant d’être branché à une prise de courant ou
débranché. Pour débrancher, saisir la fiche et la retirer de la prise. Ne pas tirer sur le cordon
d’alimentation.
7.
Ne pas laisser le cordon toucher les surfaces chaudes. Laisser refroidir le fer complètement
avant de le remiser. Rembobiner le cordon sur l’enrouleur automatique fourni pour ranger.
8.
Toujours débrancher le fer d’une prise de courant électrique lorsqu’on le remplit d’eau ou
lorsqu’on le vide, ou si l’appareil n’est pas utilisé.
9.
Ne pas utiliser le fer avec un cordon endommagé, si le fer est tombé ou endommagé, s’il
y a des signes visibles de dommage ou s’il fuit. Pour éviter le risque de choc électrique, ne
pas démonter le fer. Le faire examiner et réparer par un dépanneur qualifié. Un assemblage
incorrect risque d’entraîner un risque de choc électrique lorsque le fer est utilisé après
réassemblage. Veuillez communiquer avec le service à la clientèle pour obtenir de
l’information concernant l’inspection, la réparation ou le réglage, comme précisé dans la
garantie limitée.
10.
Le fer doit être utilisé et reposé sur une surface stable.
11.
En plaçant le fer sur son support, assurez-vous que la surface sur laquelle le support est placé
est stable.
12.
Ne pas laisser le fer sans surveillance pendant qu’il est branché ou pendant qu’il est sur une
planche à repasser.
13.
Des brûlures peuvent survenir lorsqu’on touche des pièces chaudes en métal, de l’eau
chaude ou de la vapeur. Adopter des précautions lorsqu’on tourne un fer à vapeur à l’envers,
car il peut rester de l’eau chaude dans le réservoir.
14.
Pour éviter une surcharge du circuit, ne pas utiliser le fer sur le même circuit qu’un autre
appareil de haute puissance.
15.
Si une rallonge électrique est absolument nécessaire, un cordon d’intensité nominale égale ou
supérieure à l’intensité nominale maximale du fer doit être utilisé. Un cordon d’une intensité
nominale moindre peut entraîner un risque d’incendie ou de choc électrique en raison d’une
surchauffe. Il faut prendre soin de placer le cordon de rallonge pour qu’il ne puisse pas être
tiré par des enfants ou faire trébucher.
16.
Veuillez toujours fermer le couvercle de l’ouverture pour le remplissage lors de l’utilisation de
l’appareil.
CONSERVER CES INSTRUCTIONS
Autres consignes de sécurité pour le consommateur
Cet appareil est destiné à un usage domestique uniquement.
w AVERTISSEMENT
Risque de choc électrique : Cet appareil est fourni avec une
fiche polarisée (une broche large) pour réduire le risque d’électrocution. Cette fiche n’entre que
dans un seul sens dans une prise polarisée. Ne contrecarrez pas l’objectif sécuritaire de cette
fiche en la modifiant de quelque manière que ce soit ou en utilisant un adaptateur. Si vous ne
pouvez pas insérer complètement la fiche dans la prise, inversez la fiche. Si elle refuse toujours de
s’insérer, faire remplacer la prise par un électricien.
La longueur du cordon installé sur cet appareil a été sélectionnée afin de réduire les risques
d’enchevêtrement ou de faux pas causés par un fil trop long. L’utilisation d’une rallonge approuvée
est permise si le cordon est trop court. Les caractéristiques électriques de la rallonge doivent être
équivalentes ou supérieures aux caractéristiques de l’appareil. Prendre toutes les précautions
nécessaires pour installer la rallonge de manière à ne pas la faire courir sur le comptoir ou sur une
table pour éviter qu’un enfant ne tire sur le cordon ou trébuche accidentellement.
Pour éviter la surcharge du circuit électrique, ne pas utiliser un autre appareil à haute puissance
sur le même circuit que cet appareil.
Pièces et caractéristiques
1.
Vaporisateur
2.
Couvercle de l’ouverture pour le remplissage
3.
Interrupteur de vapeur ajustable
4.
Boutons de surpuissance de vapeur et de
vaporisation
5.
Poignée douce
6.
Cordon rétractable
7.
Bouton pour le cordon rétractable
8.
Talon d’appui
9.
Cadran de réglage de température avec bouton
d’alimentation central avec lumière ( )
10.
Semelle antiadhésive Durathon
MC
11.
Bouton d’autonettoyage
Pour commander des
pièces, visiter :
hamiltonbeach.ca/parts
Repassage à sec
1.
Brancher dans la prise. Le voyant de l’alimentation clignotera jusqu’à ce que le bouton
d’alimentation est appuyé.
2.
Appuyer sur le bouton d’alimentation ( ). Le fer commencera à chauffer pour atteindre le réglage de
température illuminé. Le cadran de réglage de température peut être tourné jusqu’au réglage souhaité.
Alors que le cadran est tourné, le fer émettra une sonorité pour chaque changement de réglage.
3.
Une fois le repassage terminé, appuyez sur le bouton d’alimentation ( ) pour passer au mode de
veille. Le voyant d’alimentation clignotera jusqu’à ce que l’appareil soit débranché. Débrancher le
fer pour l’éteindre.
Repassage à la vapeur
Si vous avez de l’eau extrêmement dure, faire un mélange de 50 % d’eau du robinet non traitée et de
50 % d’eau distillée ou déminéralisée pour utiliser dans le fer.
1.
Débrancher le fer. Ensuite, en utilisant une tasse avec un petit bec verseur, remplir le réservoir
jusqu’à la ligne de remplissage MAX.
2.
Brancher dans la prise. Le voyant d’alimentation clignotera jusqu’à ce que le bouton
d’alimentation est appuyé.
3.
Appuyer sur le bouton d’alimentation
( )
. Le fer commencera à chauffer pour atteindre le
réglage de température illuminé. Le cadran de réglage de température peut être tourné jusqu’au
réglage souhaité. Alors que le cadran est tourné, le fier émettra une sonorité pour chaque
changement de réglage.
4.
Déplacer l’interrupteur de vapeur ajustable au réglage de vapeur souhaité.
5.
Une fois le repassage terminé, appuyez sur le bouton d’alimentation ( ) pour passer au mode
de veille. Le voyant d’alimentation clignotera jusqu’à ce que l’appareil soit débranché. Débrancher
le fer pour l’éteindre.
w AVERTISSEMENT
Risque de brûlures. La tentative du repassage à la vapeur
à un réglage de température inférieur ou ne pas laisser le fer chauffer pendant 2 minutes peut
occasionner un égouttement d’eau depuis la semelle.
Vapeur verticale
1.
Suivre les étapes 1 à 4 dans « Repassage à la vapeur ».
2.
Suspendre le vêtement dans un endroit qui ne risque pas d’être
endommagé par la chaleur et l’humidité. Ne pas le suspendre
devant du papier peint, une fenêtre ou un miroir.
3.
Tenir le fer à environ 15 centimètres (6 pouces) du vêtement et
840351000 12/20
Modelo: Tipo: Características Eléctricas:
19806 I87 120 V ~ 60 Hz 1800 W
Los modelos incluídos en el instructivo de Uso y Cuidado pueden ir seguidos
o no por un sujo correspondiente a una o varias letras del alfabeto y sus
combinaciones, separadas o no por un espacio, coma, diagonal, o guión.
Como ejemplos los sujos pueden ser:
“Y” y/o “MX” y/o “MXY” y/o “Z”.
Grupo HB PS, S.A. de C.V.
Monte Elbruz No. 124 - 401
Col. Polanco V Sección,
Miguel Hidalgo
Ciudad de México, C.P. 11560
GARANTÍA PARA PRODUCTOS COMPRADOS EN MÉXICO
PRODUCTO: MARCA: MODELO:
Grupo HB PS, S.A. de C.V. cuenta con una Red de Centros de Servicio Autorizada, por favor
consulte en la lista anexa el nombre y dirección de los establecimientos en la República
Mexicana en donde usted podrá hacer efectiva la garantía, obtener partes, componentes,
consumibles y accesorios; así como también obtener servicio para productos fuera de garantía.
Para mayor información llame al:
Centro de Atención al Consumidor: 800 71 16 100
Grupo HB PS, S.A. de C.V. le otorga a partir de la fecha de compra:
GARANTÍA DE 1 AÑO.
COBERTURA
• Esta garantía ampara, todas las piezas y componentes del producto que resulten con defecto
de fabricación incluyendo la mano de obra.
• Grupo HB PS, S.A. de C.V. se obliga a reemplazar, reparar o reponer, cualquier pieza o
componente defectuoso; proporcionar la mano de obra necesaria para su diagnóstico y
reparación, todo lo anterior sin costo adicional para el consumidor.
• Esta garantía incluye los gastos de transportación del producto que deriven de su
cumplimiento dentro de su red de servicio.
LIMITACIONES
• Esta garantía no ampara el reemplazo de piezas deterioradas por uso o por desgaste normal,
como son: cuchillas, vasos, jarras, filtros, etc.
• Grupo HB PS, S.A. de C.V. no se hace responsable por los accidentes producidos a consecuencia
de una instalación eléctrica defectuosa, ausencia de toma de tierra, clavija o enchufe en mal
estado, etc.
EXCEPCIONES
Esta garantía no será efectiva en los siguientes casos:
a) Cuando el producto se hubiese utlizado en condiciones distintas a las normales. (Uso industrial,
semi-industrial o comercial.)
b) Cuando el producto no hubiese sido operado de acuerdo con el instructivo de uso.
c) Cuando el producto hubiese sido alterado o reparado por personas no autorizadas por
Grupo HB PS, S.A. de C.V. el fabricante nacional, importador o comercializador responsable
respectivo.
El consumidor puede solicitar que se haga efectiva la garantía ante la propia casa comercial
donde adquirió su producto, siempre y cuando Grupo HB PS, S.A. de C.V. no cuente con talleres
de servicio.
PROCEDIMIENTO PARA HACER EFECTIVA LA GARANTÍA
• Para hacer efectiva la garantía, lleve su aparato al Centro de Servicio Autorizado más
cercano a su domicilio (consulte la lista anexa).
• Si no existe Centro de Servicio Autorizado en su localidad llame a nuestro Centro de
Atención al Consumidor para recibir instrucciones de como hacer efectiva su garantía.
FECHA DE
ENTREGA
SELLO DEL
VENDEDOR
QUEJAS Y SUGERENCIAS
DÍA_______
MES______
AÑO______
Si desea hacer comentarios o sugerencias con respecto
a nuestro servicio o tiene alguna queja derivada de la
atención recibida en alguno de nuestros Centros de Servicio
Autorizados, por favor dirigirse a:
GERENCIA INTERNACIONAL DE SERVICIO
800 71 16 100
Email:
CENTROS DE SERVICIO AUTORIZADOS
Ciudad de México
ELECTRODOMÉSTICOS
Av. Plutarco Elias Calles No. 1499
Zacahuitzco, Benito Juárez,
Ciudad de México, C.P. 09490
Tel: 55 5235 2323
CASA GARCÍA
Av. Patriotismo No. 875-B
Mixcoac, Benito Juárez,
Ciudad de México, C.P. 03910
Tel: 55 5563 8723
Nuevo León
FERNANDO SEPÚLVEDA REFACCIONES
Ruperto Martínez No. 238 Ote.
Col. Centro, Monterrey, N.L., C.P. 64000
Tel: 81 8343 6700
Jalisco
SERVICIOS DE MANTENIMIENTO CASTILLO
Garibaldi No. 1450,
Ladrón de Guevara,
Guadalajara,
Jalisco, C.P. 44660
Tel: 33 3825 3480
appuyer et relâcher le bouton de jet de vapeur pour repasser les plis. Ne pas appuyer sur le
bouton de vaporisation plus d’une fois toutes les 2 secondes.
4.
Une fois le repassage terminé, appuyez sur le bouton d’alimentation ( ) pour passer au
mode de veille. Le voyant d’alimentation clignotera jusqu’à ce que l’appareil soit débranché.
Débrancher le fer pour l’éteindre.
5.
Vider l’eau du fer en suivant les instructions de « Entretien et nettoyage ».
REMARQUE : Ne pas laisser la semelle brûlante entrer en contact avec des tissus fragiles.
Arrêt automatique
Le fer se fermera automatiquement et émettra cinq signaux sonores lorsque :
• Repose sur la semelle pendant 60 secondes.
• Repose d’un côté ou de l’autre pendant 60 secondes ou 30 minutes, selon sa direction.
• Repose sur le talon d’appui pendant 30 minutes.
Cordon rétractable
1.
Tirer sur le cordon jusqu’à obtenir la longueur désirée. Ne pas
dérouler le cordon au-delà du ruban coloré sur le fil.
2.
Pour remiser le cordon, appuyer sur le bouton de dégagement du
cordon et le maintenir appuyé tout en guidant le cordon dans le
compartiment de rangement.
w AVERTISSEMENT
Risque de blessures oculaires.
Ne pas laisser le cordon se rétracter librement. Le cordon peut se
coincer ou fouetter et blesser.
Entretien et nettoyage
1. Appuyer sur le bouton d’alimentation ( ). Débrancher. Laisser refroidir.
2. Vider l’eau et rétracter le cordon d’alimentation.
3. Le ranger sur son talon d’appui.
Semelle
1. Ne jamais repasser les fermetures à glissière, épingles, rivets métalliques ou boutons-
pression, car ils pourraient rayer la semelle.
2. Pour nettoyer les accumulations de la semelle, essuyer avec un chiffon mouillé d’eau
savonneuse. Ne pas utiliser de nettoyants abrasifs ou de tampons à récurer.
3. Ne pas utiliser de nettoyants chimiques ou pour nettoyage à chaud, car ils risquent
d’endommager le fini sur la surface de la semelle.
Comment utiliser la fonction de
nettoyage automatique
Pour garder les orifices de vapeur dégagés de toute souillure, suivre ces instructions à chaque repassage
à la vapeur.
1.
Assurez-vous que le fer est éteint et débranché. Déplacez l’interrupteur de vapeur à sans vapeur
( ). Remplissez le fer d’eau jusqu’à la moitié de sa capacité maximum.
2.
Branchez-le dans une prise électrique. Appuyez sur le bouton d’alimentation ( ) pour le mettre en
marche. Tournez le cadran de réglage de température jusqu’à LINEN (lin) et laissez le fer chauffer
pendant deux minutes.
3.
Appuyez sur le bouton d’alimentation ( ) pour l’éteindre, puis débranchez-le. Tenez-le au-dessus
d’un évier en ayant la semelle vers le bas.
4.
Appuyez et maintenez enfoncé le bouton d’autonettoyage. Une fois qu’il n’y a plus de vapeur,
relâchez le bouton et inclinez le fer vers l’avant et vers l’arrière pour vous assurer que l’eau restante
sort par les orifices de la semelle.
5.
S’il reste de l’eau à l’intérieur de la semelle, faites chauffer à nouveau le fer comme indiqué à l’étape
2. De l’eau bouillante et de la vapeur pourraient continuer de sortir des orifices de vapeur.
Garantie limitée
Cette garantie s’applique aux produits achetés et utilisées aux É.-U. et au Canada. C’est la seule
garantie expresse pour ce produit et est en lieu et place de tout autre garantie ou condition.
Ce produit est garanti contre tout défaut de matériaux et de main-d’oeuvre pour une période des
cinq (5) ans à compter de la date d’achat d’origine au Canada et un (1) an à compter de la date
d’achat d’origine aux É.-U. De plus, l’enduit antiadhésif DurathonMC de la semelle est garanti
contre l’usure pendant une période de dix (10) ans à compter de la date d’achat d’origine. Au cours
de cette période, votre recours exclusif se limitera au remplacement de ce produit ou tout autre
composant défectueux, à notre discrétion. Cependant, vous êtes responsables des frais associés au
retour du produit ou d’un composant en vertu de la présente garantie. Si le produit ou le composant
est non disponible, nous le remplacerons avec un article similaire de valeur égale ou supérieure.
Cette garantie ne couvre pas le verre, les filtres, l’usure d’un usage normal, l’utilisation non conforme
aux directives imprimées, ou des dommages au produit résultant d’un accident, modification,
utilisation abusive ou incorrecte. Cette garantie s’applique seulement à l’acheteur original ou à la
personne l’ayant reçu en cadeau. La présentation du reçu de vente d’origine comme preuve d’achat
est nécessaire pour faire une réclamation au titre de cette garantie. Cette garantie s’annule si le
produit est utilisé autrement que par une famille ou si l’appareil est soumis à toute tension ou forme
d’onde différente des caractéristiques nominales précisées sur l’étiquette (par ex. : 120 V ~ 60 Hz).
Nous excluons toutes les réclamations au titre de cette garantie pour les dommages spéciaux,
consécutifs et indirects causés par la violation de garantie expresse ou implicite. Toute
responsabilité est limitée au prix d’achat. Chaque garantie implicite, y compris toute garantie ou
condition de qualité marchande ou d’adéquation à un usage particulier, est exonérée, sauf dans la
mesure interdite par la loi, auquel cas la garantie ou condition est limitée à la durée de cette garantie
écrite. Cette garantie vous donne des droits légaux précis. Vous pouvez avoir d’autres droits qui
varient selon l’endroit où vous habitez. Certaines provinces ne permettent pas les limitations sur
les garanties implicites ou les dommages spéciaux ou indirects de telle sorte que les limitations
ci-dessus ne s’appliquent peut-être pas à votre cas.
Pour faire une réclamation au titre de la garantie, veuillez ne pas retourner cet appareil au magasin.
Veuillez nous écrire à Hamilton Beach Brands, Inc., Customer Service Department, 4421 Waterfront
Dr., Glen Allen, VA 23060, ou visiter le site hamiltonbeach.com/customer-service aux États-Unis ou
hamiltonbeach.ca/customer-service au Canada. Pour obtenir un service plus rapide, veuillez repérer
les numéros de modèle, de type et de séries sur votre appareil.
SALVAGUARDIAS IMPORTANTES
Cuando utilice aparatos eléctricos, siempre deben seguirse precauciones de seguridad básicas
a fin de reducir el riesgo de incendio, descarga eléctrica, y/o lesiones a personas, incluyendo las
siguientes:
1.
Lea todas las instrucciones.
2.
Este aparato no se destina para utilizarse por personas (incluyendo niños) cuyas
capacidades físicas, sensoriales o mentales sean diferentes o estén reducidas, o carezcan
de experiencia o conocimiento, a menos que dichas personas reciban una supervisión
o capacitación para el funcionamiento del aparato por una persona responsable de su
seguridad.
3.
Se requiere de una estrecha supervisión cuando el aparato se use por o cerca de niños. Los
niños deben supervisarse para asegurar que ellos no empleen los aparatos como juguete.
4.
Verifique que el voltaje de su instalación corresponda con el del producto.
5.
Use la plancha de vapor de mano sólo para el uso para el que fue diseñada.
6.
Para reducir el riesgo de descarga eléctrica, no sumerja la plancha en agua o en otros
líquidos.
7.
Siempre gire la plancha a OFF ( /apagado) antes de enchufarla o desenchufarla del
tomacorriente. Para desconectarlo, agarre el enchufe y retire del tomacorrientes. Nunca tire
el cable de alimentación.
8.
No permita que el cable toque superficies calientes. Deje que la plancha se enfríe bien antes
de guardarla. Enrolle el cable en el carrete provisto para almacenar.
9.
Siempre desconecte la plancha del tomacorriente antes de llenarla o vaciarla o cuando la
plancha no se encuentra en uso.
10.
No utilice la plancha con un cable dañado o si la plancha ha sufrido una caída o se ha
dañado, o si existen señales visibles de daños o si sufre pérdidas. Para evitar el riesgo de
una descarga eléctrica, no desarme la plancha. Llévela a un técnico en reparaciones para
su inspección y reparación. Un montaje incorrecto puede provocar un riesgo de descarga
eléctrica cuando la plancha se utilice después de su rearmado. Comuníquese con Servicio
al cliente para obtener información sobre la revisión, la reparación o los ajustes, según lo
establecido en la Garantía limitada.
11.
La plancha se debe usar y apoyar sobre una superficie estable.
12.
Al apoyar la plancha sobre su base, asegúrese de que la superficie sobre la cual se apoya
sea estable.
13.
No deje la plancha sin atención mientras esté conectada o sobre una tabla de planchar.
14.
Pueden ocurrir quemaduras por tocar las partes metálicas calientes, agua caliente o vapor.
Tenga cuidado cuando voltee una plancha a vapor boca abajo—ya que puede haber agua
caliente en el depósito.
15.
Para evitar una sobrecarga eléctrica, no haga funcionar la plancha en el mismo circuito con
otro aparato de alto vataje.
16.
Si el uso de un cable de extensión es absolutamente necesario, deberá utilizarse un cable
con una clasificación de amperios igual o superior a la clasificación máxima de la plancha.
Un cable clasificado para un amperaje menor puede provocar un riesgo de incendio o de
descarga eléctrica debido al sobrecalentamiento. Tenga cuidado de colocar el cable de
manera tal que se evite tironearlo o tropezarse con él.
17.
Cierre siempre la tapa de la abertura para llenado cuando utilice el aparato.
GUARDE ESTAS INSTRUCCIONES
Otra información de seguridad para el cliente
Este aparato ha sido diseñado solamente para uso doméstico.
w ADVERTENCIA
Riesgo de descarga eléctrica: Este aparato es provisto con un
enchufe polarizado (una pata más ancha) para reducir el riesgo de una descarga eléctrica. El
enchufe embona únicamente en una dirección dentro de un tomacorriente polarizado. No trate
de obviar el propósito de seguridad del enchufe modificándolo de alguna manera o utilizando
un adaptador. Si el enchufe no entra completamente en la toma, invierta el enchufe. Si aún no
entra, haga que un electricista reemplace la toma.
El largo del cable que se usa en este aparato fue seleccionado para reducir el peligro de que
alguien se enganche o tropiece con un cordón más largo. Si se necesita un cordón más largo,
se puede usar un cable de extensión aprobado. La clasificación nominal eléctrica del cable de
extensión deberá ser igual o mayor que la clasificación nominal del aparato. Es importante tener
cuidado de colocar el cable de extensión para que no se pliegue sobre el mostrador o la mesera
en donde niños puedan tirar del mismo o tropezarse accidentalmente.
Para evitar una sobrecarga eléctrica del circuito, no use otro aparato de alto voltaje en el mismo
circuito con este aparato.
Piezas y características
1.
Boquilla de rocío
2.
Tapa de la abertura para llenado
3.
Interruptor de vapor ajustable
4.
Botones de golpe de vapor y rocío
5.
Manija de agarre suave
6.
Cable retráctil
7.
Botón del cable retráctil
8.
Descanso de talón
9.
Selector de ajuste de temperatura
con botón de encendido central con
luz ( )
10.
Suela antiadherente Durathon™
11.
Botón de autolimpieza
Para ordenar piezas, visite:
hamiltonbeach.com/parts
Cómo planchar en seco
1.
Enchufe en un tomacorriente. La luz de encendido parpadeará hasta que se presione el botón de
encendido.
2.
Presione el botón de encendido ( ). La plancha comenzará a calentarse al ajuste de
temperatura iluminado. El selector de ajuste de temperatura se puede girar al ajuste deseado. Al
girar el selector, la plancha emitirá un pitido con cada cambio de ajuste.
3.
Después de planchar presione el botón de encendido para ingresar al modo de espera. La luz de
encendido parpadeará hasta que se desenchufe. Desenchufe la plancha para apagarla.
Cómo planchar con vapor
Si tiene agua extremadamente dura, mezcle 50% de agua del grifo sin tratar y 50% agua destilada o
mineralizada para usar en la plancha.
1.
Desconecte la plancha. Luego, usando la taza de medición con un pequeño pico para vaciar,
llene la plancha hasta la línea de llenado MÁX.
2.
Enchufe en un tomacorriente. La luz de encendido parpadeará hasta que se presione el botón de
encendido.
3.
Presione el botón de encendido ( ). La plancha comenzará a calentarse al ajuste de
temperatura iluminado. El selector de ajuste de temperatura se puede girar al ajuste deseado. Al
girar el selector, la plancha emitirá un pitido con cada cambio de ajuste.
4.
Mueva el interruptor de vapor ajustable al ajuste de vapor deseado.
5.
Después de planchar presione el botón de encendido ( ) para ingresar al modo de espera. La
luz de encendido parpadeará hasta que se desenchufe. Desenchufe la plancha para apagarla.
w ADVERTENCIA
Riesgo de quemaduras. Si trata de planchar con vapor en una
configuración de temperatura más baja o si no deja precalentar la plancha durante 2 minutos,
saldrá agua caliente de la suela.
Vapor vertical
1.
Siga los pasos del 1 al 4 en “Cómo planchar con vapor”.
2.
Cuelgue la prenda de vestir en un sitio que no se dañe con el calor
y la humedad. No la cuelgue frente a empapelados, ventanas o
espejos.
3.
Sostenga la plancha a aproximadamente 6 pulgadas (15 cm) de la
prenda y presione y suelte el botón de golpe de vapor para eliminar
las arrugas. No presione botón de golpe de vapor más de una vez
cada 2 segundos.
4.
Después de planchar presione el botón de encendido ( ) para
ingresar al modo de espera. La luz de encendido parpadeará hasta que se desenchufe.
Desenchufe la plancha para apagarla.
5.
Vacíe el agua de la plancha siguiendo las instrucciones en “Cuidado y limpieza”.
NOTA: No deje que la suela de la plancha haga contacto con las prendas de vestir delicadas
cuando esté caliente.
Apagado automático
La plancha se apagará automáticamente y emitirá un pitido 5 veces cuando:
• Descansa en la suela durante 60 segundos.
• Descansa sobre cualquier costado durante 60 segundos o 30 minutos, dependiendo de la
orientación.
• Descansa sobre el talón durante 30 minutos.
Cable retráctil
1.
Jale el cable hasta el largo deseado. No desenrolle el cable más allá
de la cinta de color indicador del mismo.
2.
Para almacenar el cable, presione y sostenga el botón para liberar el
cable mientras guía el cable dentro del área de almacenaje.
w ADVERTENCIA
Riesgo de lesión de ojo. No deje que
el cable se repliegue solo. El cable se puede enredar en el carrete,
o estando flojo puede ladearse hacia atrás o hacia adelante, lo que
podría causar heridas.
Cuidado y limpieza
1.
Presione el botón de encendido ( ). Desenchufe. Permita que la plancha se enfríe.
2.
Drene el agua y retraiga el cable.
3.
Guarde la plancha en posición vertical.
Suela
1.
Nunca planche sobre cierres, prendedores, remaches metálicos, o broches, ya que pueden rayar
la suela.
2.
Para limpiar la acumulación en la suela, limpie con un paño jabonoso. No use limpiadores
abrasivos o estropajos de metal.
3.
No use limpiadores químicos o para planchas calientes, ya que estos dañarían el acabado de la
suela de la plancha.
Cómo activar la autolimpieza
Para evitar que se formen acumulaciones en las salidas del vapor, siga estas instrucciones cada vez
que planche utilizando vapor.
1.
Asegúrese de que la plancha esté apagada y desenchufada. Mueva el interruptor de vapor
ajustable al ajuste sin vapor ( ). Llene la plancha con agua hasta la mitad de su capacidad
máxima.
2.
Enchufe en un tomacorriente. Presione el botón de encendido ( ) para encender. Gire el selector
de ajuste de temperatura a LINEN (ropa de cama) y deje que la plancha se caliente durante 2
minutos.
3.
Presione el botón de encendido ( ) para apagar, luego desenchufe. Sostenga sobre un
fregadero con la base hacia abajo.
4.
Mantenga presionado el botón de autolimpieza. Una vez que el vapor deje de salir, suelte el
botón e incline la plancha hacia adelante y hacia atrás para asegurarse de que salga toda el agua
restante de los orificios de la base.
5.
Si queda agua dentro de la base, vuelva a calentar la plancha como se indica en el paso 2.
Podría salir agua hirviendo y vapor por los respiraderos de vapor.