Loading ...
Loading ...
Loading ...
2. 2
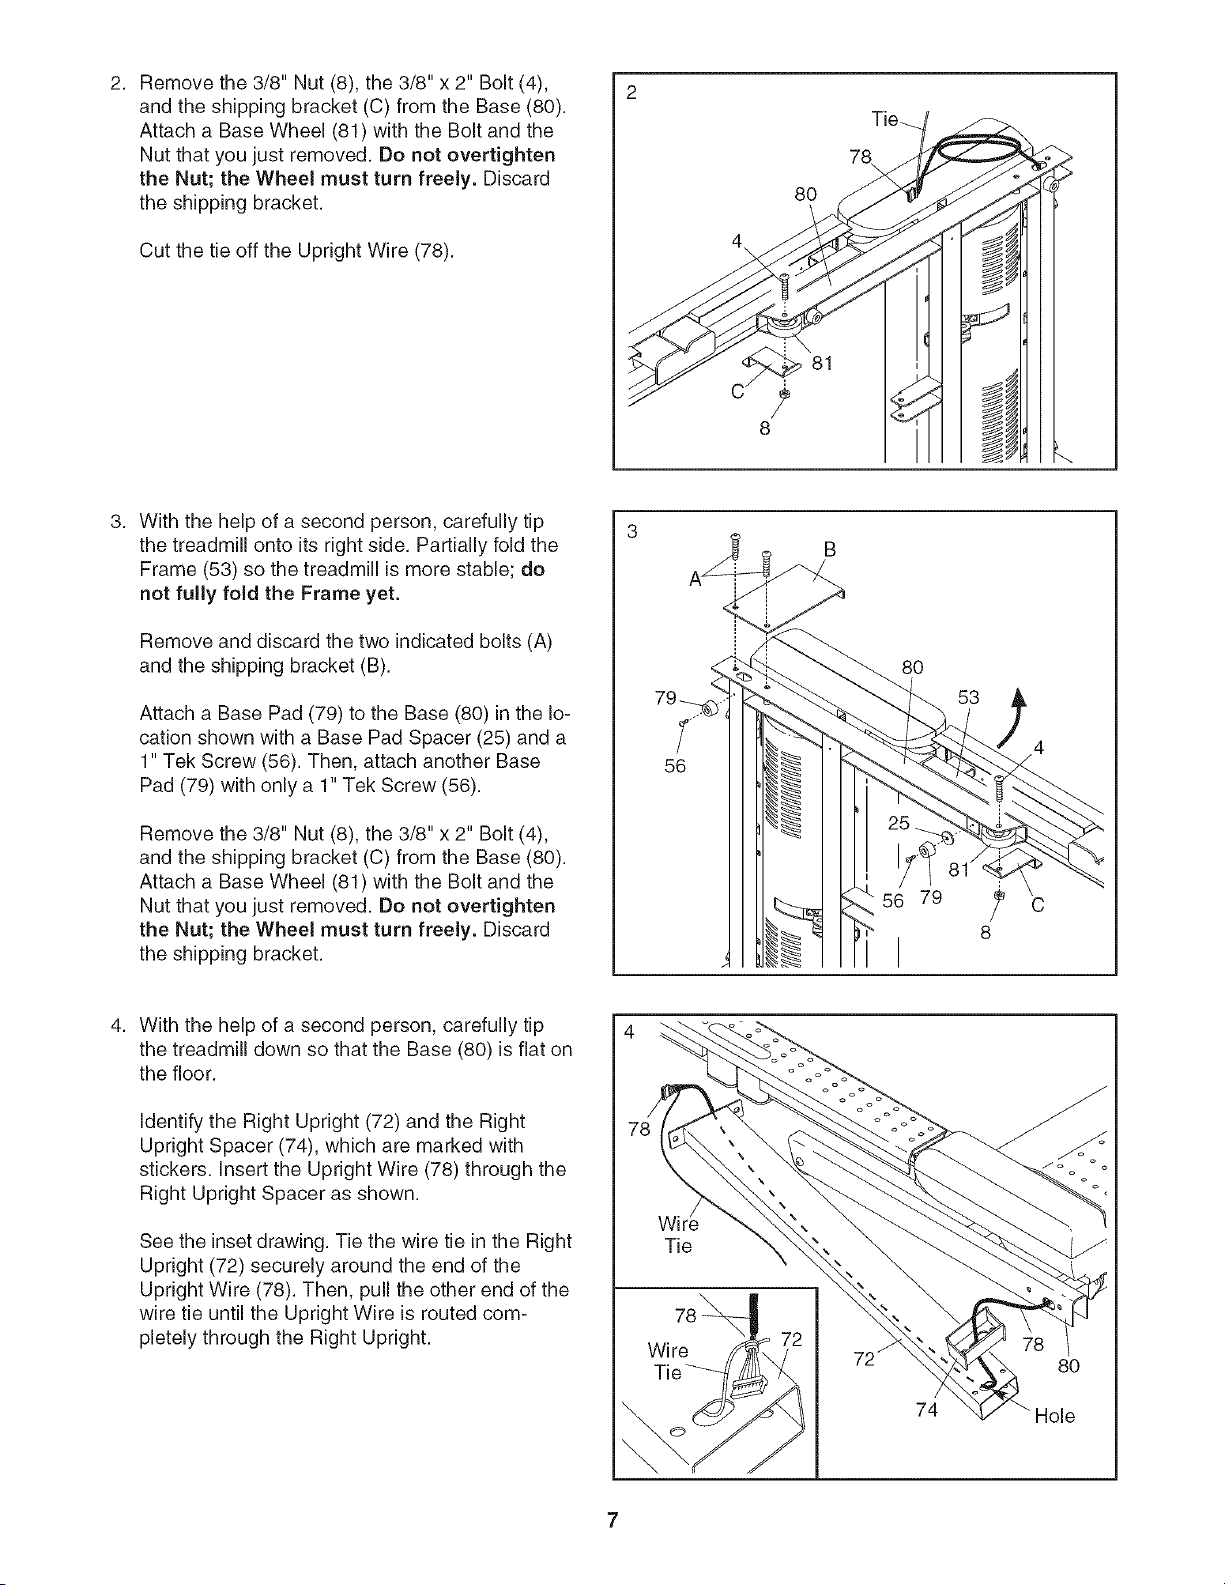
Removethe3/8"Nut(8),the3/8"x2"Bolt(4),
andtheshippingbracket(C)fromtheBase(80).
AttachaBaseWheel(81)withtheBoltandthe
Nutthatyoujustremoved.Donotovertighten
theNut;theWheelmustturn freely.Discard
theshippingbracket.
CutthetieofftheUprightWire(78).
8
80
81
Withthehelpofasecondperson,carefullytip
thetreadmillontoitsrightside.Partiallyfoldthe
Frame(53)sothetreadmillismorestable;do
notfullyfoldtheFrameyet.
Removeanddiscardthetwoindicatedbolts(A)
andtheshippingbracket(B).
AttachaBasePad(79)totheBase(80)inthelo-
cationshownwithaBasePadSpacer(25)anda
1"TekScrew(56).Then,attachanotherBase
Pad(79)withonlya1"TekScrew(56).
Removethe3/8"Nut(8),the3/8"x2"Bolt(4),
andtheshippingbracket(C)fromtheBase(80).
AttachaBaseWheel(81)withtheBoltandthe
Nutthatyoujustremoved.Donotovertighten
theNut;theWheelmustturn freely.Discard
theshippingbracket.
79_
56
B
80
56 79
I
53
8
With the help of a second person, carefully tip
the treadmill down so that the Base (80) is flat on
the floor.
Hentify the Right Upright (72) and the Right
Upright Spacer (74), which are marked with
stickers. Insert the Upright Wire (78) through the
Right Upright Spacer as shown.
See the inset drawing. Tie the wire tie in the Right
Upright (72) securely around the end of the
Upright Wire (78). Then, pull the other end of the
wire tie until the Upright Wire is routed com-
pletely through the Right Upright.
78
Wire
74
8O
Hole
Loading ...
Loading ...
Loading ...