Loading ...
Loading ...
Loading ...
Page. 15
3. Use a T-20 torx screwdriver to remove the screws from
the back rear panel of the backguard assembly.
4. Carefully lift the backguard assembly from the range.
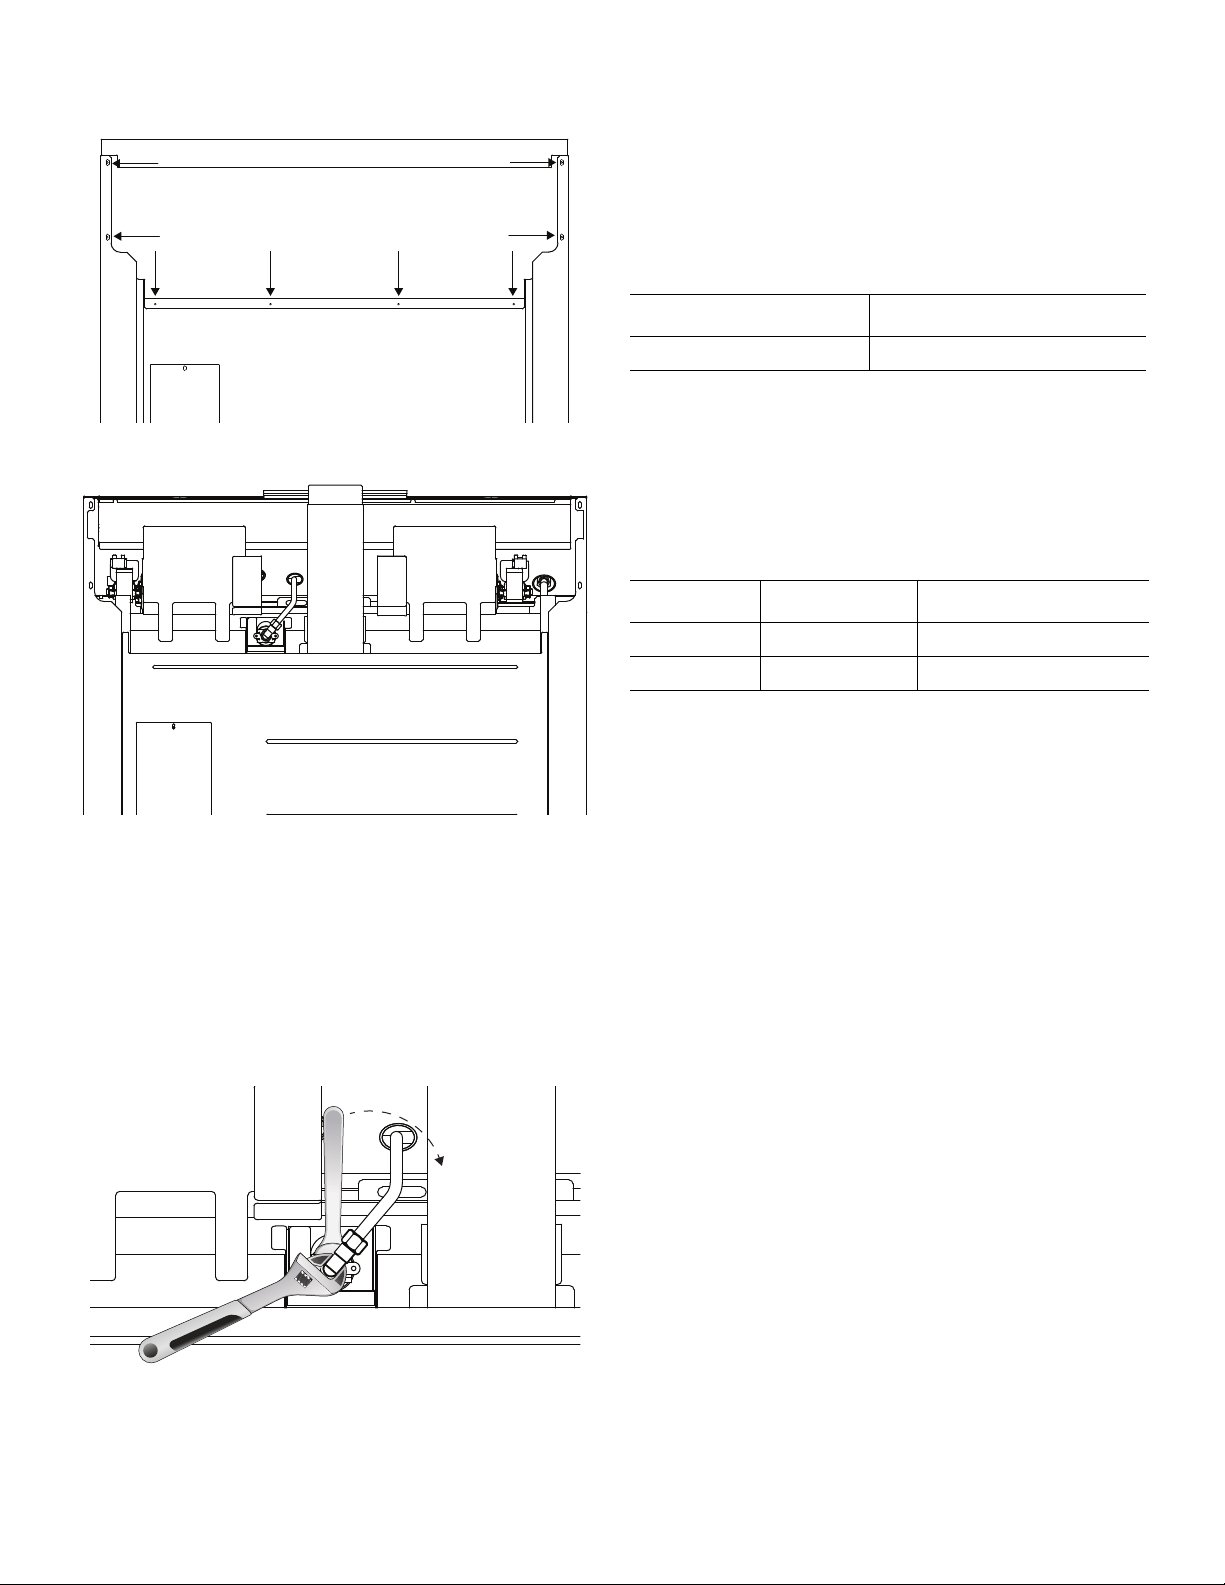
Changing the broil burner orifice
NOTE: This procedure applies to both the main oven broil
burner and, when applicable, to the auxiliary oven broil
burner.
1. Remove broil orifice using a 7/16'' box end wrench,
while restraining the elbow fitting from rotation using
a small adjustable wrench.
IMPORTANT: DO NOT bend the broil burner orifice
bracket. Ensure that the broiler orifice is aligned to the
center of the burner tube inlet.
2. Label each of the removed orifices, noting from which
burner they were removed, in the event the appliance
is converted back to natural gas in the future.
For your convenience, note the orifice sizes and
locations in the following table.
3. Locate the proper burner orifices included with the kit.
Orifices are stamped with the orifice diameter size on
the side.
4. Replace orifices as indicated in the table. To avoid any
possible gas leak in this area, ensure the orifice is
completely seated and tight to the burner orifice
holding bracket and the 90° orifice elbow.
NOTE: The replacement broil orifices have straight
threads (not tapered threads) and DO NOT require thread
sealing compound.
5. Continue to “Removing and installing the oven
door(s), on GAS ranges only (PRG models)” before
reattaching the backguard assembly. Once all of the
broil and bake burners' orifices have been replaced
and converted to LP gas, reinstall the oven doors
before performing a gas leak check of all the replaced
bake and broil orifices and their associated supply
tube fittings.
Main oven broil Aux oven broil
Description Main oven broil Aux oven broil
Pro Grand 1.25 mm (125) 0.813 mm (813) or “67”
Pro Harmony 1.25 mm (125) 0.75 mm (75)
Loading ...
Loading ...
Loading ...