Loading ...
Loading ...
Loading ...
• 8 •
9. ASSEMBLY INSTRUCTIONS
9.1 It is important to fully assemble your charger before use. Remove all cord wraps and uncoil the cables
prior to using the battery charger. Follow these instructions for assembly.
PARTS TOOLS NEEDED
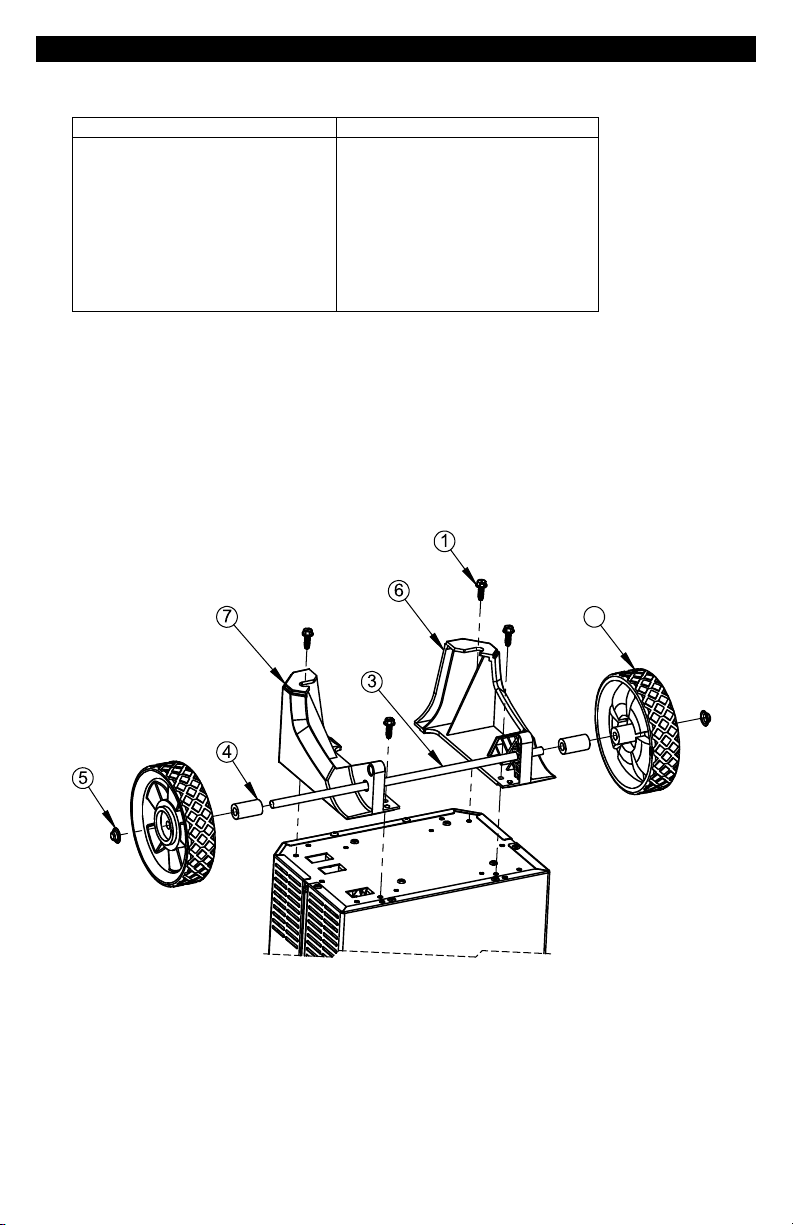
1. ¼-20, thread-cutting screws, 4 ea.
2. Wheels, 2 ea.
3. Axle, 1 ea.
4. Nylon spacers, 2 ea.
5. Axle end cap, 2 ea.
6. Right foot, 1 ea.
7. Left foot, 1 ea.
3/8˝ nut driver or socket with extension
Hammer
9.2 Prepare parts: Remove the charger and parts from the lower case materials and place the charger
upside down on a at surface. To assembly the right foot (6) and left foot (7) and wheels (2), you will
need a 3/8˝ nut driver.
9.3 Assemble the wheels and axle: Tap the end cap (5) with a hammer to install on one end of the axle (3).
Slide one wheel (2) onto the axle (3) and then one nylon spacer (4). Slide axle (3) through right foot (6)
and left foot (7) as shown. Slide the other nylon spacer (4) onto axle and then the other wheel (2).
Install the other end cap (5). There should be a one wheel (2) on each end of the axle (3) assembly.
9.4 Attach the right foot and left foot: Attach the right foot (6) to the bottom of charger and secure it
with the two ¼-20 thread-cutting screws (1) provided. Attach the left foot (7), using the other two ¼-20
thread-cutting screws (1) provided.
2
9.5 Extend the handle from the retracted position by pulling it upward until it locks into place.
(Press the small silver buttons inward, if necessary.)
Loading ...
Loading ...
Loading ...