Loading ...
Loading ...
Loading ...
7
ASSEMBLY
IMPORTANT: This mower is shipped without gasoline or oil in
the engine. Be certain to service engine with gasoline and oil as
instructed in the Operation section of the Engine Manual before
starting or operating your mower.
NOTE: Reference to right and left hand side of the Lawn Mower is
observed from the operating position.
Unpacking
OPENING CARTON
1. Cut each corner of the carton vertically from top to bottom.
2. Remove all loose parts:
• Grass Catcher (if equipped)
• Engine Oil
3. Remove loose packing material.
REMOVING MOWER FROM CARTON
1. Lift mower from the rear to detach it from underlying carton
material and roll mower out of carton.
2. Check carton thoroughly for any other loose parts.
3. Remove any packing material which may be between upper
and lower handles.
Mower Assembly
Preform the following procedures to assemble and set up the
mower:
• Handle Assembly
• Pull-Out Handle. See page 7.
• Folding Handle. See page 8.
• Vertical Storage Handle. See page 9.
• Recoil Starter Rope Handle Assembly
• Attaching the Grass Catcher (if equipped)
• Attaching Side Discharge Chute or Side Discharge Blower
(if equipped)
• Electric Start Set-Up (If Equipped)
NOTE: If necessary, refer to the procedures in the Adjustments
Section after assembling the mower.
Handle Assembly
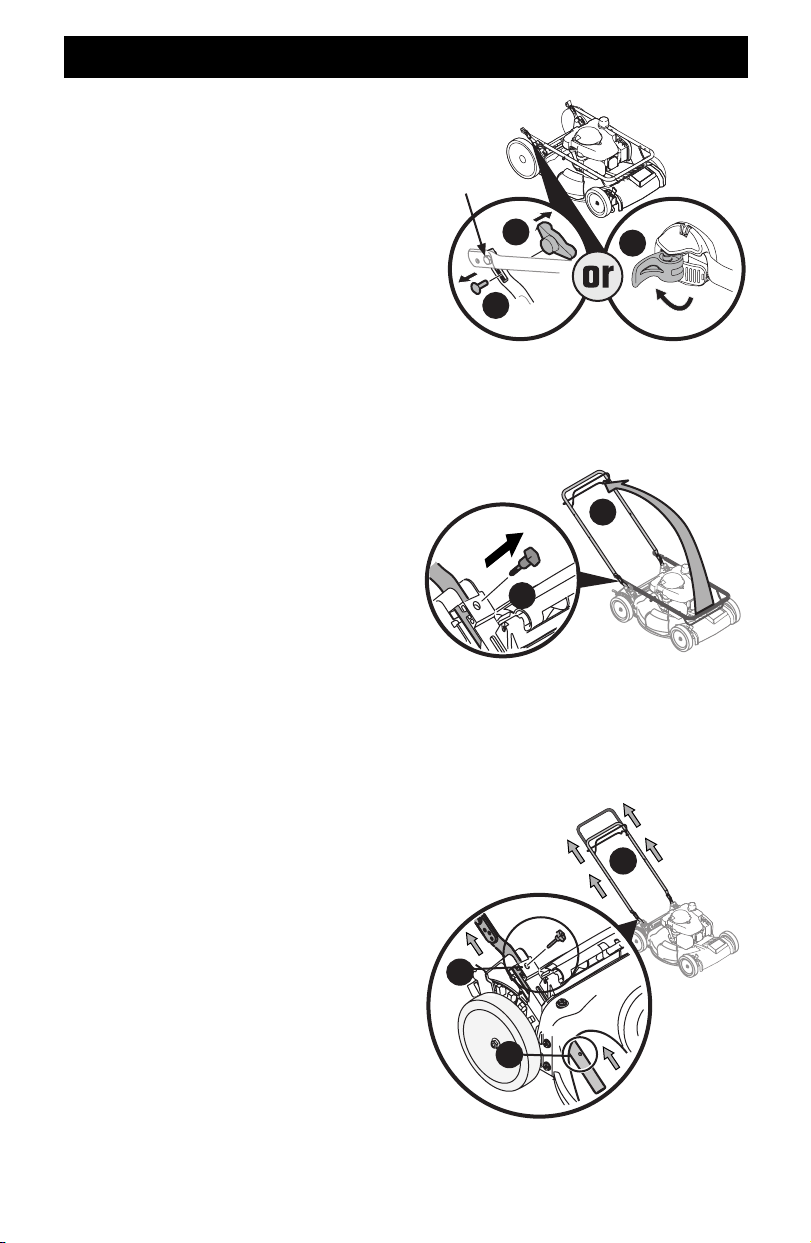
PULLOUT HANDLE
1. Remove knobs or wing nuts (a) and carriage bolts (b) from
the handle or if equipped with the EZ-lock handle (c), proceed
to STEP 2 (Figure 1).
NOTE: The EZ-Fold handle release levers are shipped in the
unlocked position.
Do not loosen
or remove hex
head screws.
a
c
b
Figure 1
2. Remove T-bolts (d) from the handle brackets (Figure 2).
3. While stabilizing mower so it doesn’t move, pivot upper
handle (e) up (Figure 2). Do not crimp blade or drive control
cables while lifting the handle up.
e
d
Figure 2
4. Pull upward on the handle (e) (Figure 3) until holes in lower
handle (f) line up with holes in handle brackets (g) (Figure 3
Inset, Deck Cutaway).
NOTE: When pulling upward on handle, do not pull handle all
the way out of the handle brackets.
e
g
f
Figure 3
Loading ...
Loading ...
Loading ...