®
GAS RANGE
ESTUFA A GAS
Sears Roebuck and Co., Hoffman Estates, IL 60179 U.S.A.
www.sears.com
P/N 316000966 (0001)
Table of Content
Free-Standing Range Warranty ........................................ 2
Product Record ................................................................ 2
IMPORTANT SAFETY INSTRUCTIONS ....................... 3-5
Grounding Instructions ..................................................... 5
Control Pad Functions ...................................................... 6
Setting the Clock and Minute Timer .................................. 7
Surface Cooking ............................................................ 8-9
Setting Warmer Drawer Controls (if equipped) ............... 10
Before Setting Oven Controls .......................................... 11
Setting Oven Controls ................................................ 11-13
Oven Cleaning ........................................................... 14-15
General Cleaning ....................................................... 16-18
Changing Oven Lights .................................................... 19
Adjusting Oven Temperature .......................................... 19
Avoid Service Checklist ............................................. 20-21
Sears Service ................................................................. 22
Espa_ol ..................................................................... 23-44
Product Record
In this space below, record the date of purchase, model
and serial number of your product. You will find the model
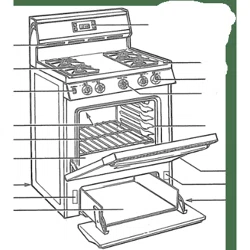
and serial number printed on an identification plate. The
identification plate is located on the right side of the oven
front frame in the storage compartment for models with
sealed burners. For all other gas models the identification
plate is located under the lift-up cooktop.
Model No. 790.
Serial No.
Date of Purchase
Save these instructions and your sales receipt for future
reference.
Free-Standing Range Warranty
FULL ONE YEAR WARRANTY ON ALL PARTS
If, within one year from the date of installation, any part fails to function properly due to a defect in material or
workmanship, Sears will repair or replace it, at our option, free of charge.
If the product is subjected to other than private family use, the above warranty is effective for only 90 days.
WARRANTY SERVICE IS AVAILABLE BY CONTACTING THE NEAREST SEARS SERVICE CENTER IN THE
UNITED STATES.
This warranty gives you specific legal rights, and you may also have other rights which vary from state to state.
Sears Roebuck and Co. Dept. 817 WA Hoffman Estates, IL 60179
....._÷'_"_:_' _'_ _' TO 'T'h_!!_V_!:__.e_Of v_ _ _'_:_e B_,.!j _!:__,__:_ _
Years of Ownership Coverage 1st Year 2nd Year 3rd Year
1. Replacement of Defective Parts W MA MA
2. Annual Preventive Maintenance MA MA MA
Check at Your Request
W=Warranty MA=Maintenance Agreement
Kenmore Ranges are designed, manufactured, and tested for years of dependable operation. Yet, any major home
appliance may require service from time to time. The Sears Warranty plus the Sears Maintenance Agreement helps
provide protection from unexpected repair bills.
The chart above compares the warranty and Maintenance Agreement and shows you the benefits of a Sears Range
Maintenance Agreement.
Contact your Sears Sales Associate or Local Sears Service Center today and purchase a Sears Maintenance
Agreement.
IMPORTANT SAFETY INSTRUCTIONS
Read a nsI,_i_cl ons berise tJ_sY{_5this app! ance
Save t_:_ese nst_ ctoss fo_ _futue _efe_eY_ce
This manual contains many important safety messages. Always read and obey all safety messages.
This is the safety alert symbol. It alers you to safety messages that inform you of hazards that can kill or hurt you or others, or cause
damage to the product.
Indicates an imminently hazardous situation which, if not avoided may result in death or serious injury.
Indicates an imminently hazardous situation which, if not avoided may result in minor or moderate injury, or product-
damage-only.
All safety messages wilt identify the hazard, tell you how to reduce the chance of injury, and tell you what can happen if the
instructions are not followed.
I_lf the information in this manual
is not followed exactly, a fire or explosion
may result causing property damage,
personal injury or death.
FOR YOUR SAFETY:
Do not store or use gasoline or other
flammable vapors and liquids in the
vicinity of this or any other appliance.
WHAT TO DO IF YOU SMELL GAS:
• Do not try to light any appliance.
• Do not touch any electrical switch; do
not use any phone in your building.
• Immediately call your gas supplier
from a neighbor's phone. Follow the
gas supplier's instructions.
• If you cannot reach your gas supplier,
call the fire department.
Installation and service must be
performed by a qualified installer,
servicer or the gas supplier.
• All ranges can tip.
• Injury to persons could result.
• Install anti-tip device packed
with range.
• See Installation Instructions.
To reduce the risk of tipping, the range
must be secured by properly installed
anti-tip bracket provided with the range.
To check if the bracket is installed
properly, visually check that rear leveling
leg is inserted into and fully secured by
the anti-tip bracket by removing lower
panel or storage drawer. For models with a
warmer drawer or broiler compartment,
grasp the top rear edge of the range and
carefully attempt to tilt it forward. Refer to
the Installation Instructions for proper anti-
tip bracket installation.
• Remove all tape and packaging before using the range.
Destroy the carton and plastic bags after unpacking the range.
Never allow children to play with packaging material.
• Proper Installation-Be sure your appliance is properly
installed and grounded by a qualified technician in
accordance with the National Fuel Gas Code ANSI Z223.--
latest edition, and the National Electrical Code ANSI/NFPA
No. 70--latest edition, and local code requirements. Install
only per installation instructions provided in the literature
package for this range.
Ask your dealer to recommend a qualified technician and an
authorized repair service. Know how to disconnect the power to
the range at the circuit breaker or fuse box in case of an
emergency.
• User servicing--Do not repair or replace any part of the
appliance unless specifically recommended in the manuals.
All other servicing should be done only by a qualified technician,
This may reduce the risk of personal injury and damage to the
range.
• Never modify or alter the construction of a range by
removing leveling legs, panels, wire covers, anti-tip
brackets/screws, or any other part of the product.
Stepping, leaning or sitting on the doors or
drawers of this range can result in serious injuries and also
cause damage to the range. Do not allow children to climb or
play around the range. The weight of a child on an open door
may cause the range to tip, resulting in serious burns or other
injury.
Do not use the oven, broiler compartment or
warmer drawer for storage.
Do not store items of interest to children in
the cabinets above a range or on the backguard of a range.
Children climbing on the range to reach items could be seriously
injured.
Never Use Your Appliance for Warming or
Heating the Room.
IMPORTANT SAFETY INSTRUCTIONS
• Storage in or on Appliance--Flammable materials should
not be stored in an oven, warmer drawer, broiler
compartment, near surface burners, broiler compartment
or in the storage drawer. This includes paper, plastic and
cloth items, such as cookbooks, ptasticware and towels, as well
as flammable liquids. Do not store explosives, such as aerosol
cans, on or near the range.
• Do Not Leave Children Alone--Children should not be left
alone or unattended in the area where appliance is in use.
They should never be allowed to sit or stand on any part of the
appliance.
• DO NOT TOUCH SURFACE BURNERS, AREAS NEAR
THESE BURNERS, OVEN BURNERS OR INTERIOR
SURFACES OF THE OVEN. Both surface and oven burners
may be hot even though flames are not visible. Areas near
surface burners may become hot enough to cause burns.
During and after use, do not touch, or let clothing or other
flammable materials touch these areas until they have had
sufficient time to cool. Among these areas are the cooktop,
surfaces facing the cooktop, the oven vent openings and
surfaces near these openings, oven door and window.
• Wear Proper Apparel--Loose-fitting or hanging garments
should never be worn while using the appliance. Do not let
clothing or other flammable materials contact hot surfaces.
• Do Not Use Water or Flour on Grease Fires--Smother the
fire with a pan lid, or use baking soda, a dry chemical or
foam-type extinguisher.
• When heating fat or grease, watch it closely. Fat or grease
may catch fire if allowed to become too hot.
• Use Only Dry Potholders--Moist or damp potholders on
hot surfaces may result in burns from steam, Do not let
potholders touch hot heating elements. Do not use a towel or
other bulky cloth instead of a potholder.
• Do Not Heat Unopened Food Containers--Buildup of
pressure may cause container to burst and result in injury,
• Remove the oven door from any unused range if it is to be
stored or discarded,
IMPORTANT--Do not attempt to operate the oven during a
power failure. If the power fails, always turn off the oven. If the
oven is not turned off and the power resumes, the oven will
begin to operate again. Once the power resumes, reset the clock
and oven function.
_POR'_iHT HS_I"RUCT OHS _s;OR US/HG
YOUR COOHYOR
Use Proper Flame Size--Adjust flame size so it
does not extend beyond the edge of the utensil. The use of
undersized utensils wilt expose a portion of the burner flame to
direct contact and may result in ignition of clothing. Proper
relationship of utensil to flame will also improve efficiency.
• Know which knob controls each surface burner. Place a
pan of food on the burner before turning it on, and turn the
burner off before removing the pan.
• Always turn knob to the full LITE position when igniting top
burners. Visually check that burner has lit. Then adjust the
flame so it does not extend beyond the edge o the utensil.
• Utensil Handles Should Be Turned Inward and Not Extend
Over Adjacent Surface Burners--To reduce the risk of burns,
ignition of flammable materials, and spillage due to unintentional
contact with the utensil, the handle of the utensil should be
positioned so that it is turned inward, and does not extend over
adjacent surface burners.
• Never Leave Surface Burners Unattended at High Heat
Settings--Boilovers cause smoking and greasy spillovers that
may ignite, or a pan that has boiled dry may melt
• Protective Liners--Do not use aluminum foil to line surface
burner pans, or oven bottom, except as suggested in this
manual. Improper installation of these liners may result in risk
of electric shock, or fire.
• Glazed Cooking Utensils--Only certain types of glass, glass/
ceramic, ceramic, earthenware, or other glazed utensils are
suitable for cooktop service without breaking due to the sudden
change in temperature. Check the manufacturer's
recommendations for cooktop use.
IMPORTANT SAFETY INSTRUCTIONS
_x:_oR°_s@rr NSTRtJCTOHS _SORUS/HG
YOUR OVEH
• Use Care When Opening Oven Door or Warmer Drawer--
Stand to the side of the range when opening the door of a hot
oven. Let hot air or steam escape before you remove or
replace food in the oven.
• Keep Oven Vent Ducts Unobstructed. The oven vent is
located below the backguard. Touching the surfaces in this
area when the oven is operating may cause severe burns.
Also, do not place plastic or heat-sensitive items on or near the
oven vent. These items could melt or ignite.
• Placement of Oven Racks. Always place oven racks in
desired location while oven is cool. If rack must be moved
while oven is hot use extreme caution. Use potholders and
grasp the rack with both hands to reposition. Do not let
potholders contact the hot heating elements in the oven.
Remove all utensils from the rack before moving.
• Do not use the broiler pan without its insert. The broiler
pan and its insert allow dripping fat to drain and be kept away
from the high heat of the broiler.
• Do not cover the broiler insert with aluminum foil.
Exposed fat and grease could ignite.
• Cold temperatures can damage the electronic control. When
using the appliance for the first time, or when the appliance
has not been used for an extended period of time, be certain
the unit has been in temperatures above 32°F (0°C) for at least
3 hours before turning on the power to the appliance
_ROR_'_H°!i_ HSTRUCT OHS _s_OR CLEAH/NG
YOUR RAHGE
• Clean the range regularly to keep all parts free of grease
that could catch fire. Pay particular attention to the area
underneath each surface element. Do not allow grease to
accumulate. Refer to the hood manufacturer's instructions for
cleaning.
• Kitchen cleaners and aerosols--Always follow the
manufacturer's recommended directions for use. Be aware
that excess residue from cleaners and aerosols may ignite
causing damage and injury.
SEL__::CLEAN HG OVEHS
• Clean in the self-cleaning cycle only the parts listed in this
Owner's Guide. Before self cleaning the oven, remove the
broiler pan and any utensils or foods from the oven.
• Do Not Use Oven Cleaners--No commercial oven cleaner or
oven liner protective coating of any kind should be used in or
around any part of the oven.
• Do Not Clean Door Gasket--The door gasket is essential for
a good seal. Care should be taken not to rub, damage or
move the gasket.
S _!£THESE HS"_"RUCT OHS
Grounding Instructions
(electric ignition models only)
Avoid fire hazard or electrical shock. Do not use
an adapter plug, an extension cord, or remove grounding prong
from electrical power cord. Failure to follow this warning can
cause serious injury, fire or death.
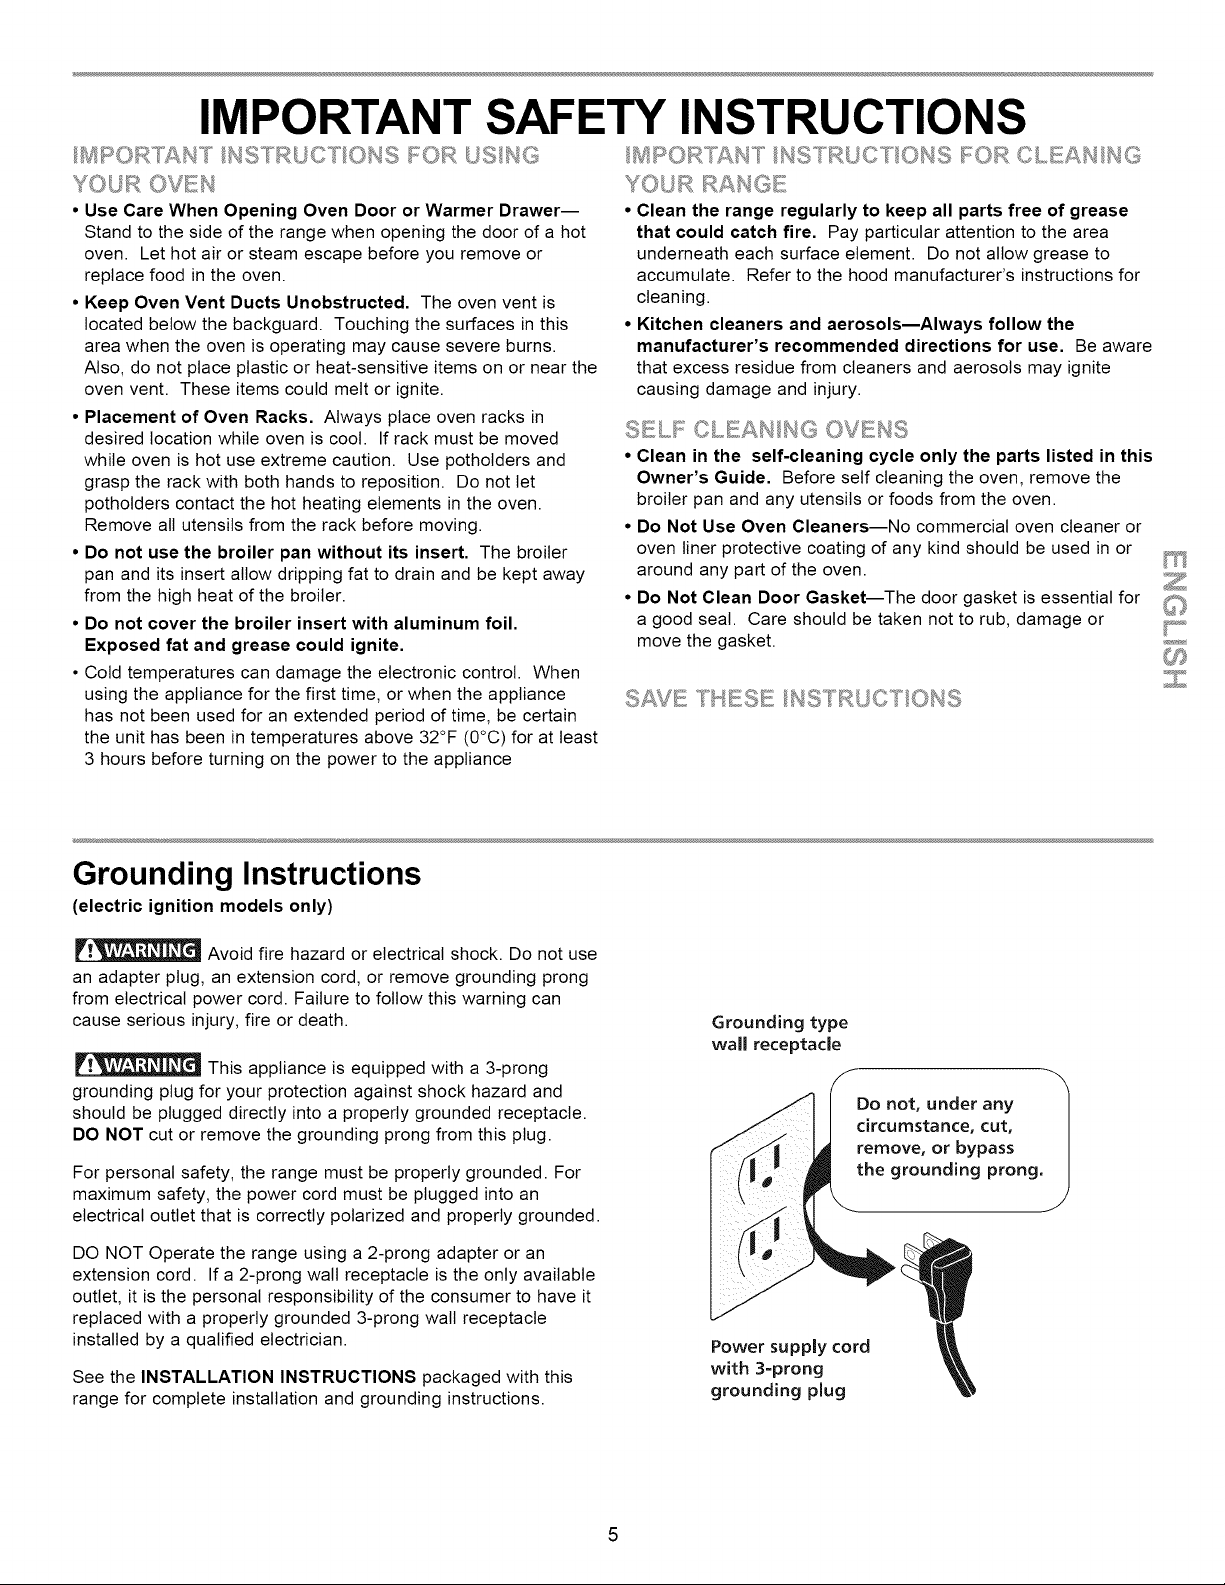
This appliance is equipped with a 3-prong
grounding plug for your protection against shock hazard and
should be plugged directly into a properly grounded receptacle.
DO NOT cut or remove the grounding prong from this plug.
For personal safety, the range must be properly grounded. For
maximum safety, the power cord must be plugged into an
electrical outlet that is correctly polarized and properly grounded.
DO NOT Operate the range using a 2-prong adapter or an
extension cord. If a 2-prong walt receptacle is the only available
outlet, it is the personal responsibility of the consumer to have it
replaced with a properly grounded 3-prong wall receptacle
installed by a qualified electrician.
See the INSTALLATION INSTRUCTIONS packaged with this
range for complete installation and grounding instructions.
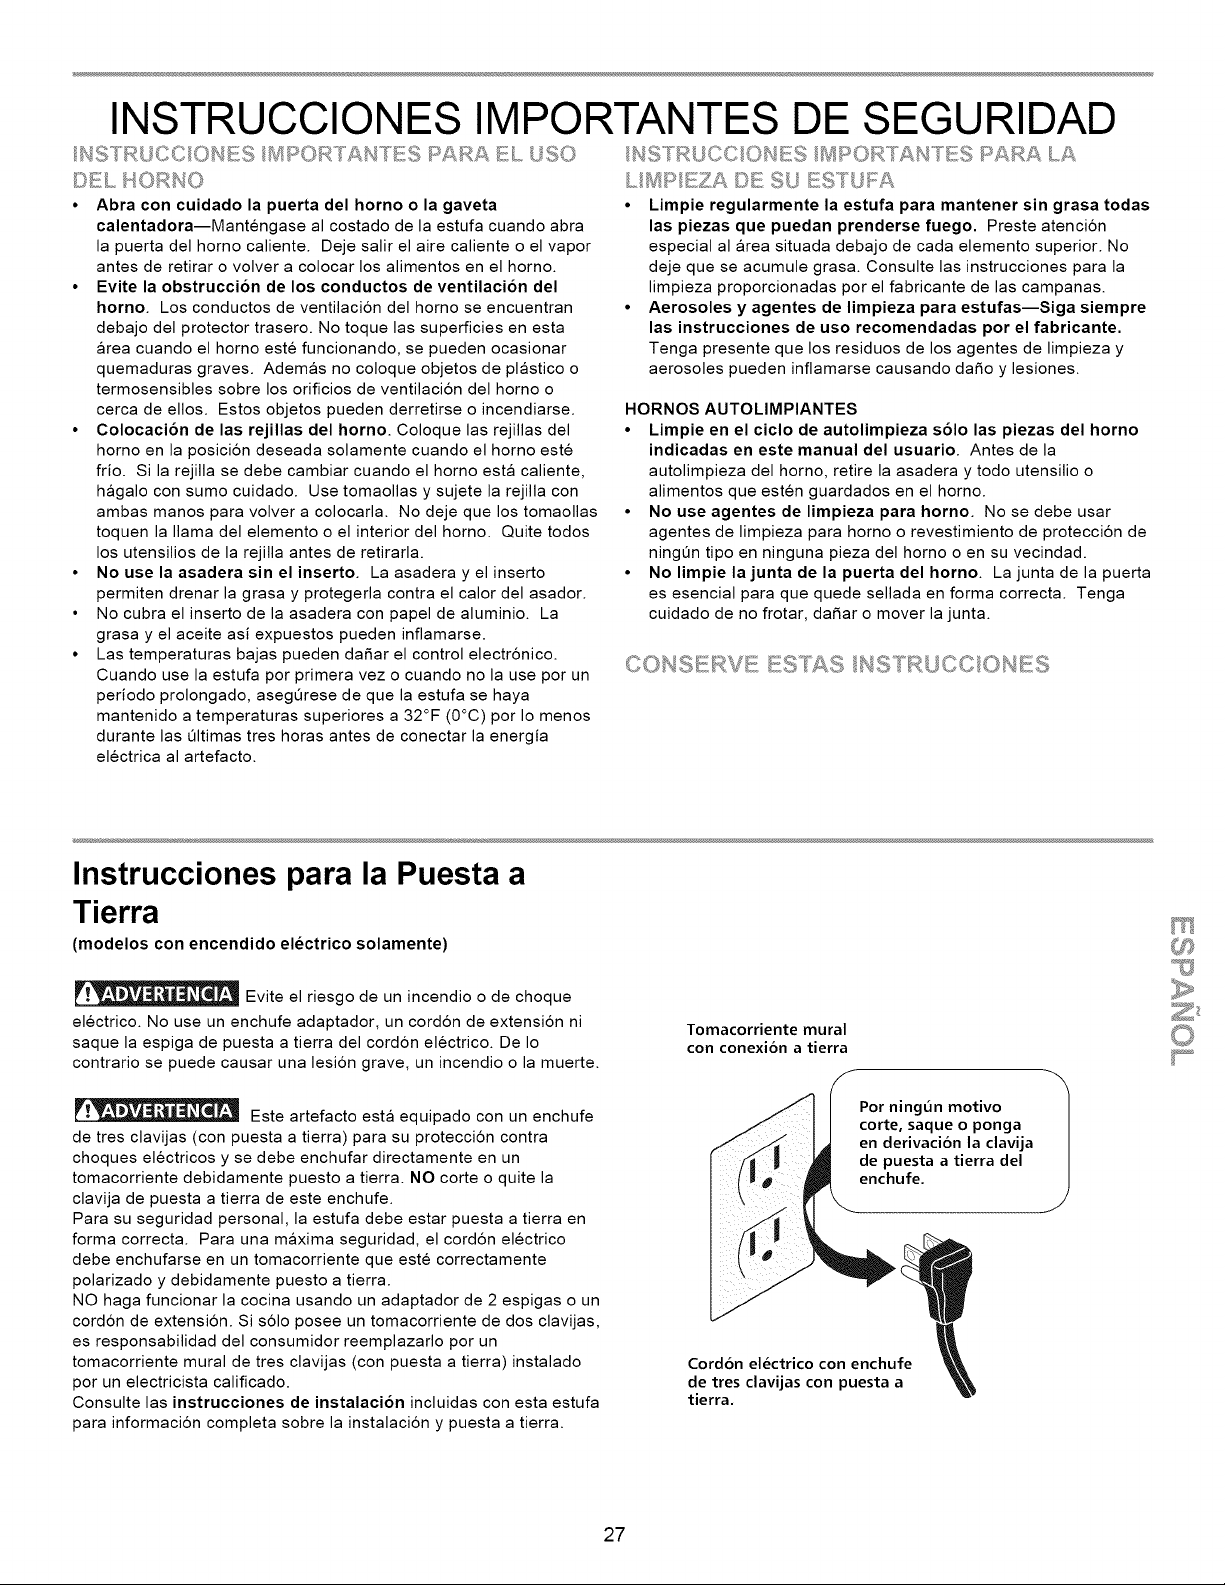
Grounding type
wall receptacle
Do not, under any
circumstance, cut,
remove, or bypass
the grounding prong.
Power supply cord
with 3=prong
grounding plug
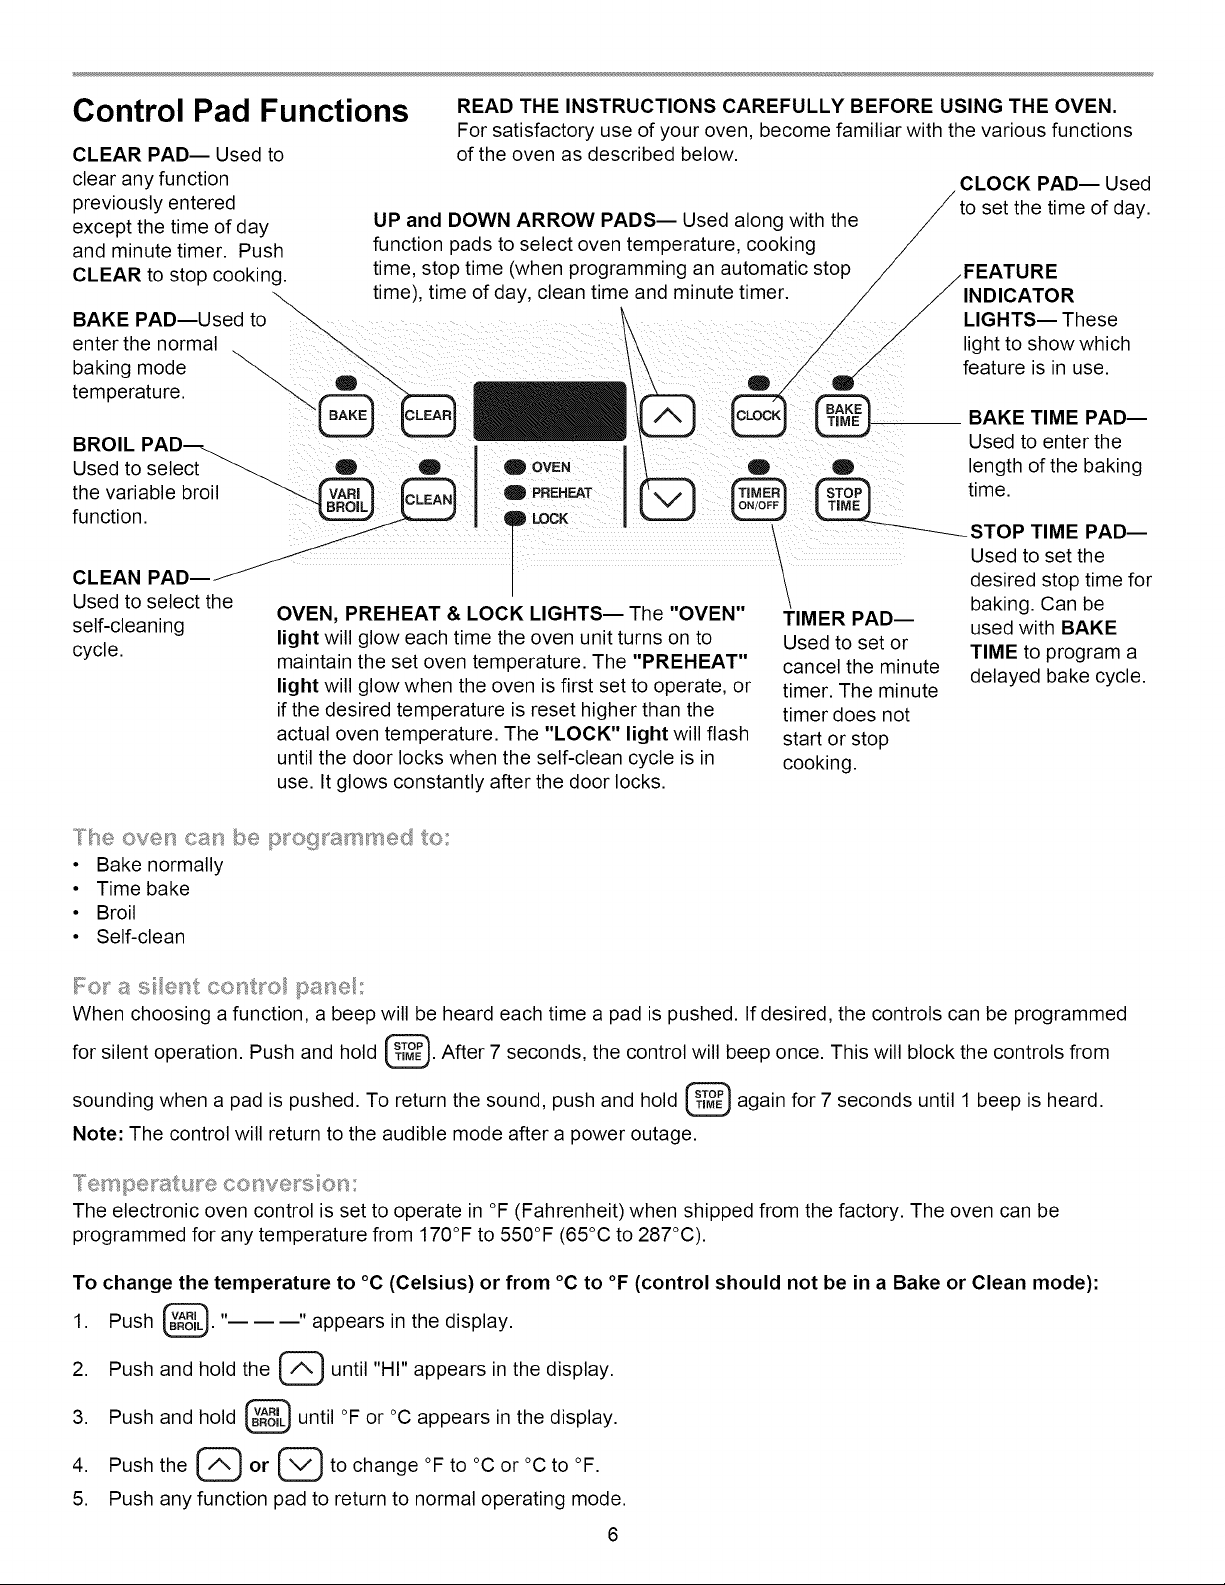
Control Pad Functions
CLEAR PAD Used to
clear any function
previously entered
except the time of day UP and DOWN ARROW PADS-- Used along with the
and minute timer. Push function pads to select oven temperature, cooking
CLEAR to stop cooking, time, stop time (when programming an automatic stop
time), time of day, clean time and minute timer.
BAKE PAD Used to
b:tkie_;heod°:mal _
temperature ___ _
BROIL PAD--_._ I
Used to select _ g e O OVEN
the variable broil _..._ _ _ PREHEAT
function, g LOCK
CLEAN PAD J
Used to select the
self-cleaning
cycle,
READ THE INSTRUCTIONS CAREFULLY BEFORE USING THE OVEN.
For satisfactory use of your oven, become familiar with the various functions
of the oven as described below.
OVEN, PREHEAT & LOCK LIGHTS-- The "OVEN"
light will glow each time the oven unit turns on to
maintain the set oven temperature. The "PREHEAT"
light will glow when the oven is first set to operate, or
if the desired temperature is reset higher than the
actual oven temperature. The "LOCK" light will flash
until the door locks when the self-clean cycle is in
use. It glows constantly after the door locks.
CLOCK PAD-- Used
set the time of day.
INDICATOR
LIGHTS-- These
light to show which
feature is in use.
TIMER PAD--
Used to set or
cancel the minute
timer. The minute
timer does not
start or stop
cooking.
BAKE TIME PAD--
Used to enter the
length of the baking
time.
STOP TIME PAD--
Used to set the
desired stop time for
baking. Can be
used with BAKE
TIME to program a
delayed bake cycle.
The oven can be p_'oga'ammed to:
• Bake normally
• Time bake
• Broil
• Self-clean
When choosing a function, a beep will be heard each time a pad is pushed. If desired, the controls can be programmed
for silent operation. Push and hold _. After 7 seconds, the control will beep once. This will block the controls from
sounding when a pad is pushed. To return the sound, push and hold _ again for 7 seconds until 1 beep is heard.
Note: The control will return to the audible mode after a power outage.
"_'e_'_"{:_e_atu _e conve "sTon:
The electronic oven control is set to operate in °F (Fahrenheit) when shipped from the factory. The oven can be
programmed for any temperature from 170°F to 550°F (65°C to 287°C).
To change the temperature to °C (Celsius) or from °C to °F (control should not be in a Bake or Clean mode):
1. Push _. "------" appears in the display.
2. Push and hold the (_ until "HI" appears in the display.
3. Push and hold _ until °F or °C appears in the display.
4. Push the (_ or (_ to change °F to °C or °C to °F.
5. Push any function pad to return to normal operating mode.
6
Setting the Clock and
Minute Timer
0 OVEN
PREHEAT
g LOCK
D O
Note: The oven function will not work
if the time of day clock is not set.
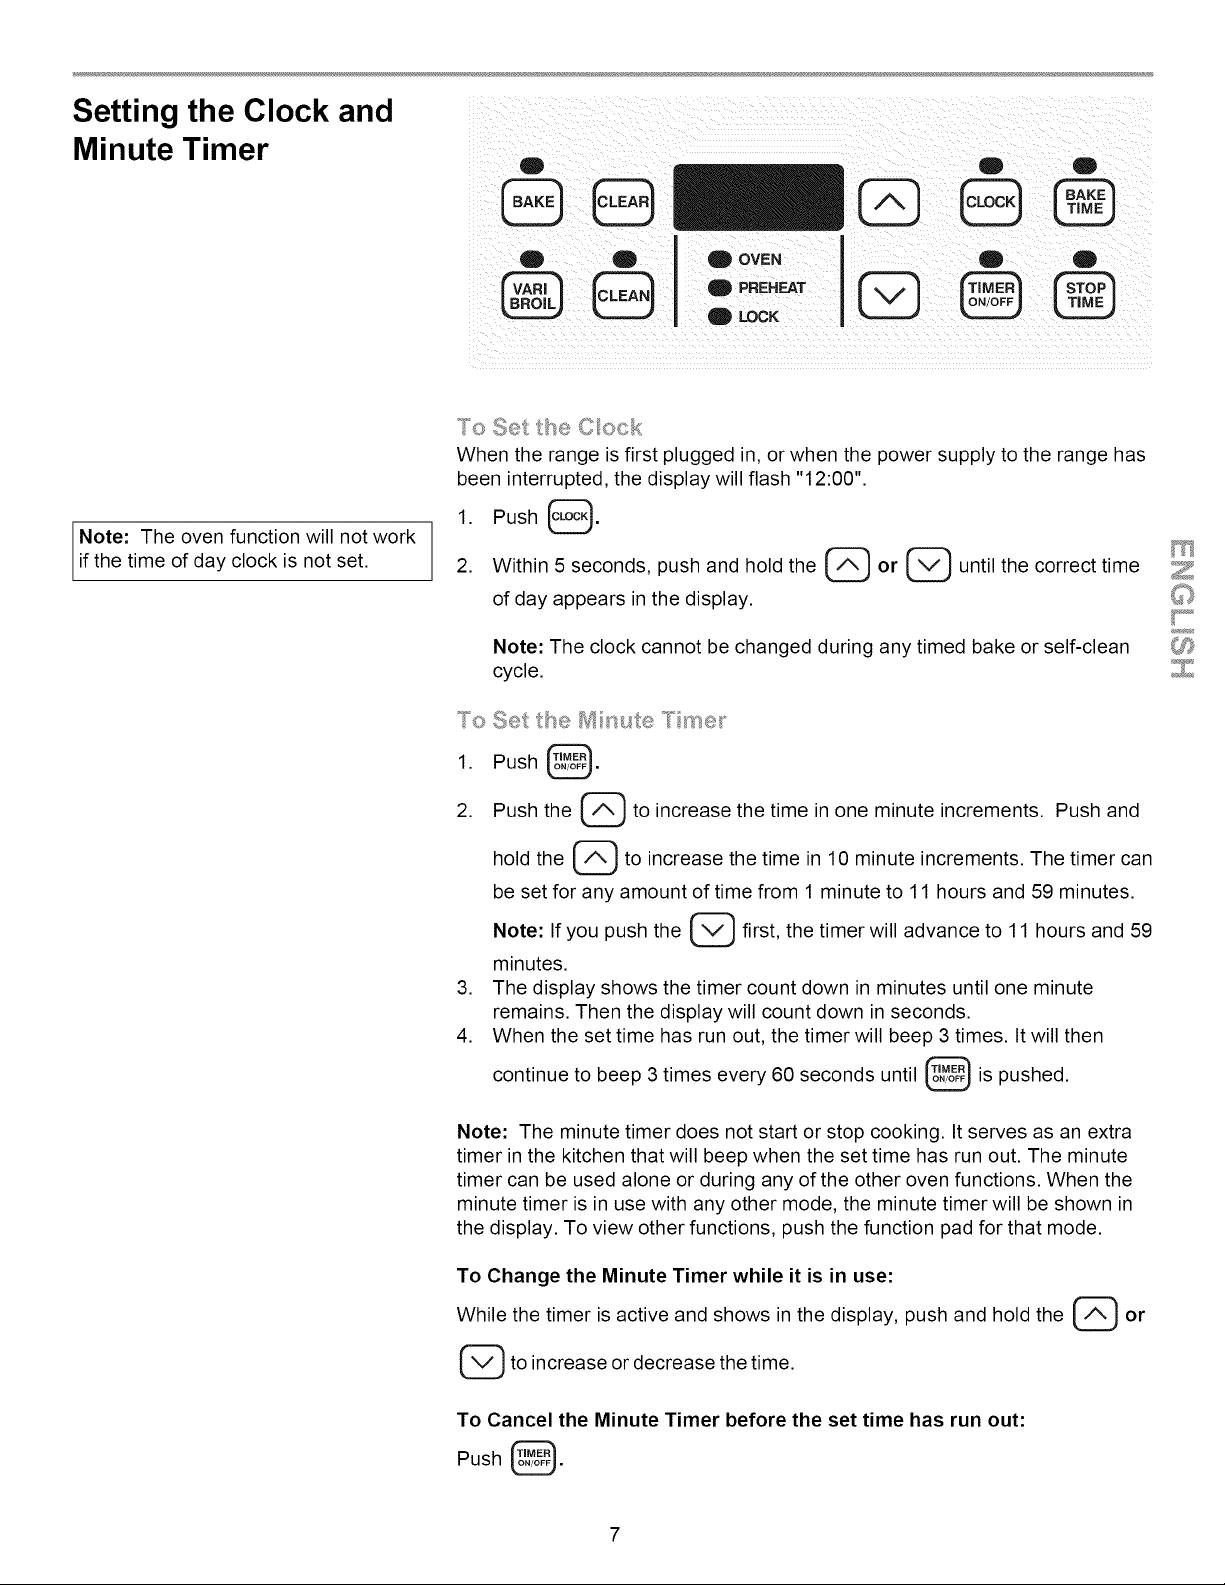
To Set the C_ock
When the range is first plugged in, or when the power supply to the range has
been interrupted, the display will flash "12:00".
1. Push @.
2. Within 5 seconds, push and hold the (_ or @ until the correct time
of day appears in the display.
Note: The clock cannot be changed during any timed bake or self-clean
cycle.
To Set the M n_,te Tme_
1. Push _.
2. Push the (_ to increase the time in one minute increments. Push and
hold the @ to increase the time in 10 minute increments. The timer can
be set for any amount of time from 1 minute to 11 hours and 59 minutes.
Note: If you push the _ first, the timer will advance to 11 hours and 59
minutes.
3. The display shows the timer count down in minutes until one minute
remains. Then the display will count down in seconds.
4. When the set time has run out, the timer will beep 3 times. It will then
continue to beep 3 times every 60 seconds until @ is pushed.
Note: The minute timer does not start or stop cooking. It serves as an extra
timer in the kitchen that will beep when the set time has run out. The minute
timer can be used alone or during any of the other oven functions. When the
minute timer is in use with any other mode, the minute timer will be shown in
the display. To view other functions, push the function pad for that mode.
To Change the Minute Timer while it is in use:
While the timer is active and shows in the display, push and hold the _ or
_to increase or decrease the time.
To Cancel the Minute Timer before the set time has run out:
Push _.
r
7
Surface Cooking
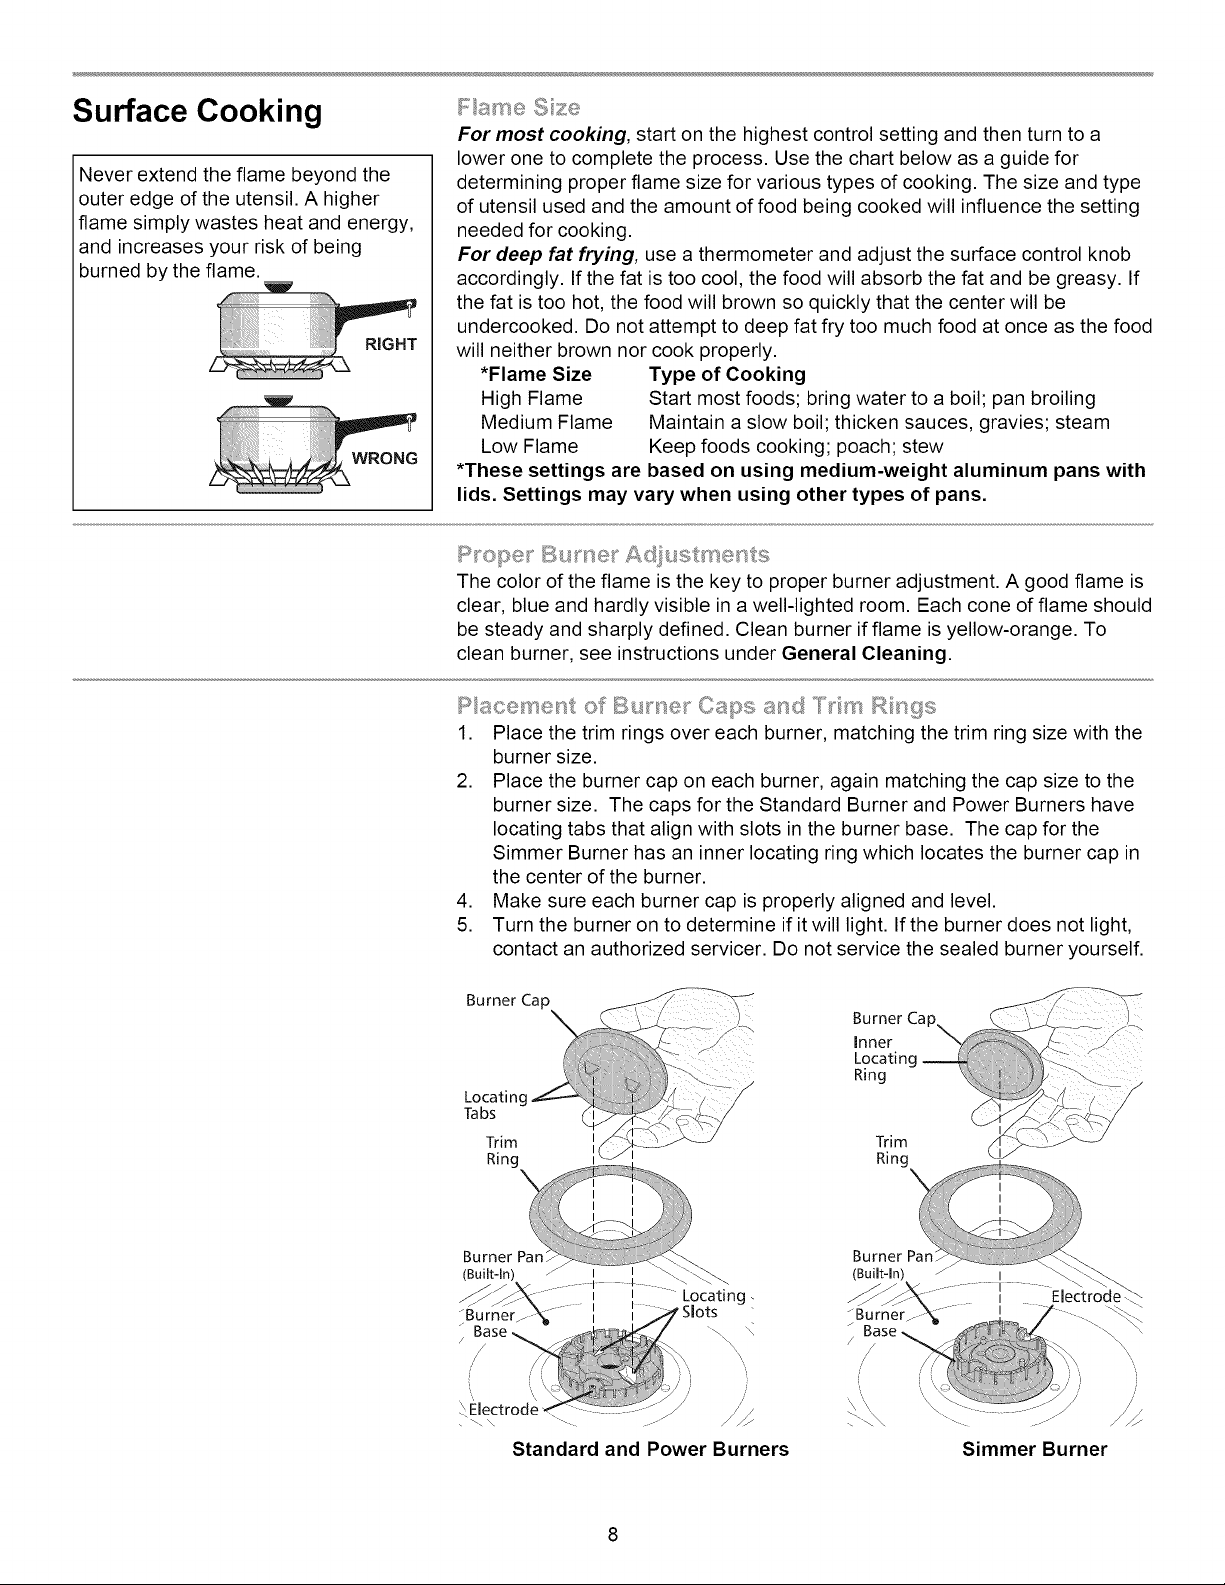
Never extend the flame beyond the
outer edge of the utensil. A higher
flame simply wastes heat and energy,
and increases your risk of being
burned by the flame.
Fame Sz®
For meat cooking, start on the highest control setting and then turn to a
lower one to complete the process. Use the chart below as a guide for
determining proper flame size for various types of cooking. The size and type
of utensil used and the amount of food being cooked will influence the setting
needed for cooking.
For deep fat frying, use a thermometer and adjust the surface control knob
accordingly. If the fat is too cool, the food will absorb the fat and be greasy. If
the fat is too hot, the food will brown so quickly that the center will be
undercooked. Do not attempt to deep fat fry too much food at once as the food
will neither brown nor cook properly.
*Flame Size Type of Cooking
High Flame Start most foods; bring water to a boil; pan broiling
Medium Flame Maintain a slow boil; thicken sauces, gravies; steam
Low Flame Keep foods cooking; poach; stew
*These settings are based on using medium-weight aluminum pans with
lids. Settings may vary when using other types of pans.
Ropes _Bu_!:_e_: A@_ stments
The color of the flame is the key to proper burner adjustment. A good flame is
clear, blue and hardly visible in a well-lighted room. Each cone of flame should
be steady and sharply defined. Clean burner if flame is yellow-orange. To
clean burner, see instructions under General Cleaning.
_:_acement of Bume_ _'Caps and T_m R _:_gs
1. Place the trim rings over each burner, matching the trim ring size with the
burner size.
2. Place the burner cap on each burner, again matching the cap size to the
burner size. The caps for the Standard Burner and Power Burners have
locating tabs that align with slots in the burner base. The cap for the
Simmer Burner has an inner locating ring which locates the burner cap in
the center of the burner.
4. Make sure each burner cap is properly aligned and level.
5. Turn the burner on to determine if it will light. If the burner does not light,
contact an authorized servicer. Do not service the sealed burner yourself.
Burner Cap
Locatin(
Tabs
Trim i
I I
Ring
Burner
_ ....... I II " Locating.
"Bur4er.\..........', , -
Base "\_ \
/ ,
_Electrode
Standard and Power Burners
Burner Cap_,
Ring
Trim
Ring "/
Burner Par
(Built-In) I
_ ........ ..... Electrode_
"Burner.. X_....
B
/
/
\
i
Simmer Burner
Surface Cooking
Your range may be equipped with any combination of the following burners:
Simmer Burner, this burner is best used for simmering delicate sauces, etc.
Standard Burner, can be used for most all surface cooking needs.
Large Burner, the larger burner is best used when bringing large quantities of
liquid to temperature and when preparing larger quantities of food.
Regardless of size, always select a utensil that is suitable for the amount and
type of food being prepared. Select a burner and flame size appropriate to the
pan. Never allow flames to extend beyond the outer edge of the pan.
Each burner lights automatically from an electric ignitor each time a control
knob is turned to the LITE position.
Do not place plastic items such as salt and pepper
shakers, spoon holders or plastic wrappings on top of the range when it
is in use. These items could melt or ignite. Potholders, towels or wood
spoons could catch fire if placed too close to a flame.
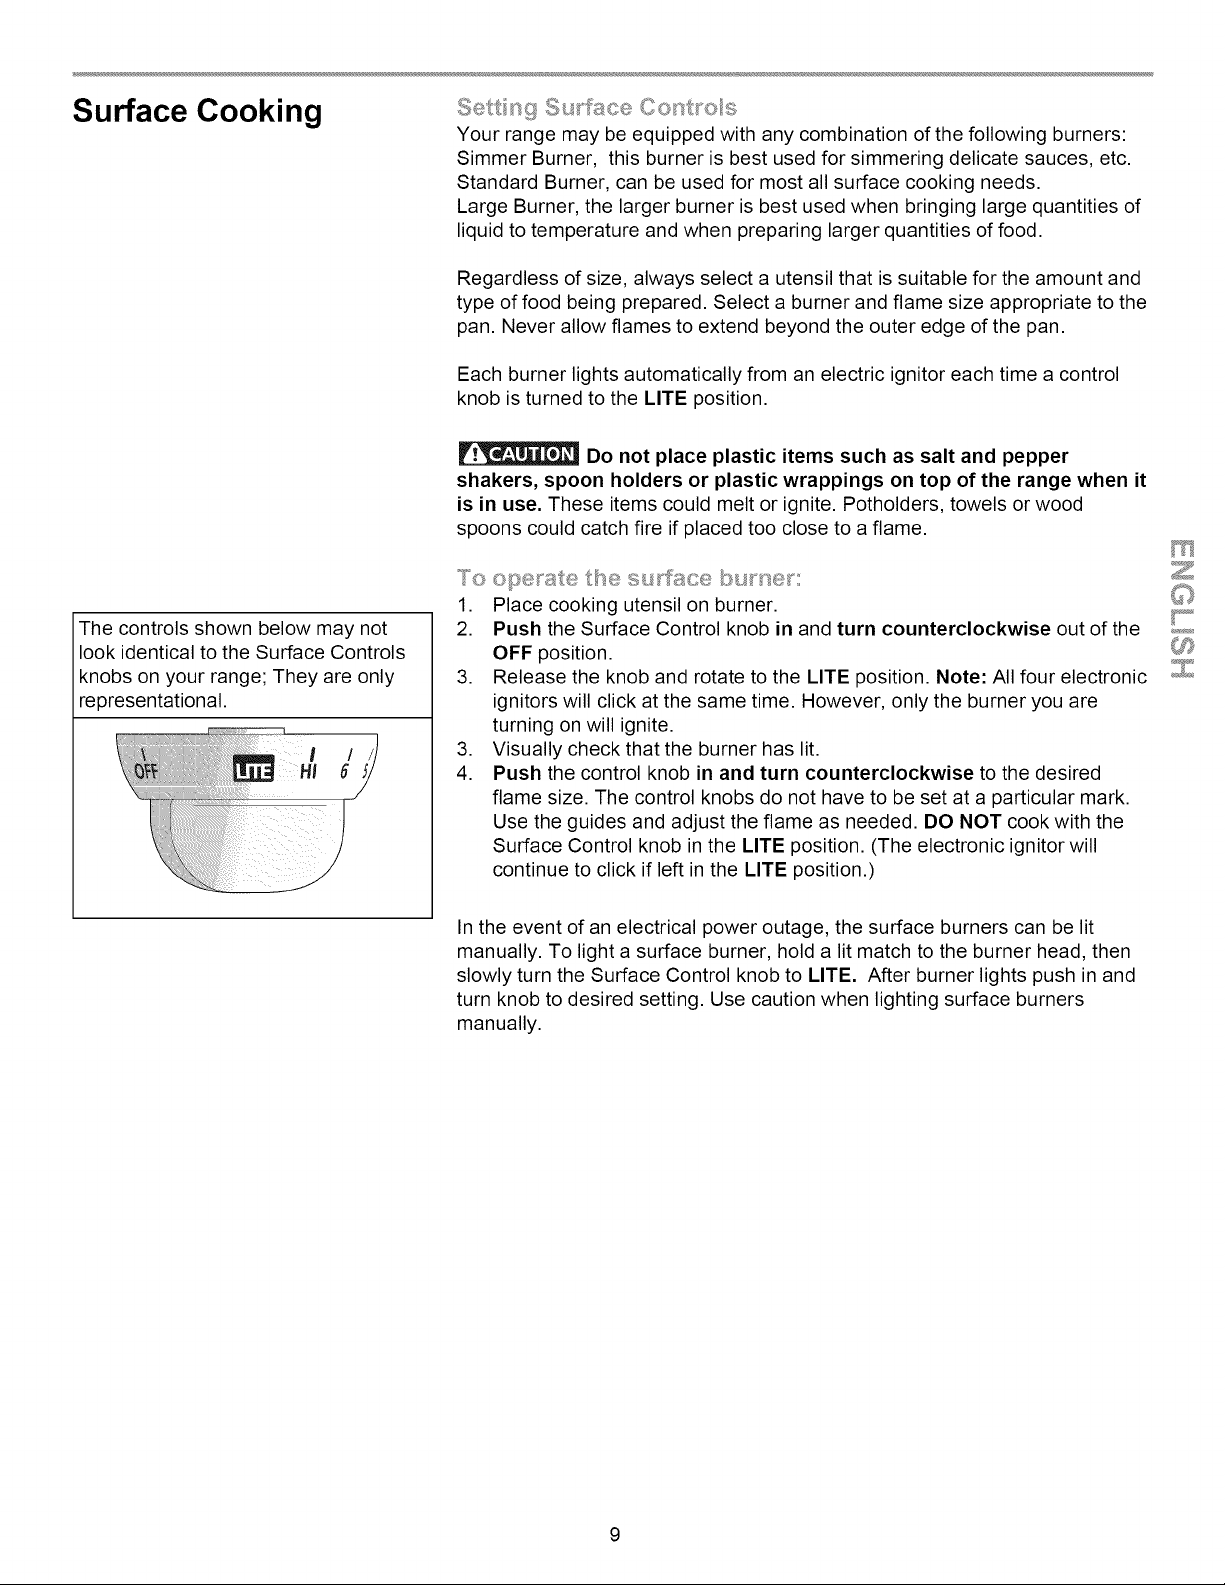
The controls shown below may not
look identical to the Surface Controls
knobs on your range; They are only
representational.
/
5
To opec'ate the subface bume_c
1. Place cooking utensil on burner.
2. Push the Surface Control knob in and turn counterclockwise out of the
OFF position.
3. Release the knob and rotate to the LITE position. Note: All four electronic
ignitors will click at the same time. However, only the burner you are
turning on will ignite.
3. Visually check that the burner has lit.
4. Push the control knob in and turn counterclockwise to the desired
flame size. The control knobs do not have to be set at a particular mark.
Use the guides and adjust the flame as needed. DO NOT cook with the
Surface Control knob in the LITE position. (The electronic ignitor will
continue to click if left in the LITE position.)
r
In the event of an electrical power outage, the surface burners can be lit
manually. To light a surface burner, hold a lit match to the burner head, then
slowly turn the Surface Control knob to LITE. After burner lights push in and
turn knob to desired setting. Use caution when lighting surface burners
manually.
9
Setting Warmer Drawer
Controls (ifequipped)
Use the warmer drawer to keep hot
foods hot such as: vegetables, gravies,
meats, casseroles, biscuits and rolls,
pastries and heated dinner plates.
The warmer drawer is equipped with a
catch which may require extra force
when open ng and c os ng the drawer.
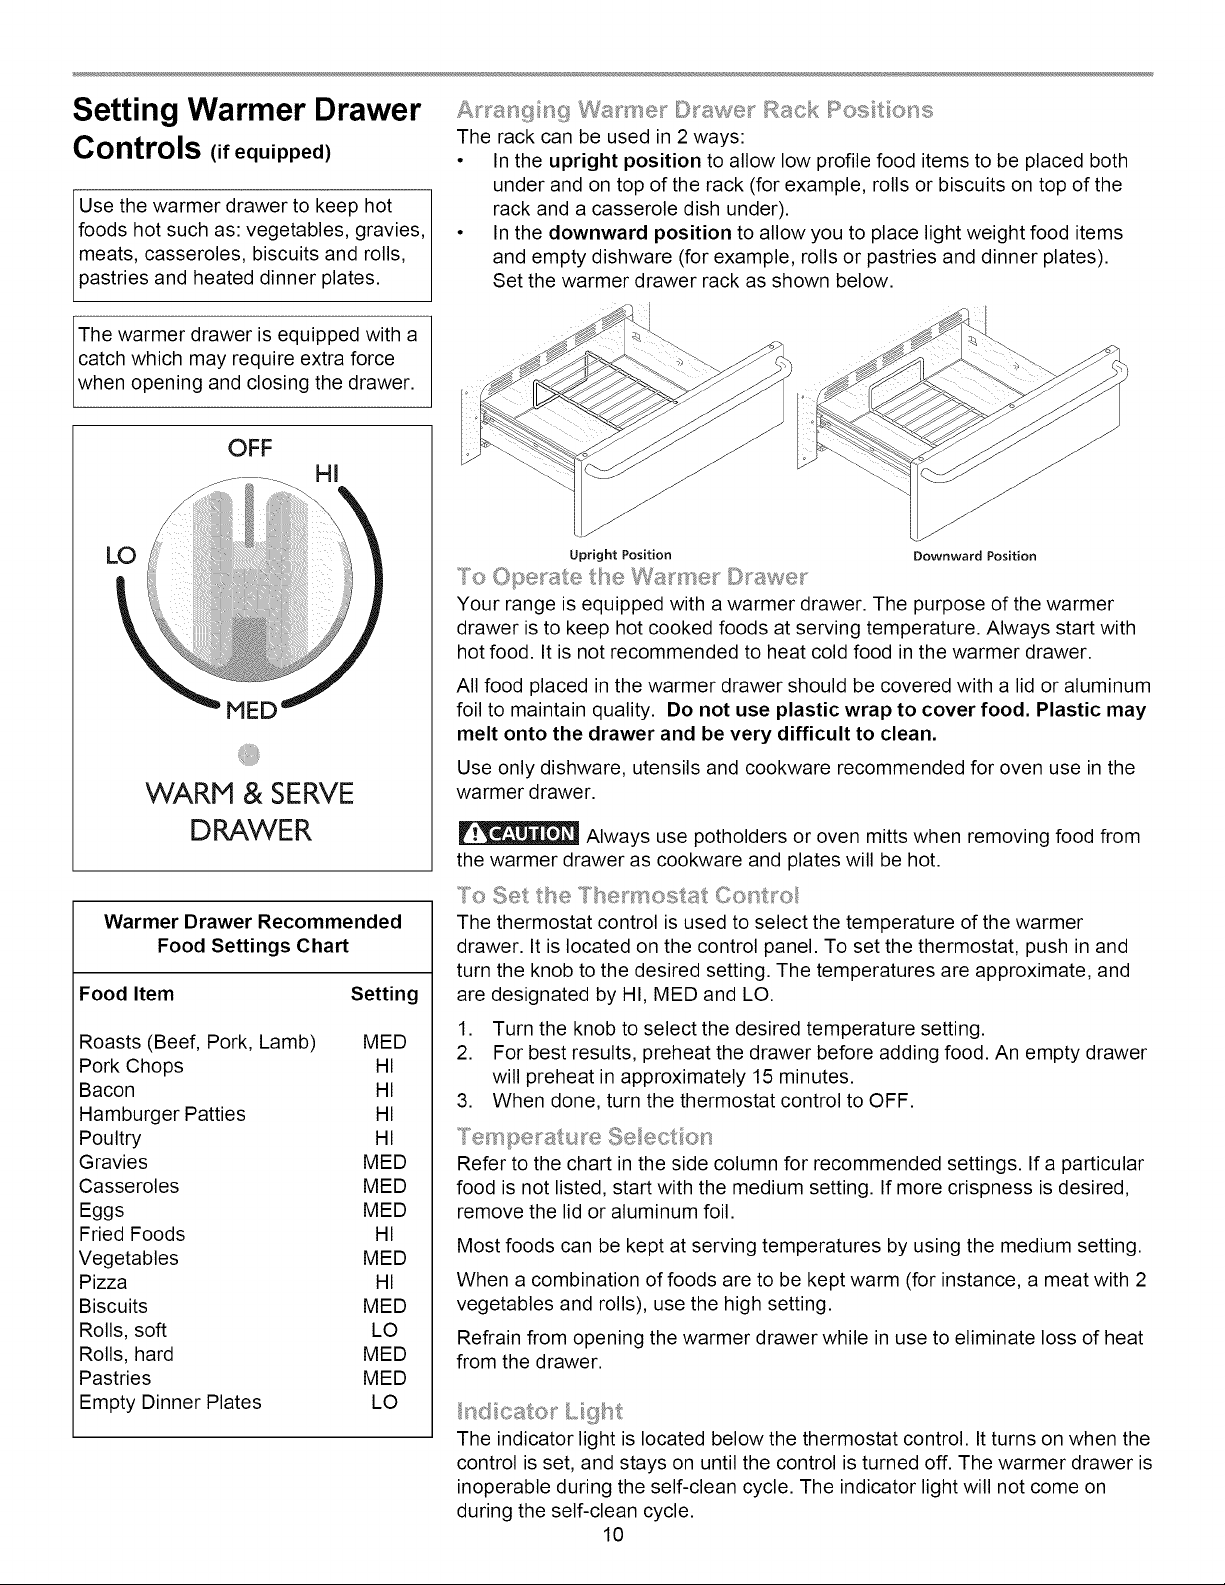
A_s/ang ng Wa_me_ _ ©_awe_ _Rack Rosi:t o_ss
The rack can be used in 2 ways:
• In the upright position to allow low profile food items to be placed both
under and on top of the rack (for example, rolls or biscuits on top of the
rack and a casserole dish under).
• In the downward position to allow you to place light weight food items
and empty dishware (for example, rolls or pastries and dinner plates).
Set the warmer drawer rack as shown below.
OFF
HI
MED
WARM & SERVE
DRAWER
Warmer Drawer Recommended
Food Settings Chart
Food Item Setting
Roasts (Beef, Pork, Lamb) MED
Pork Chops HI
Bacon HI
Hamburger Patties HI
Poultry HI
Gravies MED
Casseroles MED
Eggs MED
Fried Foods HI
Vegetables MED
Pizza HI
Biscuits MED
Rolls, soft LO
Rolls, hard MED
Pastries MED
Empty Dinner Plates LO
Upright Position Downward Position
To Opec'ate t_e Wa_"_'_e_' D a,,v_;,
Your range is equipped with a warmer drawer. The purpose of the warmer
drawer is to keep hot cooked foods at serving temperature. Always start with
hot food. It is not recommended to heat cold food in the warmer drawer.
All food placed in the warmer drawer should be covered with a lid or aluminum
foil to maintain quality. Do not use plastic wrap to cover food. Plastic may
melt onto the drawer and be very difficult to clean.
Use only dishware, utensils and cookware recommended for oven use in the
warmer drawer.
Always use potholders or oven mitts when removing food from
the warmer drawer as cookware and plates will be hot.
To Set t_'_e T_e_:_ _sostat Contuo
The thermostat control is used to select the temperature of the warmer
drawer. It is located on the control panel. To set the thermostat, push in and
turn the knob to the desired setting. The temperatures are approximate, and
are designated by HI, MED and LO.
1. Turn the knob to select the desired temperature setting.
2. For best results, preheat the drawer before adding food. An empty drawer
will preheat in approximately 15 minutes.
3. When done, turn the thermostat control to OFF.
Refer to the chart in the side column for recommended settings. If a particular
food is not listed, start with the medium setting. If more crispness is desired,
remove the lid or aluminum foil.
Most foods can be kept at serving temperatures by using the medium setting.
When a combination of foods are to be kept warm (for instance, a meat with 2
vegetables and rolls), use the high setting.
Refrain from opening the warmer drawer while in use to eliminate loss of heat
from the drawer.
nd cater' Lglst
The indicator light is located below the thermostat control. It turns on when the
control is set, and stays on until the control is turned off. The warmer drawer is
inoperable during the self-clean cycle. The indicator light will not come on
during the self-clean cycle.
10

Before Setting Oven
Controls
A_s_a_"g ng Ove_l Racks
(Some models may have one rack.) ALWAYSARRANGE OVEN RACKS
WHEN THE OVEN IS COOL (PRIOR TO OPERATING THE OVEN). Always
use oven mitts when using the oven.
Oven Vent Location
The oven vent is located below the
backguard. When the oven is on,
warm air is released through the vents.
This venting is necessary for proper air
REMOVING & REPLACING OVEN
RACKS
To remove, pull the rack forward until it
stops. Lift up front of rack and slide out.
To replace, fit the rack onto the guides
ARRANGING OVEN RACKS WITH
5 RACK POSITIONS
To bake on 1 rack, place the rack on
_osition 3 or 4. To bake on 2 racks,
_lace the racks on positions 2 and 4.
circulation in the oven and good baking
results.
OVEN VENT
on the oven walls. Tilt the front of the
rack upward and slide the rack back
into place.
2nd Rack Position
3rd Rack Position
4th Rack Position
5th Rack Position
6th Rack Position
(for roasting Harge
food items only)
Setting Oven Controls
g O e OVEN " g O
I I LOCK
Note: The oven function will not work
if the time of day clock is not set.
Note: The oven control has a built-in
safety feature that will shut off the oven
if the control is left on for more than 11
hours 59 minutes.
To bet o__Change t__e "Te _ i/_ealu_'e fo_" .... _
The oven can be programmed to bake at any temperature from 170°F to
550°F (65°C to 287°C).
To Set the Controls for Normal Baking:
1. Push _. " "appears in the display.
2. Within 5 seconds, push the _ or _. The display will show "350°F
(177°C). '' By holding the _ or _, the temperature can then be
adjusted in 5°F (1°C)increments.
3. As soon as the _ or _ is released, the oven will begin heating to
the selected temperature. When the displayed temperature reaches the
desired baking temperature, the control will beep 3 times.
4. To cancel the baking function, push _.
To Change the Oven Temperature after Baking has Started:
1. If you are using the minute timer, push _ and make sure the bake
temperature is displayed.
2. Push the _ or _ to increase or decrease the set temperature.
11
Setting Oven Controls
(continued)
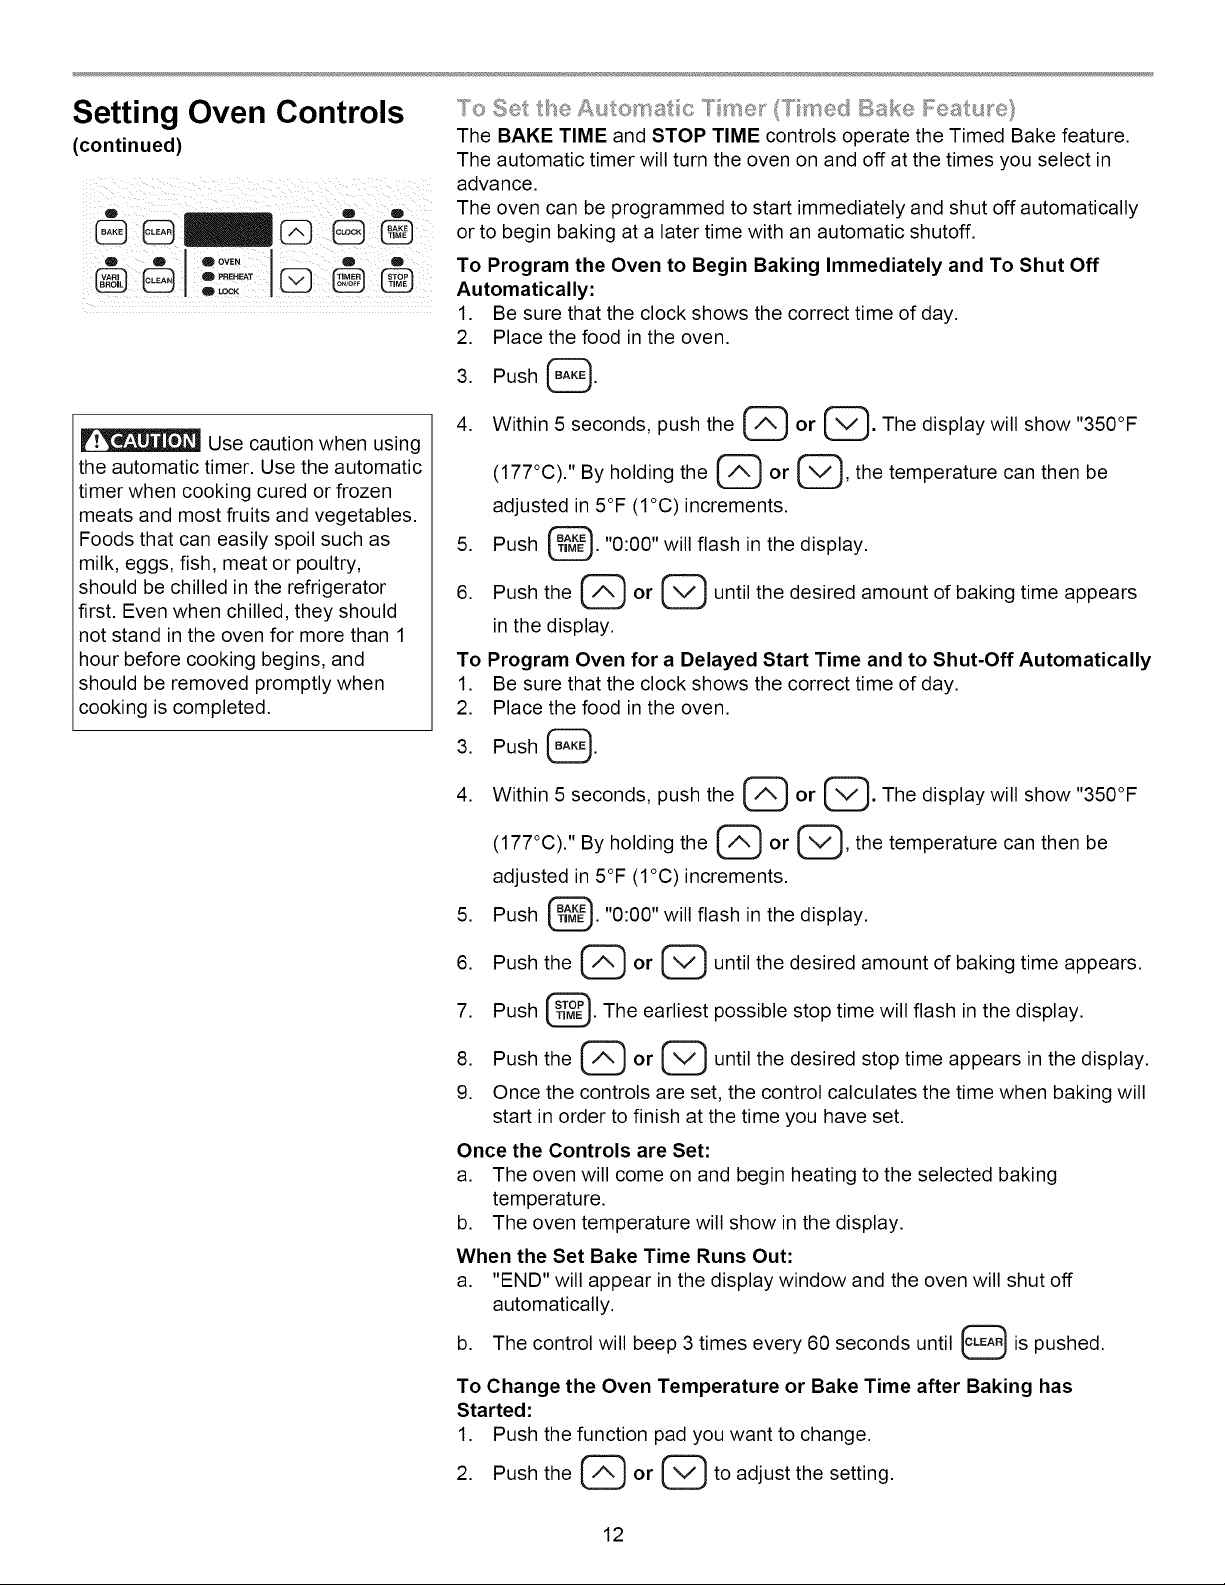
To Set tse Autonat c "T me__ (Treed Bake _J:eat}__e}
The BAKE TIME and STOP TIME controls operate the Timed Bake feature.
The automatic timer will turn the oven on and off at the times you select in
advance.
The oven can be programmed to start immediately and shut off automatically
or to begin baking at a later time with an automatic shutoff.
To Program the Oven to Begin Baking Immediately and To Shut Off
Automatically:
Be sure that the clock shows the correct time of day.
Place the food in the oven.
3. Push _.
4. Within 5 seconds, push the (_ or (_. The display will show "350°F
(177°C). '' By holding the (_ or G' the temperature can then be
adjusted in 5°F (1°C)increments.
5. Push @. "0:00" will flash in the display.
6. Push the (_ or (_ until the desired amount of baking time appears
in the display.
e I eQ_o. I ,,,, e
1.
2.
Use caution when using
the automatic timer. Use the automatic
timer when cooking cured or frozen
meats and most fruits and vegetables.
Foods that can easily spoil such as
milk, eggs, fish, meat or poultry,
should be chilled in the refrigerator
first. Even when chilled, they should
not stand in the oven for more than 1
hour before cooking begins, and
should be removed promptly when
cooking is completed.
To Program Oven for a Delayed Start Time and to Shut-Off Automatically
1. Be sure that the clock shows the correct time of day.
2. Place the food in the oven.
3. Push _.
4. Within 5 seconds, push the @ or @. The display will show "350°F
(17700)." By holding the _ or _, the temperature can then be
adjusted in 5°F (1°C)increments.
5. Push _. "0:00" will flash in the display.
6. Push the _ or @ until the desired amount of baking time appears.
7. Push _. The earliest possible stop time will flash in the display.
8. Push the _ or _ until the desired stop time appears in the display.
9. Once the controls are set, the control calculates the time when baking will
start in order to finish at the time you have set.
Once the Controls are Set:
a. The oven will come on and begin heating to the selected baking
temperature.
b. The oven temperature will show in the display.
When the Set Bake Time Runs Out:
a. "END" will appear in the display window and the oven will shut off
automatically.
b. The control will beep 3 times every 60 seconds until _ is pushed.
To Change the Oven Temperature or Bake Time after Baking has
Started:
1. Push the function pad you want to change.
2. Push the _ or _ to adjust the setting.
12
Controls
Setting Oven
(continued)
0 OVEN
PREHEAT
g LOCK
D O
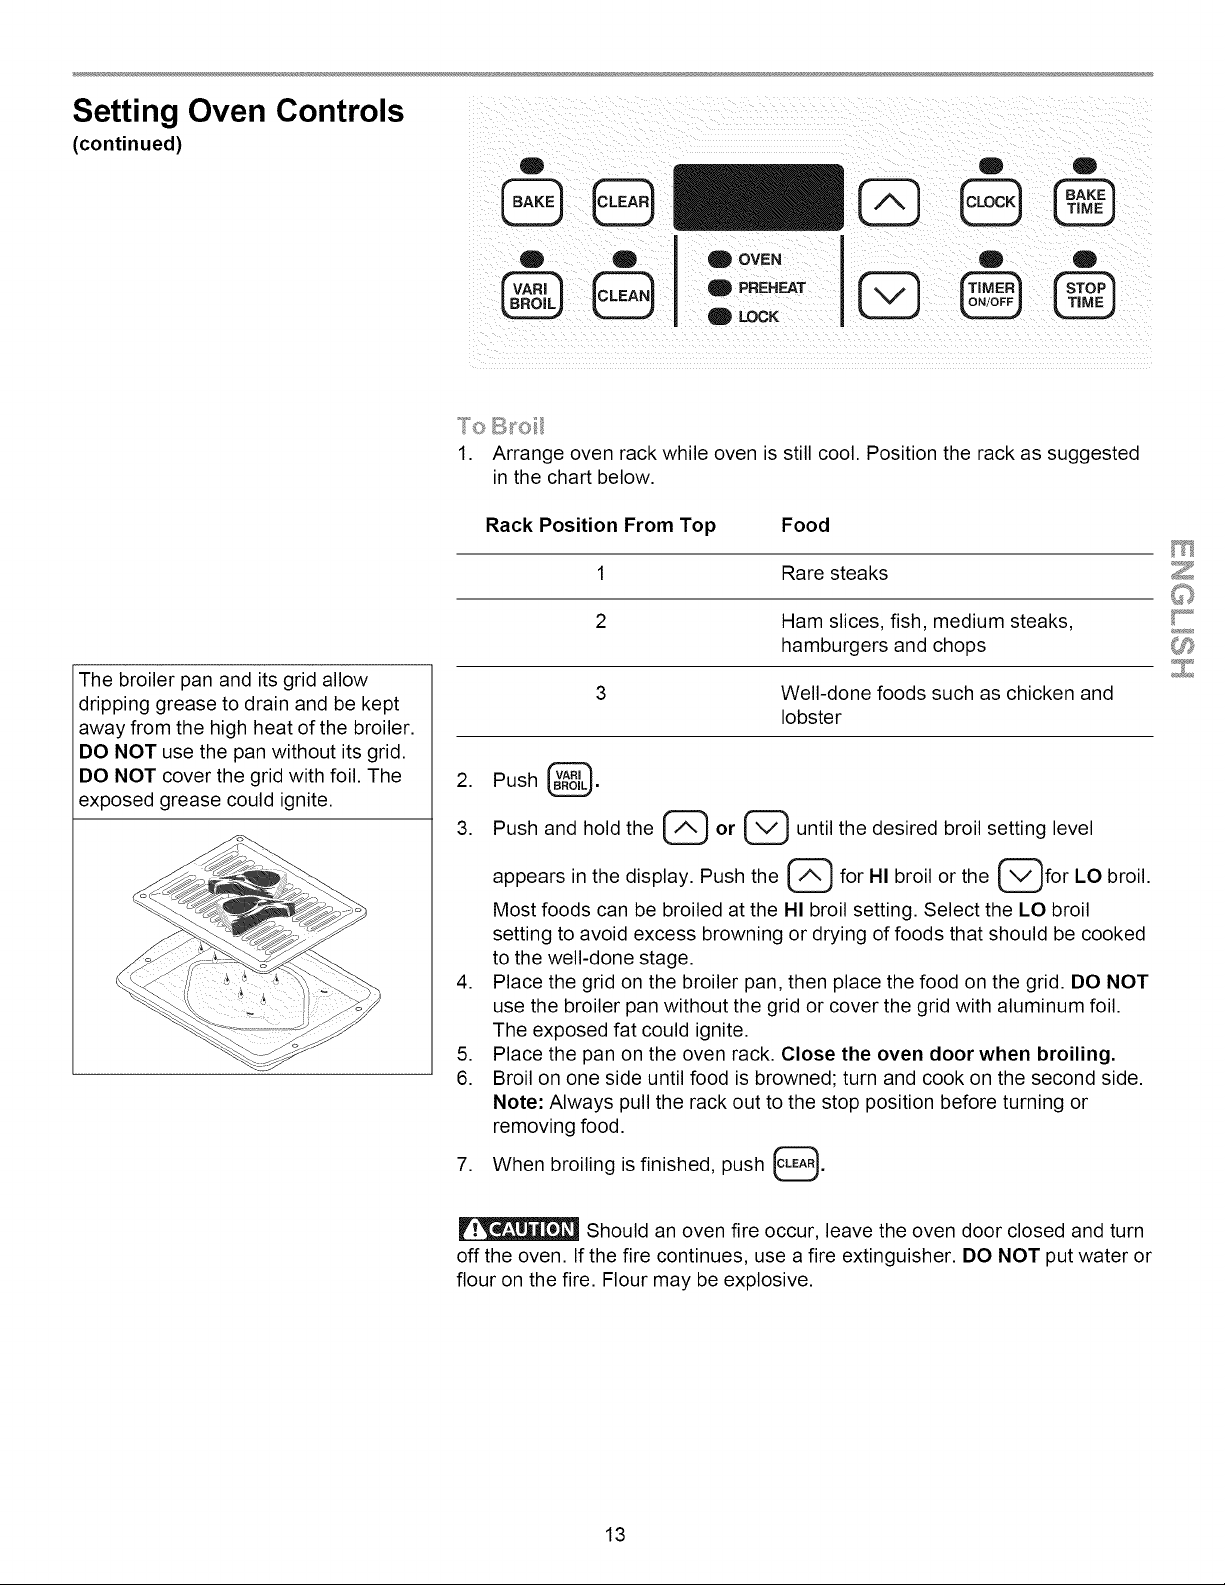
The broiler pan and its grid allow
dripping grease to drain and be kept
away from the high heat of the broiler.
DO NOT use the pan without its grid.
DO NOT cover the grid with foil. The
exposed grease could ignite.
To B_o/
1. Arrange oven rack while oven is still cool. Position the rack as suggested
in the chart below.
Rack Position From Top Food
1 Rare steaks
2 Ham slices, fish, medium steaks,
hamburgers and chops
3 Well-done foods such as chicken and
lobster
2. Push _.
3. Push and hold the _ or _ until the desired broil setting level
appears in the display. Push the _ for HI broil or the _for LO broil.
Most foods can be broiled at the HI broil setting. Select the LO broil
setting to avoid excess browning or drying of foods that should be cooked
to the well-done stage.
4. Place the grid on the broiler pan, then place the food on the grid. DO NOT
use the broiler pan without the grid or cover the grid with aluminum foil.
The exposed fat could ignite.
5. Place the pan on the oven rack. Close the oven door when broiling.
6. Broil on one side until food is browned; turn and cook on the second side.
Note: Always pull the rack out to the stop position before turning or
removing food.
7. When broiling is finished, push 0"
Should an oven fire occur, leave the oven door closed and turn
off the oven. If the fire continues, use a fire extinguisher. DO NOT put water or
flour on the fire. Flour may be explosive.
r
13
Oven Cleaning
OVEN
PREHEAT
Q LOCK
Q t
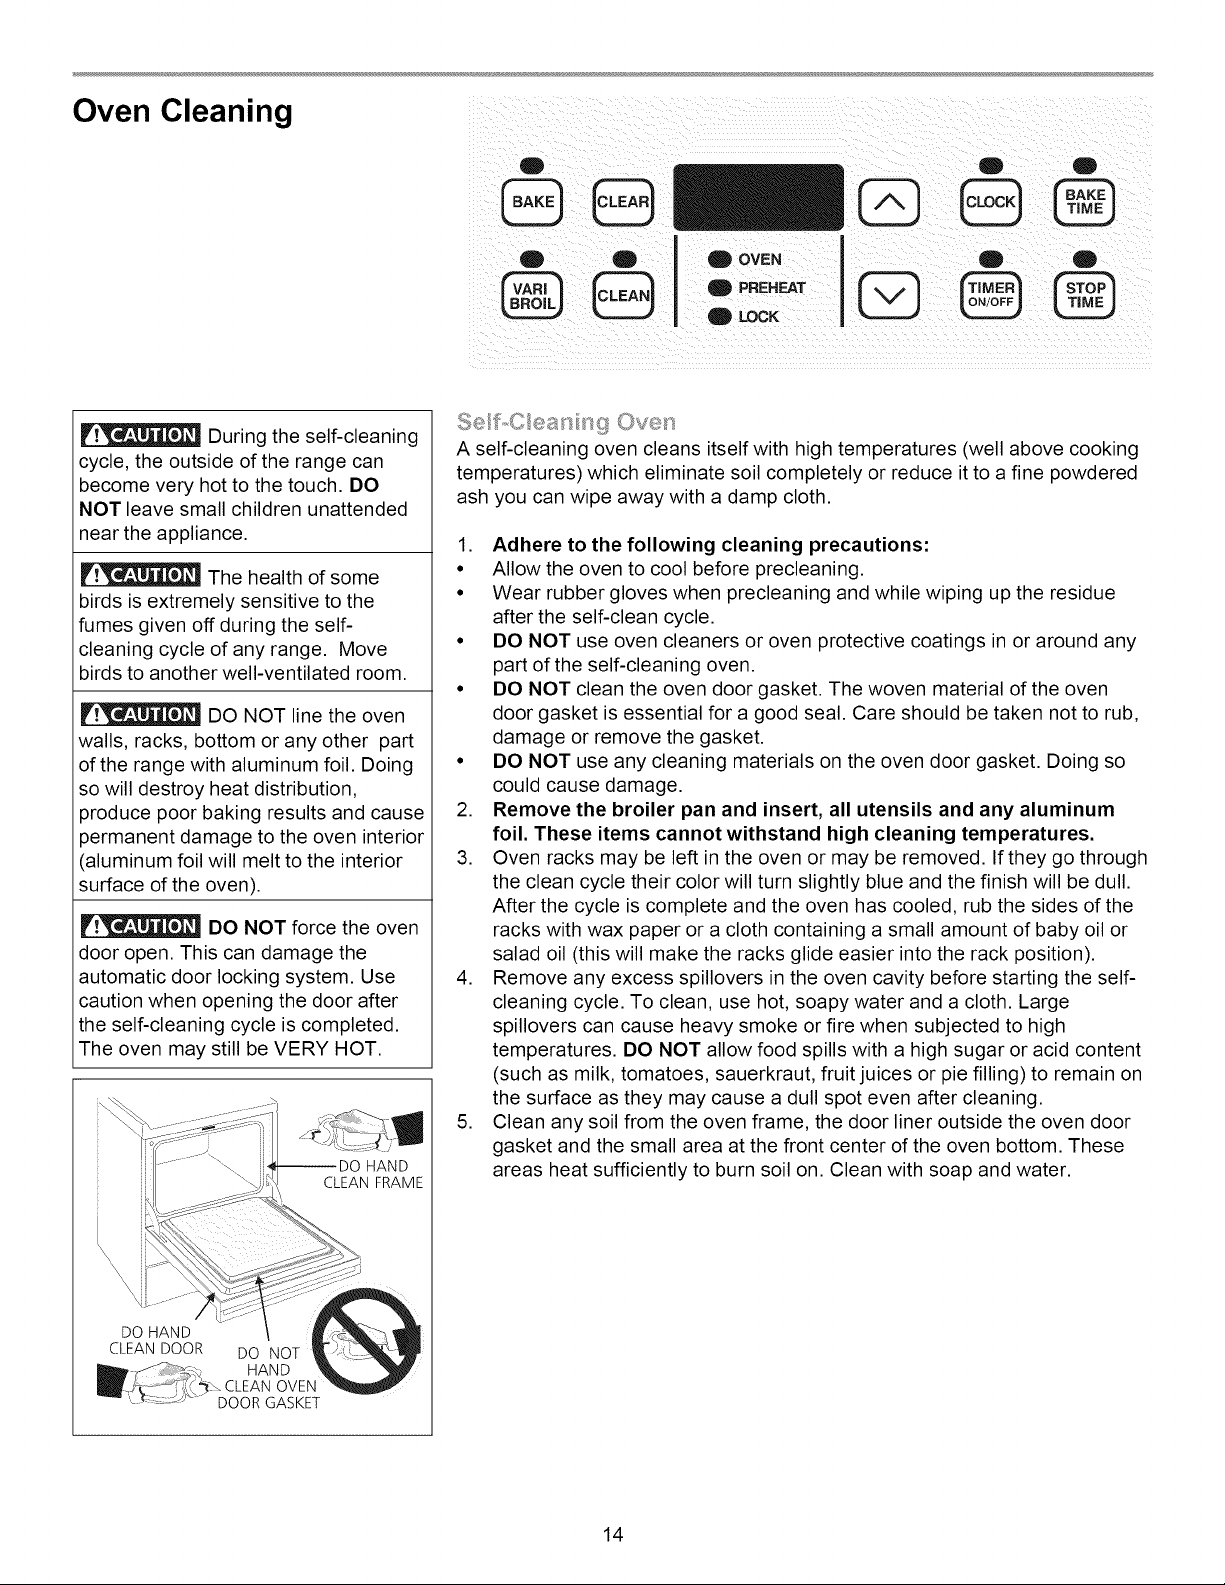
During the self-cleaning
cycle, the outside of the range can
become very hot to the touch. DO
NOT leave small children unattended
near the appliance.
The health of some
birds is extremely sensitive to the
fumes given off during the self-
cleaning cycle of any range. Move
birds to another well-ventilated room.
DO NOT line the oven
walls, racks, bottom or any other part
of the range with aluminum foil. Doing
so will destroy heat distribution,
produce poor baking results and cause
permanent damage to the oven interior
(aluminum foil will melt to the interior
surface of the oven).
DO NOT force the oven
door open. This can damage the
automatic door locking system. Use
caution when opening the door after
the self-cleaning cycle is completed.
The oven may still be VERY HOT.
HAND
CLEAN FRAME
DO HAND
CLEAN DOOR DO NOT
HAND
f _-'fi{ {,('_\ CLEAN OVEN
"-_ _ _J'_"" DOOR GASKET
Se f,.C ean n90ve_s
A self-cleaning oven cleans itself with high temperatures (well above cooking
temperatures) which eliminate soil completely or reduce it to a fine powdered
ash you can wipe away with a damp cloth.
1. Adhere to the following cleaning precautions:
• Allow the oven to cool before precleaning.
• Wear rubber gloves when precleaning and while wiping up the residue
after the self-clean cycle.
• DO NOT use oven cleaners or oven protective coatings in or around any
part of the self-cleaning oven.
• DO NOT clean the oven door gasket. The woven material of the oven
door gasket is essential for a good seal. Care should be taken not to rub,
damage or remove the gasket.
• DO NOT use any cleaning materials on the oven door gasket. Doing so
could cause damage.
2. Remove the broiler pan and insert, all utensils and any aluminum
foil. These items cannot withstand high cleaning temperatures.
3. Oven racks may be left in the oven or may be removed. If they go through
the clean cycle their color will turn slightly blue and the finish will be dull.
After the cycle is complete and the oven has cooled, rub the sides of the
racks with wax paper or a cloth containing a small amount of baby oil or
salad oil (this will make the racks glide easier into the rack position).
4. Remove any excess spillovers in the oven cavity before starting the self-
cleaning cycle. To clean, use hot, soapy water and a cloth. Large
spillovers can cause heavy smoke or fire when subjected to high
temperatures. DO NOT allow food spills with a high sugar or acid content
(such as milk, tomatoes, sauerkraut, fruit juices or pie filling) to remain on
the surface as they may cause a dull spot even after cleaning.
5. Clean any soil from the oven frame, the door liner outside the oven door
gasket and the small area at the front center of the oven bottom. These
areas heat sufficiently to burn soil on. Clean with soap and water.
14
Oven Cleaning
(continued)
Q OVEN
PREHEAT
g LOCK
D I
Use care when opening
the oven door after the self-cleaning
cycle. Stand to the side of the oven
when opening the door to allow hot air
or steam to escape.
DO NOT force the oven
door open. This can damage the
automatic door locking system. Use
caution when opening the door after
the self-cleaning cycle is completed.
The oven may still be VERY HOT.
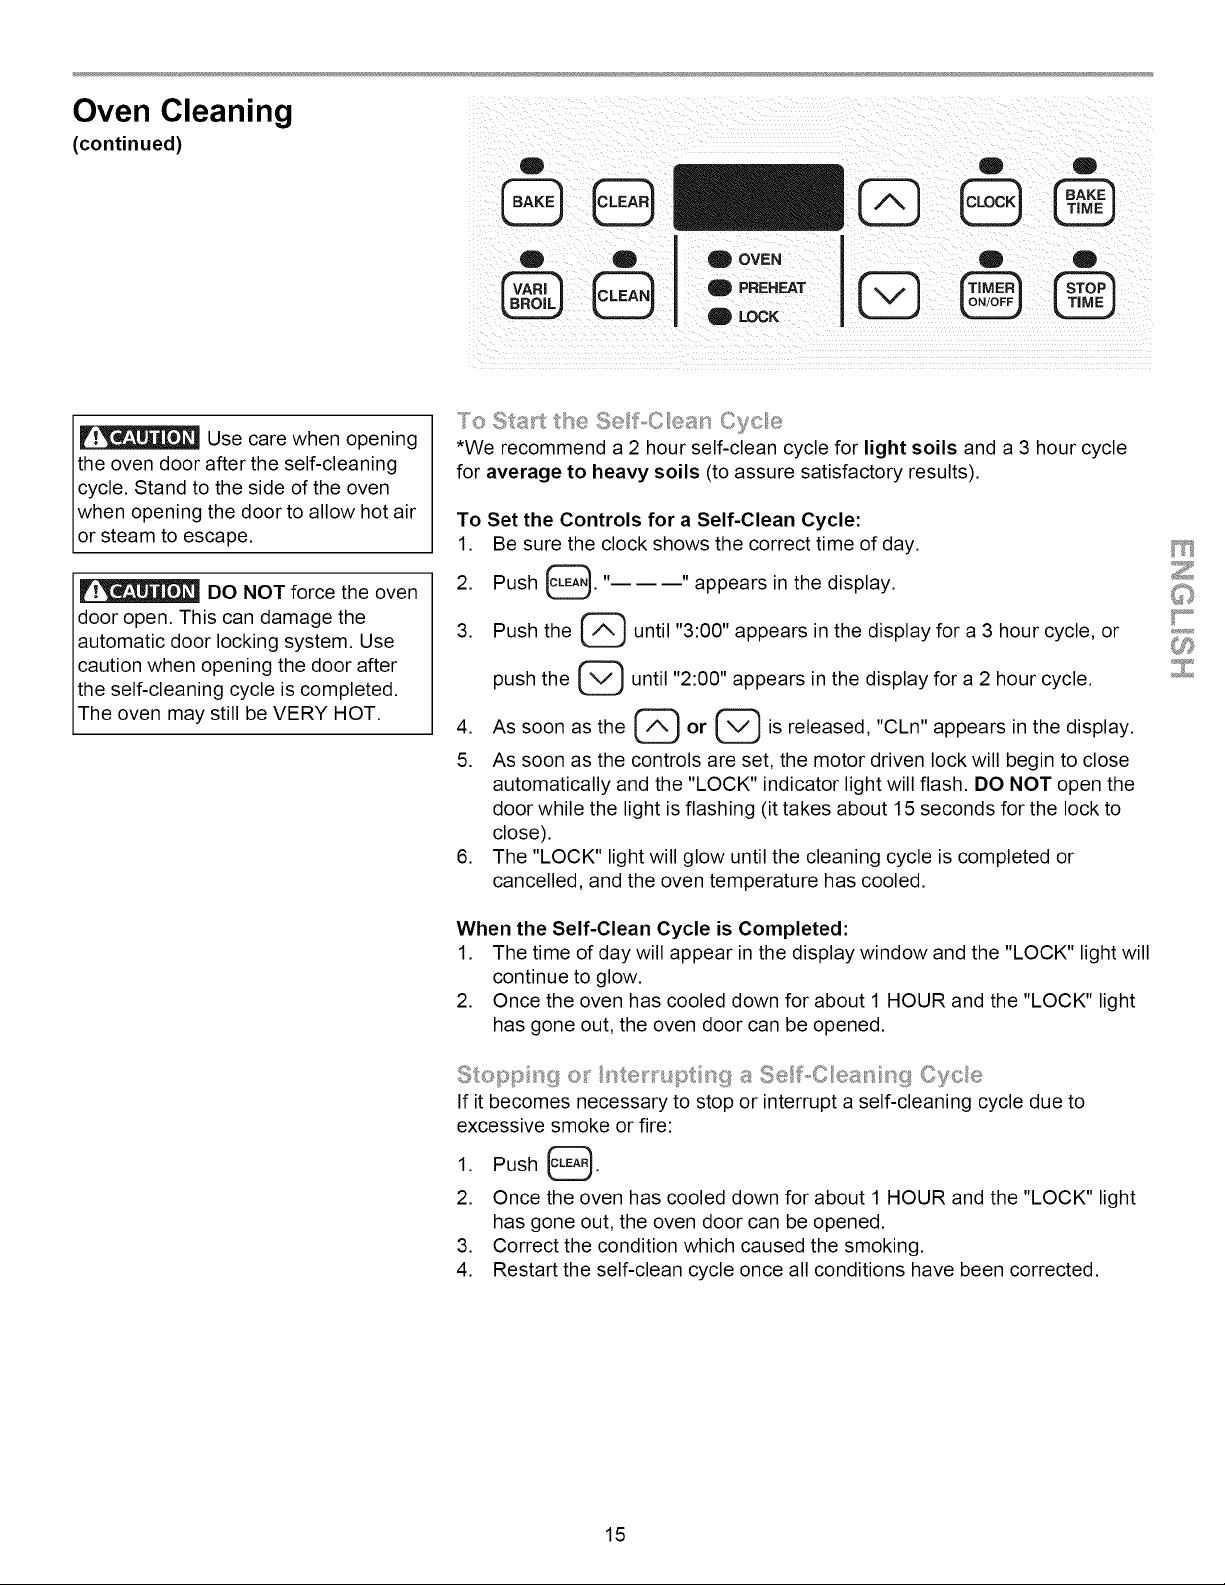
*We recommend a 2 hour self-clean cycle for light soils and a 3 hour cycle
for average to heavy soils (to assure satisfactory results).
To Set the Controls for a Self-Clean Cycle:
1. Be sure the clock shows the correct time of day.
2. Push Q. " "appears in the display.
3. Push the (_ until "3:00" appears in the display for a 3 hour cycle, or
push the (_ until "2:00" appears in the display for a 2 hour cycle.
4. As soon as the (_ or (_ is released, "CLn" appears in the display.
5. As soon as the controls are set, the motor driven lock will begin to close
automatically and the "LOCK" indicator light will flash. DO NOT open the
door while the light is flashing (it takes about 15 seconds for the lock to
close).
6. The "LOCK" light will glow until the cleaning cycle is completed or
cancelled, and the oven temperature has cooled.
When the Self-Clean Cycle is Completed:
1. The time of day will appear in the display window and the "LOCK" light will
continue to glow.
2. Once the oven has cooled down for about 1 HOUR and the "LOCK" light
has gone out, the oven door can be opened.
Stopp _s{itot _ nte_x%_pt nga Se f_C ean _sg Cycle
If it becomes necessary to stop or interrupt a self-cleaning cycle due to
excessive smoke or fire:
1. Push _.
2. Once the oven has cooled down for about 1 HOUR and the "LOCK" light
has gone out, the oven door can be opened.
3. Correct the condition which caused the smoking.
4. Restart the self-clean cycle once all conditions have been corrected.
r
15
General Cleaning
@s I0 Ll;:s ,.)I
Clealsing I "._,.=,,, =<;°F;_;,_'"=- _-4 Yoll"
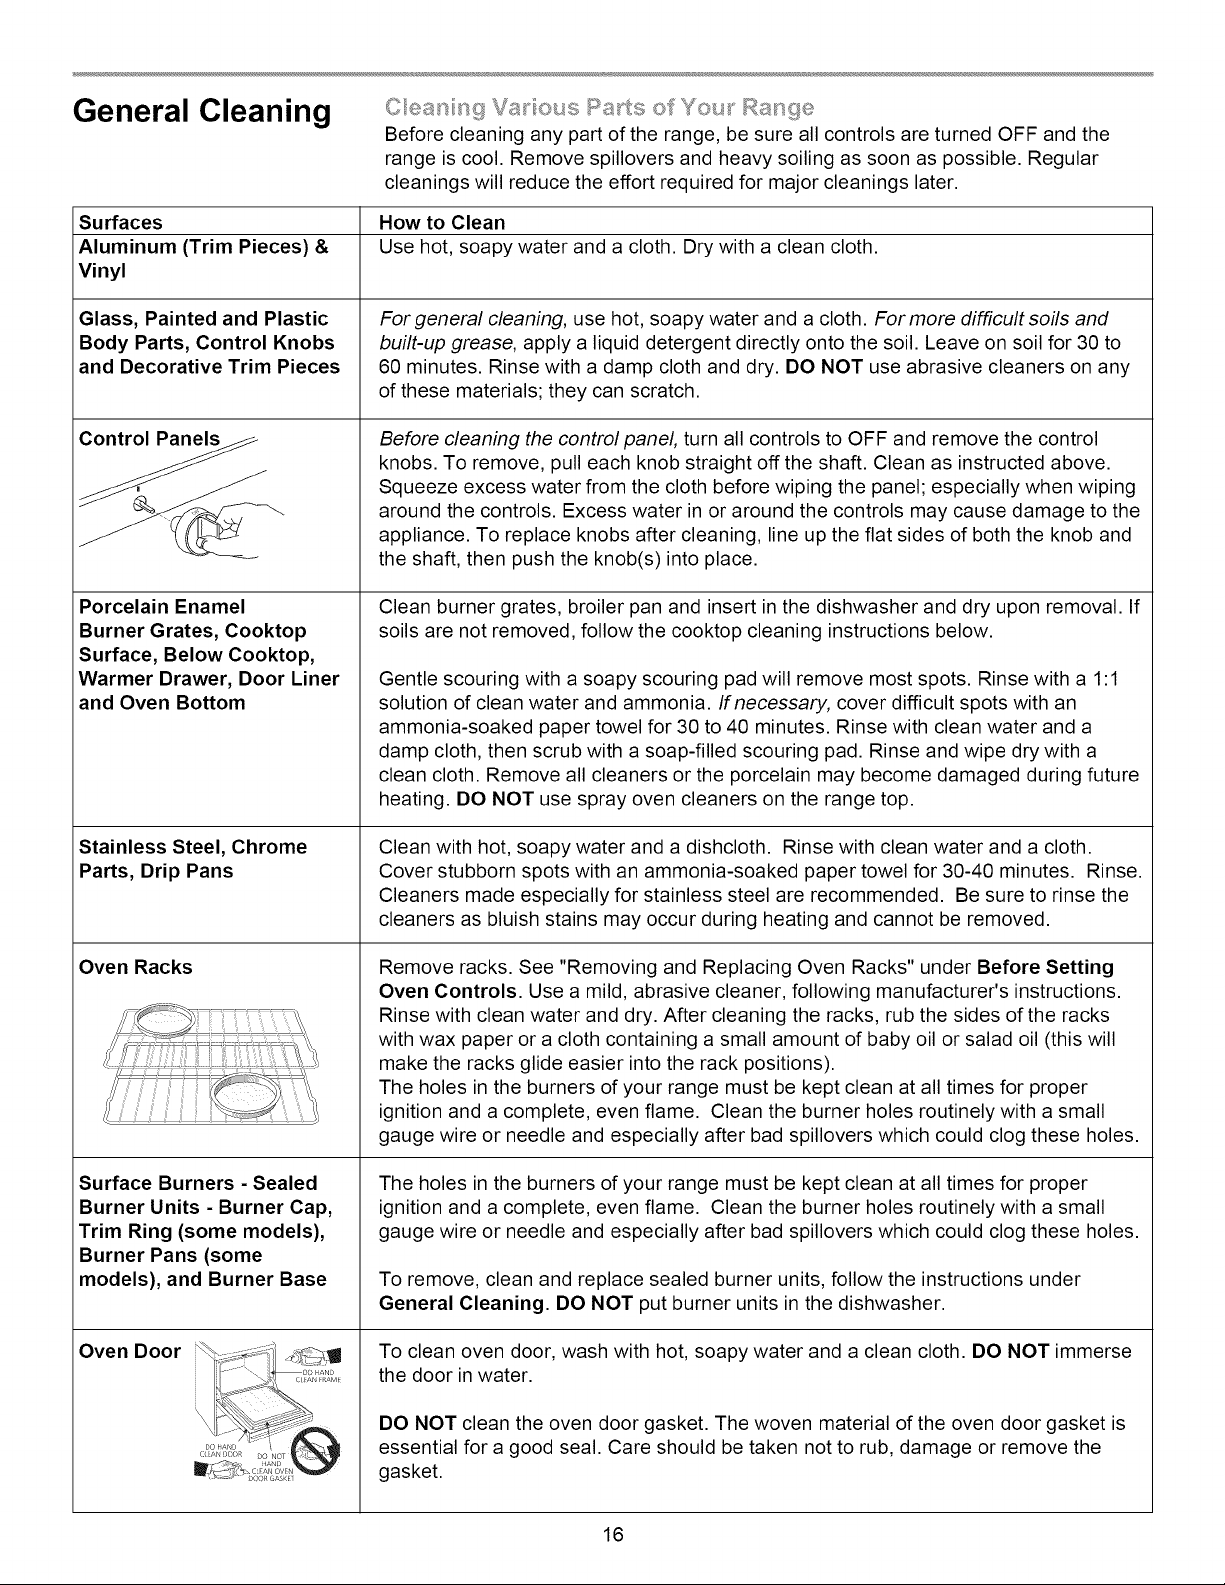
Before cleaning any part of the range, be sure all controls are turned OFF and the
range is cool. Remove spillovers and heavy soiling as soon as possible. Regular
cleanings will reduce the effort required for major cleanings later.
Surfaces How to Clean
Aluminum (Trim Pieces) & Use hot, soapy water and a cloth. Dry with a clean cloth.
Vinyl
Glass, Painted and Plastic
Body Parts, Control Knobs
and Decorative Trim Pieces
Control P_
Porcelain Enamel
Burner Grates, Cooktop
Surface, Below Cooktop,
Warmer Drawer, Door Liner
and Oven Bottom
Stainless Steel, Chrome
Parts, Drip Pans
Oven Racks
Surface Burners - Sealed
Burner Units - Burner Cap,
Trim Ring (some models),
Burner Pans (some
models), and Burner Base
j - - "- -Do ._,ND
j _'._
(]£AN)OOR Do NOT
_AD
, _P> soo_ GASKt
Oven Door
Forgeneral cleaning, use hot, soapy water and a cloth. Formore difficult softs and
built-up grease, apply a liquid detergent directly onto the soil. Leave on soil for 30 to
60 minutes. Rinse with a damp cloth and dry. DO NOT use abrasive cleaners on any
of these materials; they can scratch.
Before cleaning the control panel, turn all controls to OFF and remove the control
knobs. To remove, pull each knob straight off the shaft. Clean as instructed above.
Squeeze excess water from the cloth before wiping the panel; especially when wiping
around the controls. Excess water in or around the controls may cause damage to the
appliance. To replace knobs after cleaning, line up the flat sides of both the knob and
the shaft, then push the knob(s)into place.
Clean burner grates, broiler pan and insert in the dishwasher and dry upon removal. If
soils are not removed, follow the cooktop cleaning instructions below.
Gentle scouring with a soapy scouring pad will remove most spots. Rinse with a 1:1
solution of clean water and ammonia. If necessary, cover difficult spots with an
ammonia-soaked paper towel for 30 to 40 minutes. Rinse with clean water and a
damp cloth, then scrub with a soap-filled scouring pad. Rinse and wipe dry with a
clean cloth. Remove all cleaners or the porcelain may become damaged during future
heating. DO NOT use spray oven cleaners on the range top.
Clean with hot, soapy water and a dishcloth. Rinse with clean water and a cloth.
Cover stubborn spots with an ammonia-soaked paper towel for 30-40 minutes. Rinse.
Cleaners made especially for stainless steel are recommended. Be sure to rinse the
cleaners as bluish stains may occur during heating and cannot be removed.
Remove racks. See "Removing and Replacing Oven Racks" under Before Setting
Oven Controls. Use a mild, abrasive cleaner, following manufacturer's instructions.
Rinse with clean water and dry. After cleaning the racks, rub the sides of the racks
with wax paper or a cloth containing a small amount of baby oil or salad oil (this will
make the racks glide easier into the rack positions).
The holes in the burners of your range must be kept clean at all times for proper
ignition and a complete, even flame. Clean the burner holes routinely with a small
gauge wire or needle and especially after bad spillovers which could clog these holes.
The holes in the burners of your range must be kept clean at all times for proper
ignition and a complete, even flame. Clean the burner holes routinely with a small
gauge wire or needle and especially after bad spillovers which could clog these holes.
To remove, clean and replace sealed burner units, follow the instructions under
General Cleaning. DO NOT put burner units in the dishwasher.
To clean oven door, wash with hot, soapy water and a clean cloth. DO NOT immerse
the door in water.
DO NOT clean the oven door gasket. The woven material of the oven door gasket is
essential for a good seal. Care should be taken not to rub, damage or remove the
gasket.
16
General Cleaning
(continued)
Unlike the standard gas range, THIS
COOKTOP IS NOT REMOVABLE. Do
not attempt to remove or lift the
cooktop.
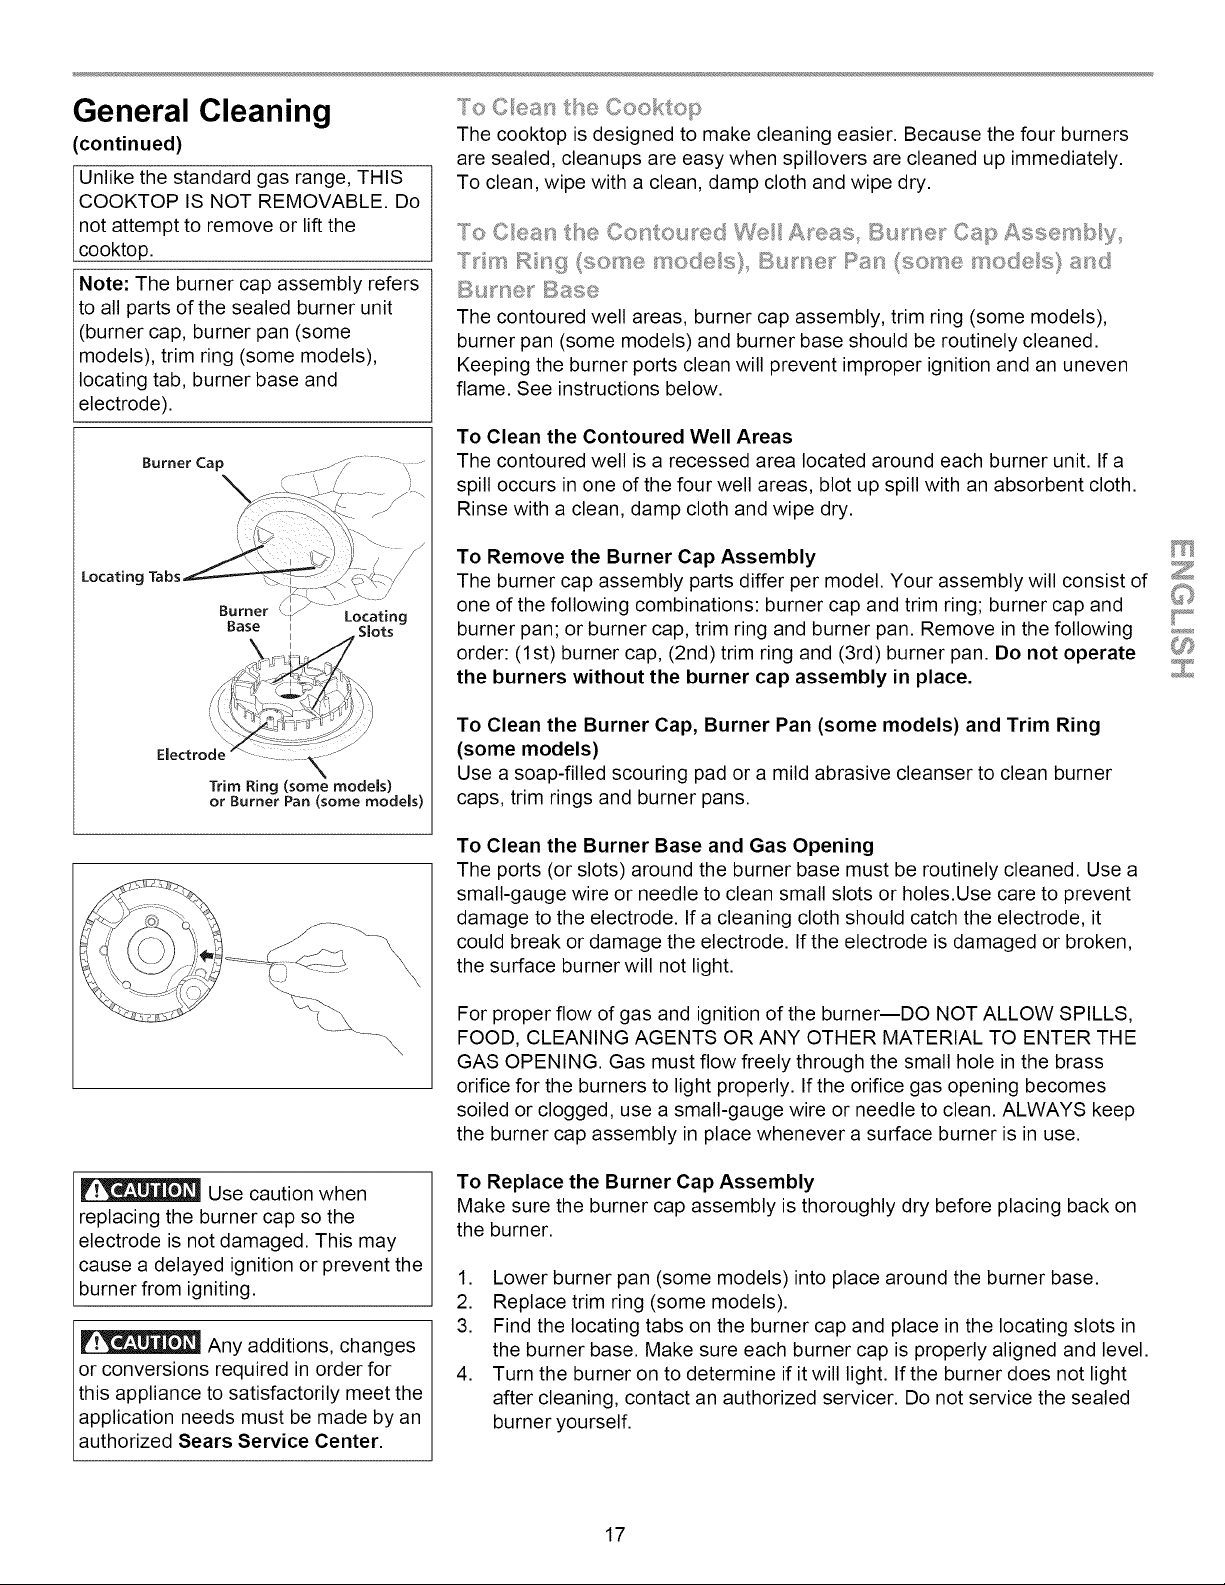
Note: The burner cap assembly refers
to all parts of the sealed burner unit
(burner cap, burner pan (some
models), trim ring (some models),
locating tab, burner base and
electrode).
Burner Cap
Locating Tabs
Burner Locatinc
Base
Electrode
Trim Ring (some models)
or Burner Pan (some models)
To Cean tse Cooktop
The cooktop is designed to make cleaning easier. Because the four burners
are sealed, cleanups are easy when spillovers are cleaned up immediately.
To clean, wipe with a clean, damp cloth and wipe dry.
TO Cea_s t_e Co_:_touued We A_eas Bu_ne_ Cap Assemb y,_
_T_'_m Rs9 (some modes} B_ _ne__'_Pa_"_(some modes} a__d
Bul:nel_ Base
The contoured well areas, burner cap assembly, trim ring (some models),
burner pan (some models) and burner base should be routinely cleaned.
Keeping the burner ports clean will prevent improper ignition and an uneven
flame. See instructions below.
To Clean the Contoured Well Areas
The contoured well is a recessed area located around each burner unit. If a
spill occurs in one of the four well areas, blot up spill with an absorbent cloth.
Rinse with a clean, damp cloth and wipe dry.
To Remove the Burner Cap Assembly
The burner cap assembly parts differ per model. Your assembly will consist of
one of the following combinations: burner cap and trim ring; burner cap and
burner pan; or burner cap, trim ring and burner pan. Remove in the following
order: (1st) burner cap, (2nd) trim ring and (3rd) burner pan. Do not operate
the burners without the burner cap assembly in place.
To Clean the Burner Cap, Burner Pan (some models) and Trim Ring
(some models)
Use a soap-filled scouring pad or a mild abrasive cleanser to clean burner
caps, trim rings and burner pans.
x
\,
To Clean the Burner Base and Gas Opening
The ports (or slots) around the burner base must be routinely cleaned. Use a
small-gauge wire or needle to clean small slots or holes.Use care to prevent
damage to the electrode. If a cleaning cloth should catch the electrode, it
could break or damage the electrode. If the electrode is damaged or broken,
the surface burner will not light.
For proper flow of gas and ignition of the burner--DO NOT ALLOW SPILLS,
FOOD, CLEANING AGENTS OR ANY OTHER MATERIAL TO ENTER THE
GAS OPENING. Gas must flow freely through the small hole in the brass
orifice for the burners to light properly. If the orifice gas opening becomes
soiled or clogged, use a small-gauge wire or needle to clean. ALWAYS keep
the burner cap assembly in place whenever a surface burner is in use.
Use caution when
replacing the burner cap so the
electrode is not damaged. This may
cause a delayed ignition or prevent the
burner from igniting.
Any additions, changes
or conversions required in order for
this appliance to satisfactorily meet the
application needs must be made by an
authorized Sears Service Center.
To Replace the Burner Cap Assembly
Make sure the burner cap assembly is thoroughly dry before placing back on
the burner.
1. Lower burner pan (some models) into place around the burner base.
2. Replace trim ring (some models).
3. Find the locating tabs on the burner cap and place in the locating slots in
the burner base. Make sure each burner cap is properly aligned and level.
4. Turn the burner on to determine if it will light. If the burner does not light
after cleaning, contact an authorized servicer. Do not service the sealed
burner yourself.
r
17
General Cleaning
'continued)
The door is heavy. For
safe, temporary storage, lay the door
flat with the inside of the door facing
down.
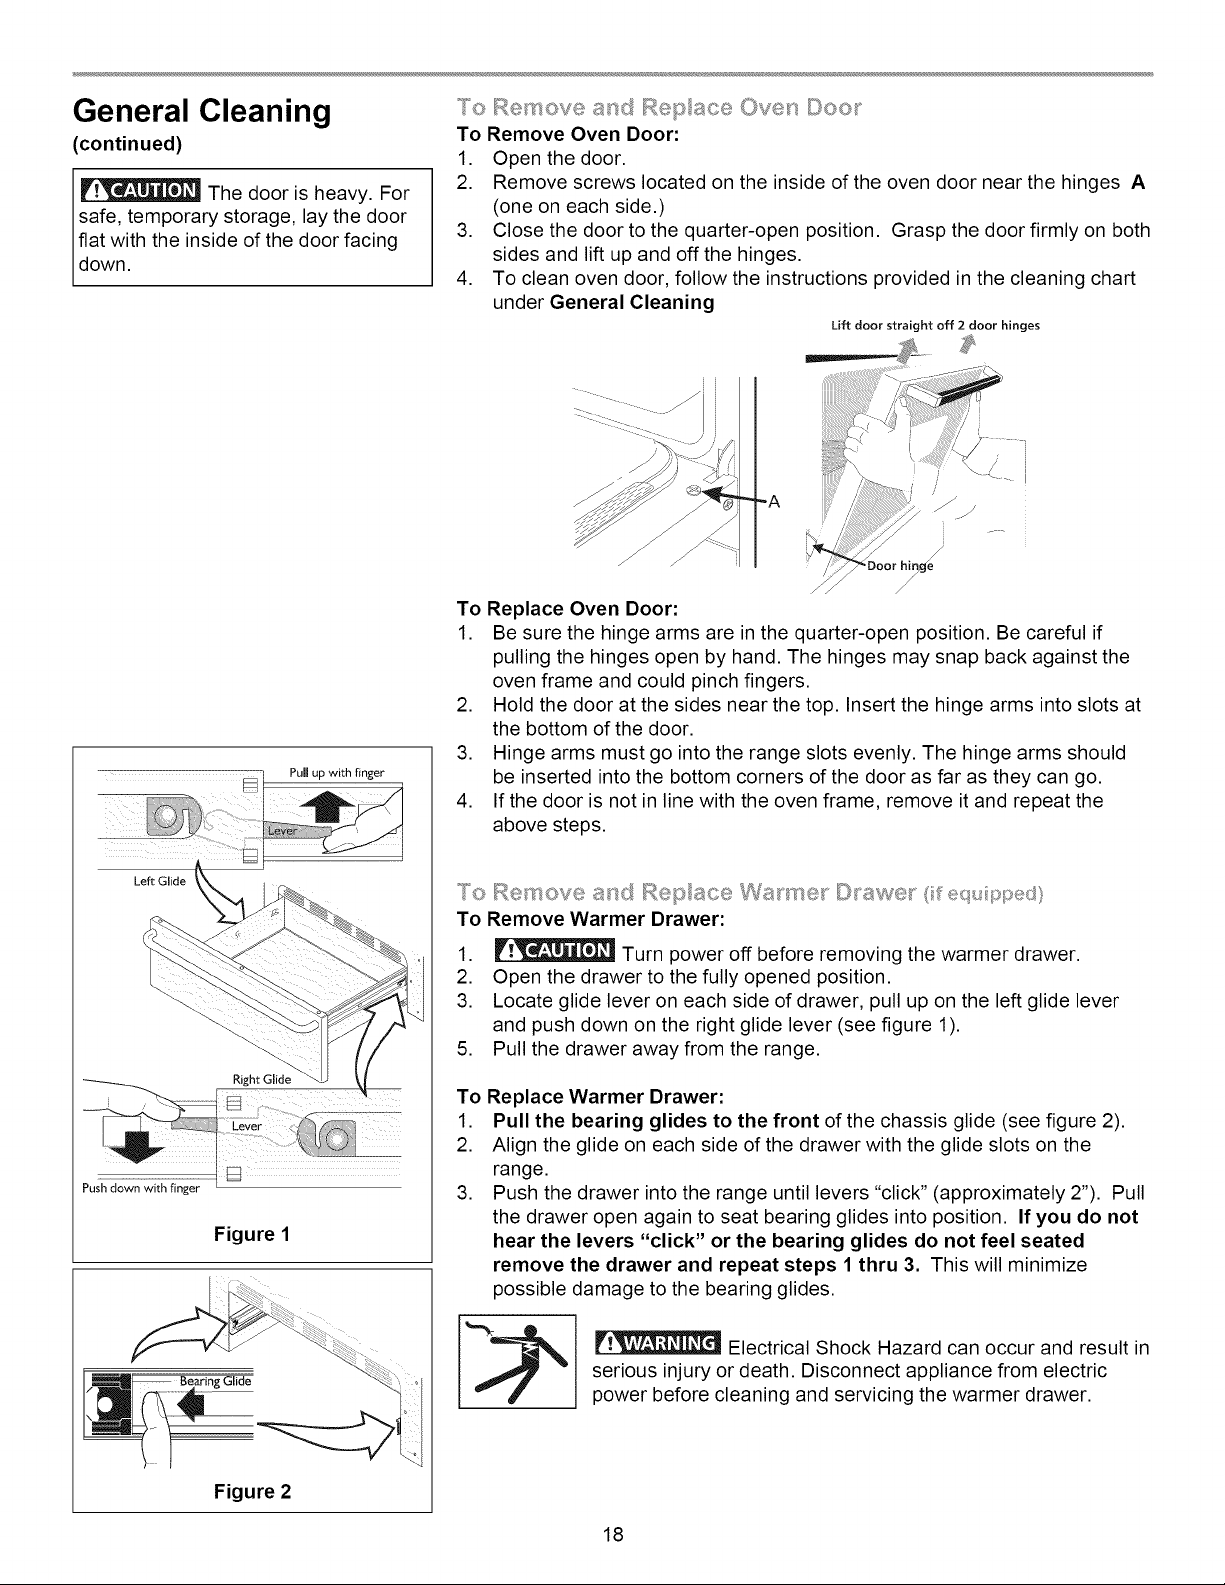
To Remove a_sd Rep ace Oven ©oo
To Remove Oven Door:
1. Open the door.
2. Remove screws located on the inside of the oven door near the hinges A
(one on each side.)
3. Close the door to the quarter-open position. Grasp the door firmly on both
sides and lift up and off the hinges.
4. To clean oven door, follow the instructions provided in the cleaning chart
under General Cleaning
Lift door straight off 2 door hinges
ii
Pull up with finger
Left Glide
Push down with finger
Figure 1
To Replace Oven Door:
1. Be sure the hinge arms are in the quarter-open position. Be careful if
pulling the hinges open by hand. The hinges may snap back against the
oven frame and could pinch fingers.
2. Hold the door at the sides near the top. Insert the hinge arms into slots at
the bottom of the door.
3. Hinge arms must go into the range slots evenly. The hinge arms should
be inserted into the bottom corners of the door as far as they can go.
4. If the door is not in line with the oven frame, remove it and repeat the
above steps.
To Remove and Rep ace Wa_me_ ©_J_awe__ (f equ pped}
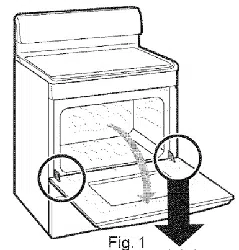
To Remove Warmer Drawer:
1. _ Turn power off before removing the warmer drawer.
2. Open the drawer to the fully opened position.
3. Locate glide lever on each side of drawer, pull up on the left glide lever
and push down on the right glide lever (see figure 1).
5. Pull the drawer away from the range.
To Replace Warmer Drawer:
1. Pull the bearing glides to the front of the chassis glide (see figure 2).
2. Align the glide on each side of the drawer with the glide slots on the
range.
3. Push the drawer into the range until levers "click" (approximately 2"). Pull
the drawer open again to seat bearing glides into position. If you do not
hear the levers "click" or the bearing glides do not feel seated
remove the drawer and repeat steps 1 thru 3. This will minimize
possible damage to the bearing glides.
Electrical Shock Hazard can occur and result in
serious injury or death. Disconnect appliance from electric
power before cleaning and servicing the warmer drawer.
18
Changing Oven Lights
(some models)
Be sure the range is unplugged and all parts are COOL before
replacing the surface or oven lights. Wear a leather-faced glove for protection
against possible broken glass.
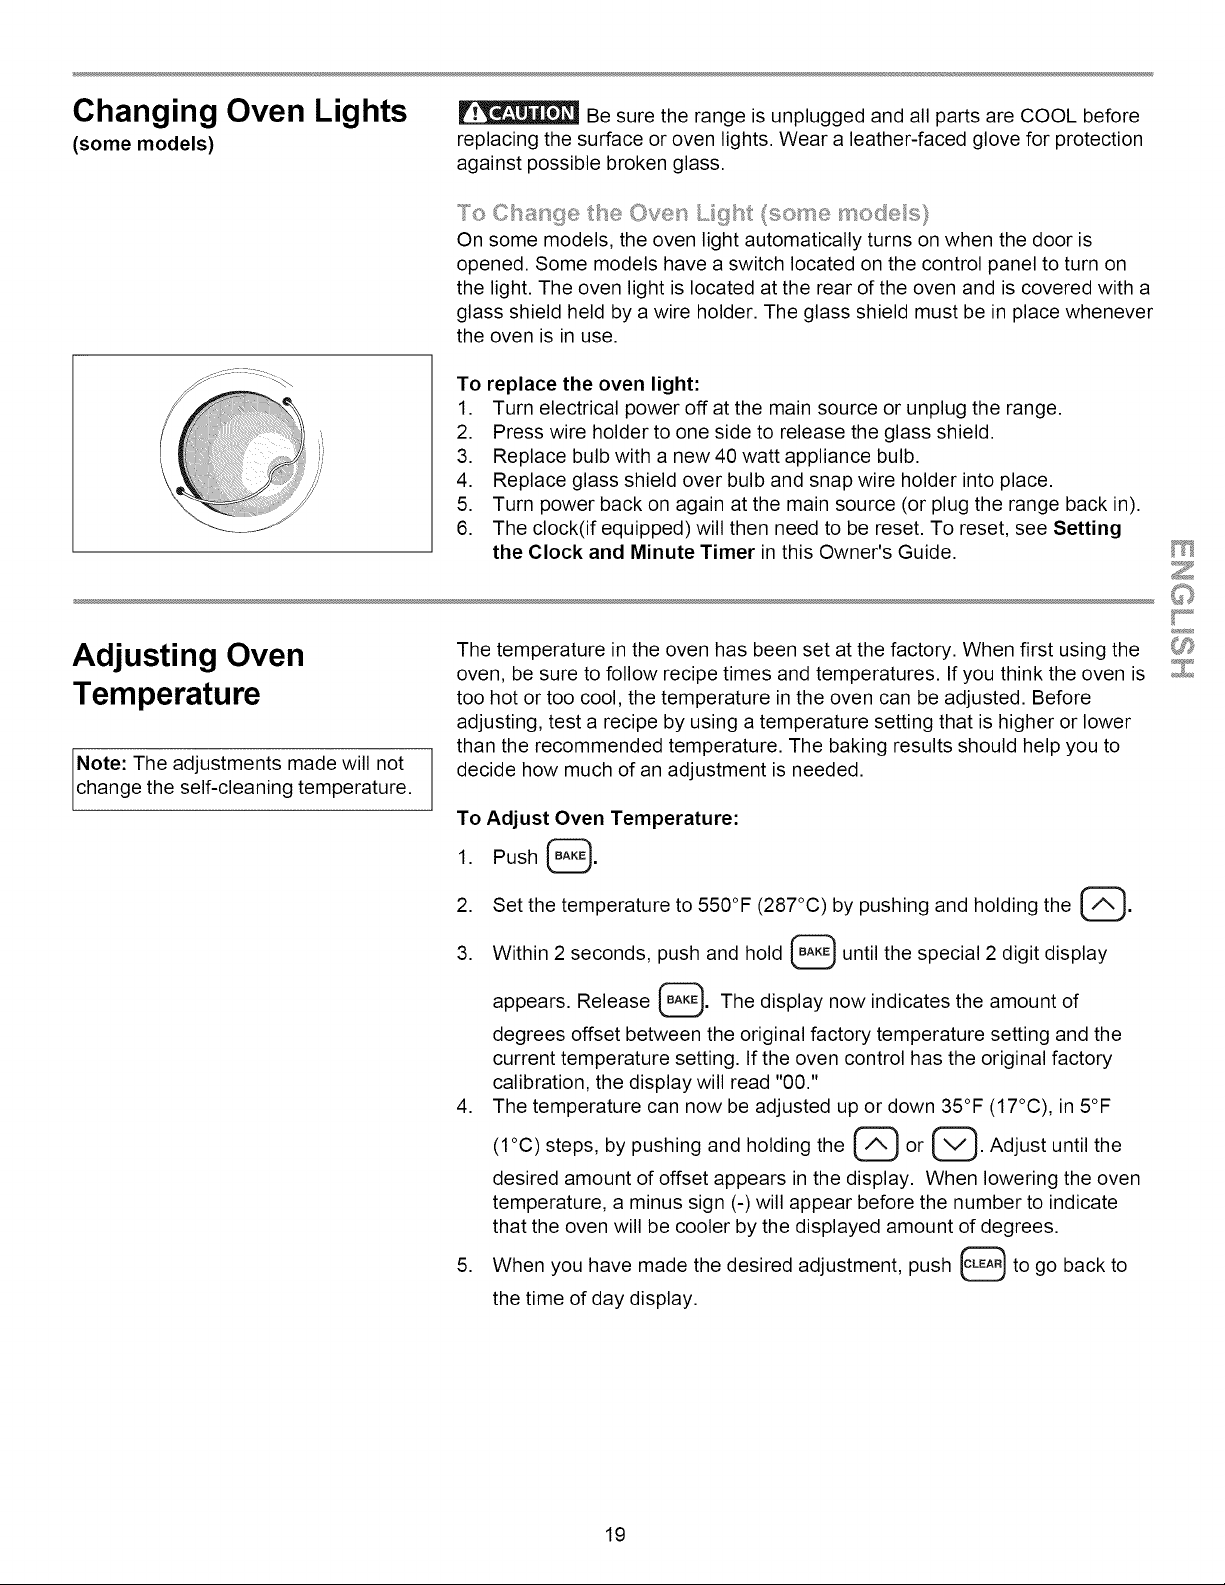
To Change the Oven L {4tht (some modes)
On some models, the oven light automatically turns on when the door is
opened. Some models have a switch located on the control panel to turn on
the light. The oven light is located at the rear of the oven and is covered with a
glass shield held by a wire holder. The glass shield must be in place whenever
the oven is in use.
f
To replace the oven light:
1. Turn electrical power off at the main source or unplug the range.
2. Press wire holder to one side to release the glass shield.
3. Replace bulb with a new 40 watt appliance bulb.
4. Replace glass shield over bulb and snap wire holder into place.
5. Turn power back on again at the main source (or plug the range back in).
6. The clock(if equipped) will then need to be reset. To reset, see Setting
the Clock and Minute Timer in this Owner's Guide.
Adjusting Oven
Temperature
Note: The adjustments made will not
change the self-cleaning temperature.
The temperature in the oven has been set at the factory. When first using the
oven, be sure to follow recipe times and temperatures. If you think the oven is
too hot or too cool, the temperature in the oven can be adjusted. Before
adjusting, test a recipe by using a temperature setting that is higher or lower
than the recommended temperature. The baking results should help you to
decide how much of an adjustment is needed.
To Adjust Oven Temperature:
1. Push _.
2. Set the temperature to 550°F (287°C) by pushing and holding the _.
3. Within 2 seconds, push and hold _ until the special 2 digit display
appears. Release _. The display now indicates the amount of
degrees offset between the original factory temperature setting and the
current temperature setting. If the oven control has the original factory
calibration, the display will read "00."
4. The temperature can now be adjusted up or down 35°F (17°C), in 5°F
(1°C) steps, by pushing and holding the @ or _. Adjust until the
desired amount of offset appears in the display. When lowering the oven
temperature, a minus sign (-) will appear before the number to indicate
that the oven will be cooler by the displayed amount of degrees.
5. When you have made the desired adjustment, push _ to go back to
the time of day display.
CO
r
19
Avoid Service Checklist
Before you call for service, review this list. It may save you time and expense. The list includes common occurrences
that are not the result of defective workmanship or materials in this appliance.
This oven is equipped with a state of the art electronic oven controller. Among its many features is a full time oven circuit
diagnostics system. The controller constantly monitors its internal circuitry as well as several crucial oven circuits to
insure they are all operating correctly. If at any time one of these systems fails, the controller will immediately stop
operation, beeping and flashing an error code of F1 or F3* in the display window.
Range is not level.
Poor installation. Place oven rack in center of oven. Place a level on the oven rack.
Adjust leveling legs at base of range until the rack is level. When range is level,
cooktop may appear out of alignment if countertop is not level.
Weak, unstable floor. Be sure floor is level and can adequately support range.
Contact a carpenter to correct sagging or sloping floor.
Kitchen cabinet misalignment may make range appear to be unlevel. Be sure
cabinets are square and have sufficient room for range clearance.
Cannot move appliance easily.
Appliance must be accessible for
service.
Cabinets not square or are built in too tight. Contact a cabinet maker to correct the
problem.
Contact builder or installer to make appliance accessible.
Carpeting interferes with range. Provide sufficient space so range can be lifted over
carpet.
Gas line is hard-plumbed. Have a flexible A.G.A./C.G.A. approved metal appliance
connector installed.
*Oven control beeps and displays F1 or
F3.
Electronic control has detected a fault condition. Push CLEAR to clear the display
and stop beeping. Reprogram oven. If fault recurs, record fault number. Push CLEAR
and contact an authorized servicer.
Surface burners do not light. Surface Control knob has not been completely turned to LITE. Push in and turn the
Surface Control knob to LITE until burner ignites and then turn control knob to
desired flame size.
Burner ports are clogged. Clean burners. See "To Clean the Contoured Welt Areas,
Burner Cap Assembly, Trim Ring (some models), Burner Pan (some models) and
Burner Base" under General Cleaning. With the burner off, clean ports with a small-
gauge wire or needle.
Range power cord is disconnected from outlet (Electric Ignition Models only). Be sure
cord is securely plugged into the outlet.
Electrical power outage (electric ignition models only). Burners can be lit manually.
See Setting Surface Controls in this Owner's Guide.
Surface burner flame burns half way
around.
Burner ports are clogged. With the burner off, clean ports by using a small-gauge
wire or needle.
Moisture is present after cleaning. Lightly fan the flame and allow burner to operate
until flame is full. Dry the burners thoroughly following instructions in the General
Cleaning section.
Surface burner flame is orange. Dust particles in main line. Allow the burner to operate a few minutes until flame turns
blue.
In coastal areas, a slightly orange flame is unavoidable due to salt air.
2O
Oven does not operate. Be sure the electronic oven controls are set correctly for the desired function. See
Setting Oven Controls in this Owner's Guide or Entire Appliance Does Not
Operate (see below).
Be sure regulator gas valve is "ON". See installation instructions.
Entire appliance does not operate. Make sure electrical cord/plug is plugged tightly into outlet (electric ignition models
only).
Service wiring not complete. Contact servicer or dealer.
Electrical power outage (electric ignition models only). Check house lights to be sure.
Call your local electric company for service. Surface burners can be lit manually. See
Setting Surface Controls in this Owner's Guide.
Be sure gas supply is turned on.
Cooktop and/or oven light (some
models) does not work.
Burned-out or loose bulb. See Changing Cooktop and/or Oven Lights (some
models) section in this Owner's Guide to replace or tighten the bulb.
Oven smokes excessively during
broiling.
Oven door is open. Door should be closed during broiling.
Meat too close to broil burner. Reposition the rack to provide more clearance
between the meat and the broiler.
Meat not properly prepared. Remove excess fat from meat. Slash remaining fatty
edges to prevent curling, but do not cut into the lean.
Broiler pan used without grid or grid covered with foil. DO NOT use the broiler pan
without grid or cover grid with foil.
Oven needs to be cleaned. Grease has built up on oven surfaces. Regular cleaning
is necessary when broiling frequently. Old grease or food spatters cause excessive
smoking.
Poor baking results. Many factors affect baking results. Make sure the proper rack position is used. Center
food in the oven and space pans to allow air to circulate. Allow the oven to preheat to
the set temperature before placing food in the oven. Try adjusting the recipe's
recommended temperature or baking time. If you feel the oven is too hot or cool, see
Adjusting Oven Temperature in this Owner's Guide.
Self-Cleaning cycle does not work. Controls are not set properly. Follow instructions under Oven Cleaning.
Self-cleaning cycle was interrupted. Stop time must be set 2 to 4 hours past the start
time. Follow steps under "Stopping or Interrupting a Self-Clean Cycle" under Oven
Cleaning.
Soil is not completely removed. Failure to clean bottom front, top of oven or door areas outside oven seal. These
areas are not in the self-cleaning area, but get hot enough to burn on residue. Clean
these areas before starting the self-clean cycle. Burned-on residue may be cleaned
with a stiff nylon brush and water or a nylon scrubber. Be careful not to damage the
oven gasket.
Excessive spillovers in oven. Set self-clean cycle for a longer cleaning time.
Flames inside oven or smoking from
vent.
Excessive spillovers in oven. This is normal, especially for pie spittovers or large
amounts of grease on the oven bottom. Wipe up excessive spittovers before starting
the self-clean cycle. If flames or excessive smoke are present, stop the self-clean
cycle and follow the steps under "Stopping or Interrupting the Self-Clean Cycle" in
the Oven Cleaning section.
r
21

in U.S.A. or Canada
for in-home major brand repair service:
Call 24 hours a day, 7 days a week
1-800-4-MY-H O M EsM(1-800-469-4663)
Para pedir servicio de reparacion a domicillio -1-800-676-5811
Au Canada pour tout le service = 1-877-LE=FOYERSM(1-877-533-6937)
For the repair or replacement parts you need:
Call 6 a.m. - 11 p.m. CST, 7 days a week
PartsDirecf °
1-800-366-PART (1-800-366-7278)
www.sears.com/partsdirect
Para ordenar piezas con entrega a domicilio - 1-800-659-7084
For the location of a Sears Service Center in your area:
Call 24 hours a day, 7 days a week
1-800-488-1222
To purchase or inquire about a Sears Maintenance Agreement:
Call 7 a.m. - 5 p.m. CST, Monday - Saturday
1-800-827-6655
HomeCentrai
®
GAS RANGE
ESTUFA A GAS
_li_ K_ _ __I_ _'_ _,_""_
Sears Roebuck and Co., Hoffman Estates, IL 60179 U.S.A.
www.sears.com
Tabla de Materias
Garantia de la Estufa Autoestable .................................. 24
Registro del Producto ..................................................... 24
INSTRUCCIONES IMPORTANTES DE SEGURIDAD25-27
Instrucciones para la Puesta a Tierra ............................. 27
Funciones de los Botones de Control ............................. 28
Programaci6n del Reloj y del Contador de Minutos ........ 29
Ajustes correctos de los Quemadores ....................... 30-31
Ajuste de los Controles de la Gaveta Calentadora ......... 32
Antes de Regular los Controles del Homo ...................... 33
Regulaci6n de los Controles del Homo ...................... 33-35
Limpieza del Homo .................................................... 36-37
Limpieza General ...................................................... 38-40
Cambio de las Luces del Homo ...................................... 41
Regulaci6n de la Temperatura del Homo ........................ 41
Lista para Evitar Llamadas de Servicio ...................... 42-43
Sears Servico ................................................................. 44
Registro del Producto
En el espacio provisto a continuacion, registre la fecha de compra,
el nQmero de modelo y el nQmero de serie de su producto. El
nQmero de modelo y de serie se encuentran en una placa de
identificacion. La placa de indentificacion se encuentra en el lado
derecho del marco delantero del horno en el compartimiento de
almacenamiento para modelos con quemadores sellados. Para
todos los otros modelos a gas, la placa de identificacion se
encuentra debajo de la cubierta que se levanta hacia arriba.
790.
No. de Modelo
No. de Serie
Fecha de Compra
Conserve estas instrucciones y su recibo de compra para referencia
futura.
Garantia de la Estufa Autoestable
Si dentro de un ado de la fecha de instalaci6n, alguna de las piezas no funciona en forma adecuada debido a un defecto de material o
fabricacion, Sears la reemplazarfi o repararfi, a nuestra opcion, gratuitamente.
Si este producto se usa para otros prop6sitos que no sean los normales del hogar, la garantia anterior es s61o vfilida durante 90 dias.
EL SERVICIO BAJO LA GARANTIA ESTA DISPONIBLE PONIENDOSE EN CONTACTO CON SU CENTRO DE SERVICIO SEARS MAS
CERCANO EN LOS ESTADOS UNIDOS.
Esta garantia le otorga ciertos derechos legales especificos y usted tambien puede tener otros derechos que varian de un estado a otro.
Sears Roebuck and Co. Dept. 817 WA Hoffman Estates, tL 60179
A fi_°_de ag_egs_ a/valor de su esg;._fa compl"e un Cont_"at® de _/_a_stenimi®_sto de Sea_s_
Amos de Cobertura ler Afio 2do Afio 3er Afio
1. Reemptazo de piezas defectuosas W MA MA
2. Revisi6n de Mantenimiento PreventivoAnual, MA MA MA
si 1o solicita
W=Garantia MA=Contrato de Mantenimiento
Las estufas Kenmore han sido disefiadas, fabricadas y probadas para ofrecerle afios de funcionamiento seguro. Sin embargo, cualquier
electrodomestico puede requerir servicio de vez en cuando. La garantia de Sears y el Contrato de Mantenimiento de Sears le proporcionan
proteccion contra cuentas de reparacion inesperadas.
En la tabla anterior se compara la garantia y el contrato de mantenimiento y se muestran los beneficios de un Contrato de Mantenimiento de
Estufas Sears.
P6ngase hoy mismo en contacto con su Vendedor Sears o con el Centro Local de Servicio Sears y compre un Contrato de Mantenimiento
Sears.
24
INSTRUCCIONES IMPORTANTES DE SEGURIDAD
Lea todas las instrucciones antes de usar este artefacto.
Guarde estas instrucciones para referencia futura.
Este manual contiene muchos avisos de seguridad importantes. Siempre lea y obedezca todos los avisos de seguridad.
Este es el simbolo de alerta sobre seguridad. Le advierte sobre avisos de seguridad que le informan sobre peligros que pueden causarle la
muerte o lesionarlo a usted o a otros o causar da5o al producto.
Indica una situacion inminentemente peligrosa que, si no se evita puede resultar en una lesion grave o mortal.
Indica una situacion inminentemente peligrosa que, si no se evita puede resultar en una lesion menor o moderada o
solamente da_o del producto.
Todos los avisos de seguridad identifican un peligro, le explican como reducir la posibilidad de sufrir una lesion y le indican Io que puede
suceder si no se siguen las instrucciones.
Si no se sigue estrictamente la
informacion de este manual, se puede producir
un incendio o una explosion causando daSos
materiales, lesiones corporales o fatales.
PARA $U $EGURIDAD:
m No almacene ni use gasolina u otros liquidos o
vapores inflamables cerca de este o cualquier
otro artefacto.
SI SIENTE OLOR A GAS:
• No trate de encender el artefacto.
• No toque ningun interruptor electrico; no use
ningun telefono en su edificio.
• Llame inmediatamente a su proveedor de gas
desde un telefono vecino. Siga las
instrucciones del proveedor de gas.
• Si no puede comunicarse con su proveedor de
gas, Ilame al departamento de bomberos.
La instalacion y el servicio tecnico deben ser
efectuados por un instalador o tecnico
calificado o por el proveedor de gas.
@
@
la estufa,
• Todas las estufas pueden volcarse.
• Se pueden causar lesiones.
• Instale el dispositivo antivuelco
incluido con la estufa.
• Vea las instrucciones de instalacion.
Para reducir el riesgo de vuelco de
se debe asegurar instalando
adecuadamente el(los) soporte(s) antivuelco
provistos con la estufa. Para verificar si el soporte ha
sido instalado correctamente, verifique visualmente
que la pata niveladora este insertada y completamente
asegurada por el soporte del dispositivo antivuelco
sacando el panel inferior o la gaveta de
almacenamiento. Para los modelos con gaveta
calentadora o compartimiento para asar, sujete el
borde trasero superior de la estufa y trate
cuidadosamente de inclinarla hacia adelante.
Consulte las instrucciones de instalacion para instalar
correctamente el soporte antivuelco.
• Retire todas las cintas y los envoltorios de empaque antes
de usar la estufa. Destruya la caja de cart6n y las bolsas de
plastico despues de desempacar la estufa. Nunca deje jugar a
los ni5os con el material de empaque.
• Instalacion correcta - Asegurese de que su artefacto haya
sido correctamente instalado y puesto a tierra en forma
adecuada por un tecnico calificado de acuerdo con la norma
ANSI Z223.1 del C6digo Nacional de Gas--Qltima edicion y
con la norma ANSI/NFPA No. 70 del C6digo Electrico
Nacional--y con los requisitos de los c6digos locales.
Instale siguiendo solamente las instrucciones de instalacion
proporcionadas en la documentacion de esta estufa.
Consulte con su distribuidor para que le recomiende un tecnico
calificado y un centro de servicio autorizado. Aprenda a
desconectar la energia electrica de la estufa en el disyuntor o en
la caja de fusibles en caso de emergencia.
• Mantenimiento por el usuario--No repare o reemplace
ninguna pieza del artefacto a menos que se recomiende
especificamente en los manuales. Todo otro tipo de
mantenimiento debe ser efectuado por un tecnico calificado para
reducir el riesgo de lesiones corporales o da_o a la estufa.
• Nunca modifique o altere la construccion de una estufa
quitando las patas niveladoras, paneles, protectores de
cables, tornillos o soportes antivuelco o cualquiera otra
pieza de la estufa.
_'v_J__ Si se para, se apoya o se sienta en las
puertas o gavetas de esta estufa puede provocar lesiones
corporales graves y puede tambien daSar la estufa. No permita
que los ni_os trepen o jueguen alrededor de la estufa. El peso de
un ni_o en una puerta abierta puede volcar la estufa causando
quemaduras graves u otro tipo de lesiones.
No use el homo o la gaveta calentadora (si la
tiene) para guardar utensilios.
No guarde articulos que interesen a los ni_os
en los armarios que esten arriba de la estufa o en el protector
trasero. Los niSos que se suban a la estufa para alcanzar dichos
articulos pueden sufrir lesiones graves.
Nunca use este artefacto para calentar o
calefaccionar la habitacion.
25
INSTRUCCIONES IMPORTANTES DE SEGURIDAD
• Almacenamiento dentro o sobre el artefacto--No se deben
guardar materiales inflamables en el horno, cerca de los
elementos superiores, en la gaveta de almacenamiento o en
la gaveta calentadora (si la tiene). Esto incluye articulos de
papel, plastico y tela, tales como libros de cocina, objetos de
plastico y toallas, asi como liquidos inflamables. No almacene
articulos explosivos, tales como latas de aerosol sobre la estufa
o cerca de ella.
• No deje a los niSos solos. No se debe dejar a los niSos
solos o sin vigilancia en el area donde se usa el artefacto.
Nunca debe permitirseles que se sienten o se apoyen en ninguna
parte del artefacto.
• NO TOQUE LOS QUEMADORES SUPERIORES, LAS AREAS
CERCANAS A LOS QUEMADORES, LOS QUEMADORES DEL
HORNO O LAS SUPERFICIES INTERIORES DEL HORNO.
Tanto los elementos superiores como los quemadores del homo
pueden estar calientes aQn cuando no sean visibles las llamas.
Las Areas cercanas a los quemadores superiores pueden
calentarse Io suficiente como para causar quemaduras. Durante
y despues que use la estufa, no toque ni deje que la ropa u otros
materiales infiamables toquen estas Areas hasta que no se hayan
enfriado. Entre estas Areas se encuentra la cubierta, las
superficies orientadas hacia la cubierta, los orificios de los
respiraderos del homo, las superficies cercanas a estos orificios,
la puerta y la ventanilla del horno.
• Vista ropa adecuada--No use nunca prendas de vestir
holgadas o sueltas cuando este usando este artefacto. No
deje que la ropa u otros materiales inflamables entren en
contacto con las superficies calientes.
• No use agua ni harina para apagar un incendio causado por
frituras--Apague el fuego con la tapa de una sarten o bien
utilice bicarbonato de sodio o un extinguidor de espuma o
de un producto quimico seco.
• Cuando caliente grasa o aceite, debe vigilar atentamente la
estufa. La grasa o el aceite se pueden inflamar si se calientan
demasiado.
• Use s61o tomaollas secos--Los tomaollas mojados o
humedos en superficies calientes pueden causar
quemaduras ocasionadas por el vapor. No deje que los
tomaollas toquen las llamas o los elementos. No use toallas u
otros materiales gruesos en vez de tomaollas.
• No caliente envases de alimentos cerrados--La acumulacion
de presion puede reventar el envase y ocasionar lesiones.
• Saque la puerta del homo de toda estufa que ya no se utilice
cuando la guarde o la descarte.
IMPORTANTE--No trate de usar la estufa durante una
interrupcion del suministro el(_ctrico. Si se interrumpe la
energia el(_ctrica, apague siempre la estufa. Si la estufa no se
apaga, y se restablece el suministro electrico, la estufa puede
comenzar a funcionar nuevamente. El alimento que se haya dejado
desatendido puede prenderse fuego o daSarse.
_4STRUCC O#,;ES _MPORT'AN_ _!IS F';_ARAUSAR LA
CUB/ERTA
[: ""' ' ° UselallamadetamaSoadecuado-Ajuste
el tamaSo de la llama de modo que no se extienda mas alia del
borde del utensilio. El uso de utensilios demasiado peque5os dejara
expuesta parte de la llama y se puede quemar la ropa. Debe existir
una relacion adecuada entre el tama5o del utensilio y el tama5o de
la llama y de tal modo tambien se mejorara la eficiencia.
• Familiaricese con cada uno de los botones que controlan los
elementos superiores. Coloque un utensilio con alimento en el
elemento antes de encenderlo y apague el elemento antes de
retirar el utensilio.
• Siempre gire el bot6n a la posicion LITE cuando encienda
los quemadores superiores. Verifique visualmente si el
quemador se ha encendido. Luego ajuste la llama de modo que
no se extienda mas alia del borde del utensilio.
• Los mangos de los utensilios deben colocarse hacia adentro
y no dejarlos sobre los elementos contiguos-- Para reducir el
riesgo de quemaduras, incendio de materiales infiamables y
derrames debido a contacto accidental con el utensilio, el mango
debe colocarse hacia adentro y no sobre los elementos
superiores contiguos.
• Nunca deje sin vigilancia los elementos superiores
encendidos en los ajustes altos--AI hervir se derrama el
contenido produciendo derrames de grasa que se pueden
incendiar o bien se puede fundir una sarten cuyo contenido se
haya consumido.
• Revestimientos protectores--No use papel de aluminio para
forrar la superficie de los platillos de los quemadores o la parte
inferior del homo, excepto como sea sugerido en este manual.
Cualquier otto uso de revestimientos protectores o del papel de
aluminio puede resultar en un riesgo de choque electrico o
incendio.
• Utensilios de cocina de ceramica--S61o ciertos tipos de vidrio,
vidrio/ceramica, ceramica, arcilla u otros utensilios de vidrio
resultan adecuados para usar en la cubierta de la estufa sin que
se quiebren con el cambio repentino de temperatura. Consulte
las recomendaciones del fabricante para uso en la cubierta de la
estufa.
26
INSTRUCCIONES IMPORTANTES DE SEGURIDAD
_NSTR( CC/ONES MPOF_T'AN] 8!IS PARA EL USO
©EL HORNO
• Abra con cuidado la puerta del horno o la gaveta
calentadora--Mantengase al costado de la estufa cuando abra
la puerta del homo caliente. Deje salir el aire caliente o el vapor
antes de retirar o volver a colocar los alimentos en el homo.
• Evite la obstrucci6n de los conductos de ventilacion del
horno. Los conductos de ventilacion del homo se encuentran
debajo del protector trasero. No toque las superficies en esta
area cuando el homo este funcionando, se pueden ocasionar
quemaduras graves. Ademas no coloque objetos de plastico o
termosensibles sobre los orificios de ventilaci6n del homo o
cerca de ellos. Estos objetos pueden derretirse o incendiarse.
• Colocacion de las rejillas del horno. Coloque las rejillas del
homo en la posicion deseada solamente cuando el homo este
frio. Si la rejilla se debe cambiar cuando el homo esta caliente,
hagalo con sumo cuidado. Use tomaollas y sujete la rejilla con
ambas manos para volver a colocarla. No deje que los tomaollas
toquen la llama del elemento o el interior del homo. Quite todos
los utensilios de la rejilla antes de retirarla.
• No use la asadera sin el inserto. La asadera y el inserto
permiten drenar la grasa y protegerla contra el calor del asador.
• No cubra el inserto de la asadera con papel de aluminio. La
grasa y el aceite asi expuestos pueden inflamarse.
• Las temperaturas bajas pueden da5ar el control electr6nico.
Cuando use la estufa pot primera vez o cuando no la use pot un
periodo prolongado, asegOrese de que la estufa se haya
mantenido a temperaturas superiores a 32°F (0°C) pot Io menos
durante las Oltimas tres horas antes de conectar la energia
electrica al artefacto.
_NSTRLICC/ONES MP©RTANTES PARA LA
L MP EZA DE SU ESTL FA
• Limpie regularmente la estufa para mantener sin grasa todas
las piezas que puedan prenderse fuego. Preste atenci6n
especial al area situada debajo de cada elemento superior. No
deje que se acumule grasa. Consulte las instrucciones para la
limpieza proporcionadas por el fabricante de las campanas.
• Aerosoles y agentes de limpieza para estufas--Siga siempre
las instrucciones de uso recomendadas por el fabricante.
Tenga presente que los residuos de los agentes de limpieza y
aerosoles pueden infiamarse causando da_o y lesiones.
HORNOS AUTOLIMPIANTES
• Limpie en el ciclo de autolimpieza s61o las piezas del homo
indicadas en este manual del usuario. Antes de la
autolimpieza del homo, retire la asadera y todo utensilio o
alimentos que esten guardados en el horno.
• No use agentes de limpieza para homo. No se debe usar
agentes de limpieza para homo o revestimiento de protecci6n de
ningQn tipo en ninguna pieza del homo o en su vecindad.
• No limpie la junta de la puerta del horno. La junta de la puerta
es esencial para que quede sellada en forma correcta. Tenga
cuidado de no frotar, da5ar o mover la junta.
CONSERV8 _'_:"'_""_':_..........................
Instrucciones para la Puesta a
Tierra
(modelos con encendido electrico solamente)
_J__ Evite el riesgo de un incendio o de choque
electrico. No use un enchufe adaptador, un cordon de extension ni
saque la espiga de puesta a tierra del cord6n electrico. De Io
contrario se puede causar una lesion grave, un incendio o la muerte.
Tomacorriente mural
con conexion a tierra
,,= ,,. ,
: ""' ' " Este artefacto esta equipado con un enchufe
de tres clavijas (con puesta a tierra) para su proteccion contra
choques electricos y se debe enchufar directamente en un
tomacorriente debidamente puesto a tierra. NO corte o quite la
clavija de puesta a tierra de este enchufe.
Para su seguridad personal, la estufa debe estar puesta a tierra en
forma correcta. Para una maxima seguridad, el cord6n electrico
debe enchufarse en un tomacorriente que este correctamente
polarizado y debidamente puesto a tierra.
NO haga funcionar la cocina usando un adaptador de 2 espigas o un
cord6n de extension. Si s61o posee un tomacorriente de dos clavijas,
es responsabilidad del consumidor reemplazarlo por un
tomacorriente mural de tres clavijas (con puesta a tierra) instalado
por un electricista calificado.
Consulte las instrucciones de instalacion incluidas con esta estufa
para informacion completa sobre la instalacion y puesta a tierra.
Por ningun motivo
corte, saque o ponga
en derivaci6n la clavija
de puesta a tierra del
enchufe.
Cordon electrico con enchufe
de tres clavijas con puesta a
tierra.
27
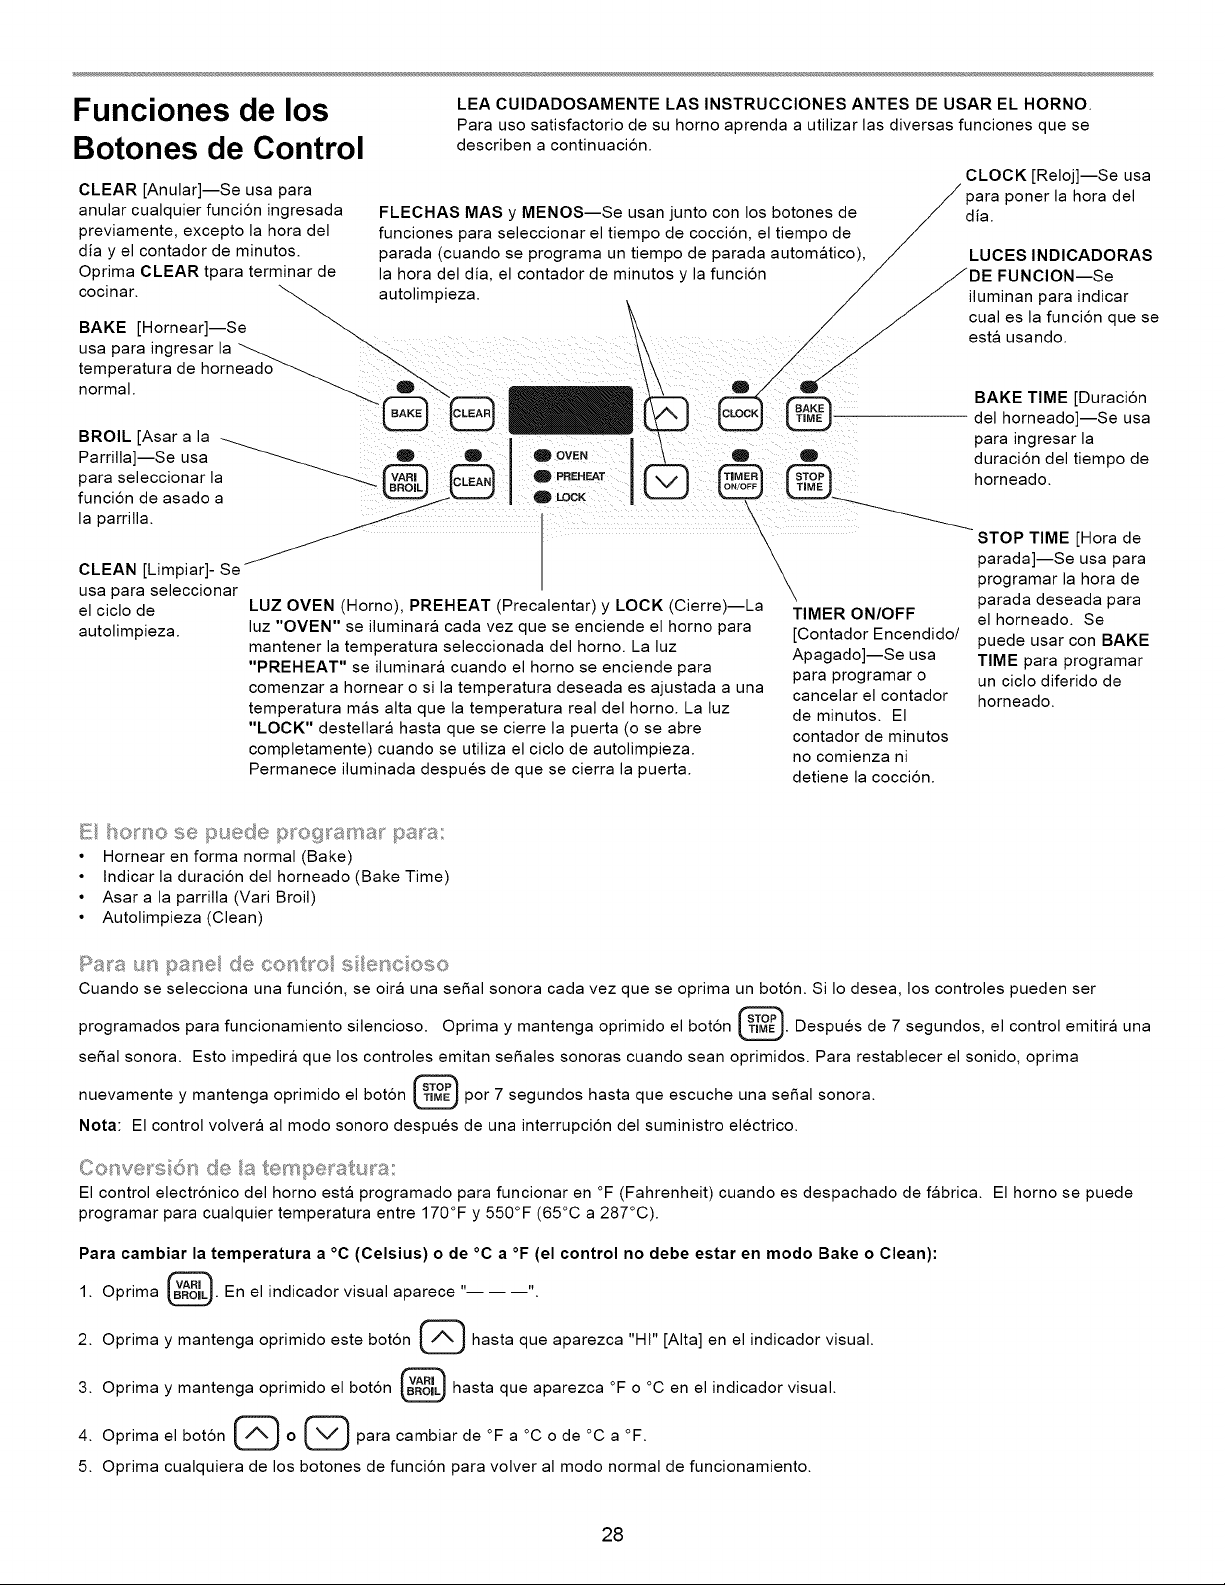
Funciones de los
Botones de Control
CLEAR [Anular]--Se usa para
anular cualquier funcion ingresada
previamente, excepto la hora del
dia y el contador de minutos.
Oprima CLEAR tpara terminar de
cocinar.
BAKE [Hornear] Se
usa para ingresar la
temperatura de
normal.
LEA CUIDADOSAMENTE LAS INSTRUCClONES ANTES DE USAR EL HORNO.
Para uso satisfactorio de su homo aprenda a utilizar las diversas funciones que se
describen a continuaci6n.
FLECHAS MAS y MENOS--Se usan junto con los botones de
funciones para seleccionar el tiempo de cocci6n, el tiempo de
parada (cuando se programa un tiempo de parada automatico),
la hora del dia, el contador de minutos y la funcion
autolimpieza.
BROIL [Asar a la _ I
Parrilla] Se usa _ g Q I Q OVENparaseleccionarla _ _ __ /_ .PREHEAT
funci6n de asado a - I LOCK
la parrilla.
/
CLEAN [Limpiar]- Se"
\
\
\
\
\
\
usa para seleccionar
el ciclo de
autolimpieza.
CLOCK [Reloj]--Se usa
para poner la hora del
dia.
LUCES INDICADORAS
FUNClON--Se
iluminan para indicar
cual es la funci6n que se
esta usando.
LUZ OVEN (Homo), PREHEAT (Precalentar) y LOCK (Cierre)--La
luz "OVEN" se iluminara cada vez que se enciende el homo para
mantener la temperatura seleccionada del horno. La luz
"PREHEAT" se iluminara cuando el horno se enciende para
comenzar a hornear o si la temperatura deseada es ajustada a una
temperatura mas alta que la temperatura real del horno. La luz
"LOCK" destellara hasta que se cierre la puerta (o se abre
completamente) cuando se utiliza el ciclo de autolimpieza.
Permanece iluminada despues de que se cierra la puerta.
BAKE TIME [Duraci6n
del horneado]--Se usa
para ingresar la
duraci6n del tiempo de
horneado.
TIMER ON/OFF
[Contador Encendido/
Apagado]--Se usa
para programar o
cancelar el contador
de minutos. El
contador de minutos
no comienza ni
STOP TIME [Hora de
parada]--Se usa para
programar la hora de
parada deseada para
el horneado. Se
puede usar con BAKE
TIME para programar
un ciclo diferido de
horneado.
detiene la coccion.
E h®no se puede p ©9 ama_ _pa_a:
• Hornear en forma normal (Bake)
• Indicar la duraci6n del horneado (Bake Time)
• Asar a la parrilla (Vari Broil)
• Autolimpieza (Clean)
Ra}_s u_ pane_ de co_:_t_'o s e}_}c oso
Cuando se selecciona una funcion, se oira una serial sonora cada vez que se oprima un bot6n. Si Io desea, los controles pueden ser
programados para funcionamiento silencioso. Oprima y mantenga oprimido el bot6n _. Despues de 7 segundos, el control emitira una
serial sonora. Esto impedira que los controles emitan seriales sonoras cuando sean oprimidos. Para restablecer el sonido, oprima
nuevamente y mantenga oprimido el bot6n _ por 7 segundos hasta que escuche una serial sonora.
Nota: El control volvera al modo sonoro despues de una interrupcion del suministro electrico.
C_::_'we 'S 6_" de ......
El control electr6nico del homo esta programado para funcionar en °F (Fahrenheit) cuando es despachado de fabrica. El homo se puede
programar para cualquier temperatura entre 170°F y 550°F (65°C a 287°C).
Para cambiar la temperatura a °C (Celsius) o de °C a °F (el control no debe estar en modo Bake o Clean):
1. Oprima _. En el indicador visual aparece .... .
2. Oprima y mantenga oprimido este bot6n (_ hasta que aparezca "HI" [AIta] en el indicador visual.
3. Oprima y mantenga oprimido el bot6n _ hasta que aparezca °F o °C en el indicador visual.
4. Oprima el bot6n (_ o (_ para cambiar de °F a °C o de °C a °F.
5. Oprima cualquiera de los botones de funcion para volver al modo normal de funcionamiento.
28

Programacibn del Reloj
y del Contador de
Minutos @
O OVEN
PREHEAT
t LOCK
Q I
Nota: El horno no funcionara si no se ha
programado el re oj de a hora de dia.
Cuando la estufa se enchufa por primera vez o cuando se ha interrumpido el suministro
electrico, el indicador visual mostrara en forma intermitente "12:00".
1. Oprima @.
2. Dentro de 5 segundos, oprima y mantenga oprimida (_ o (_ hasta que
aparezca en el indicador visual la hora correcta del dia.
Nota: El reloj no se puede cambiar durante el horneado programado o el ciclo de
autolimpieza.
R}_og_-amac 6_s de_ Co_stado_ de M m.£os
1. Oprima _.
2. Oprima (_ para aumentar la hora en incrementos de un minuto. Oprima y
mantenga oprimida @ para aumentar la hora en incrementos de 10 minutos. El
contador se puede programar para cualquier cantidad de tiempo desde 1 minuto a 11
horas y 59 minutos.
Nota: Si oprime primero _, el contador avanzara a 11 horas y 59 minutos.
i
3. El indicador visual muestra la cuenta regresiva del contador en minutos hasta que
quede s61o un minuto. Luego el indicador visual efectuara la cuenta regresiva en
segundos.
4. Cuando se acaba el tiempo programado, el contador emitira 3 se5ales
sonoras. Continuara sonando 3 veces cada 60 segundos hasta que se oprima
el bot6n @.
Nota: El contador de minutos no comienza ni detiene la coccion. Sirve come un contador
adicional en la cocina que sonara cuando se acabe el tiempo programado. El contador de
minutos se puede utilizar solo o junto con cualquier otra funcion del horno. Cuando el
contador de minutos se usa con cualquier otro modo, el contador se mostrara en el
indicador visual. Para ver otras funciones, oprima el bot6n de la funcion deseada.
Cambio del Contador de Minutos durante el Uso:
uando el contador de minutos este active y aparezca en el indicador visual, oprima y
mantenga oprimida [/%1 o rvl para aumentar o disminuir el tiempo.
J
Para Cancelar el Contador de Minutos antes de que se acabe el tiempo:
Oprima @.
29
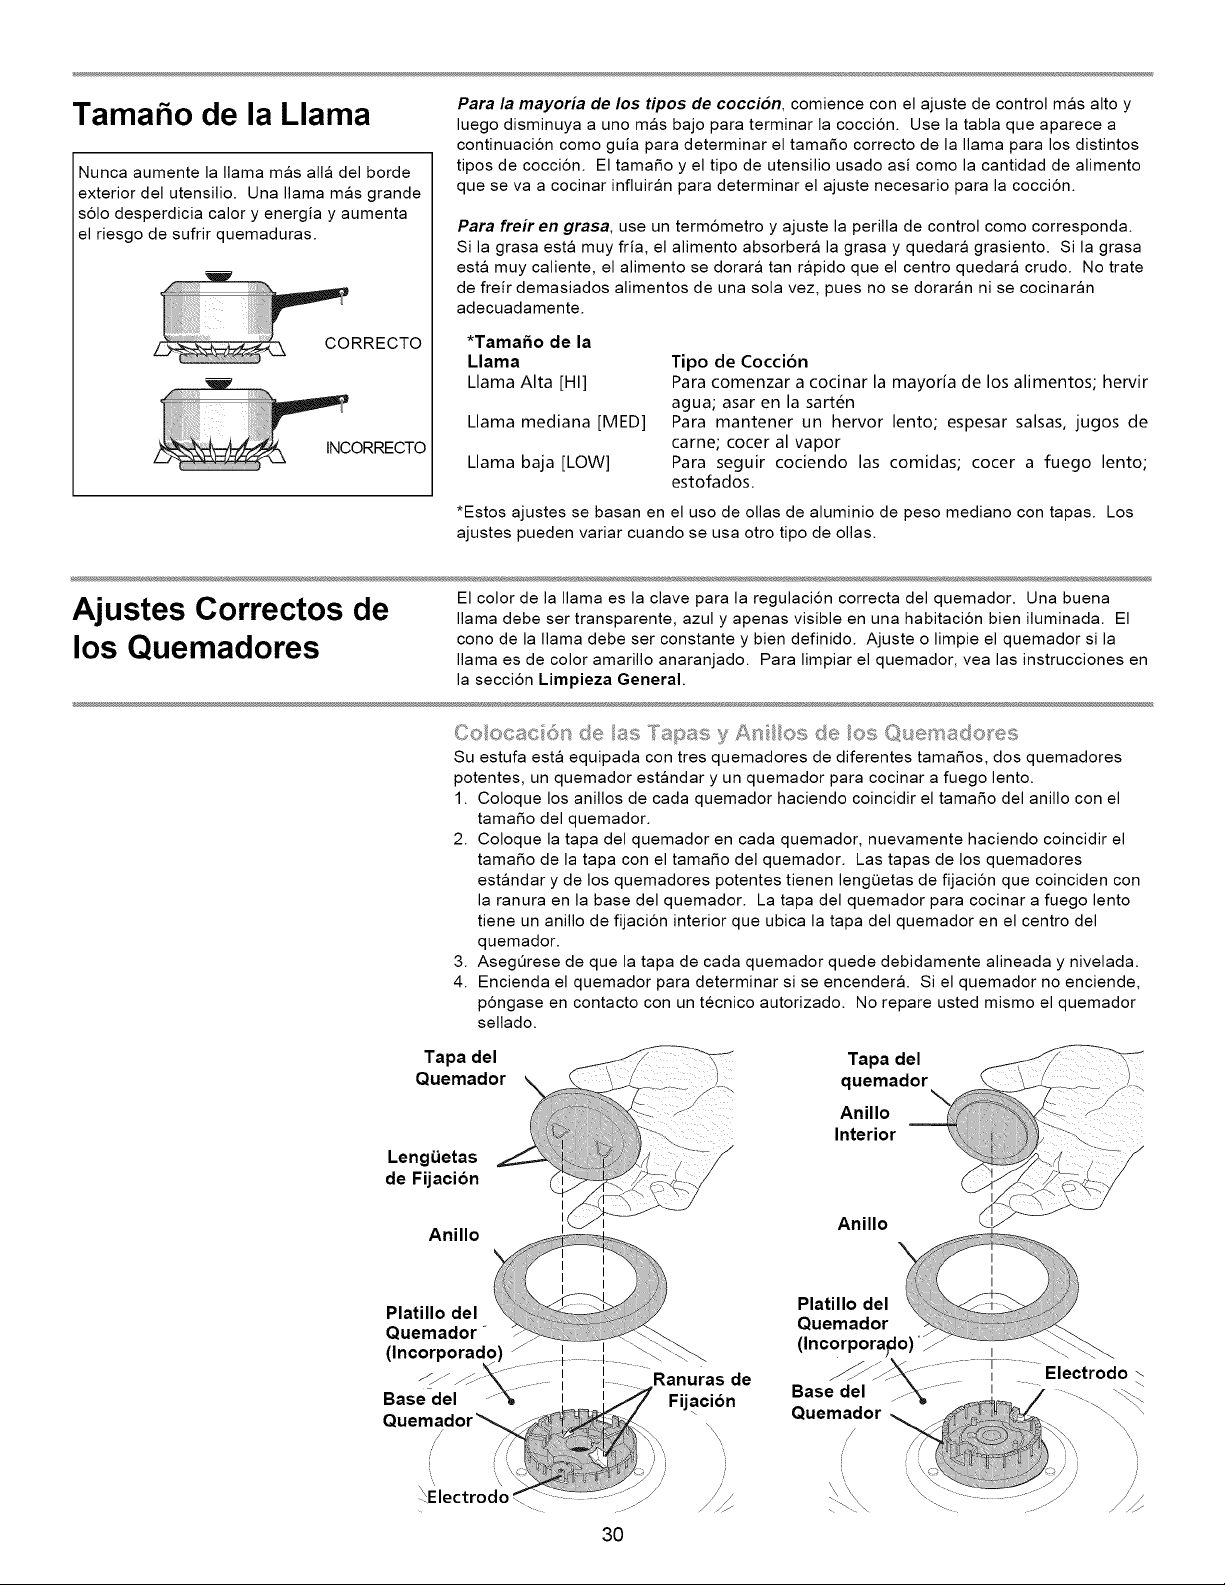
Tamaho de la Llama
Nunca aumente la llama mas alia del borde
exterior del utensilio. Una llama mas grande
s61o desperdicia calory energia y aumenta
el riesgo de sufrir quemaduras.
w
w
Para la mayoria de los tipos de coccion, comience con el ajuste de control mas alto y
luego disminuya a uno mas bajo para terminar la coccion. Use la tabla que aparece a
continuacion como guia para determinar el tama5o correcto de la llama para los distintos
tipos de coccion. El tama5o y el tipo de utensilio usado asi como la cantidad de alimento
que se va a cocinar influiran para determinar el ajuste necesario para la coccion.
Para freir en grasa, use un term6metro y ajuste la perilla de control como corresponda.
Si la grasa esta muy fria, el alimento absorbera la grasa y quedara grasiento. Si la grasa
esta muy caliente, el alimento se dorara tan rapido que el centro quedara crudo. No trate
de freir demasiados alimentos de una sola vez, pues no se doraran ni se cocinaran
adecuadamente.
*Tamaho de la
Llama
Llama Alta [HI]
Llama mediana [MED]
Llama baja [LOW]
Tipo de Coccion
Para comenzar a cocinar la mayoria de los alimentos; hervir
agua; asar en la sarten
Para mantener un hervor lento; espesar salsas, jugos de
came; cocer al vapor
Para seguir cociendo las comidas; cocer a fuego lento;
estofados.
*Estos ajustes se basan en el uso de ollas de aluminio de peso mediano con tapas. Los
ajustes pueden variar cuando se usa otro tipo de ollas.
•-,j •^ ;us*es Correctos U_41'_ El color de la llama es la clave para la regulacion correcta del quemador. Una buena
llama debe set transparente, azul y apenas visible en una habitacion bien iluminada. El
Q cono de la llama debe ser constante y bien definido. Ajuste o limpie el quemador si la
los uemadores llama es de color amarillo anaranjado. Para limpiar el quemador, vea las instrucciones en
la seccion Limpieza General.
Co_®csc @s de as 'Ta_:_asy As os de os @,,_emado_:es
Su estufa esta equipada con tres quemadores de diferentes tama_os, dos quemadores
potentes, un quemador estandar y un quemador para cocinar a fuego lento.
1. Coloque los anillos de cada quemador haciendo coincidir el tama_o del anillo con el
tama_o del quemador.
2. Coloque la tapa del quemador en cada quemador, nuevamente haciendo coincidir el
tama_o de la tapa con el tama_o del quemador. Las tapas de los quemadores
estandar y de los quemadores potentes tienen leng0etas de fijacion que coinciden con
la ranura en la base del quemador. La tapa del quemador para cocinar a fuego lento
tiene un anillo de fijacion interior que ubica la tapa del quemador en el centro del
quemador.
3. Aseg0rese de que la tapa de cada quemador quede debidamente alineada y nivelada.
4. Encienda el quemador para determinar si se encender& Si el quemador no enciende,
p6ngase en contacto con un tecnico autorizado. No repare usted mismo el quemador
sellado.
Tapa del
Quemador
/:
Tapa del
LengUetas
de Fijacion
Anillo
I
Anillo
Platillo del
Quemador _
(Incorporado) ..........I ...... II....
FJ_ _"R " ...... I 1 Ranuras de
Base del .....% I I
Fijacion
Q
/
'\ /
30
Platillo del
Quemador
I
Base del .......\ - I
Quemador
/
/
i i
Electrodo \
/
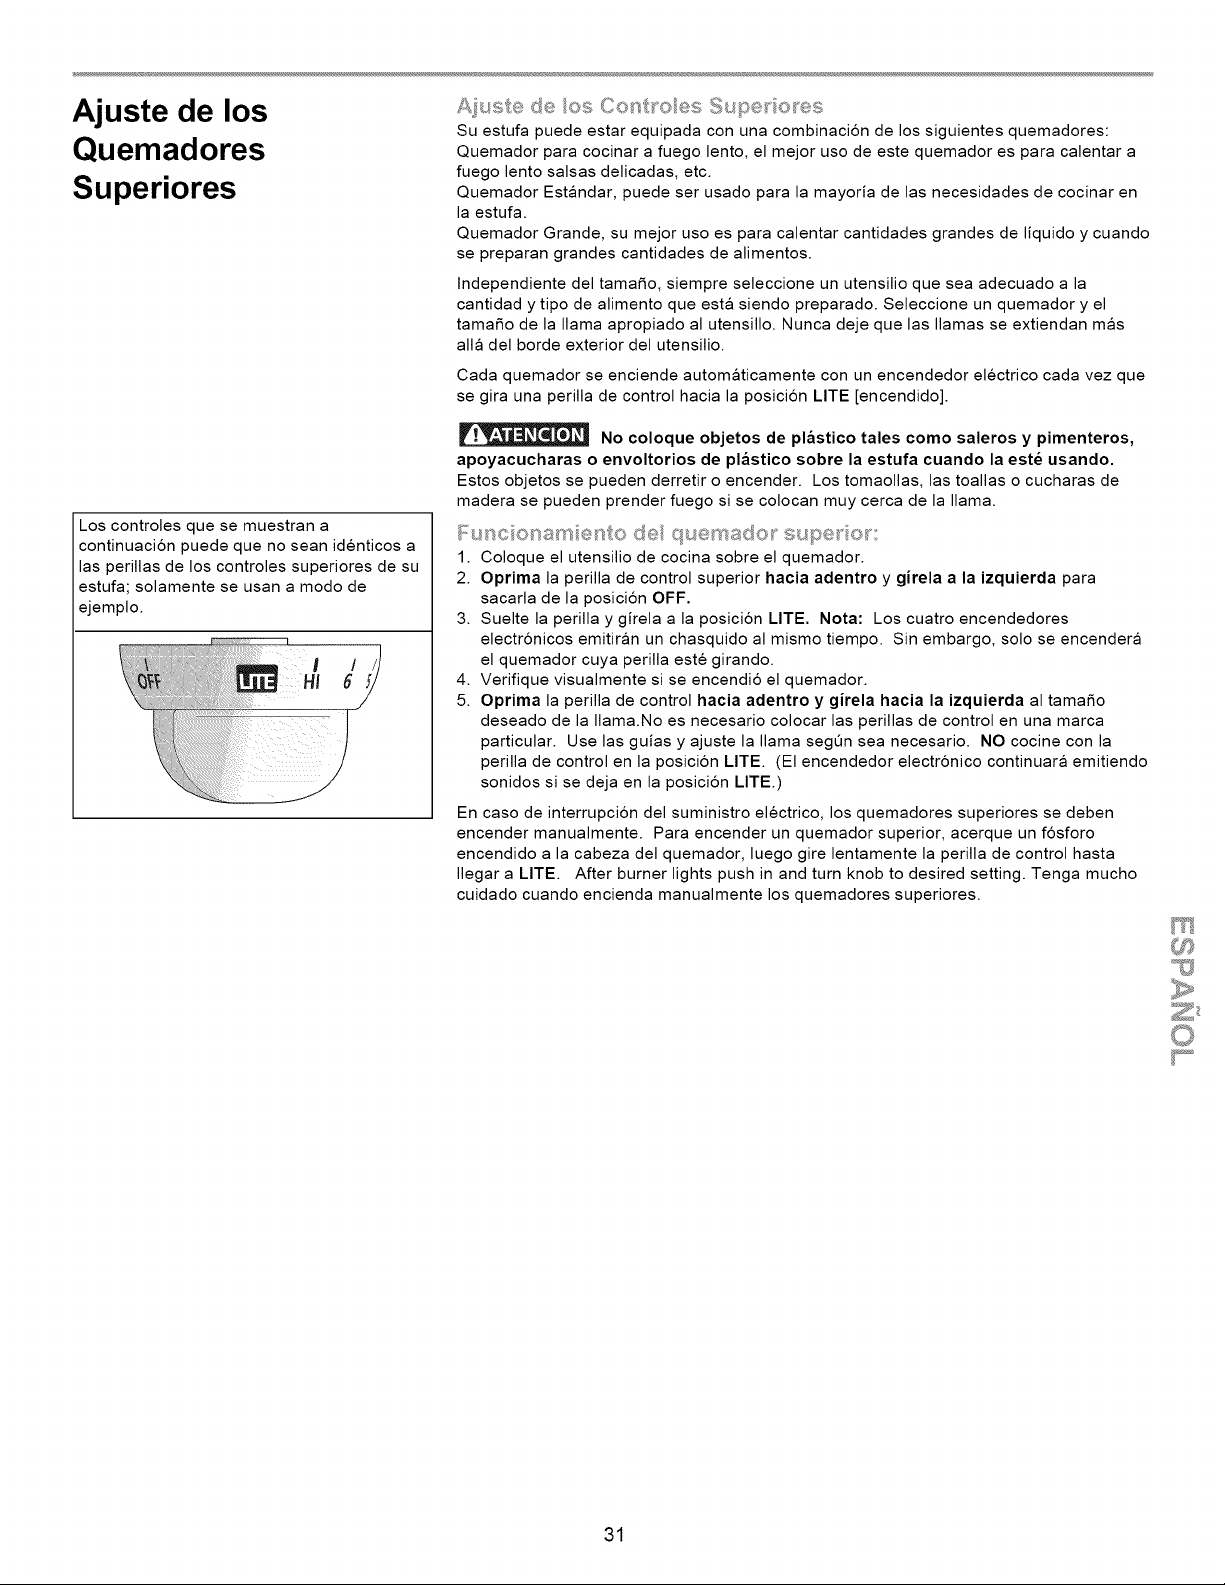
Ajuste de los
Quemadores
Superiores
Los controles que se muestran a
continuacion puede que no sean identicos a
las perillas de los controles superiores de su
estufa; solamente se usan a modo de
ejemplo.
Ajeste de los Co_st_o/es Supe_,_o es
Su estufa puede estar equipada con una combinacion de los siguientes quemadores:
Quemador para cocinar a fuego lento, el mejor uso de este quemador es para calentar a
fuego lento salsas delicadas, etc.
Quemador Estandar, puede ser usado para la mayoria de las necesidades de cocinar en
la estufa.
Quemador Grande, su mejor uso es para calentar cantidades grandes de liquido y cuando
se preparan grandes cantidades de alimentos.
Independiente del tama5o, siempre seleccione un utensilio que sea adecuado a la
cantidad y tipo de alimento que esta siendo preparado. Seleccione un quemador y el
tama5o de la llama apropiado al utensillo. Nunca deje que las llamas se extiendan mas
alia del borde exterior del utensilio.
Cada quemador se enciende automaticamente con un encendedor electrico cada vez que
se gira una perilla de control hacia la posicion LITE [encendido].
No coloque objetos de plastico tales como saleros y pimenteros,
apoyacucharas o envoltorios de plastico sobre la estufa cuando la este usando.
Estos objetos se pueden derretir o encender. Los tomaollas, las toallas o cucharas de
madera se pueden prender fuego si se colocan muy cerca de la llama.
Fu_c o_am e_to de quelsado_ s_,@e_ o_x
1. Coloque el utensilio de cocina sobre el quemador.
2. Oprima la perilla de control superior hacia adentro y girela a la izquierda para
sacarla de la posicion OFF.
3. Suelte la perilla y girela a la posicion LITE. Nota: Los cuatro encendedores
electr6nicos emitiran un chasquido al mismo tiempo. Sin embargo, solo se encendera
el quemador cuya perilla este girando.
4. Verifique visualmente si se encendio el quemador.
5. Oprima la perilla de control hacia adentro y girela hacia la izquierda al tama_o
deseado de la llama.No es necesario colocar las perillas de control en una marca
particular. Use las guias y ajuste la llama segQn sea necesario. NO cocine con la
perilla de control en la posicion LITE. (El encendedor electr6nico continuara emitiendo
sonidos si se deja en la posicion LITE)
En caso de interrupcion del suministro electrico, los quemadores superiores se deben
encender manualmente. Para encender un quemador superior, acerque un f6sforo
encendido a la cabeza del quemador, luego gire lentamente la perilla de control hasta
Ilegar a LITE. After burner lights push in and turn knob to desired setting. Tenga mucho
cuidado cuando encienda manualmente los quemadores superiores.
31
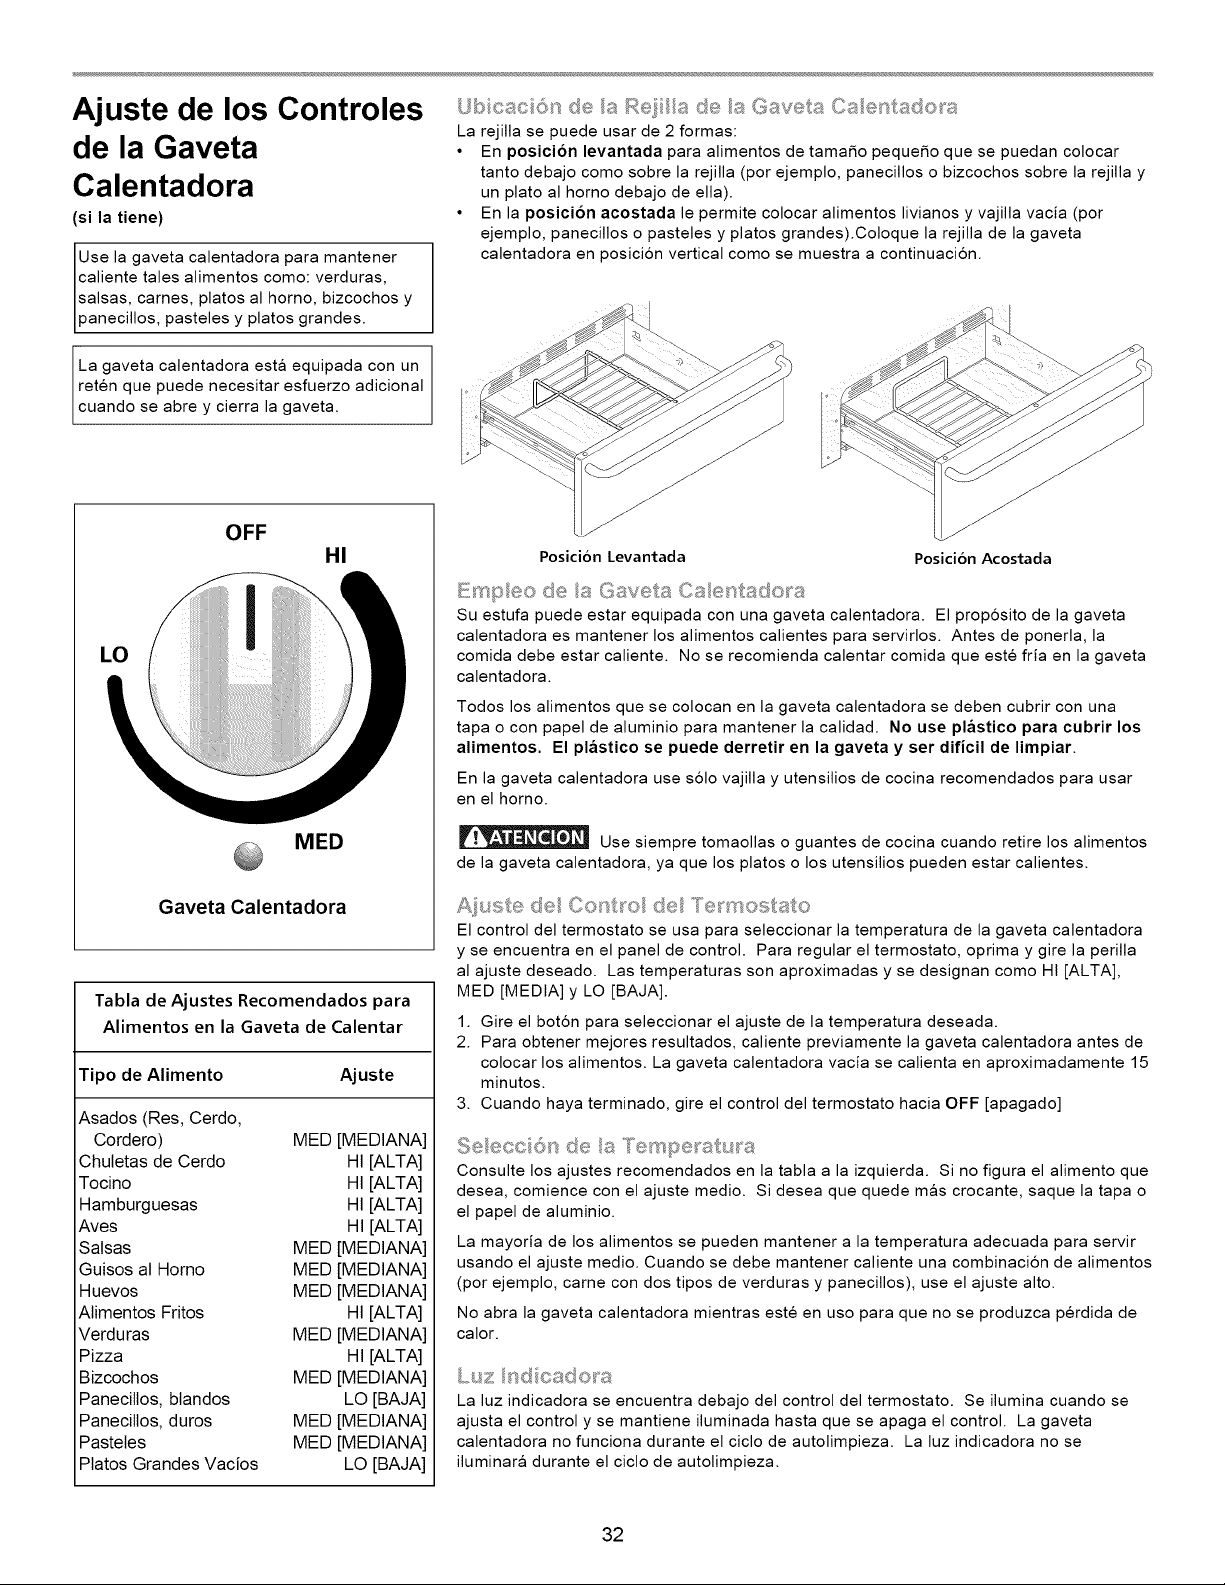
Ajuste de los Controles
de la Gaveta
Calentadora
(si la tiene)
Use la gaveta calentadora para mantener
caliente tales alimentos como: verduras,
salsas, carnes, platos al homo, bizcochos y
3anecillos, pasteles y platos grandes.
La gaveta calentadora esta equipada con un
reten que puede necesitar esfuerzo adicional
cuando se abre y cierra la gaveta.
La rejilla se puede usar de 2 formas:
• En posici6n levantada para alimentos de tama_o peque_o que se puedan colocar
tanto debajo como sobre la rejilla (por ejemplo, panecillos o bizcochos sobre la rejilla y
un plato al homo debajo de ella).
• En la posici6n acostada le permite colocar alimentos livianos y vajilla vacia (por
ejemplo, panecillos o pasteles y platos grandes).Coloque la rejilla de la gaveta
calentadora en posici6n vertical como se muestra a continuacion.
OFF
HI
MED
Gaveta Calentadora
Tabla de Ajustes Recomendados para
Alimentos en la Gaveta de Calentar
Tipo de Alimento Ajuste
Asados (Res, Cerdo,
Cordero) MED [MEDIANA]
Chuletas de Cerdo HI [ALTA]
Tocino HI [ALTA]
Hamburguesas HI [ALTA]
Aves HI [ALTA]
Salsas MED [MEDIANA]
Guisos al Homo MED [MEDIANA]
Huevos MED [MEDIANA]
Alimentos Fritos HI [ALTA]
Verduras MED [MEDIANA]
Pizza HI [ALTA]
Bizcochos MED [MEDIANA]
Panecittos, blandos LO [BAJA]
Panecillos, duros MED [MEDIANA]
Pasteles MED [MEDIANA]
Platos Grandes Vacios LO [BAJA]
Posicion Levantada
Posicion Acostada
........_ a Gavet_ Ca e__tsd : s
Su estufa puede estar equJpada con una gaveta calentadora. El prop6sito de la gaveta
calentadora es mantener los alirnentos calientes para servJrlos. Antes de ponerla, la
comJda debe estar caliente. No se recomJenda calentar comJda que este fria en la gaveta
calentadora.
Todos los alimentos que se colocan en la gaveta calentadora se deben cubrir con una
tapa o con papel de aluminio para mantener la calidad. No use plastico para cubrir los
alimentos. El plastico se puede derretir en la gaveta y ser dificil de limpiar.
En la gaveta calentadora use s61o vajilla y utensilios de cocina recomendados para usar
en el horno.
Use siempre tomaollas o guantes de cocina cuando retire los alimentos
de la gaveta calentadora, ya que los platos o los utensilios pueden estar calientes.
A i_,,,ste <e C_::_'t_-_¢de Te m_/:stato
El control del termostato se usa para seleccionar la temperatura de la gaveta calentadora
y se encuentra en el panel de control. Para regular el termostato, optima y gire la perilla
al ajuste deseado. Las temperaturas son aproximadas y se designan como HI [ALTA],
MED [MEDIA] y LO [BAJA].
1. Gire el bot6n para seleccionar el ajuste de la temperatura deseada.
2. Para obtener mejores resultados, caliente previamente la gaveta calentadora antes de
colocar los alimentos. La gaveta calentadora vacia se calienta en aproximadamente 15
minutos.
3. Cuando haya terminado, gire el control del termostato hacia OFF [apagado]
d_._ a Ten'/s®_'stu a
Consulte los ajustes recomendados en la tabla a la izquierda. Si no figura el alimento que
desea, comience con el ajuste medio. Si desea que quede mas crocante, saque la tapa o
el papel de aluminio.
La mayoria de los alimentos se pueden mantener a la temperatura adecuada para servir
usando el ajuste medio. Cuando se debe mantener caliente una combinacion de alimentos
(pot ejemplo, came con dos tipos de verduras y panecillos), use el ajuste alto.
No abra la gaveta calentadora mientras este en uso para que no se produzca perdida de
calor.
L_.sz hd cadets
La luz indicadora se encuentra debajo del control del termostato. Se ilumina cuando se
ajusta el control y se mantiene iluminada hasta que se apaga el control. La gaveta
calentadora no funciona durante el ciclo de autolimpieza. La luz indicadora no se
iluminara durante el ciclo de autolimpieza.
32
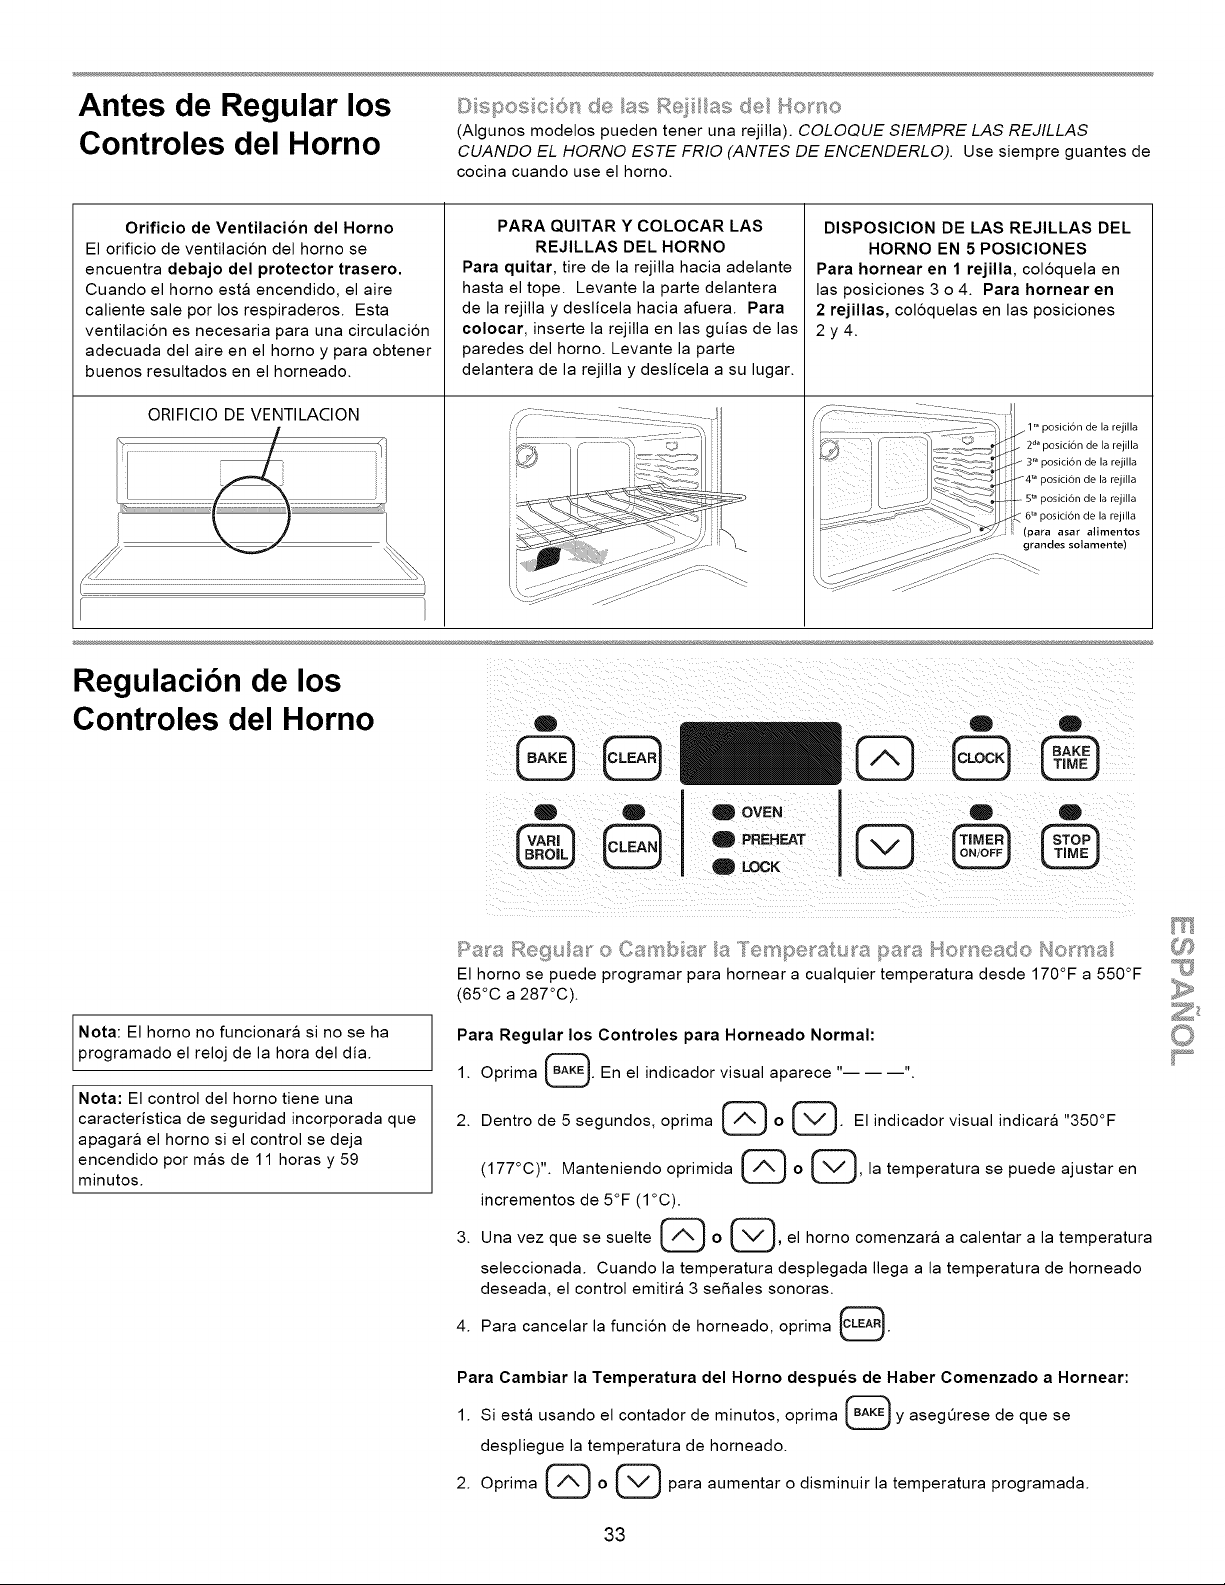
Antes de Regular los
Controles del Horno
aS I:'O T ©
(AIgunos modelos pueden tener una rejilla). COLOQUE SIEMPRE LAS REJILLAS
CUANDO EL HORNO ESTE FRIO (ANTES DE ENCENDERLO). Use siempre guantes de
cocina cuando use el homo.
Orificio de Ventilacion del Horno
El orificio de ventilaci6n del homo se
encuentra debajo del protector trasero.
Cuando el homo esta encendido, el aire
caliente sale pot los respiraderos. Esta
ventilaci6n es necesaria para una circulaci6n
adecuada del aire en el homo y para obtener
buenos resultados en elhorneado_
I ORIFICIO DE VENTILACION
PARA QUlTAR Y COLOCAR LAS
REJILLAS DEL HORNO
Para quitar, tire de la rejilla hacia adelante
hasta el tope. Levante la parte delantera
de la rejilla y deslicela hacia afuera. Para
DISPOSICION DE LAS REJILLAS DEL
HORNO EN 5 POSICIONES
Para hornear en 1 rejilla, col6quela en
las posiciones 3 o 4. Para hornear en
2 rejillas, coloquelas en las posiciones
colocar, inserte la rejilla en las guias de las
paredes del horno. Levante la parte
delantera de la rejilla y deslicela a su lugar.
2y4.
.1 _ posici6n de la rejilla
2d" posici6n de la rejilla
3 _" posici6n de la rejilla
4 a posici6n de la rejilla
5 _ posici6n de la rejilla
6 t_ posicion de la rejilla
asar alimentos
grandes solamente)
Regulacibn de los
Controles del Horno
O O _ OVEN _
Nota: El homo no funcionara si no se ha
programado el reloj de la hora del dia.
Nota: El control del homo tiene una
caracteristica de seguridad incorporada que
apagara el homo si el control se deja
encendido pot mas de 11 horas y 59
minutos.
El homo se puede programar para hornear a cualquier temperatura desde 170°F a 550°F
(65°C a 287°C).
Para Regular los Controles para Horneado Normal:
1. Oprima _. En el indicador visual aparece .... .
2. Dentro de 5 segundos, oprima (_ o (_. El indicador visual indicara "350°F
(17700) ". Manteniendo oprimida [_ o (_, la temperatura se puede ajustar en
incrementos de 5°F (1°C).
3. Una vez que se suelte G o @, el homo comenzara a calentar a la temperatura
seleccionada. Cuando la temperatura desplegada Ilega a la temperatura de horneado
deseada, el control emitira 3 se5ales sonoras.
4. Para cancelar la funcion de horneado, oprima 0
Para Cambiar la Temperatura del Horno despues de Haber Comenzado a Hornear:
1. Siesta usando el contador de minutos, oprima _ y asegQrese de que se
despliegue la temperatura de horneado.
2. Oprima r/_l o rvl para aumentar o disminuir la temperatura programada.
i
33
Regulacibn de los
Controles del Horno
(continuacion)
_:_og_"amac 6 s de_ Co_s_:ado_ A_>_om£it ¢0 (F_ _sc 6_s de Ho_xsead®
Los controles BAKE TIME y STOP TIME activan la funcion Timed Bake [Horneado
Programado]. El contador automatico encendera y apagara el homo en las horas que ha
seleccionado con anterioridad. El homo se puede programar para que comience
inmediatamente y se apague en forma automatica o para que empiece a hornear en una
hora posterior y se apague automaticamente.
_r.v_ Tenga mucho cuidado
cuando use el contador automatico. Use el
contador automatico cuando cocine carnes
curadas o congeladas, asi como la mayoria
de las frutas y verduras. Los alimentos que
se puedan echar a perder facilmente tales
como la leche, huevos, pescado, came de
res o de ave deben set refrigerados primero.
AQn cuando han estado refrigerados, no
deben dejarse en el homo pot mas de 1 hora
antes de comenzar la cocci6n y se deben
sacar rapidamente una vez que esten listos.
Programacion del Horno para Horneado Inmediato y se Apague Automaticamente:
1. AsegQrese de que el reloj indique la hora correcta del dia.
2. Coloque los alimentos en el homo.
3. Optima @.
4. Dentro de 5 segundos, oprima G o G' El indicador visual mostrara "350°F
(177°C) " Manteniendo oprimida G o G' Is temperatura se puede ajustar en
incrementos de 5°F (1°C).
5. Optima _. El indicador visual mostrara intermitentemente "0:00".
6. Oprima (_ o (_ hasta que aparezca en el indicador visual el tiempo de
horneado deseado.
Programacion del Horno para Tiempo de Horneado Diferido y Parada Automatica:
1. AsegQrese de que el reloj indique la hora correcta del dia.
2. Coloque los alimentos en el homo.
3. Optima _.
4. Dentro de5 segundos, oprima G o _. El indicador mostrara "350°F (177°C) ''.
Manteniendo oprimida G o @, la temperatura puede entonces ser ajustada en
incrementos de 5°F (1°C).
5. Optima _. "0:00" destellara en el indicador.
6. Oprima (_ o (_ hasta que aparezca la cantidad deseada de tiempo de
horneado.
7. Optima @. El tiempo de parada mas temprano posible aparecera en el indicador.
8. Oprima @ o G hasta que aparezca en el indicador el tiempo de parada
deseado.
9. Una vez que se han programado los controles, el control calcula la hora en que debe
comenzar el horneado a fin de terminar en la hora que usted program6.
Despues de Programar los Controles:
a. El homo se encendera y comenzara a calentar a la temperatura de horneado
seleccionada.
b. La temperatura del homo aparecera en el indicador visual.
Expiracion del Tiempo de Horneado:
a. Aparecera "END" [Fin] en el indicador visual y el horno se apagara automaticamente.
b. El control emitira 3 se5ales sonoras cada 60 segundos hasta que oprima [CLEAR1.
Cambio de la Temperatura del Horno o del Tiempo de Horneado despues de
Empezado el Horneado:
1. Oprima el bot6n de funcion que desea cambiar.
2. Oprima _ o _ para cambiar el ajuste.
34
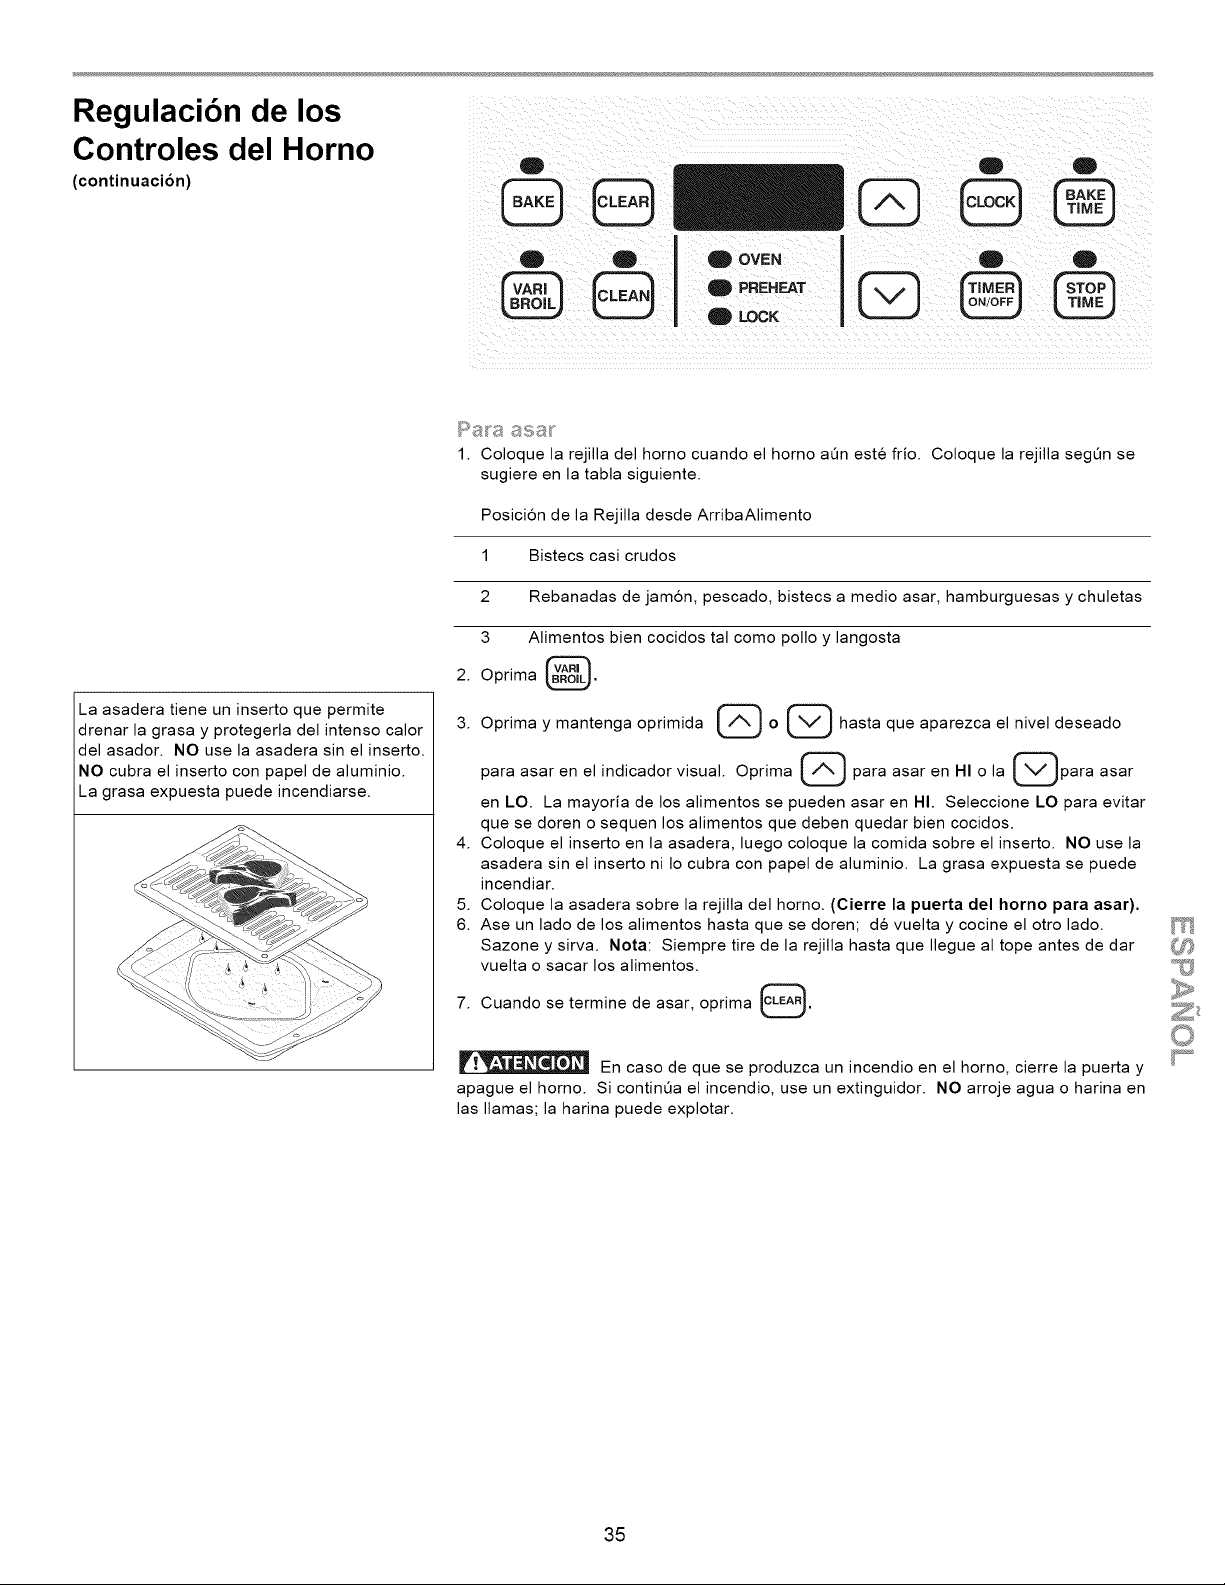
Regulacibn de los
Controles del Horno
(continuaci6n)
0 OVEN
PREHEAT
g LOCK
D O
La asadera tiene un inserto que permite
drenar la grasa y protegerla del intenso calor
del asador. NO use la asadera sin el inserto.
NO cubra el inserto con papel de aluminio.
La grasa expuesta puede incendiarse.
Ra_a @sa/__
1. Coloque la rejilla del horno cuando el horno aOn est¢ frio. Coloque la rejilla segOn se
sugiere en la tabla siguiente.
Posicion de la Rejilla desde ArribaAlimento
1 Bistecs casi crudos
2 Rebanadas de jam6n, pescado, bistecs a medio asar, hamburguesas y chuletas
3 Alimentos bien cocidos tal como polio y langosta
2. Oprima _.
3. Oprima y mantenga oprimida G o _ hasta que aparezca el nivel deseado
para asar en el indicador visual. Oprima @ para asar en HI o la @para asar
en LO. La mayoria de los alimentos se pueden asar en HI. Seleccione LO para evitar
que se doren o sequen los alimentos que deben quedar bien cocidos.
4. Coloque el inserto en la asadera, luego coloque la comida sobre el inserto. NO use la
asadera sin el inserto ni Io cubra con papel de aluminio. La grasa expuesta se puede
incendiar.
5. Coloque la asadera sobre la rejilla del horno. (Cierre la puerta del homo para asar).
6. Ase un lado de los alimentos hasta que se doren; de vuelta y cocine el otro lado.
Sazone y sirva. Nota: Siempre tire de la rejilla hasta que Ilegue al tope antes de dar
vuelta o sacar los alimentos.
7. Cuando se termine de asar, oprima [_-_.
En caso de que se produzca un incendio en el homo, cierre la puerta y
apague el horno. Si continua el incendio, use un extinguidor. NO arroje agua o harina en
las llamas; la harina puede explotar.
35
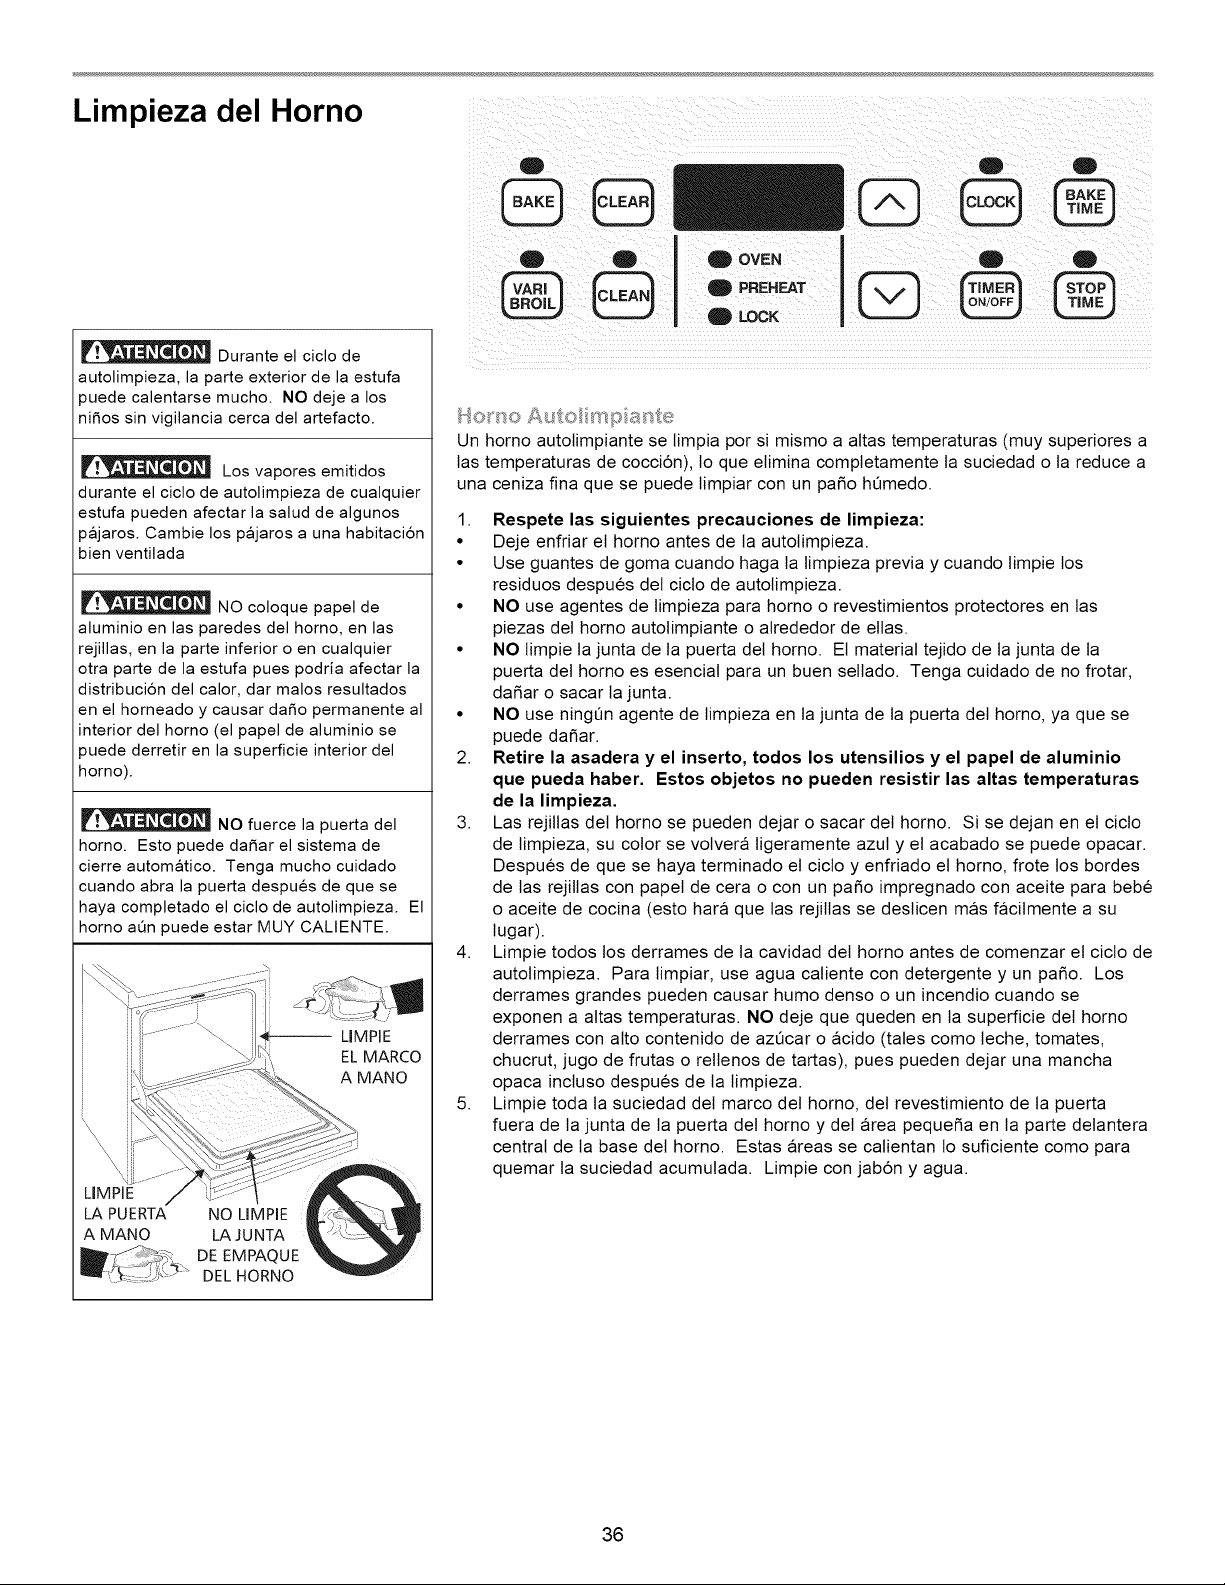
Limpieza del Horno
Durante el ciclo de
autolimpieza, la parte exterior de la estufa
3uede calentarse mucho. NO deje a los
ni_os sin vigilancia cerca del artefacto.
r.'_ Los vapores emitidos
durante el ciclo de autolimpieza de cualquier
estufa pueden afectar la salud de algunos
pajaros. Cambie los pajaros a una habitacion
bien ventilada
, • , w , NOcoloquepapelde
aluminio en las paredes del homo, en las
rejillas, en la parte inferior o en cualquier
otra parte de la estufa pues podria afectar la
distribucion del calor, dar malos resultados
en el horneado y causar da_o permanente al
interior del homo (el papel de aluminio se
3uede derretir en la superficie interior del
homo).
NO fuerce la puerta del
horno. Esto puede da_ar el sistema de
cierre automatico. Tenga mucho cuidado
cuando abra la puerta despues de que se
haya completado el ciclo de autolimpieza. El
homo aOn puede estar MUY CALIENTE.
-- LIMPIE
EL MARCO
A MANO
LIMPIE
LA PUERTA NO LIMPIE i
A MANO LA JUNTA
DE EMPAQUE
,,..... _-, DEL HORNO
O D O
@13 @@@
S OVEN
O PREHEAT
. g LOCK .
t Q
@@@
_4o_°u_oAuto mp _:_nte
Un homo autolimpiante se timpia por si mismo a altas temperaturas (muy superiores a
tas temperaturas de cocci6n), to que elimina completamente la suciedad o la reduce a
una ceniza fina que se puede limpiar con un paBo hOmedo.
1. Respete las siguientes precauciones de limpieza:
• Deje enfriar el homo antes de ta autolimpieza.
• Use guantes de goma cuando haga la limpieza previa y cuando limpie los
residuos despues del cicto de autolimpieza.
• NO use agentes de timpieza para homo o revestimientos protectores en las
piezas del homo autolimpiante o alrededor de eltas.
• NO timpie la junta de la puerta del homo. El material tejido de ta junta de ta
puerta del homo es esencial para un buen sellado. Tenga cuidado de no frotar,
da_ar o sacar ta junta.
• NO use ning0n agente de limpieza en la junta de la puerta del homo, ya que se
puede da_ar.
2. Retire la asadera y el inserto, todos los utensilios y el papel de aluminio
que pueda haber. Estos objetos no pueden resistir las altas temperaturas
de la limpieza.
3. Las rejittas del homo se pueden dejar o sacar del homo. Si se dejan en el ciclo
de timpieza, su color se volvera tigeramente azul y el acabado se puede opacar.
Despues de que se haya terminado el cicto y enfriado el homo, frote los bordes
de tas rejitlas con papel de cera o con un paso impregnado con aceite para bebe
o aceite de cocina (esto hara que las rejittas se deslicen mas facilmente a su
lugar).
4. Limpie todos los derrames de ta cavidad del homo antes de comenzar et cicto de
autolimpieza. Para limpiar, use agua caliente con detergente y un paso. Los
derrames grandes pueden causar humo denso o un incendio cuando se
exponen a altas temperaturas. NO deje que queden en la superficie del homo
derrames con alto contenido de az0car o acido (tales como teche, tomates,
chucrut, jugo de frutas o rellenos de tartas), pues pueden dejar una mancha
opaca inctuso despues de la limpieza.
5. Limpie toda la suciedad del marco del homo, del revestimiento de ta puerta
fuera de la junta de la puerta del homo y del area pequeSa en la parte delantera
central de ta base del homo. Estas areas se calientan lo suficiente como para
quemar la suciedad acumulada. Limpie con jab6n y agua.
36
Limpieza del Horno
(continuacion)
O OVEN
PREHEAT
g LOCK
D 0
Tenga mucho cuidado
cuando abra la puerta despues del ciclo de
autolimpieza. Permanezca al lado del homo
cuando abra la puerta para dejar salir el aire
o vapor caliente.
f:_ NO fuerce la puerta del
horno. Esto puede da5ar el sistema de
cierre automatico de la puerta. Tenga mucho
cuidado cuando abra la puerta despues de
que se haya completado el ciclo de
autolimpieza, ya que el homo aOn puede
estar MUY CALIENTE.
Comie_'_:£_ode Cco de A_,_£o mp e;sa
*Recomendamos un ciclo de 2 horas para un homo no muy sucio y un ciclo de 3 horas
para hornos medianamente sucios a muy sucios (para garantizar resultados
satisfactorios).
Ajuste de los Controles para un Ciclo de Autolimpieza:
1. AsegQrese de que el reloj muestre la hora del dia correcta.
2. Optima _. El indicador visual muestra .... .
3. Optima (_ asta que aparezca "3:00" en el indicador visual para un ciclo de tres
horas o bien optima (_ hasta que aparezca "2:00" en el indicador visual para un
ciclo de dos horas.
4. Una vez que se deja de oprimir (_ o @, en el indicador visual aparece "CIn"
[limpiar].
5. Tan pronto se hart ajustado los controles, el seguro mecanico comenzara a cerrase
automaticamente y la luz indicadora "LOCK" comenzara a destellar. NO abra la puerta
mientras la luz esta destellando (el seguro se cierra en aproximadamente 15
segundos).
6. La luz "LOCK" se mantendra iluminada hasta que se complete o cancele el ciclo de
autolimpieza y haya bajado la temperatura del homo.
Termino del Ciclo de Autolimpieza:
1. La hora del dia aparecera en el indicador visual y la luz "LOCK" continuara iluminada.
2. La puerta del homo se puede abrir una vez que se haya enfriado el homo durante
aproximadamente 1 HORA y se haya apagado la luz "LOCK".
Raw'ads o _'_te_},'spc @s de_ Coo de Auto mp e;sa
SJ es necesarJo detener o JnterrumpJr el cJclo de autolimpJeza debJdo al exceso de calor o
a un JncendJo:
1. Oprima _ CLEAR.
2. Se puede abrJr la puerta del homo una vez que este se haya enfrJado por Io menos por
1 HORA y que se haya apagado la luz "LOCK".
3. CorrJja Io que ocasJon6 el humo.
4. Vuelva a JnJcJar el ciclo de autolimpJeza una vez que se hayan corregido todas las
causas.
37
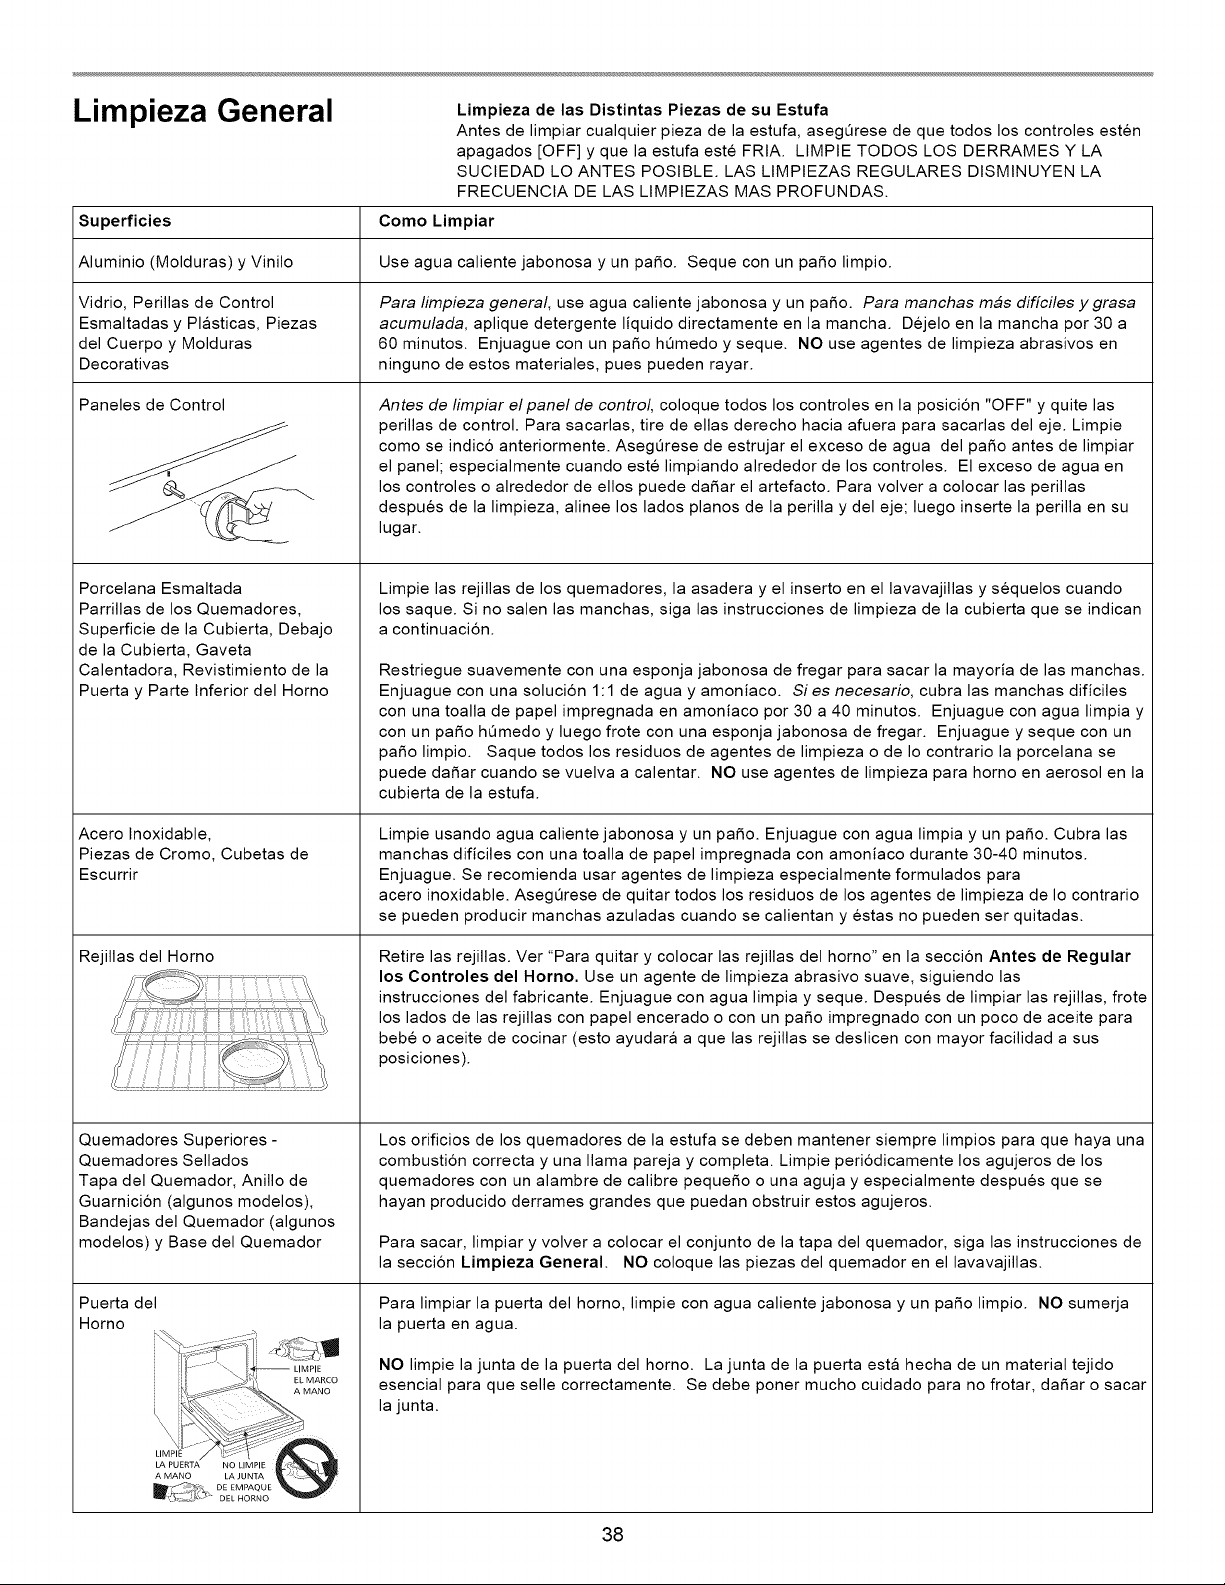
Limpieza General
Limpieza de las Distintas Piezas de su Estufa
Antes de limpiar cualquier pieza de la estufa, aseg0rese de que todos los controles esten
apagados [OFF] y que la estufa este FRtA. LIMPIE TODOS LOS DERRAMES Y LA
SUCIEDAD LO ANTES POSIBLE. LAS LIMPIEZAS REGULARES DISMINUYEN LA
FRECUENCIA DE LAS LIMPIEZAS MAS PROFUNDAS.
Superficies Como Limpiar
Aluminio (Molduras) y Vinilo Use agua caliente jabonosa y un patio. Seque con un patio limpio.
Vidrio, Perillas de Control Para limpieza general, use agua caliente jabonosa y un patio. Para manchas mbs dificiles ygrasa
Esmaltadas y Plasticas, Piezas acumulada, aplique detergente liquido directamente en la mancha. Dejelo en la mancha por 30 a
del Cuerpo y Molduras 60 minutos. Enjuague con un paso h0medo y seque. NO use agentes de limpieza abrasivos en
Decorativas ninguno de estos materiales, pues pueden rayar.
Paneles de Control
Porcelana Esmaltada
Parrillas de los Quemadores,
Superficie de la Cubierta, Debajo
de la Cubierta, Gaveta
Calentadora, Revistimiento de la
Puerta y Parte Inferior del Horno
Acero lnoxidable,
Piezas de Cromo, Cubetas de
Escurrir
Rejillas del Horno
Quemadores Superiores -
Quemadores Sellados
Tapa del Quemador, Anillo de
Guarnicion (algunos modelos),
Bandejas del Quemador (algunos
modelos) y Base del Quemador
Puerta del
Horno
:: :i ........ \ \ LIMPIE
LIMPI
LA PUERTA NO LIMPIE
A MANO LA JUNTA
Antes de limpiar el panel de control, coloque todos los controles en la posicion "OFF" y quite las
perillas de control. Para sacarlas, tire de elias derecho hacia afuera para sacarlas del eje. Limpie
como se indic6 anteriormente. Aseg0rese de estrujar el exceso de agua del paso antes de limpiar
el panel; especialmente cuando este limpiando alrededor de los controles. El exceso de agua en
los controles o alrededor de ellos puede da5ar el artefacto. Para volver a colocar las perillas
despues de la limpieza, alinee los lados pianos de la perilla y del eje; luego inserte la perilla en su
lugar.
Limpie las rejillas de los quemadores, la asadera y el inserto en el lavavajillas y sequelos cuando
los saque. Si no salen las manchas, siga las instrucciones de limpieza de la cubierta que se indican
a continuacion.
Restriegue suavemente con una esponja jabonosa de fregar para sacar la mayoria de las manchas.
Enjuague con una soluci6n 1:1 de agua y amoniaco. Si es necesario, cubra las manchas dificiles
con una toalla de papel impregnada en amoniaco por 30 a 40 minutos. Enjuague con agua limpia y
con un pa5o h0medo y luego frote con una esponja jabonosa de fregar. Enjuague y seque con un
pa5o limpio. Saque todos los residuos de agentes de limpieza o de Io contrario la porcelana se
puede da5ar cuando se vuelva a calentar. NO use agentes de limpieza para horno en aerosol en la
cubierta de la estufa.
Limpie usando agua caliente jabonosa y un paso. Enjuague con agua limpia y un pa5o. Cubra las
manchas dificiles con una toalla de papel impregnada con amoniaco durante 30-40 minutos.
Enjuague. Se recomienda usar agentes de limpieza especialmente formulados para
acero inoxidable. Aseg0rese de quitar todos los residuos de los agentes de limpieza de Io contrario
se pueden producir manchas azuladas cuando se calientan y estas no pueden ser quitadas.
Retire las rejillas. Ver "Para quitar y colocar las rejillas del horno" en la seccion Antes de Regular
los Controles del Horno. Use un agente de limpieza abrasivo suave, siguiendo las
instrucciones del fabricante. Enjuague con agua limpia y seque. Despues de limpiar las rejillas, frote
los lados de las rejillas con papel encerado o con un pa5o impregnado con un poco de aceite para
bebe o aceite de cocinar (esto ayudara a que las rejillas se deslicen con mayor facilidad a sus
posiciones).
Los orificios de los quemadores de la estufa se deben mantener siempre limpios para que haya una
combustion correcta y una llama pareja y completa. Limpie periodicamente los agujeros de los
quemadores con un alambre de calibre peque5o o una aguja y especialmente despues que se
hayan producido derrames grandes que puedan obstruir estos agujeros.
Para sacar, limpiar y volver a colocar el conjunto de la tapa del quemador, siga las instrucciones de
la seccion Limpieza General. NO coloque las piezas del quemador en el lavavajillas.
Para limpiar la puerta del homo, limpie con agua caliente jabonosa y un pa5o limpio. NO sumerja
la puerta en agua.
NO limpie la junta de la puerta del horno. La junta de la puerta esta hecha de un material tejido
esencial para que selle correctamente. Se debe poner mucho cuidado para no frotar, daSar o sacar
la junta.
38
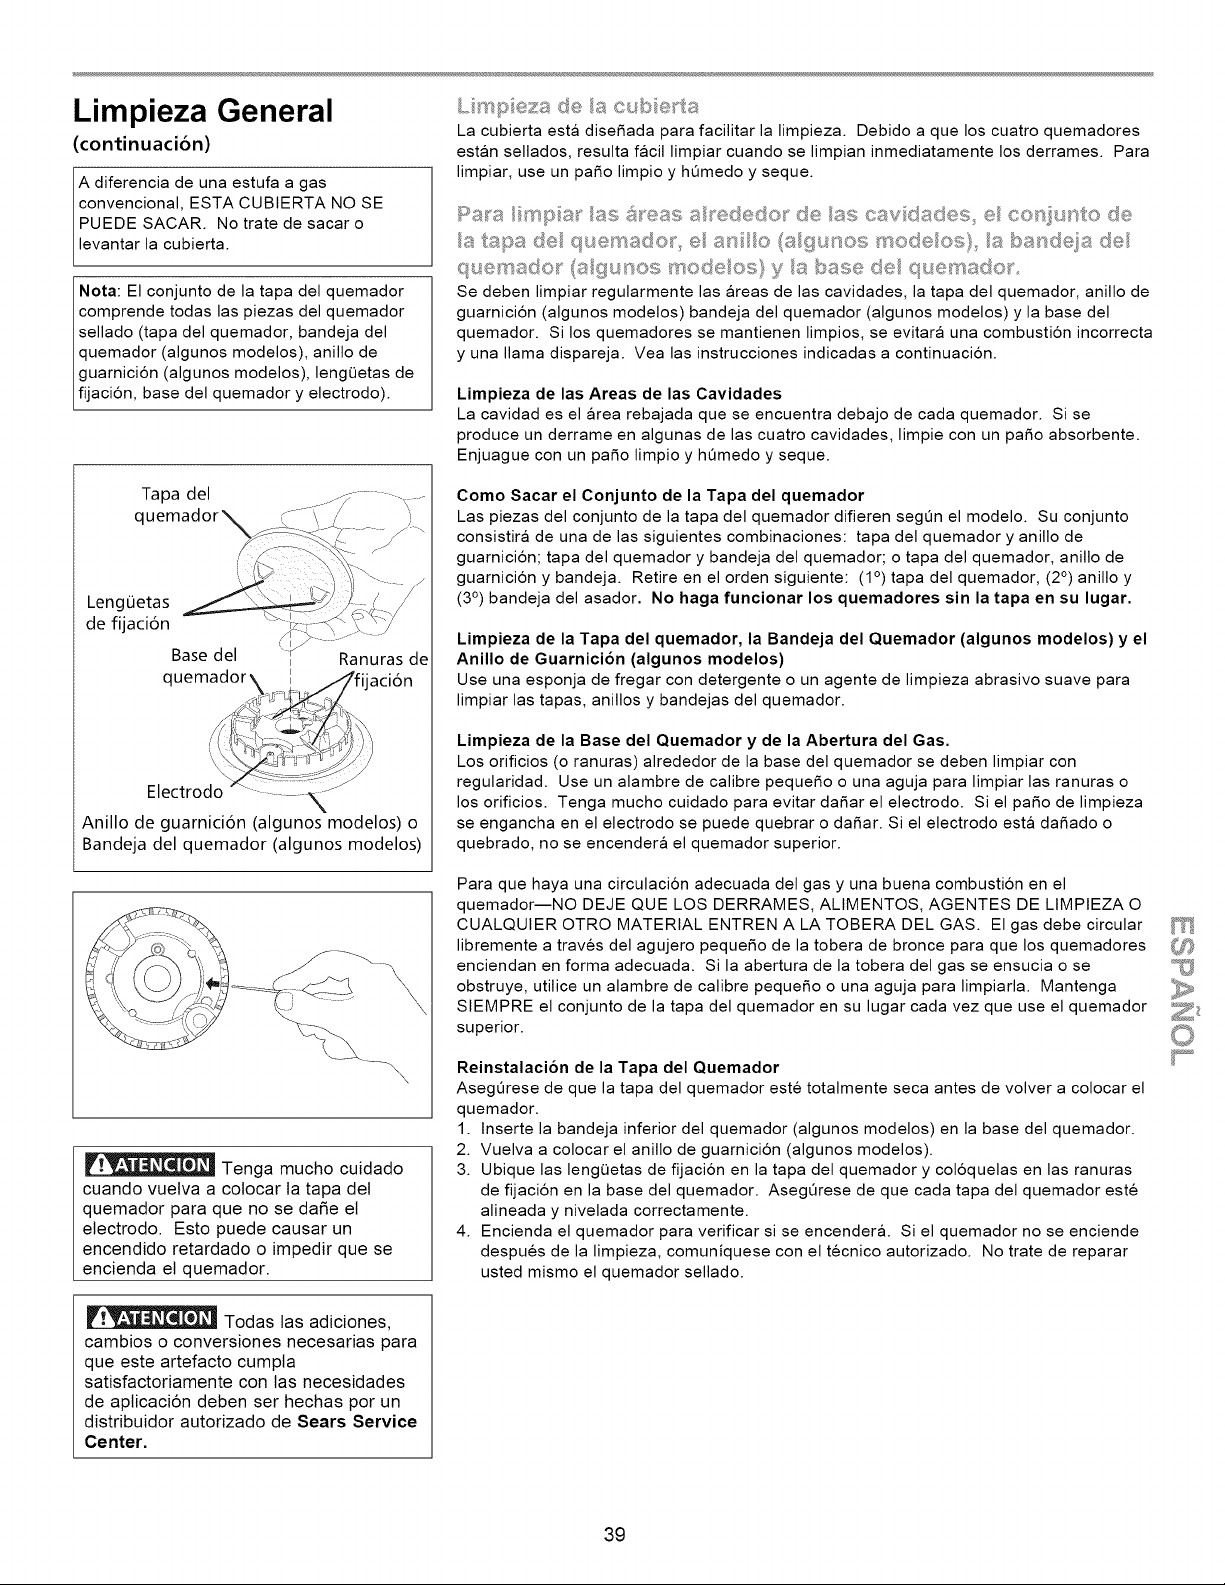
Limpieza General
(continuacion)
A diferencia de una estufa a gas
convencional, ESTA CUBIERTA NO SE
PUEDESACAR. Notratedesacaro
levantar la cubierta.
Nota: El conjunto de la tapa del quemador
comprende todas las piezas del quemador
sellado (tapa del quemador, bandeja del
quemador (algunos modelos), anillo de
guarnicion (algunos modelos), lengQetas de
fjac on, base de quemador y e ectrodo).
L mp eza de/a ct,_b e_'ta
La cubierta esta diseRada para facilitar la limpieza. Debido a que los cuatro quemadores
estan sellados, resulta facil limpiar cuando se limpian inmediatamente los derrames. Para
limpiar, use un pare limpio y hOmedo y seque.
Ra_'_a m_iisa_' as @_eas a _eded®r de as car dades e co_:'_i_,_to de
alapade quemado_ _ e a_s_o(a/gu_sos nodeos) abasdqade
quemado_c (a gunes mode os) y _a base de quemado_,,
Se deben limpiar regularmente las areas de las cavidades, la tapa del quemador, anillo de
guarnicion (algunos modelos) bandeja del quemador (algunos modelos) y la base del
quemador. Si los quemadores se mantienen limpios, se evitara una combusti6n incorrecta
y una llama dispareja. Vea las instrucciones indicadas a continuacion.
Limpieza de las Areas de las Cavidades
La cavidad es el area rebajada que se encuentra debajo de cada quemador. Si se
produce un derrame en algunas de las cuatro cavidades, limpie con un pare absorbente.
Enjuague con un pare limpio y hQmedo y seque.
Tapa del
q
LengOetas
de fijaci6n
Base del
q
Ranuras de
Electrodo _ -.......
Anillo de guarnicion (algunos modelos) o
Bandeja del quemador (algunos modelos)
Como Sacar el Conjunto de la Tapa del quemador
Las piezas del conjunto de la tapa del quemador difieren segQn el modelo. Su conjunto
consistira de una de las siguientes combinaciones: tapa del quemador y anillo de
guarnici6n; tapa del quemador y bandeja del quemador; o tapa del quemador, anillo de
guarnici6n y bandeja. Retire en el orden siguiente: (1°) tapa del quemador, (2 °) anillo y
(3°) bandeja del asador. No haga funcionar los quemadores sin la tapa en su lugar.
Limpieza de la Tapa del quemador, la Bandeja del Quemador (algunos modelos) y el
Anillo de Guarnici6n (algunos modelos)
Use una esponja de fregar con detergente o un agente de limpieza abrasive suave para
limpiar las tapas, anillos y bandejas del quemador.
Limpieza de la Base del Quemador y de la Abertura del Gas.
Los orificios (o ranuras) alrededor de la base del quemador se deben limpiar con
regularidad. Use un alambre de calibre pequeRo o una aguja para limpiar las ranuras o
los orificios. Tenga mucho cuidado para evitar daRar el electrode. Si el pare de limpieza
se engancha en el electrode se puede quebrar o daRar. Si el electrode esta daRado o
quebrado, no se encendera el quemador superior.
\
Tenga mucho cuidado
cuando vuelva a colocar ta tapa del
quemador para que no se da_e el
electrodo. Esto puede causar un
encendido retardado o impedir que se
encienda el quemador.
Para que haya una circulacion adecuada del gas y una buena combustion en el
quemador--NO DEJE QUE LOS DERRAMES, ALIMENTOS, AGENTES DE LIMPtEZA O
CUALQUIER OTRO MATERIAL ENTREN A LA TOBERA DEL GAS. El gas debe circular
libremente a traves del agujero pequeRo de la tobera de bronce para que los quemadores
enciendan en forma adecuada. Si la abertura de la tobera del gas se ensucia o se
obstruye, utilice un alambre de calibre pequeRo o una aguja para limpiarla. Mantenga
SIEMPRE el conjunto de la tapa del quemador en su lugar cada vez que use el quemador
superior.
Reinstalacion de la Tapa del Quemador
AsegOrese de que la tapa del quemador este totalmente seca antes de volver a colocar el
quemador.
1. Inserte la bandeja inferior del quemador (algunos modelos) en la base del quemador.
2. Vuelva a colocar el anillo de guarnici6n (algunos modelos).
3. Ubique las lengQetas de fijaci6n en la tapa del quemador y col6quelas en las ranuras
de fijaci6n en la base del quemador. AsegQrese de que cada tapa del quemador este
alineada y nivelada correctamente.
4. Encienda el quemador para verificar si se encender& Si el quemador no se enciende
despues de la limpieza, comuniquese con el tecnico autorizado. No trate de reparar
usted mismo el quemador sellado.
It':_ Todas tas adiciones,
cambios o conversiones necesarias para
que este artefacto cumpla
satisfactoriamente con las necesidades
de aplicaci6n deben ser hechas por un
distribuidor autorizado de Sears Service
Center.
39
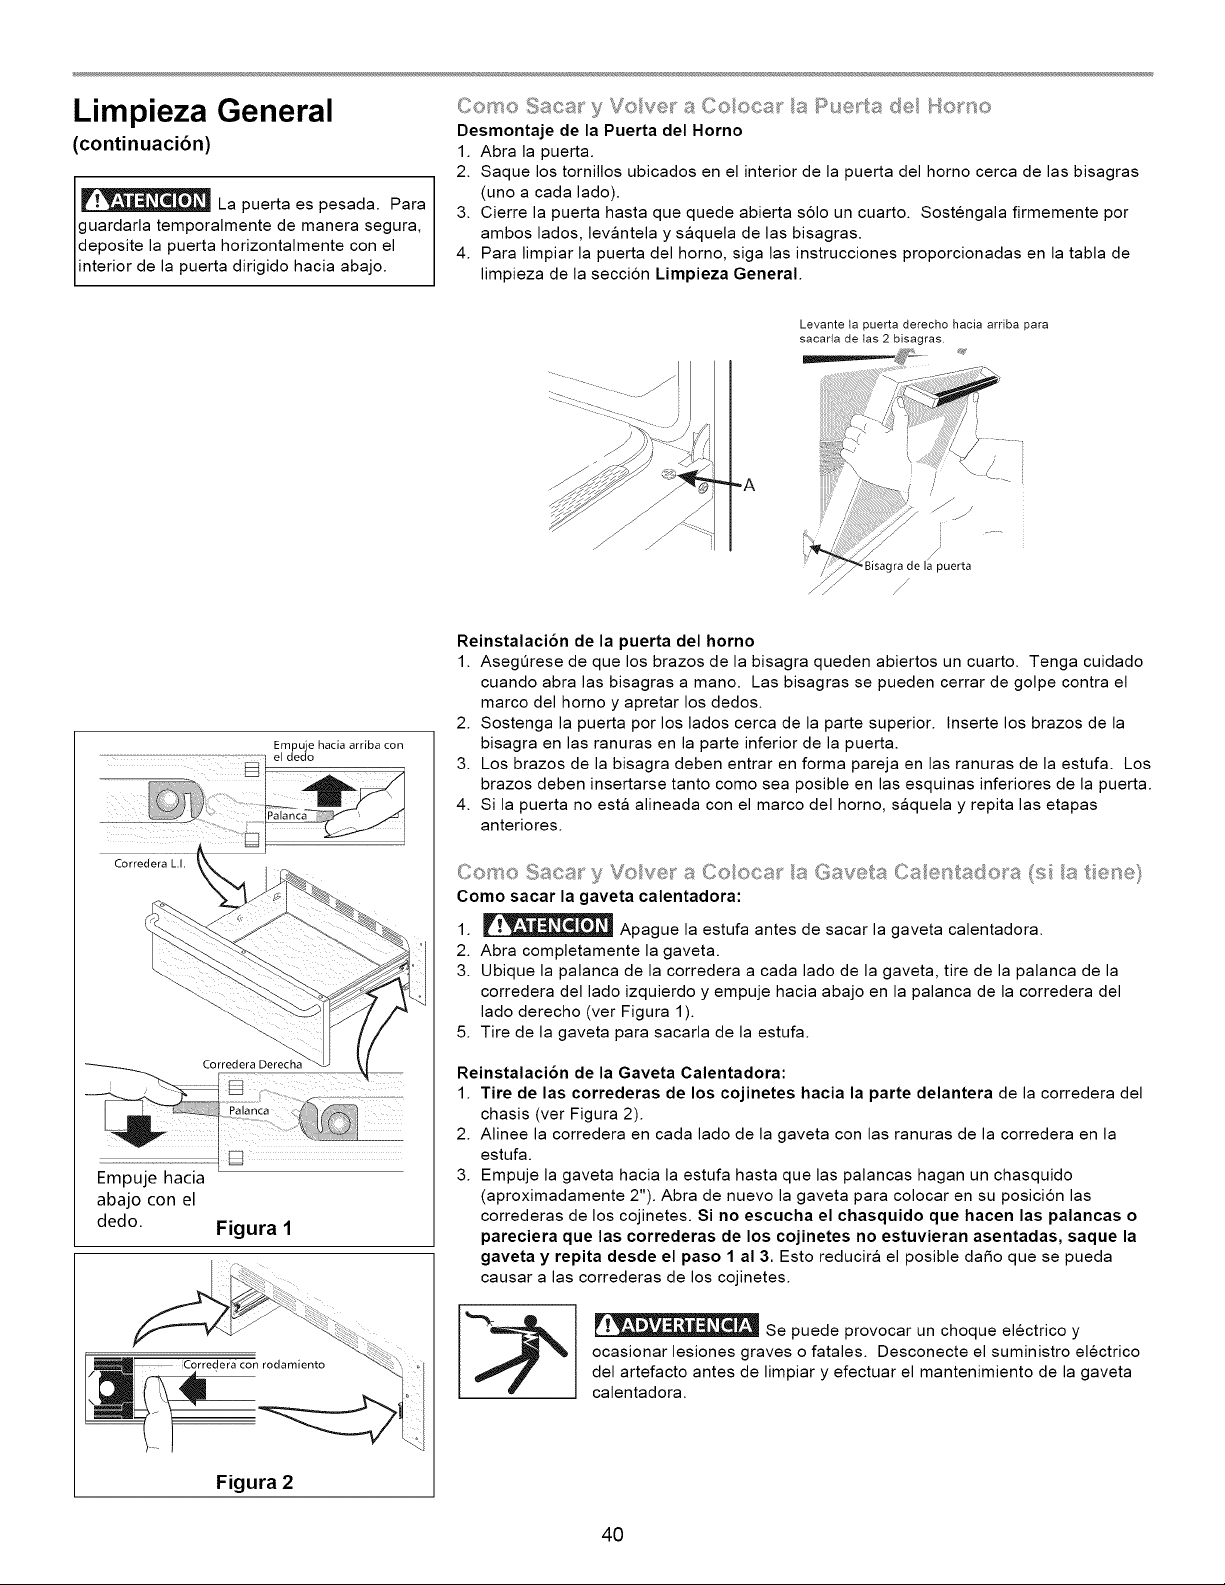
Limpieza General
(continuaci6n)
_ La puerta es pesada. Para
guardarla temporalmente de manera segura,
deposite la puerta horizontalmente con el
interior de la puerta dirigido hacia abajo.
Como Sacar y Vo/ver a Co/ocar/a Ruet-ta de/Ho_no
Desmontaje de la Puerta del Horno
1. Abra la puerta.
2. Saque los tornillos ubicados en el interior de la puerta del horno cerca de las bisagras
(uno a cada lado).
3. Cierre la puerta hasta que quede abierta s61o un cuarto. Sostengala firmemente por
ambos lados, levantela y saquela de las bisagras.
4. Para limpiar la puerta del homo, siga las instrucciones proporcionadas en la tabla de
limpieza de la seccion Limpieza General.
Levante ta puerta derecho hacia arriba para
sacada de tas 2 bisagras.
u
iiiiF
/
/
Bisagra de la puerta
/
/
Empu e hacia arriba con
e dedo
Corredera L.I.
Corredera Derecha
Empuje hacia
abajo con el
dedo. Figura 1
Figura 2
Reinstalacion de la puerta del horno
1. AsegOrese de que los brazos de la bisagra queden abiertos un cuarto. Tenga cuidado
cuando abra las bisagras a mano. Las bisagras se pueden cerrar de golpe contra el
marco del homo y apretar los dedos.
2. Sostenga la puerta pot los lados cerca de la parte superior. Inserte los brazos de la
bisagra en las ranuras en la parte inferior de la puerta.
3. Los brazos de la bisagra deben entrar en forma pareja en las ranuras de la estufa. Los
brazos deben insertarse tanto como sea posible en las esquinas inferiores de la puerta.
4. Si la puerta no esta alineada con el marco del homo, saquela y repita las etapas
anteriores.
Como Saoa_" y Vo ve_" a Co/ocar/a Gaveta Ca/entado_a (s/a t e_se}
Como sacar la gaveta calentadora:
1. _ Apague la estufa antes de sacar la gaveta calentadora.
2. Abra completamente la gaveta.
3. Ubique la palanca de la corredera a cada laclo de la gaveta, tire de la palanca de la
corredera del lado izquierdo y empuje hacia abajo en la palanca de la corredera clel
lado clerecho (ver Figura 1 ).
5. Tire de la gaveta para sacarla de la estufa.
Reinstalacion de la Gaveta Calentadora:
1. Tire de las correderas de los cojinetes hacia la parte delantera de la corredera del
chasis (vet Figura 2).
2. Alinee la corredera en cada lado de la gaveta con las ranuras de la corredera en la
estufa.
3. Empuje la gaveta hacia la estufa hasta que las palancas hagan un chasquido
(aproximadamente 2"). Abra de nuevo la gaveta para colocar en su posicion las
correderas de los cojinetes. Si no escucha el chasquido que hacen las palancas o
pareciera que las correderas de los cojinetes no estuvieran asentadas, saque la
gaveta y repita desde el paso 1 al 3. Esto reducira el posible da_o que se pueda
causar a las correderas de los cojinetes.
=v--,,- Sepuedeprovocarunchoqueelectricoy
ocasionar lesiones graves o fatales. Desconecte el suministro electrico
del artefacto antes de limpiar y efectuar el mantenimiento de la gaveta
calentadora.
40
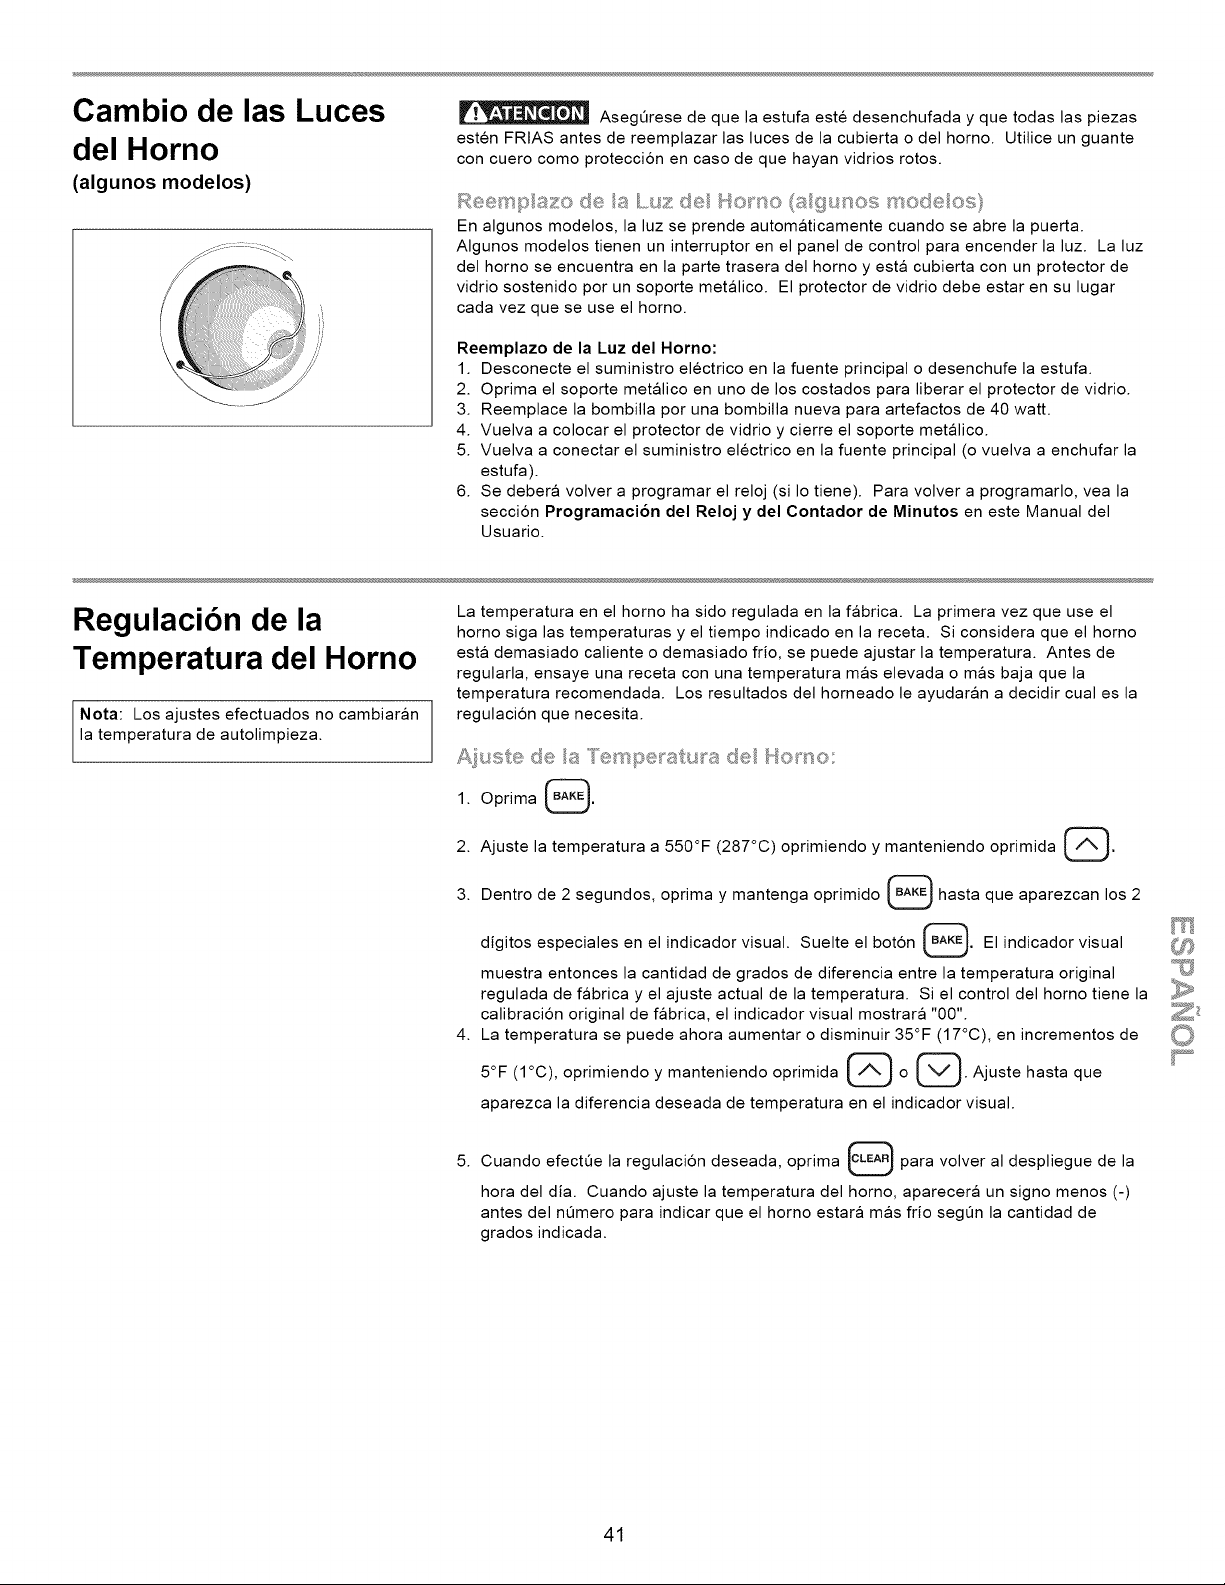
Cambio de las Luces
del Horno
(algunos modelos)
AsegOrese de que la estufa este desenchufada y que todas las piezas
esten FRtAS antes de reemplazar las luces de la cubierta o del homo. Utilice un guante
con cuero como proteccion en caso de que hayan vidrios rotos.
Reemp/azo de/a Luz de/Homo (a/gusos mode/os}
En algunos modelos, la luz se prende automaticamente cuando se abre la puerta.
AIgunos modelos tienen un interruptor en el panel de control para encender la luz. La luz
del homo se encuentra en la parte trasera del homo y esta cubierta con un protector de
vidrio sostenido por un soporte metalico. El protector de vidrio debe estar en su lugar
cada vez que se use el horno.
Reemplazo de la Luz del Horno:
1. Desconecte el suministro electrico en la fuente principal o desenchufe la estufa.
2. Optima el soporte metalico en uno de los costados para liberar el protector de vidrio.
3. Reemplace la bombilla pot una bombilla nueva para artefactos de 40 watt.
4. Vuelva a colocar el protector de vidrio y cierre el soporte metalico.
5. Vuelva a conectar el suministro electrico en la fuente principal (o vuelva a enchufar la
estufa).
6. Se debera volver a programar el reloj (si Io tiene). Para volver a programarlo, vea la
seccion Programaci6n del Reloj y del Contador de Minutos en este Manual del
Usuario.
Regulacibn de la
Temperatura del Horno
Nota: Los ajustes efectuados no cambiaran
la temperatura de autolimpieza.
La temperatura en el homo ha sido regulada en la fabrica. La primera vez que use el
homo siga las temperaturas y el tiempo indicado en la receta. Si considera que el homo
esta demasiado caliente o demasiado frio, se puede ajustar la temperatura. Antes de
regularla, ensaye una receta con una temperatura mas elevada o mas baja que la
temperatura recomendada. Los resultados del horneado le ayudaran a decidir cual es la
regulacion que necesita.
Aiuste de a 'Temperatura de hf®__:so:
1. Oprima _.
2. Ajuste la temperatura a 550°F (287°C) oprimiendo y manteniendo oprimida _.
3. Dentro de 2 segundos, oprima y mantenga oprimido _ hasta que aparezcan los 2
digitos especiales en el indicador visual. Suelte el bot6n _. El indicador visual
muestra entonces la cantidad de grados de diferencia entre la temperatura original
regulada de fabrica y el ajuste actual de la temperatura. Si el control del horno tiene la
calibracion original de fabrica, el indicador visual mostrara "00".
4. La temperatura se puede ahora aumentar o disminuir 35°F (17°C), en incrementos de
5°F (1 °C), oprimiendo y manteniendo oprimida [,_ o _. Ajuste hasta que
J
aparezca la diferencia deseada de temperatura en el indicador visual.
5.
Cuando efectOe la regulacion deseada, oprima _ para volver al despliegue de la
hora del dia. Cuando ajuste la temperatura del homo, aparecera un signo menos (-)
antes del nQmero para indicar que el homo estara mas frio segQn la cantidad de
grados indicada.
41
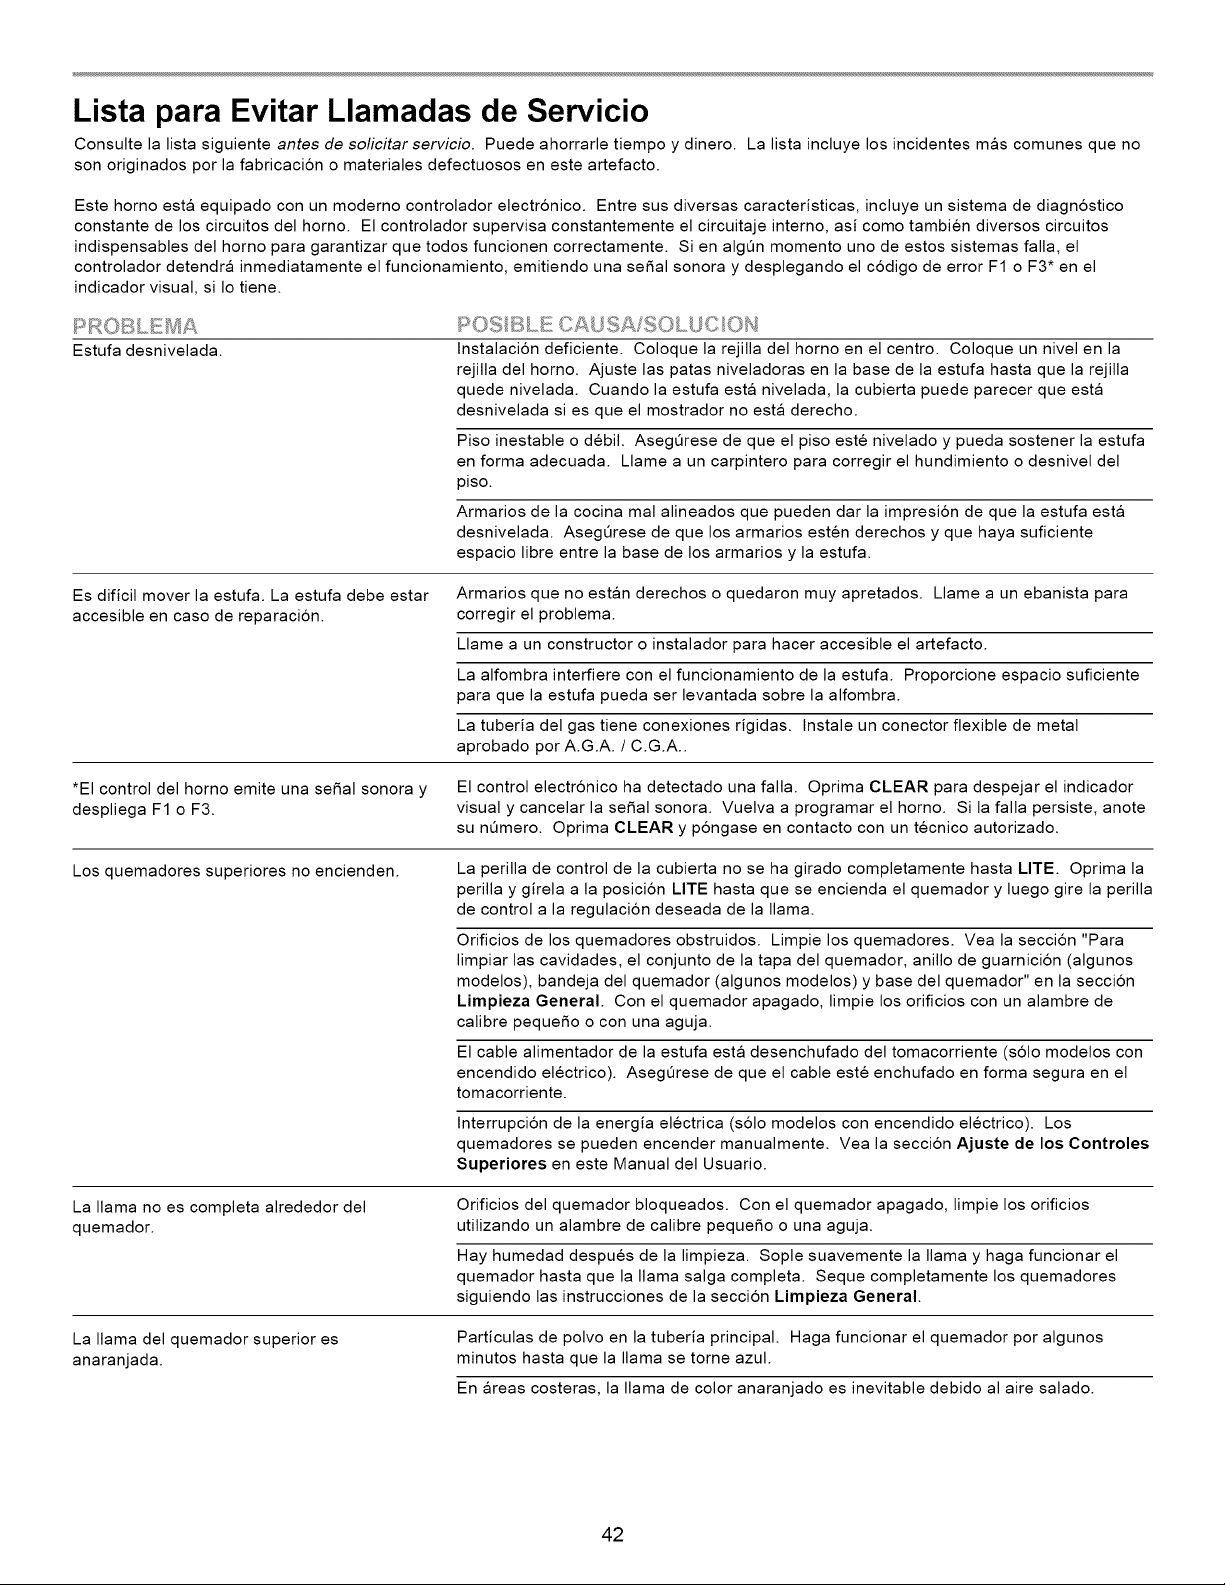
Lista para Evitar Llamadas de Servicio
Consulte la lista siguiente antes de solicitar servicio. Puede ahorrarle tiempo y dinero. La lista incluye los incidentes mas comunes que no
son originados por la fabricacion o materiales defectuosos en este artefacto.
Este horno esta equipado con un moderno controlador electr6nico. Entre sus diversas caracteristicas, incluye un sistema de diagn6stico
constante de los circuitos del horno. El controlador supervisa constantemente el circuitaje interno, asi como tambien diversos circuitos
indispensables del horno para garantizar que todos funcionen correctamente. Si en algQn momento uno de estos sistemas falla, el
controlador detendra inmediatamente el funcionamiento, emitiendo una se5al sonora y desplegando el c6digo de error F1 o F3* en el
indicador visual, si Io tiene.
Estufa desnivelada.
/:_OS BL_!!!CAUSA SOLUC 0_,{
Instalaci6n deficiente. Coloque la rejilla del homo en el centro. Coloque un nivel en la
rejilla del horno. Ajuste las patas niveladoras en la base de la estufa hasta que la rejilla
quede nivelada. Cuando la estufa esta nivelada, la cubierta puede parecer que esta
desnivelada si es que el mostrador no esta derecho.
Piso inestable o debil. AsegQrese de que el piso este nivelado y pueda sostener la estufa
en forma adecuada. Llame a un carpintero para corregir el hundimiento o desnivel del
piso.
Armarios de la cocina mal alineados que pueden dar la impresion de que la estufa esta
desnivelada. AsegQrese de que los armarios esten derechos y que haya suficiente
espacio libre entre la base de los armarios y la estufa.
Es dificil mover la estufa. La estufa debe estar
accesible en caso de reparacion.
Armarios que no estan derechos o quedaron muy apretados. Llame a un ebanista para
corregir el problema.
Llame a un constructor o instalador para hacer accesible el artefacto.
La alfombra interfiere con el funcionamiento de la estufa. Proporcione espacio suficiente
para que la estufa pueda ser levantada sobre la alfombra.
La tuberia del gas tiene conexiones rigidas. Instale un conector flexible de metal
aprobado por A.G.A. / C.G.A..
*El control del homo emite una seSal sonora y El control electr6nico ha detectado una falla. Oprima CLEAR para despejar el indicador
despliega F1 o F3. visual y cancelar la se5al sonora. Vuelva a programar el horno. Si la falla persiste, anote
su nQmero. Oprima CLEAR y p6ngase en contacto con un tecnico autorizado.
Los quemadores superiores no encienden.
La perilla de control de la cubierta no se ha girado completamente hasta LITE. Oprima la
perilla y girela a la posicion LITE hasta que se encienda el quemador y luego gire la perilla
de control a la regulacion deseada de la llama.
Orificios de los quemadores obstruidos. Limpie los quemadores. Vea la seccion "Para
limpiar las cavidades, el conjunto de la tapa del quemador, anillo de guarnicion (algunos
modelos), bandeja del quemador (algunos modelos) y base del quemador" en la seccion
Limpieza General. Con el quemador apagado, limpie los orificios con un alambre de
calibre peque5o o con una aguja.
El cable alimentador de la estufa esta desenchufado del tomacorriente (s61o modelos con
encendido electrico). AsegQrese de que el cable este enchufado en forma segura en el
tomacorriente.
Interrupcion de la energia electrica (s61o modelos con encendido electrico). Los
quemadores se pueden encender manualmente. Vea la seccion Ajuste de los Controles
Superiores en este Manual del Usuario.
La llama no es completa alrededor del
quemador.
Orificios del quemador bloqueados. Con el quemador apagado, limpie los orificios
utilizando un alambre de calibre peque_o o una aguja.
Hay humedad despues de la limpieza. Sople suavemente la llama y haga funcionar el
quemador hasta que la llama salga completa. Seque completamente los quemadores
siguiendo las instrucciones de la seccion Limpieza General.
La llama del quemador superior es
anaranjada.
Particulas de polvo en la tuberia principal. Haga funcionar el quemador por algunos
minutos hasta que la llama se torne azul.
En areas costeras, la llama de color anaranjado es inevitable debido al aire salado.
42
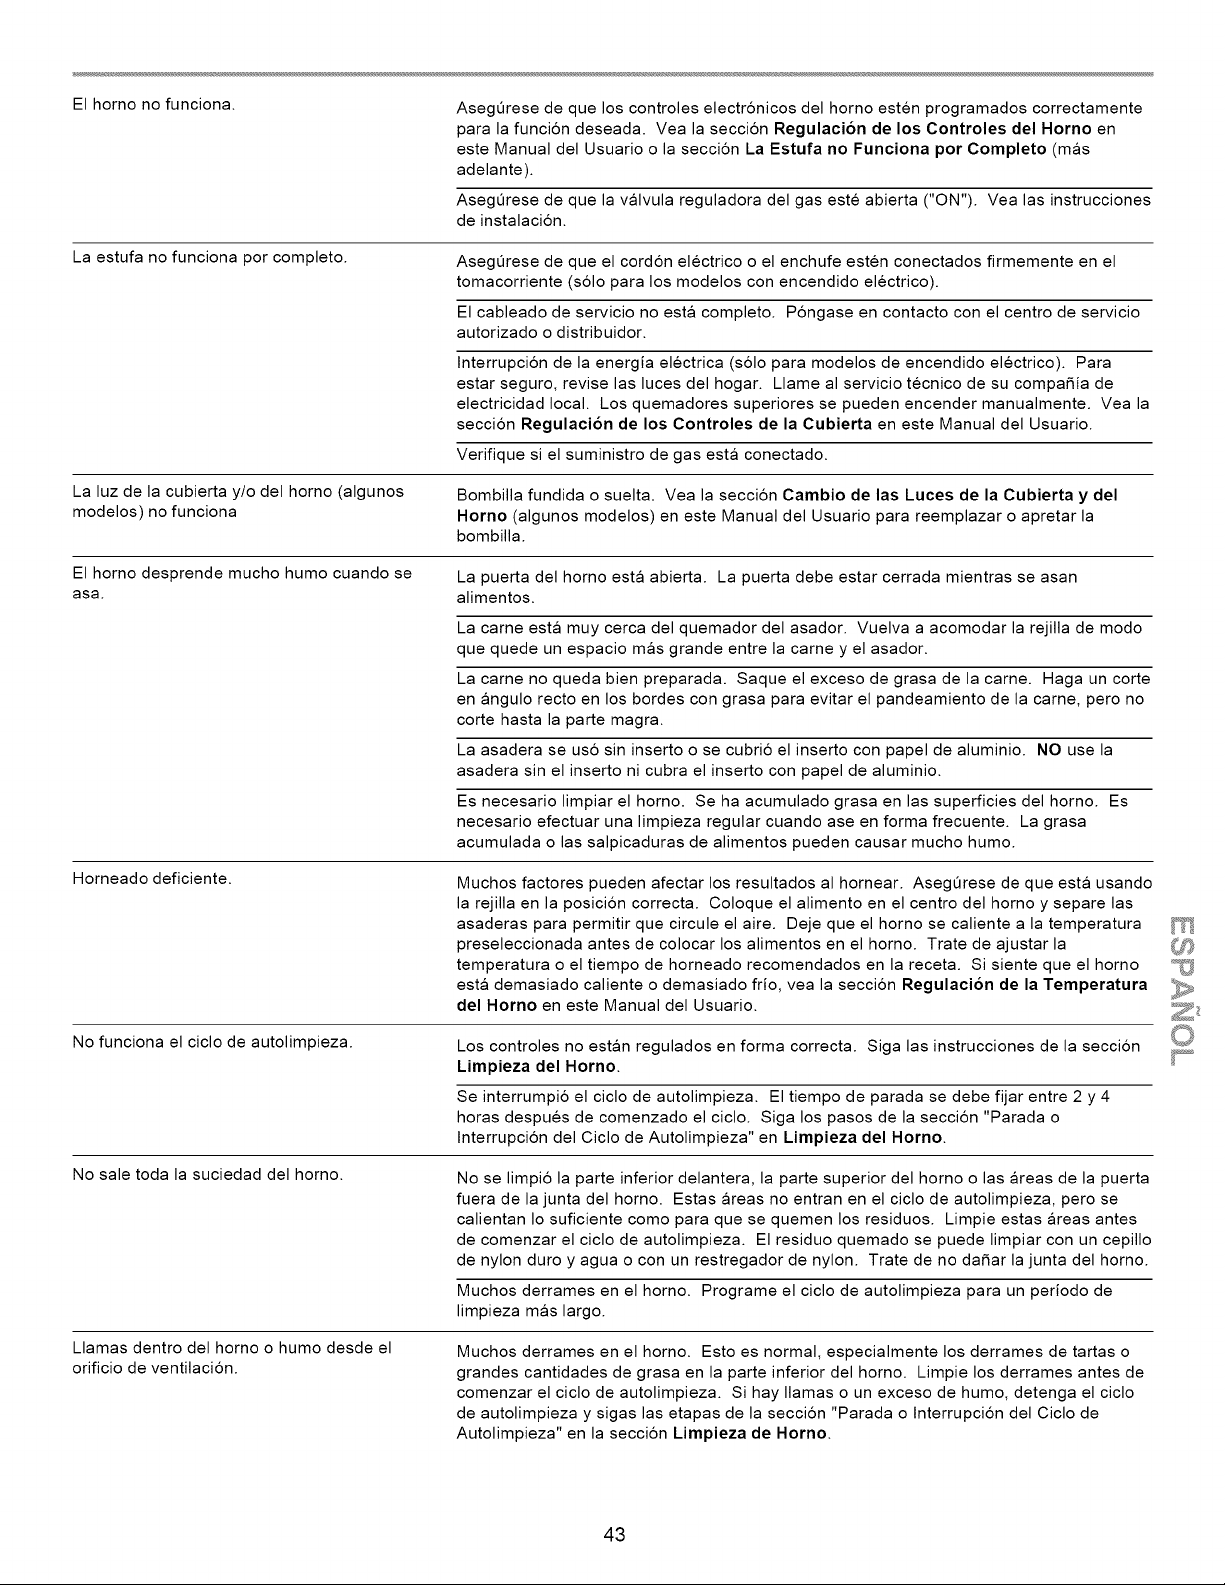
El horno no funciona.
AsegQrese de que los controles electr6nicos del horno esten programados correctamente
para la funci6n deseada. Vea la secci6n Regulacion de los Controles del Homo en
este Manual del Usuario o la secci6n La Estufa no Funciona por Completo (mas
adelante).
AsegOrese de que la valvula reguladora del gas este abierta ("ON"). Yea las instrucciones
de instalacion.
La estufa no funciona por completo.
La luz de la cubierta y/o del horno (algunos
modelos) no funciona
AsegOrese de que el cord6n electrico o el enchufe esten conectados firmemente en el
tomacorriente (s61o para los modelos con encendido electrico).
El cableado de servicio no esta completo. P6ngase en contacto con el centro de servicio
autorizado o distribuidor.
Interrupcion de la energia electrica (s61o para modelos de encendido electrico). Para
estar seguro, revise las luces del hogar. Llame al servicio tecnico de su compaSia de
electricidad local. Los quemadores superiores se pueden encender manualmente. Vea la
seccion Regulacion de los Controles de la Cubierta en este Manual del Usuario.
Verifique si el suministro de gas esta conectado.
Bombilla fundida o suelta. Yea la seccion Cambio de las Luces de la Cubierta y del
Homo (algunos modelos) en este Manual del Usuario para reemplazar o apretar la
bombilla.
El horno desprende mucho humo cuando se
asa.
Horneado deficiente.
La puerta del horno esta abierta. La puerta debe estar cerrada mientras se asan
alimentos.
La carne esta muy cerca del quemador del asador. Vuelva a acomodar la rejilla de modo
que quede un espacio mas grande entre la carney el asador.
La carne no queda bien preparada. Saque el exceso de grasa de la carne. Haga un corte
en angulo recto en los bordes con grasa para evitar el pandeamiento de la came, pero no
corte hasta la parte magra.
La asadera se us6 sin inserto o se cubrio el inserto con papel de aluminio. NO use la
asadera sin el inserto ni cubra el inserto con papel de aluminio.
Es necesario limpiar el horno. Se ha acumulado grasa en las superficies del horno. Es
necesario efectuar una limpieza regular cuando ase en forma frecuente. La grasa
acumulada o las salpicaduras de alimentos pueden causar mucho humo.
Muchos factores pueden afectar los resultados al hornear. AsegOrese de que esta usando
la rejilla en la posicion correcta. Coloque el alimento en el centro del homo y separe las
asaderas para permitir que circule el aire. Deje que el homo se caliente a la temperatura
preseleccionada antes de colocar los alimentos en el horno. Trate de ajustar la
temperatura o el tiempo de horneado recomendados en la receta. Si siente que el homo
esta demasiado caliente o demasiado frio, vea la seccion Regulaci6n de la Temperatura
del Homo en este Manual del Usuario.
No funciona el ciclo de autolimpieza.
Los controles no estan regulados en forma correcta. Siga las instrucciones de la seccion
Limpieza del Horno.
Se interrumpio el ciclo de autolimpieza. El tiempo de parada se debe fijar entre 2 y 4
horas despues de comenzado el ciclo. Siga los pasos de la seccion "Parada o
Interrupcion del Ciclo de Autolimpieza" en Limpieza del Horno.
No sale toda la suciedad del horno.
No se limpio la parte inferior delantera, la parte superior del horno o las areas de la puerta
fuera de la junta del horno. Estas areas no entran en el ciclo de autolimpieza, pero se
calientan Io suficiente como para que se quemen los residuos. Limpie estas areas antes
de comenzar el ciclo de autolimpieza. El residuo quemado se puede limpiar con un cepillo
de nylon duro y agua o con un restregador de nylon. Trate de no daSar la junta del horno.
Muchos derrames en el horno. Programe el ciclo de autolimpieza para un periodo de
limpieza mas largo.
Llamas dentro del horno o humo desde el
orificio de ventilacion.
Muchos derrames en el horno. Esto es normal, especialmente los derrames de tartas o
grandes cantidades de grasa en la parte inferior del horno. Limpie los derrames antes de
comenzar el ciclo de autolimpieza. Si hay llamas o un exceso de humo, detenga el ciclo
de autolimpieza y sigas las etapas de la seccion "Parada o Interrupcion del Ciclo de
Autolimpieza" en la seccion Limpieza de Horno.
43
in U.S.A. or Canada
for in=home major brand repair service:
Call 24 hours a day, 7 days a week
1-800-4-MY-H OM EsM(1-800-469-4663)
Para pedir servicio de reparaci6n a domicillio - 1=800=676=5811
Au Canada pour tout le service -- 1-877-LE-FOYERSM(1-877-533-6937)
For the repair or replacement parts you need:
Call 6 a.m. - 11 p.m. CST, 7 days a week
PartsDirect s°
1-800-366-PART (1-800-366-7278)
www.sears.com/partsdirect
Para ordenar piezas con entrega a domicilio - 1-800-659=7084
For the location of a Sears Service Center in your area:
Call 24 hours a day, 7 days a week
1-800-488-1222
To purchase or inquire about a Sears Maintenance Agreement:
Call 7 a.m. - 5 p.m. CST, Monday - Saturday
1-800-827-6655
HomeCentral