Loading ...
Loading ...
Loading ...

6
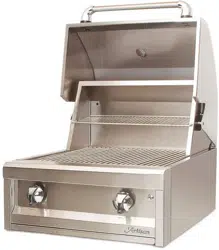
LOCATING AND ASSEMBLING THE GRILL:
When determining a suitable location for your grill, take into account concerns such as exposure to wind,
rain, sprinklers, proximity to traffic paths and keeping any gas supply line runs as short as possible.
Locate the grill only in a well ventilated area. Never locate the grill in a building, garage, breezeway,
shed or other such enclosed area without an approved ventilation system. Never locate the grill over,
under or next to unprotected combustible construction. During heavy use, the grill will produce a lot of
smoke.
CLEARANCES:
TO NON-COMBUSTIBLE CONSTRUCTION:
A minimum of 2 1/2” clearance from the back of the grill to non-combustible construction is required to
allow the hood to be opened fully.
TO COMBUSTIBLE CONSTRUCTION:
A minimum of 12” clearance must be maintained between the barbecue and any combustible materials.
ASSEMBLY:
BUILT-IN MODELS:
Before locating your ARTISAN™ Grill into your Non-combustible enclosure, complete the following
steps:
1. Remove all packaging materials.
2. Ensure that the burners are positioned correctly on their orifices, and are fully seated onto
their supports.
3. Position the tile trays onto their support ledge.
4. Make the connection to the gas regulator according to the instructions on pages 8 - 11 for
your gas type.
5. To comply with safety and service requirements, main gas shut off valve must be
accessible from front of grill without using any tools.
Your Artisan™ Grill has provision for mounting onto a mobile cart if you choose to do so.
Contact your Artisan™ dealer for the appropriate cart for your grill.
FREE STANDING MODELS:
Complete the following steps:
1. Remove all packaging materials.
2. Ensure that the burners are positioned correctly on their orifices, and are fully seated onto
their supports.
3. Position the tile trays onto their support ledge.
4. Make the connection to the gas regulator according to the instructions on pages 8 - 11 for
your gas type.
5. Allow a minimum of 3” clearance around all sides of grill cart for proper air movement.
6. Lock the front casters to prevent unwanted grill movement.
FOR INSTALLING / REPLACING THE BATTERY: SEE PAGE 27.
Loading ...
Loading ...
Loading ...