Loading ...
Loading ...
Loading ...
P.11
P.12
Installation Instructions
Install inlet pipe
Dispose the packing materials
The packing materials of this machine may be dangerous to kids. Please dispose them
properly and avoid easy touch by kids. Please dispose the related packing materials
according to the relevant local regulations. Please do no throw the packing materials away
together with the other daily living rubbishes.
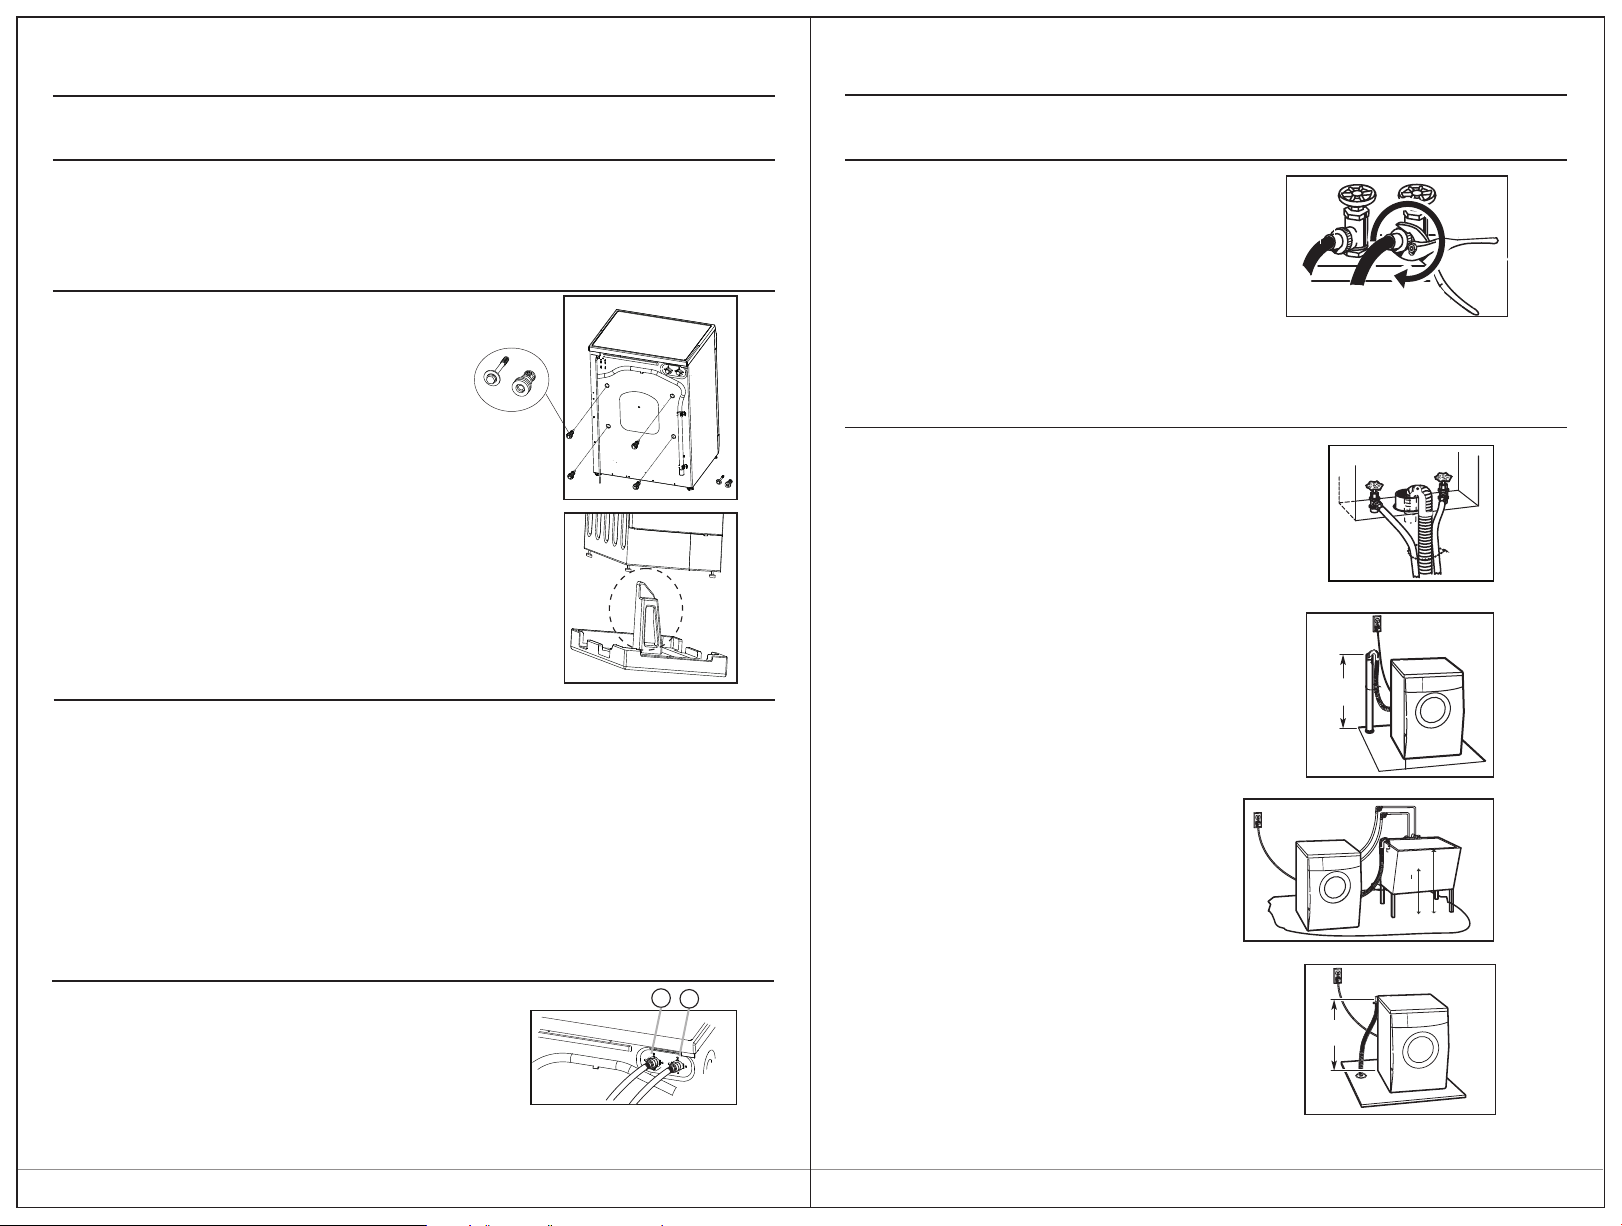
Remove transport bolts and foam
Before using this washing machine, transport bolts
must be removed from the backside of
this machine. Please take the following steps to
remove the bolts:
1.Loosen all bolts with spanner and then remove them.
2.Cover the holes with transport hole plugs.
3.Keep the transport bolts properly for future use.
Make sure the small triangle foam is removed with the
bottom one together. If not, lay the unit down with side
surface, then remove the small foam from the unit bottom
manually.
Select the location
Before installing the washing machine, the location characterized as follows shall be
selected:
- Rigid, dry, and level surface (if not level, please make it level with reference to the
following figure “Adjust Leg”)
- Avoid direct sunlight
- Sufficient ventilation
- Room temperature is above 0℃
- Keep far away from the heat resources such as coal or gas.
Make sure that the washing machine will not stand on power cord.
Do not install the washing machine on the carpet floor.
Connect inlet pipe
Connect the inlet pipe as indicated in the figure.
For the model which has hot valve , please connect
the hot vale to hot water tap.
H
C
1.Connect the elbow to tap and fasten it
clockwise.
2.Connect the other end of inlet pipe to the inlet
valve at the backside of washing machine and
fasten the pipe tightly clockwise.
Note: after connection, if there is any leakage with hose, then repeat the steps to connect inlet
pipe. The most common type of tap shall be used to supply water. If tap is square or too big,
then standard tap shall be changed.
Drain system options
A
Capacity can be no less than 17 gal.( 64 L) per minute.
The top of the standpipe must be at least 60cm high and
no higher than 100cm from the bottom of the washer.
Floor drain system(view D) .The floor drain system requires
a siphon break that may be purchased separately.
See“Tools and Parts”. The siphon break must be a minimum
of 28" (710 mm) from the bottom of the washer.
Additional hoses might be needed.
Min 60
Max 100
B
Laundry tub drain system (view C)
The laundry tub needs a minimum 20 gal. (76 L)
capacity. The top of the laundry tub must be
at least 60cm above the foor.
Min.60cm
Max.100cm
C
28
" min.
(710 mm)
D
Standpipe drain system -wall or foor ( views A & B)
The standpipe drain requires a minimum diameter
standpipe of 2"(50 mm).The minimum carry-away
Installation Instructions
Loading ...
Loading ...
Loading ...