Loading ...
Loading ...
Loading ...
5
English
SAVE THESE INSTRUCTIONS FOR
FUTURE USE
COMPONENTS (FIG. A)
Motor
Be sure your power supply agrees with the nameplate
marking. Voltage decrease of more than 10% will cause loss
of power and overheating. These tools are factory tested; if
this tool does not operate, check power supply.
Intended Use
This belt sander is designed for household use.
DO nOT use under wet conditions or in presence of
flammable liquids orgases.
DO nOT let children come into contact with the tool.
Supervision is required when inexperienced operators use
thistool.
ASSEMBLY AND ADJUSTMENTS
WARNING: To reduce the risk of serious personal
injury, turn unit off and disconnect it from
power source before making any adjustments or
removing/installing attachments or accessories.
An accidental start-up can causeinjury.
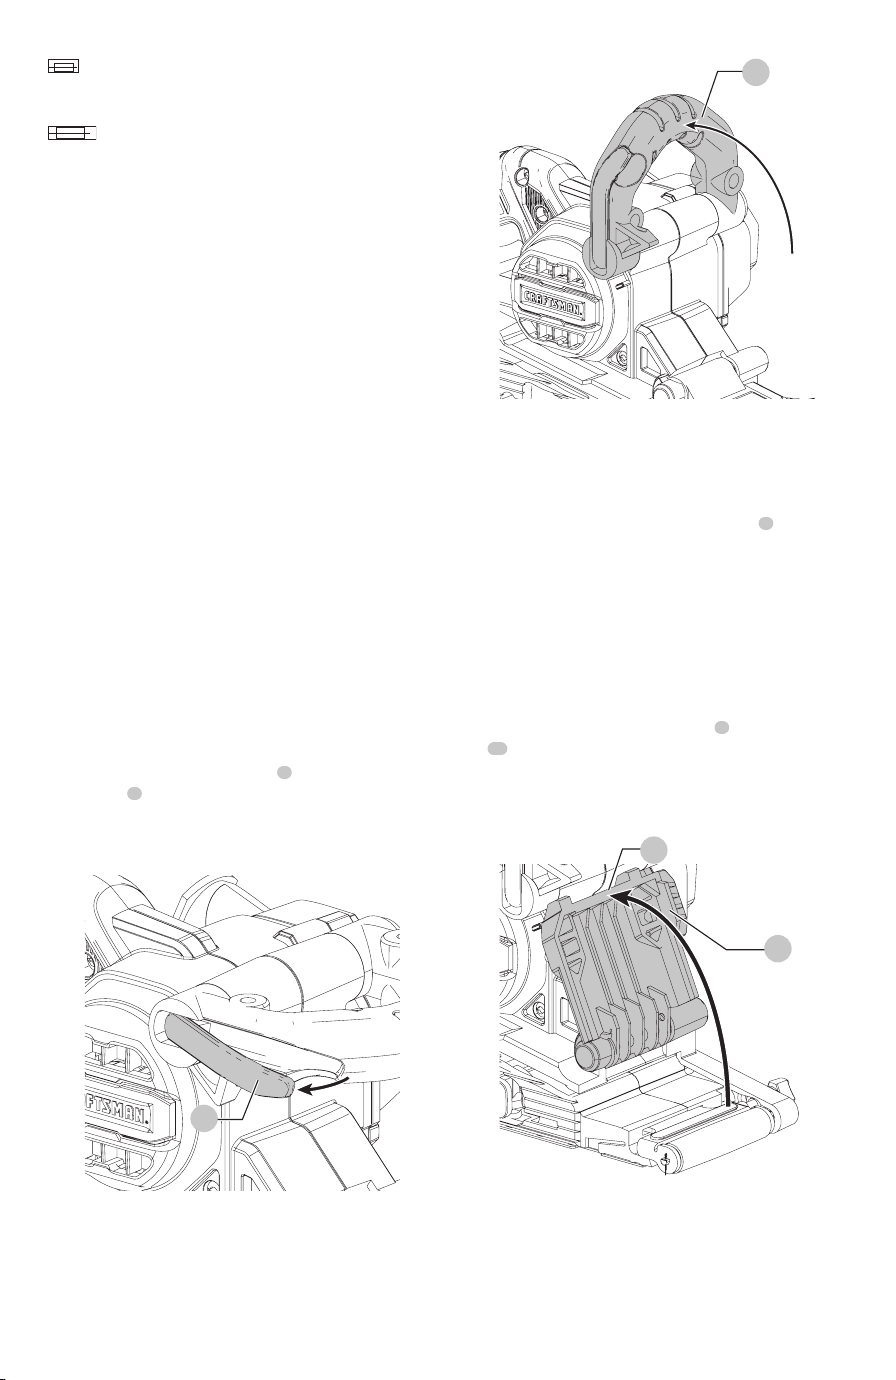
Three Position Handle (Fig. B, C)
To adjust the three position handle
1
, pull out on the
locking arm
2
and move the three position handle to the
desired position. Once the handle is positioned, push the
locking arm in to place to lock thehandle.
Fig. B
2
Fig. C
1
Two Position Belt Cover (Fig. D)
WARNING: The sanding belt is exposed when the belt
cover is raised. Use extra caution when operating in
thismode.
The belt sander has a two position belt cover
3
at the
front. When the three position handle is positioned in the
uppermost position, this cover can beraised.
• Improve accessibility to narrowareas.
• Allow the operator to sand with the smaller diameter
front roller (normally the belt cover prevents this when
in the “down”position).
• Expose the top part of the belt for more
versatilesanding.
• To raise the two position belt cover
3
, grasp the flange
12
on the side and lift it in the directionshown in
FigureD.
nOTE: The sanding belt cover cannot be locked in its raised
position unless the bail handle is in the uppermostposition.
Fig. D
12
3
Adjusting the Sanding Belt Tracking
(Fig. E)
Turn the machine upside down (FigureE), hold it firmly
with one hand, start motor and release switch immediately
after observing tracking of sanding belt. If abrasive belt runs
x
.................. rated current of the
appropriate fuse-
link in amperes
A
............ time-log miniature
fuse-link where X
is the symbol for
the time/current
characteristic, as
given in
IEC 60127-3
IPXX .................... IP symbol
Loading ...
Loading ...
Loading ...