Frigidaire LFFH2067DW2 Freezer
Product's Documents
Below are documents related to this product, you can read online or download:
- Owner's manual - (English) Read Online | Download pdf
The information contained in this Owner's Guide will instruct you on how to properly operate and care for your product. Please read through the information contained in your literature pack to learn more about your new appliance.
Record Your Model and Serial Numbers
Record the Model No and Serial No. of this freezer in the space provided below.
Model No.
Serial No.
Register Your Product
The self-addressed PRODUCT REGISTRATION CARD (shown left) should be filled in completely, signed and returned to Electrolux Home Products.
This Owner's Guide provides operating instructions for your model. Use your freezer only as instructed in this Owner's Guide.
Proper Disposal of Your Refrigerator/Freezer
Warning: Risk of child entrap-ment. Child entrapment and suffocation are not problems of the past. Junked or abandoned refrigerators or freezer are still dangerous even if they will sitfor "just a few days. Ifyou are getting rid of your old refrigerator or freezer. please follow the instructions below to help prevent accidents.
BEFORE YOU THROW AWAY YOUR OLD REFRIGERATOR/FREEZER:
WARNING : Avoid fire hazard or electric shock. Do not use an extension cord or an adapter plug. Do not remove any prong from power cord.
Read all instructions before using this freezer.
WARNING : For Your Safety
Do not store or use gasoline or other flammable vapors and liquids inthe vicinity of this or any other appliance Read product labels for flammability and other warnings.
WARNING : Child Safety
WARNING : Electrical Information
These guidelines must be followed to ensure that safety mechanisms in the design of this freezer will operate properly.
WARNING : Other Precautions
Before starting the freezer. follow these important first steps:
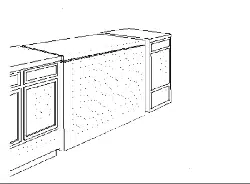
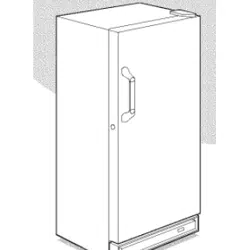
Installation
Leveling
The freezer must have all bottom corners restingfirmly on a solid floor The floor must be strong enough to support a fully loaded freezer. NOTE: It is VERY IMPORTANT for your freezer to be levelinorder to function properly. If the freezer is not leveled duringinstallatioin. he door may be misaligned and notclose orseal properly. causing cooling. frost. or moisture problems.
To Level Upright Unit:
After discarding crating screws and wood base. use a carpenter's levelto levelthe freezer from front-to-back. Adjust the plastic leveling feet infront. ½ bubble higher. so that the door closes easily when left halfway open.
To Level Chest Unit:
If needed. add metal or wood shims between feet pads and floor
Cleaning
If door must be removed (UNPLUG THE UNIT.)
LID REMOVAL (CHEST MODELS)
Cool Down Period
Temperature Control
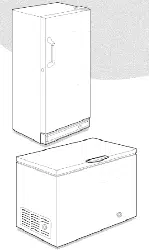
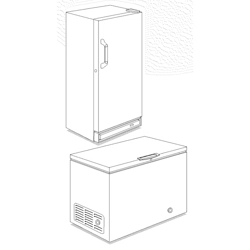
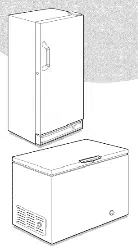
The temperature control is located inside the freezer on upright models. and on the left outside wall on chest models. The temperature is factory preset to provide satisfactory food storage temperatures. However, the temperature control is ad justable to provide a range of temperatures for your personal satisfaction. if a colder temperature is desired. turn the temperature control knob toward COLD EST and allow several hours for temperatures to stabilize between adjustments.
NOTE
Your freezer may have some. or all of the features listedbelow. Become familiar with these features, and their use and care.
Power On Light
The Power On Light indicates that the freezer is properly connected to electrical power. The light glows even when the temperature control is turned to OFF. If the light goes out, refer to "Freezer does not run" in the Avoid Service Checklist.
Temp Alarm (audible only or audible with warning light - see Figure 1)
This feature is designed to provide a warning of a possible malfunction. if the temperature of the food rises to a level unsafe for long-term storage, the buzzer will sound. The red light, if equipped, will also glow. The TempAlarm feature operates on household electricity. If power fails, the alarm will not function. An ON/OFF switch allows you to deactivate the Temp Alarm when not wanted. The freezer is shipped with the Temp Alarm in the OFF position. After freezer has run approximately4 hours. the red light. if equipped. will go off. Then you may activate the Temp Alarm without the alarm sounding.
Press the ON switch to activate the Temp Alarm To deactivate, press the OFF switch.
If the alarm sou nds. be sure freezer is properly leveled. and the door closes freely. and seals properly. If you suspect a technical malfunction. call an authorized servicer immediately.
TEMP ALARM (ELECTRONICMODELS)
This feature is designed to provide awarning if the inside temperatures reach an unsafeleveL TheTemp. Alarm Feature operates on household electricity. It will not function if household electricity is interrupted.
When the freezer is initially plugged in, the red Temp. Alarm Indicator Light blinks. The indicator lightwill continue to blink until the freezer has reached a safe freezing temperature.
If a malfunction causes an unsafe temperature inside the freezer. the red light will blink and the buzzer will sound. To silence the buzzer. press the ALARM OFF button. The indicator Light will continue to blink until a safe freezing temperature is again reached. If the problem is not resolved within 12 hours. the buzzer will turn on again. if the ALARM OFF button is not pressed. the buzzer will turn itself off automatically after 48 hours. but the red Temp Alarm Light will continue to blink.
Blue Defrost button (SomeChest Models)
IMPORTANT: It is time to defrost and clean the freezer when the blue defrost button is completely covered with frost.
Power Cord Clamp
The clamp prevents the power cord from being accidently unplugged. Remember when removing or replacing the electrical cord. to remove or replace the power cord clamp.
Slide-Out Basket (upright models)
The Slide-Out Basket. located at the bottom of the freezer provides separate storage space for items that are difficult to store on freezer shelves. To remove the basket. pull out. and lift up.
Security Lock with Pop-Out Key
This security lock fastens the door snugly. ensuring that stored food is secure To lock or unlock the freezer. push the key into the lock and turn. The key pops out of the lock after it has been turned.
Interior Light
The light comeson automaticallywhen the door isopened. To replacethe light bulb. turn the temperature control to OFF and unplug the electrical cord. Replace the old bulb with a bulb of the same wattage.
Adjustable Shelf (upright models)
This shelf can be moved to one of two positions Lift the shelf up and out to move to the desired position.
Defrost Drain
The defrost drain provides a method of draining the water during defrosting and cleaning. See "Defrosting" in Care and Cleaning Section.
Slide-Aside Basket (chest models)
This basket helps organize odd-shaped items. To reach other packages in the freezer. slide the basket aside or lift out.
Divider/Drain Pan (chest models)
The Divider/Drain Pan doubles as a convenient storage area and serves as a shallow drain pan when defrosting. To remove. lift pan straight up out of the supports. and out of the chest.
Fast Freezing Shelves (upright models)
These shelves contain cooling coils to freeze foods quickly and allow cold air to constantly circulate throughout the freezer. Do not use sharp metal objects such as ice picksor scrapers to clean the shelves. This could damage the shelves and reduce their cooling ability. These shelves are not adjustable.
Tilt-Out Shelf
This shelf is located inside on the freezer door and provides additional storage space. To access an item. tilt top of "basket" shelf down.
Drop Front (upright models)
The Drop Front. located at the bottom of the freezer. provides a separate compartmentfor small irregular shaped items or large. bulky items. Liftthe front up and outto remove.
Damp objects stick to cold metal surfaces. Do not touch interior metal surfaces with wet or damp hands.
Some upright freezers are frost-free and defrost automatically. but should be cleaned occasionally.
Between Defrostings
To avoid frequent defrosting. occasionally use a plastic scraper to remove frost. Scrape with a pulling motion. Never use a metal instrument to remove frost.
Defrosting
CAUTION
Freezer must be unplugged (to avoid electrical hazard) from power source when defrosting unit,
It is important to defrost and clean freezer when ¼ to ½ inch of frost has accumulated. Frost may tend to accumulate faster on upper part ofthe freezer due to warm. moist air entering the freezerwhen the door isopened. Remove food and leave the door open when defrosting the freezer.
Cleaning the Inside
After defrosting, wash inside surfaces of the freezer with a solution of two tablespoons of baking soda inone quart (1.136 litres)warm water. Rinse and dry. Wring excess water out of the sponge or cloth when cleaning in the area of the controls. or any electrical parts.
Wash the removable parts with the baking soda solution mentioned above, or mild detergent and warm water. Rinse and dry. Never use metallic scouring pads, brushes, abrasive cleaners, or alkaline solutions on any surface. Do not wash removable parts inadishwasher.
Cleaning the Outside
Wash the cabinet with warm water and mild liquid detergent. Rinse well and wipe dry with a clean soft cloth Replace parts and food.
WARNING
If leaving freezer door open while on vacation, make certain that children cannot get into the freeze and become emtrapped
NOTE
Do not open freezer door unnecessarily if freezer is not for several hours
Vacation and Moving Tips
Short Vacations: Leave the freezer operating during vacations of less than three weeks.
Long Vacations: If the freezer will not be used for several months, remove allfood and unplug the power cord.Clean and dry the interiorthoroughly. To prevent odor and moldgrowth, leave the freezer door open slightly, locking itopen if necessary.
Moving: Disconnect the power cord plugfrom thewall outlet. Remove foods. then defrost. nd clean the freezer. Secure all loose items suchas base panel. baskets. and shelves by taping them securely inplace to prevent damage In the moving vehicle. ecurefreezer inan uprightposition. nd secureto prevent movement Also protect outside of freezer with a blanket. or similar item.
If a power failure occurs, frozen foods will stay frozen for at least 24 hours if the freezer is kept closed If the power failu re continues. pack seven or eight pounds of dry ice intothe freezer every 24 hours. Look inthe Yellow Pages under "Dry Ice. "Dairies. or "Ice Cream Manufacturers" for local dry ice suppliers Always wear gloves and use caution when handling dry ice
If the freezer has stopped operating, see "Freezer does not run" in the Avoid Service Checklist Section of this manual. If you cannot solve the problem. call an authorized servicer immediately.
If the freezer remains offfor several hours, follow the directions above for the use of dry ice during a power failure. If necessary, take thefood to a local locker plant until the freezer is ready to operate. Look inthe Yellow Pages under "Frozen Food Locker Plants."
Avoid Service Checklist
Before calling for service. review this list It may save you both time and expense. This list includes common occurrences that are not the result of defective workmanship or materials in this appliance.
Freezer does not run
Freezer runs too much or too long
Temperature inside freezer are too cold.
Temperature inside freezer are too warm
Temperature of external freezer
The exterior freezer walls can be as much as 30°F warmer than room surface is warm temperature. This is normal while the compressor works to transfer heat from inside the freezer cabinet.
Louder sound levels whenever freezer is ON temperatures.
They require a high efficiency compressor. When the surrounding noise level is low. you might hear the compressor running while it cools the interior.
Louder sound levels when compressor comes ON
Popping or cracking sound when compressor comes ON
Bubbling or gurgling sound like water boiling
Vibrating or rattling noise
Moisture forms on inside freezer walls
Moisture forms on outside of freezer
Odor in freezer
Door will not close
Your freezer is protected by this warranty
In the U.S.A., your appliance is warranted by Electrolux Home Products, Inc. We authorize no person to change or add to any of our obligations under this warranty. Our obligations for service and parts under this warranty must be performed by us or an authedzed Electrolux Home Products, Inc. sewP.er. In Canada, your appliance is warranted by Electrolux Canada Corp.
NORMAL RESPONSIBILITIES OF THE CONSUMER EXCLUSIONS IF YOU NEED SERVICE
This warranty applies only to products in ordinary household use, and the consumer is responsible for the items listed below:
EXCLUSIONS
This warranty does not cover the following:
IF YOU NEED SERVICE
Keep your bib of sale, delivery slip, or some other appropriate payment record. The date on the bill establishes the warranty pedod should service be required. If service is performed, it is in your best interest to obtain and keep all receipts. This written warranty gives you specific legal dghts. You may also have other dghts that vary from state to state. Service under this warranty must be obtained by contacting Electrolux Home Products, Inc.:
This warranty only applies in the 50 states of the U.S.A. Puerto Rico, and Canada. Product features or specifications as described or illustrated are subject to change without notice. All warranties are made by Electrolux Home Products, Inc. In Canada, your appliance is warranted by Electrolux Canada Corp.