Loading ...
Loading ...
Loading ...
en-us Familiarizing yourself with your appliance
12
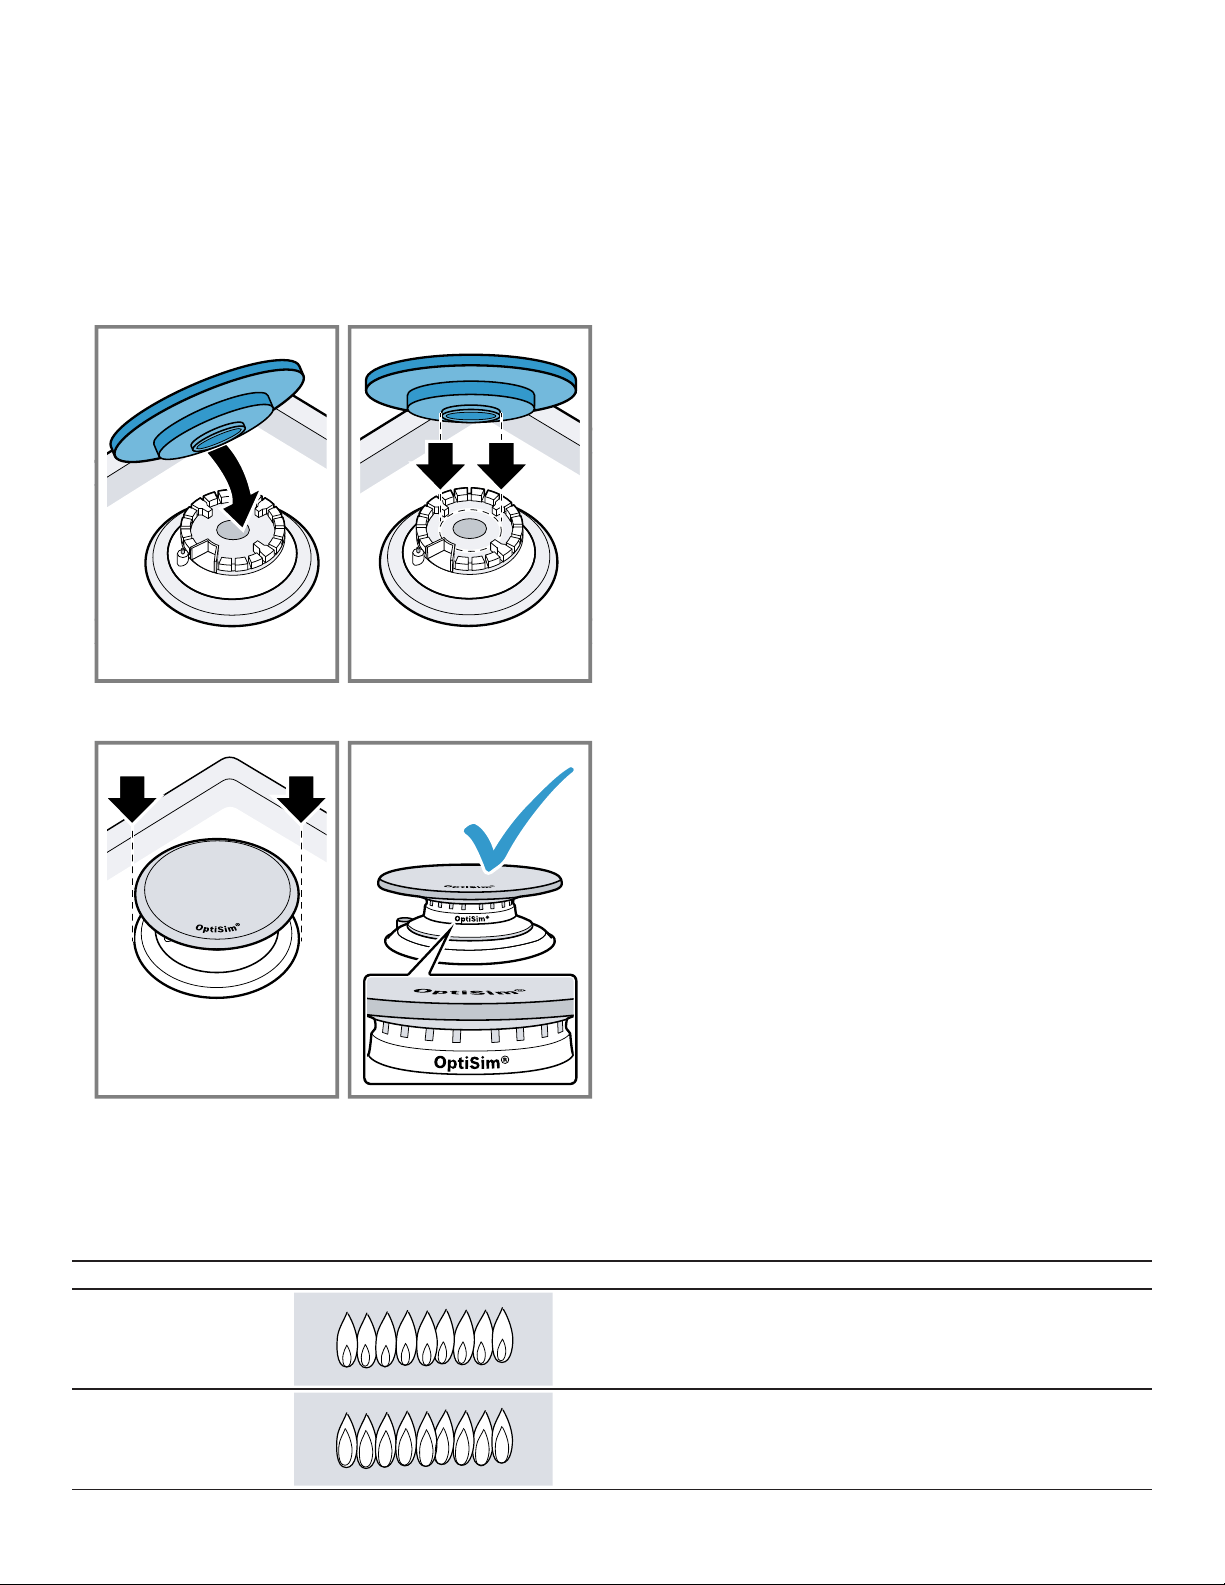
4.4 OptiSim® feature
The OptiSim® burner cap has been designed to work with
the small burner at the front left position of the cooktop. It
is used to provide optimal simmering for delicate sauces
while minimizing the risk of scorching.
Installing the OptiSim® burner cap
▶
Place the burner cap on the burner base, so that the
lower protrusion locks in place in the center of the
burner base.
a When properly installed the OptiSim® burner cap will
extend beyond the burner base and raised surface.
4.5 Burner grates
Place the burner grates correctly onto the cookop. Never
operate the cooktop without the burner grates in place.
¡ For the correct position of the burner grates, refer to the
appliance overview image →
Page10
.
¡ Place the cookware on the burner grates. Never place
cookware directly onto the burners.
¡ Always remove burner grates carefully. When you move
one burner grate, the burner grates next to it may also
move.
4.6 Sealed burners
Your cooktop has sealed gas burners. There are no
burner parts under the cooktop to clean, disassemble or
adjust.
Your cooktop has four different burner sizes; small,
medium, large and dual-flame. Match every burner cap
with the corresponding burner base.
4.7 Flame characteristics
The color of the flame tells you if the gas supply is properly adjusted.
Note:Allow the appliance to operate for 4 to 5minutes before evaluating the flame. Some yellow streaking is normal dur-
ing the initial startup.
Flame Image Measure
Completely or mostly
yellow
Verify that the regulator is set for the correct fuel. Retest af-
ter adjustment.
Yellow tips on outer
cone
Normal for LP gas
Loading ...
Loading ...
Loading ...