Loading ...
THIRD ANGLE PROJECTION
REV.
ECO#
DATE
BY
DETAILS / DESCRIPTION
Waterloo Industries, Inc.
SEDALIA, MISSOURI
PART NO.
SHEET
REVISION
DRAWING NO.
DRAWING IS DERIVED FROM SOLIDWORKS CAD MODEL AND IS PRODUCED IN ACCORDANCE WITH ASME Y14.100
AND RELATED DOCUMENTATION PRACTICES
THIS DRAWING AND THE INFORMATION IT CONTAINS IS THE PROPRIETARY PROPERTY OF WATERLOO
INDUSTRIES, INC. AND MAY NOT BE REPRODUCED WITHOUT WRITTEN PERMISSION FROM WATERLOO
INDUSTRIES, INC. PRODUCT ENGINEERING.
SCALE
SIZE
UNLESS OTHERWISE SPECIFIED
DIMENSIONS ARE IN INCHES
TOLERANCES:
ANGLE
1
2 PLACE
.03
3 PLACE
.015
OTHER TOLERANCES PER DWG 16856
INTERPRET DIMENSIONS AND
TOLERANCES PER ASME Y14.5M
TITLE
DRAWN BY
DATE:
MATERIAL
1014069
-
GHOLCOMB
1/15/2016
1:6
SHEET 1 of 1
B
1014069
UNIT ASSEMBLY CAB 41IN
-
TOOLS REQUIRED:
3/8-in Socket
7/16-in Socket
NOTE: Not all assembly instructions will relate to your model.
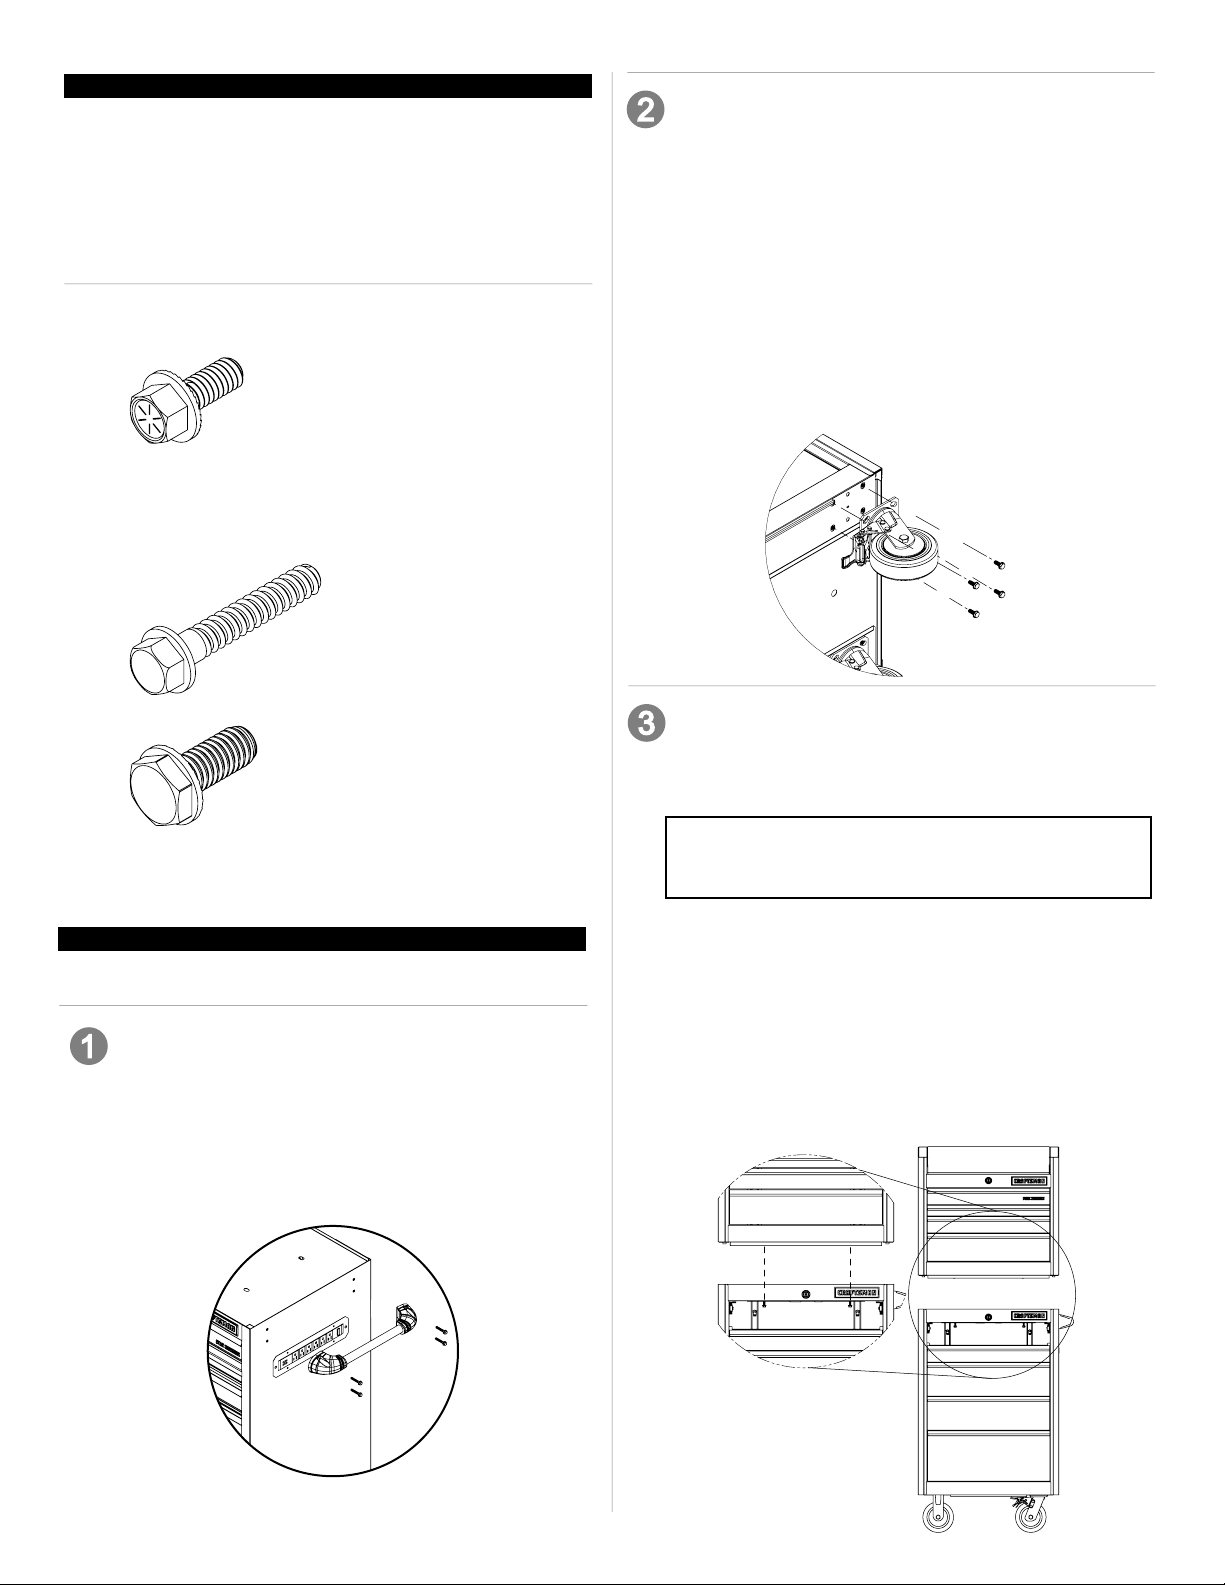
SIDE HANDLE ATTACHMENT
Items Needed:
1/4 - 20 x 1.50 Screw (Qty: 4)
3/8-in Socket
Process:
• Attach the side handle using (4) 1/4 - 20 x 1.50 screws.
• Hand tighten. Do not overtighten.
1/4 - 20 x .50 Screw (Qty: 4)
HARDWARE INCLUDED:
CHESTS:
HARDWARE
1/4 - 20 x 1.50 Screw (Qty: 4)
HARDWARE INCLUDED:
CABINETS:
5/16 - 18 x .750 Screw (Qty: 16)
CHEST INSTALLATION TO CART
Items Needed:
1/4 - 20 x .50 Screw (Qty: 4)
3/8-in Socket
Process:
NOTE: Use adequate personnel for this operation.
• Place chest on top of the rolling cart.
• Remove the top drawer(s) of the cart by following the
drawer removal instructions.
• Locate the pre-drilled holes in the cabinet top and attach
chest using (4) 1/4 - 20 x .50 screws.
• Wrench tighten all screws.
• Reinstall drawers.
NOTE: For safety, chest must be bolted to the cart to
prevent it from sliding or falling off cart.
2
ASSEMBLY
CASTER INSTALLATION
Items Needed:
5/16 - 18 x .750 Screw (Qty: 16)
7/16-in Socket
Process:
NOTE: Use adequate personnel for this operation.
• Lay the cabinet down on its back. Use packaging
material to protect the paint nish.
• Mount both swivel casters on the same side of the cart
as the side handle.
• Attach each caster using (4) 5/16 - 18 x .750 screws.
• Wrench tighten all screws.
• Return the cart to its upright position.
Loading ...
Loading ...
Loading ...