Loading ...
Loading ...
Loading ...

8
CM 47250 - 200605
www.KALORIK.com
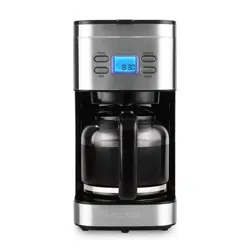
• Plug cord into an outlet. Press ON/OFF once to turn on automatic
brewing. The button will light up in red and start the brewing
process.
NOTE: You can remove the coffee pot from its place at any time to
serve, but do not exceed 30 seconds to prevent any dripping or
overflow from the edge of the funnel.
• The coffee maker will turn on Keep Warm function automatically
once the brewing process is finished. Once you are finished, you
can turn off the power by pressing the power button and
unplugging the appliance. The coffee maker will turn off
automatically 2 hours after the brewing process is finished.
• When coffee grounds are cool, carefully remove and discard used
grounds.
• Unplug appliance when not in use.
Note: The brewing cycle can be paused at any time by removing the
coffee pot. To resume, simply reinsert the coffee pot.
Programmable function
This coffee maker comes with a programmable feature, letting your
coffee be ready for you when you need it.
• To program your coffee maker, plug it in and press PROG button.
The small screen will light up in blue. Press it once and TIMER will
appear. Press again and CLOCK will appear on the screen. Use this
mode to set clock to current time. Use the HOUR button to change
the hour, and MINUTE button to change the minute. Note that
pressing the HOUR button 12 times will switch it from AM to PM.
• Once your clock is set, press PROG button again to go into TIMER
mode, which will allow you to program the machine to turn on at a
set time. Select time you wish to program.
• In order to launch the machine into its programmable mode, press
the ON/OFF button twice. The first time, the ON/OFF button will turn
red. Upon the second press, the PROG button will turn on in blue,
but the small screen will remain unlit. This indicates that you have set
the machine to start at its programmed time.
Note: Make sure that the AM and PM time matches your desired
programming time.
Loading ...
Loading ...
Loading ...