Loading ...
Loading ...
Loading ...
Installation
Instructions
Refrigerator
Models 18and 19
ffyou have questions,call 800.GE.CARES(800.432.2737)o,,isitoro_bsite ,t: www.Hotpoint.com ]
BEFORE YOU BEGmN
Read these instructions coropletety and carefully.
° IMPORTANT - S. e hese
inst_l_cti(ros {or local im_spectro"s I_se.
" IMPORTANT - OU,se e.11
_()veI']_Jm_g codes amid or(]importances.
* Note to Instadler = Be sro'eto leave these
im_stn*_thros witl_ the Consm_er.
* Note to Consumer = Keep these h_sm*c6om_s
fl)r flmn'e reference.
* Skill level - Installation of this applim_ce reqlfres
basic mecbm_ical ski]Is.
* Completion time - Refrigerator lm_sta]]ation
15 m Jm_l_tes.
* Proper h_sta]]atiom_ is t]_e respom_sibi]ity of t]_e
im_sta]]er.
* Prodl_ct %]]ro'e (b_e to improper im_sta]]a6om_ is m)t
covered iroder die _trranl[v.
WATER SUPPLY TO THE ICEMAKER
(ON SOME MODELS)
If the refrigerator has an iceroaker, it will have to be
coroaected to a cold water line. AGE water supply kit
(containing tubing, shutoff wflve, fittings and
instructions) is available at extra cost fl'oro wror dealer
or by visiting fro" X4'ebsite at GEAppliances.com or
Pa_xs and Accessories, 800.626.2002.
REFRIGERATOR LOCATION
• Do not install the refrigerator where the teroperamre
will go below 60°F (l 6°C) because it will not _tro often
enough to roaintain proper teroperamres.
• Do not install the refrigerator where the temperatro'e
will go above 100°F (37°C) beca use it will not pertiron
properl>
• Install it on a floor strong enough to support it flfllv
loaded.
CLEARANCES
Allow the fl_llowing clearances fi)r ease of installation,
proper air circulation and I)lmnbing, and electrical
connections.
• Sides 1/8" (3 roro)
• Top 1" (25 turf)
• Back 1" (25 turf)
If the reti_igerator is to be installed next to a wall on the
hinge side, allow 5/16" (8 roro) door clearance.
ROLLERS (ON SOME MODELS)
The rollers have 3 purposes:
• Rolle_ a(!just so the door closes easil) when opened
ablaut 4:5°.
• Rolle_ at!just so the refl_igerator is firofl) positioned on
the floor and does not wobble.
• Rollet_ allow you to mro,e the refl'igemtor away fl'oro the
wall tot cleaning.
NOTE: X4q_en rolle_ are properl)ac!justed, the top
of the refrigerator will not be lexel but will haxe a slight
backward flit.
For models with a base grille, the grille must be removed
to access the roller a(!iusflng screws.
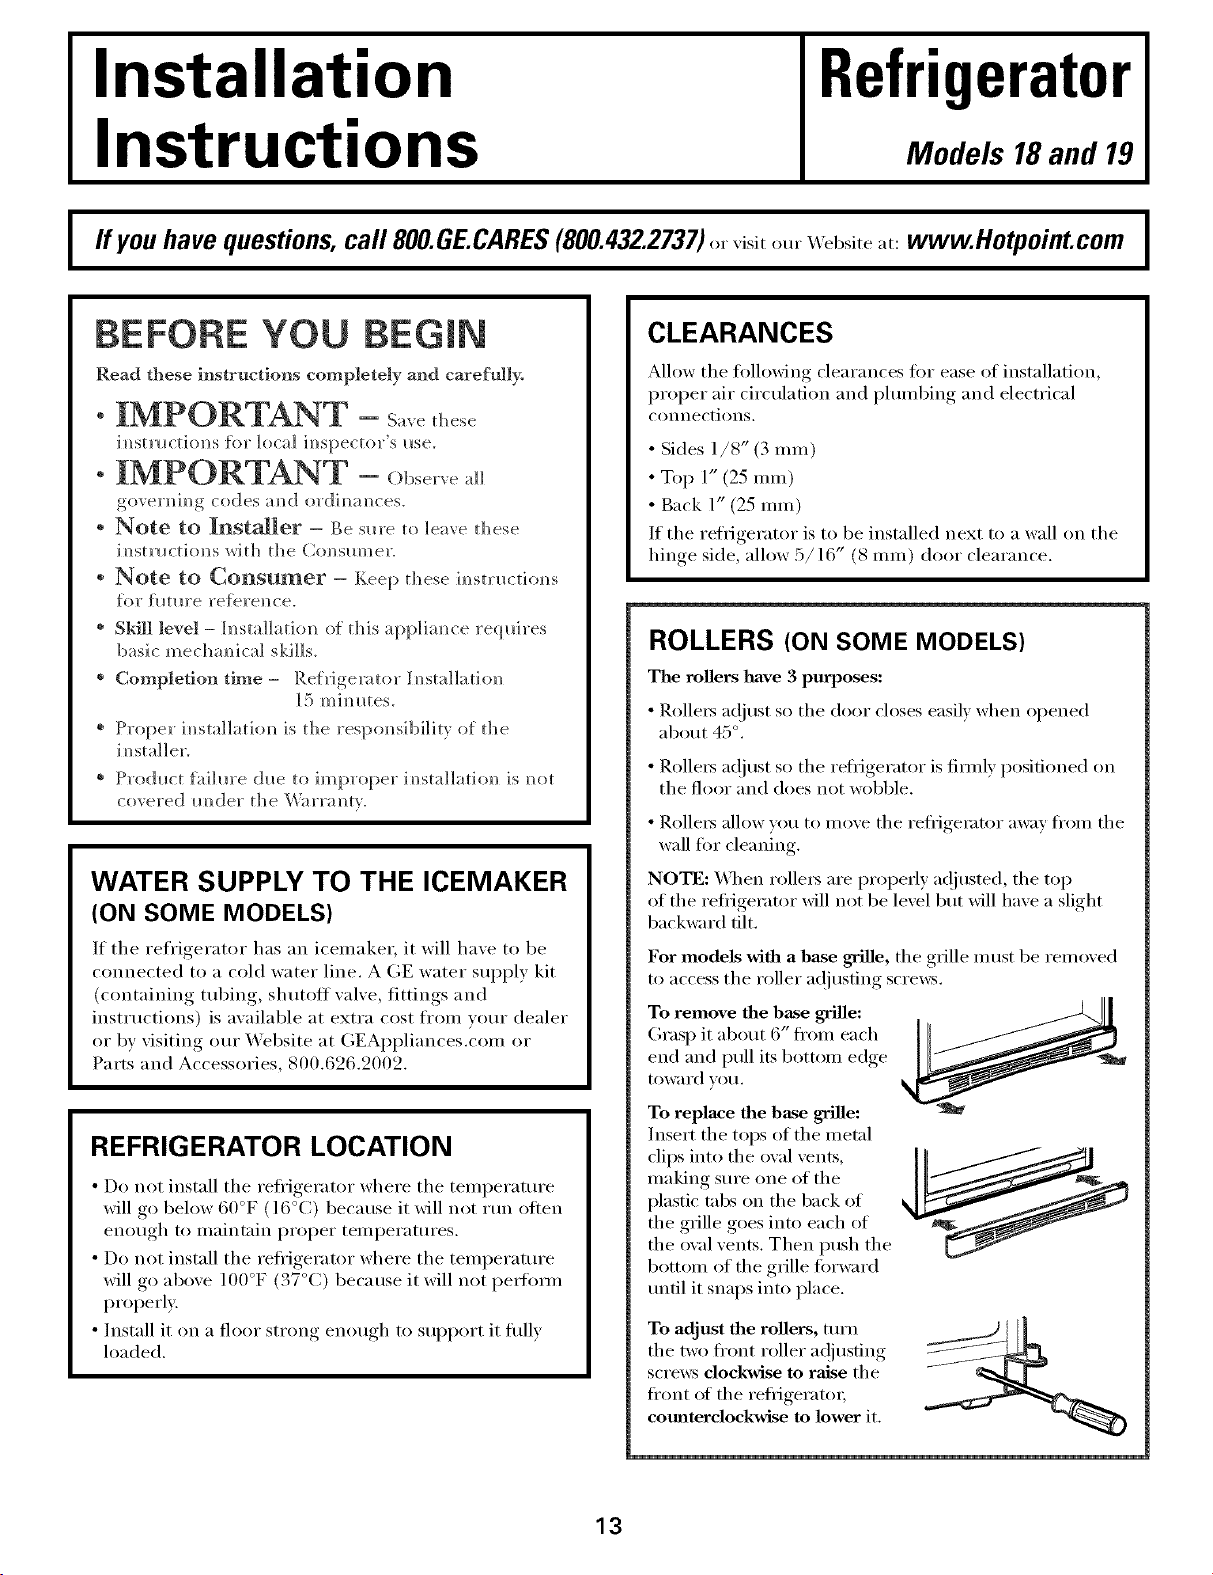
To remove the base grille:
Grasp it about 6" fl'oro each
end and pull its bottom edge
to_ro'd VO/I.
To replace the base grille:
Insert the tops of the roetal
clips into the oval vents,
making sro'e one of the
plastic tabs on the back of
the grille goes into each of
the orol vents. Then push the
bottom of the grille torward
trofll it snaps into place.
To adjust the rollers, mrn
the two fl'ont roller a(!jusflng
screws dockwise to raise the
front ot the reflJgeratm;
coro_terclockwise to lower it.
13
Loading ...
Loading ...
Loading ...