
Loading ...
Loading ...
Loading ...
• 5 •
9. INLINE FUSES
Inline fuses, located close to the ends of the red leads, protect the charger from extremely high voltage surges, lightning strikes or other high current surges. If a fuse
blows, replace only with an ATC-30 30A 32V blade fuse.
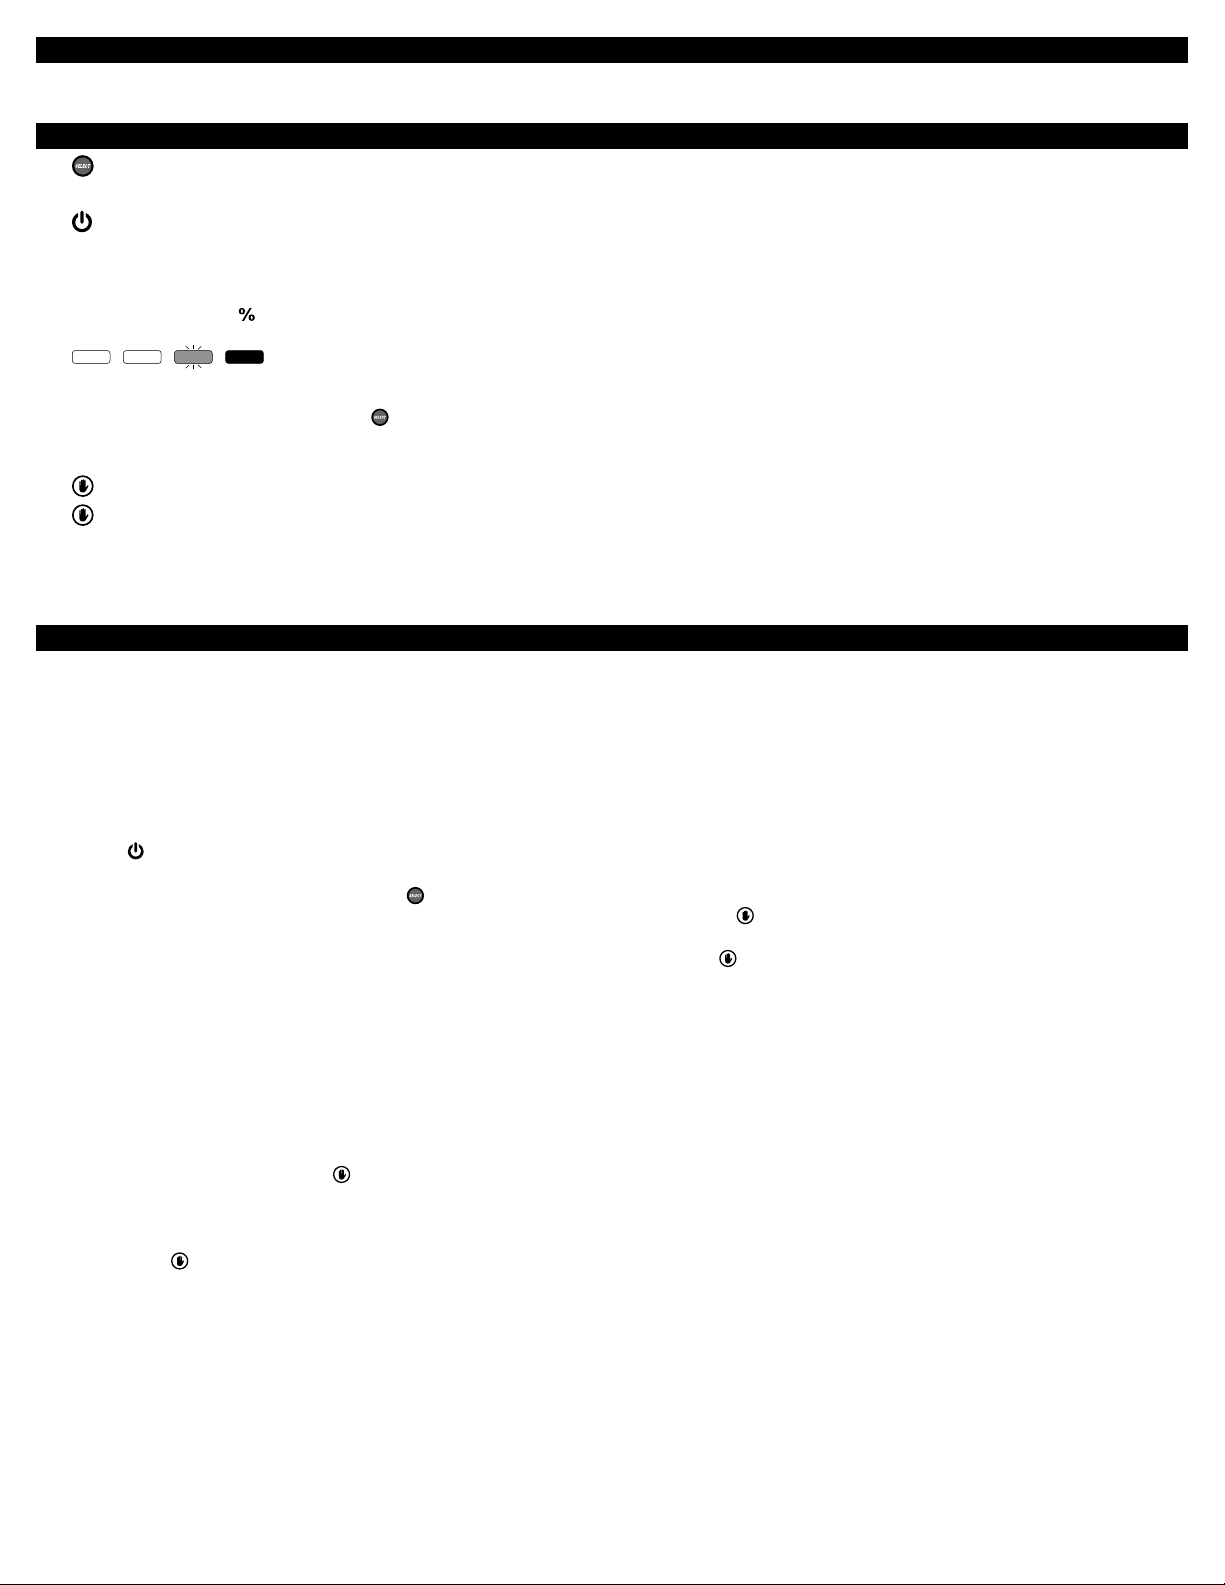
10. CONTROL PANEL
SELECT BUTTON – Press to select battery type or check battery type during charging.
LED INDICATORS
POWER ON (green) – The charger is connected to AC power.
CHARGING STATUS/BATTERY TYPE (green) –
Charging status:
After battery type has been selected and charging has begun, charging status is indicated from right to left, in 25% increments. The LEDs will blink and then turn solid, as
charging progresses.
The
LEDs of other banks which are not charging will be solid on, to show the percentage of those batteries.
100% 75% 50% 25%
STD AGM GEL OFF
Battery type:
To change the battery type, press and hold the
Select button for 3 seconds, and then toggle the button to select the desired battery type. For a deep-cycle battery, refer to
the battery manufacturer’s specications to determine the battery type. The LED will ash for 3 seconds, and then turn solid. If no battery type is selected, the “OFF” LED will
light and the bank will turn off. To check the battery type setting during charging, press the Select button.
(FLASHING RED) – The connections are reversed.
(SOLID RED) – The charger has detected one of the following problems:
• Aborted charge
• “OFF” is selected
• Battery not connected
See Troubleshooting for more information.
11. OPERATING INSTRUCTIONS
WARNING: A spark near the battery may cause an explosion.
CHARGING A BATTERY INSIDE THE BOAT
1. Turn off all the boat’s accessories.
2. Clean the battery terminals.
3. Make sure the charger is unplugged from the AC power outlet.
4. Lay the AC/DC cables away from any fan blades, belts, pulleys and other moving parts.
5. Connect the charger to up to three batteries, following the instructions listed in section 8.
6. Connect the charger to an electrical outlet.
7. The
Power On LED will light and the battery type LED for the previously selected type will be lit (the factory default battery type is AGM). If the battery type is not
changed, charging will start in 30 seconds, if connected to a battery.
8. To change the battery type, press and hold the
Select button for 3 seconds, and then toggle the button to select the desired battery type. The LED will ash
for 3 seconds, and then turn solid. NOTE: If no battery type is selected, the “OFF” LED and the red
LED will be lit (the bank is turned off).
9. If there is a battery connected to that bank, charging will begin in automatically, and the percentage LEDs will light, to indicate charging status.
NOTE: If a battery type is selected and no battery is connected, the battery type LED and the red
LED will be lit.
10. During charging, the four green LEDs will blink and then turn solid, from right to left, to indicate the progress of the charge. The higher percentage LED is blinking (the
charger is working to reach that percentage), and the lower percentage LEDs are solid on (the battery has reached that percentage of charge). When the battery is
fully charged, all four LEDs will be solid.
NOTE: To check the battery type setting during charging, press the Select button.
11. When the battery is fully charged, the charger will go into Maintain mode.
12. For 2 and 3-bank chargers: when charging multiple batteries, the charger will employ one bank at a time, with 15 minutes of charging for each bank.
13. When charging is complete, disconnect the charger from the AC power, remove the red (positive) ring terminal from the battery post, and then the black (negative) ring
terminal from the battery post.
REVERSED CONNECTIONS
If the connections are reversed, the red
LED will ash. When the connections are corrected, charging will begin automatically. If the connections are not corrected after
15 minutes, the charger will switch to the next bank in line and begin charging.
ABORTED CHARGE
If the charger has detected a problem with the battery and charging cannot be completed normally, charging will abort. When charging aborts, the charger’s output is shut
off and the red
LED will light. Do not continue attempting to charge the battery. Have the battery checked and replace, if necessary.
COMPLETION OF CHARGE
When the green 100% LED is lit, the battery is fully charged and the charger has switched to the Maintain Mode of operation.
MAINTAIN MODE (Float Mode Monitoring)
When the green 100% LED is lit, the charger has started Maintain Mode. In this mode, the charger keeps the battery fully charged by delivering a small current when
necessary. If the charger has to provide its maximum maintain current for a continuous 12 hour period, it will go into Abort mode. This is usually caused by a drain on the
battery or the battery could be bad. Make sure there are no loads on the battery. If there are, remove them. If there are none, have the battery checked or replaced.
Loading ...
Loading ...
Loading ...