Loading ...
Loading ...
Loading ...
1
2
Installation Instructions
Step 4
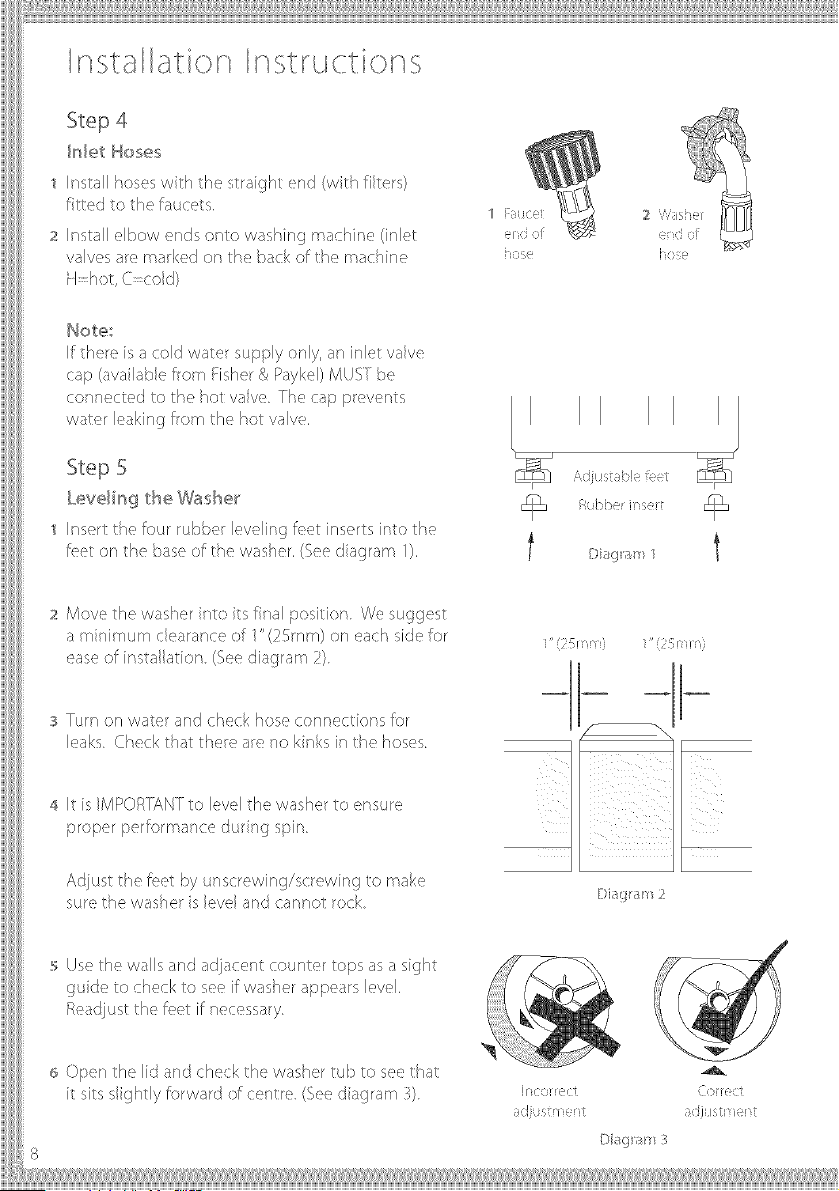
_nl_t Hos_s
Install hoses wth the st aight end (wth fiters}
ftted to the faucets.
Install ebow e_ds onto washing machine (inlet:
valves ae naked on the back of the rachine
H hot, C cod}
Note;
If the e is a cold watel supply only, an nlet valve
cap (ava abe fore Fishe 8xPay el) MUS be
co]netted othehotvave The cappevents
water ea ngfom he hot valve.
:1 ( (!:
iO
Step 5
Levelir_g the Washer &_
Insert: the four ubberleveingfeet nserts into the
feet on the base of the washer. (See d agram 1}. l
&( I I _ ) :
il ¸ )_ -i_:_
t
Move tie was]er t/to ts fnal postion We suggest:
am /m mceaanceofI" (2 nm) on each side for
ease of insta ation (See diagam 2)
Turn on ware and check hose connect ons for
leaks. Check that thee ae no kn s in the hoses.
It s MPORIANTto level the washe_to ensue
properpeforma/cedu /gspin
Adjus the feet by unscrewing/screw ng to make
sure thewashe s eve and cannot: ock
[)i_:_g_'am 2
_ Use the walls an( adjacent: cot nter tops as a sght
gude to check to see if was _erappea s le\/el.
F/eadust he feet if necessa y
6 ())el theli( and check the washertu_ oseethat
i sits s ghtly forward ofce/te (Se(, dagram 3)
ir (, (-,: / (
C!LSI t _( IH;[I i( !
Loading ...
Loading ...
Loading ...