Loading ...
Loading ...
Loading ...
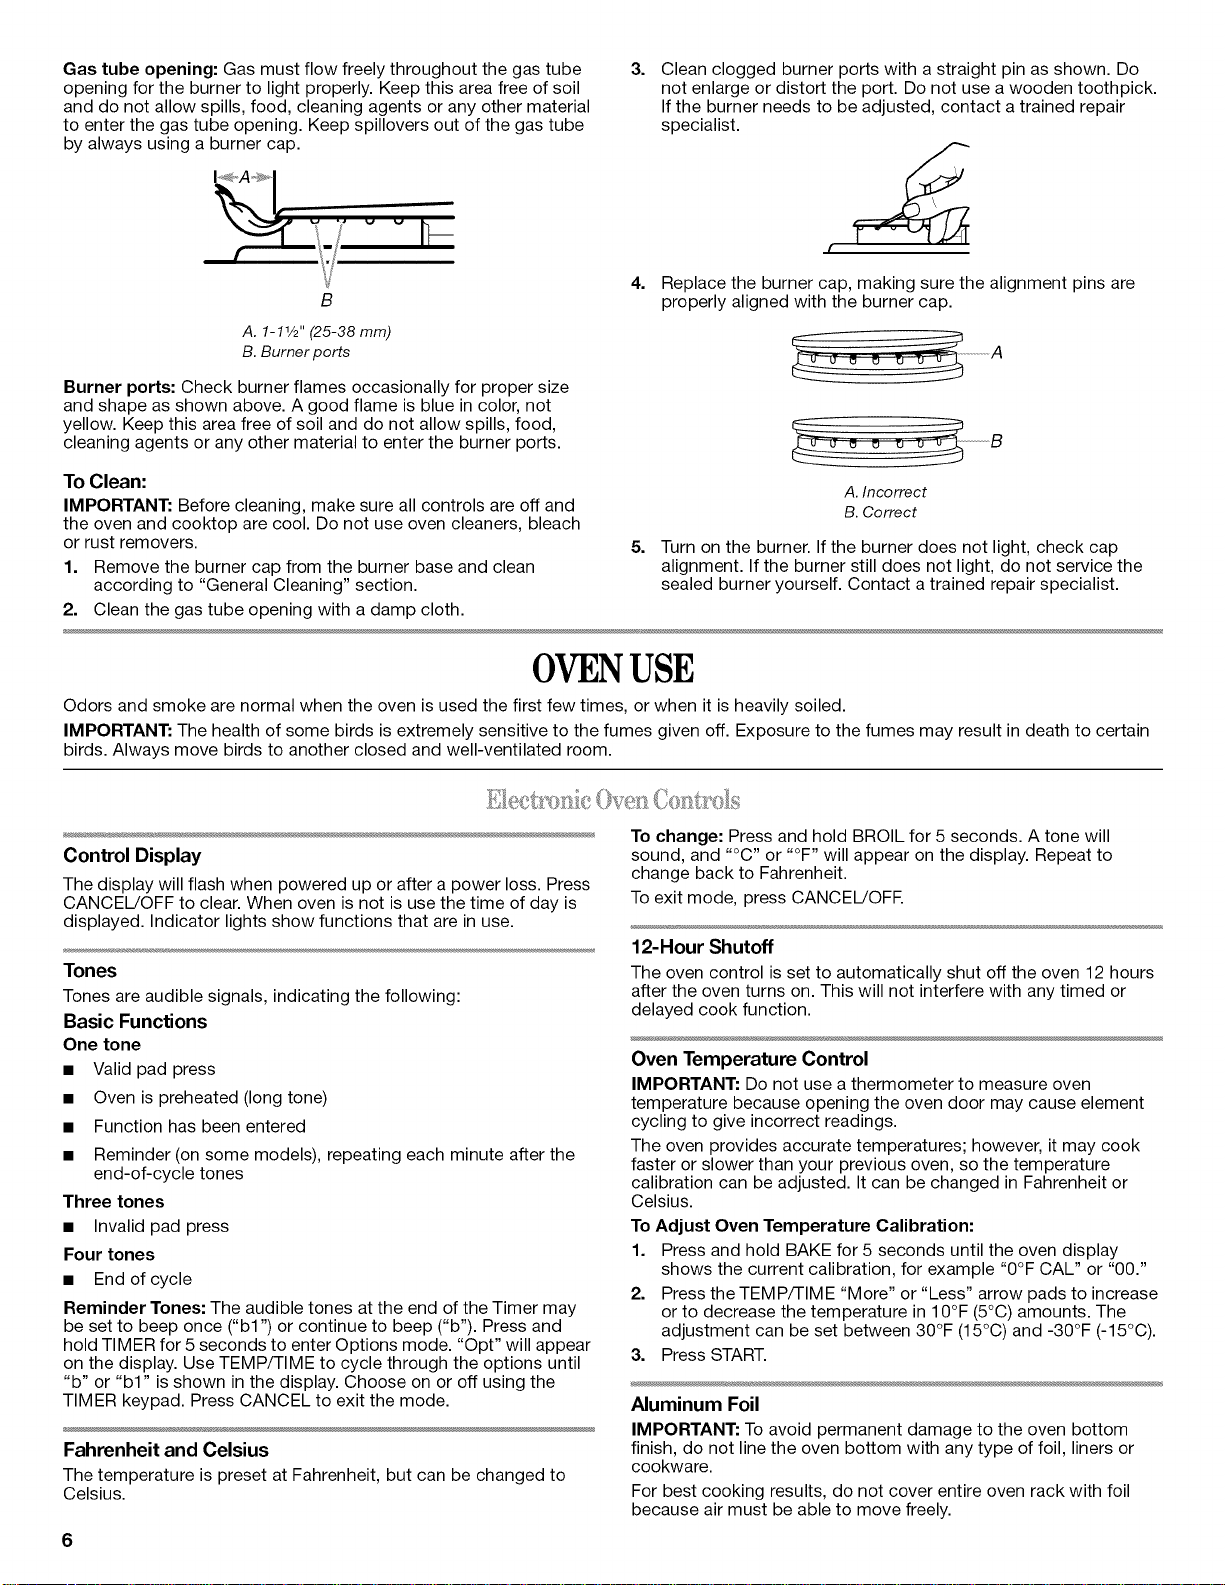
Gas tube opening: Gas must flow freely throughout the gas tube
opening for the burner to light properly. Keep this area free of soil
and do not allow spills, food, cleaning agents or any other material
to enter the gas tube opening. Keep spillovers out of the gas tube
by always using a burner cap.
3.
Clean clogged burner ports with a straight pin as shown. Do
not enlarge or distort the port. Do not use a wooden toothpick.
If the burner needs to be adjusted, contact a trained repair
specialist.
B
A. 1-11/2"(25-38 mm)
B. Burner ports
4.
Replace the burner cap, making sure the alignment pins are
properly aligned with the burner cap.
Burner ports: Check burner flames occasionally for proper size
and shape as shown above. A good flame is blue in color, not
yellow. Keep this area free of soil and do not allow spills, food,
cleaning agents or any other material to enter the burner ports.
To Clean:
IMPORTANT: Before cleaning, make sure all controls are off and
the oven and cooktop are cool. Do not use oven cleaners, bleach
or rust removers.
1. Remove the burner cap from the burner base and clean
according to "General Cleaning" section.
2. Clean the gas tube opening with a damp cloth.
A. Incorrect
B. Correct
5. Turn on the burner. If the burner does not light, check cap
alignment. If the burner still does not light, do not service the
sealed burner yourself. Contact a trained repair specialist.
OVENUSE
Odors and smoke are normal when the oven is used the first few times, or when it is heavily soiled.
IMPORTANT: The health of some birds is extremely sensitive to the fumes given off. Exposure to the fumes may result in death to certain
birds. Always move birds to another closed and well-ventilated room.
Control Display
The display will flash when powered up or after a power loss. Press
CANCEL/OFF to clear. When oven is not is use the time of day is
displayed. Indicator lights show functions that are in use.
Tones
Tones are audible signals, indicating the following:
Basic Functions
One tone
• Valid pad press
• Oven is preheated (long tone)
• Function has been entered
• Reminder (on some models), repeating each minute after the
end-of-cycle tones
Three tones
• Invalid pad press
Four tones
• End of cycle
Reminder Tones: The audible tones at the end of the Timer may
be set to beep once ("bl ") or continue to beep ("b"). Press and
hold TIMER for 5 seconds to enter Options mode. "Opt" will appear
on the display. Use TEMP/TIME to cycle through the options until
"b" or "bl" is shown in the display. Choose on or off using the
TIMER keypad. Press CANCEL to exit the mode.
Fahrenheit and Celsius
The temperature is preset at Fahrenheit, but can be changed to
Celsius.
To change: Press and hold BROIL for 5 seconds. A tone will
sound, and "°C" or "°F" will appear on the display. Repeat to
change back to Fahrenheit.
To exit mode, press CANCEL!OFE
12-Hour Shutoff
The oven control is set to automatically shut off the oven 12 hours
after the oven turns on. This will not interfere with any timed or
delayed cook function.
Oven Temperature Control
IMPORTANT: Do not use a thermometer to measure oven
temperature because opening the oven door may cause element
cycling to give incorrect readings.
The oven provides accurate temperatures; however, it may cook
faster or slower than your previous oven, so the temperature
calibration can be adjusted. It can be changed in Fahrenheit or
Celsius.
To Adjust Oven Temperature Calibration:
1. Press and hold BAKE for 5 seconds until the oven display
shows the current calibration, for example "0°F CAL" or "00."
2. Press the TEMP/TIME "More" or "Less" arrow pads to increase
or to decrease the temperature in 10°F (5°C) amounts. The
adjustment can be set between 30°F (15°C) and -30°F (-15°C).
3. Press START.
Aluminum Foil
IMPORTANT: To avoid permanent damage to the oven bottom
finish, do not line the oven bottom with any type of foil, liners or
cookware.
For best cooking results, do not cover entire oven rack with foil
because air must be able to move freely.
Loading ...
Loading ...
Loading ...