Loading ...
Loading ...
Loading ...
3=
Slide the upper chimney cover over the chimney support and
attach to the top of the support using two screws provided.
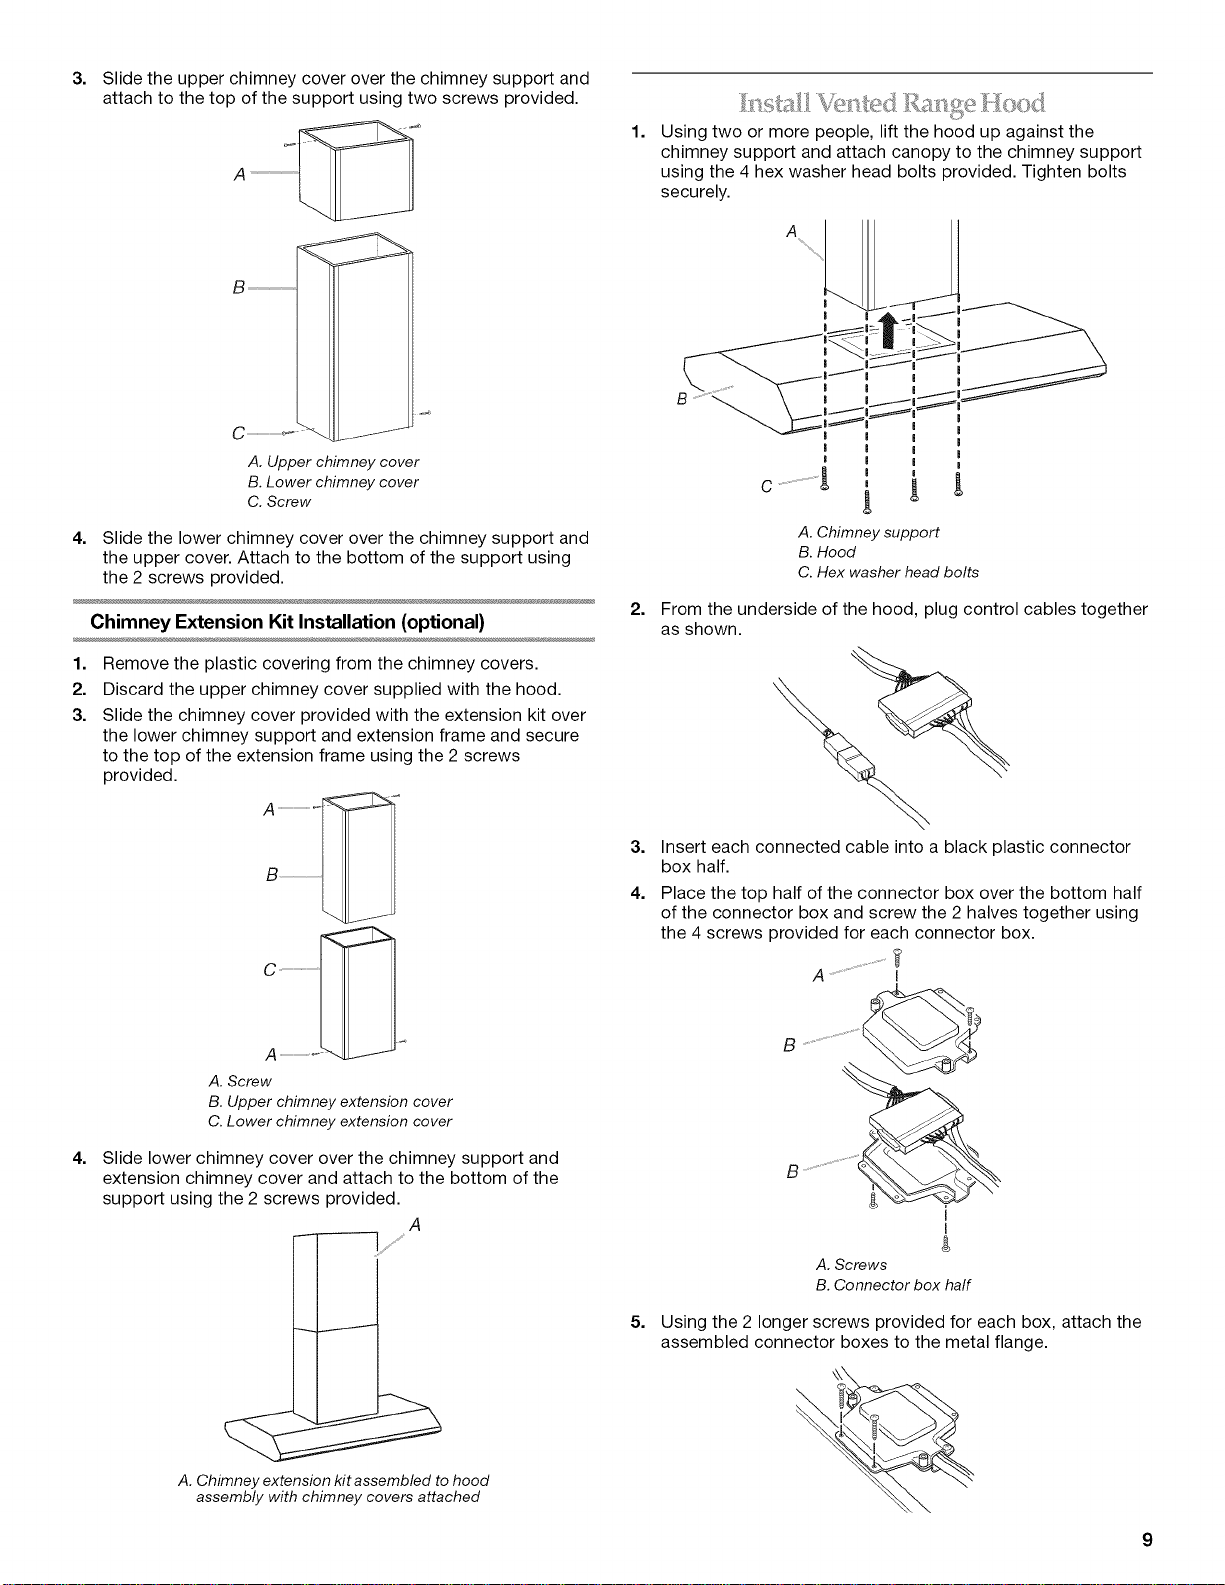
1=
Using two or more people, lift the hood up against the
chimney support and attach canopy to the chimney support
using the 4 hex washer head bolts provided. Tighten bolts
securely.
J
A. Upper chimney cover
B.Lower chimney cover
C. Screw
4. Slide the lower chimney cover over the chimney support and
the upper cover. Attach to the bottom of the support using
the 2 screws provided.
Chimney Extension Kit Installation (optional)
1. Remove the plastic covering from the chimney covers.
2. Discard the upper chimney cover supplied with the hood.
3. Slide the chimney cover provided with the extension kit over
the lower chimney support and extension frame and secure
to the top of the extension frame using the 2 screws
provided.
4=
C ..........................................
A ................................
A.Screw
B.Upper chimneyextension cover
C.Lower chimney extension cover
Slide lower chimney cover over the chimney support and
extension chimney cover and attach to the bottom of the
support using the 2 screws provided.
A
A. Chimney extension Mtassembled to hood
assembly with chimney covers attached
|
|
|
|
A. Chimney support
B. Hood
C. Hex washer head bolts
2. From the underside of the hood, plug control cables together
as shown.
3. Insert each connected cable into a black plastic connector
box half.
4. Place the top half of the connector box over the bottom half
of the connector box and screw the 2 halves together using
the 4 screws provided for each connector box.
5=
Using the 2 longer screws provided for each box, attach the
assembled connector boxes to the metal flange.
Loading ...
Loading ...
Loading ...