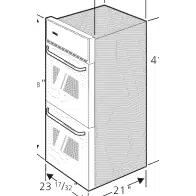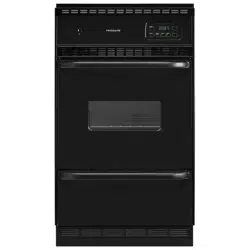
Gas Built-In
Oven
mFRIGIDAIRE
Owner's
Guide
Versi6n en espafiol ................................2
Product Registration...............................2
Important Safety Instructions............3-4
Grounding Instructions ..........................5
Oven Ignition...........................................5
Setting the Clock and MinuteTimer......6
Before Setting Oven Controls.................7
Setting Oven Controls............................8
Changing Oven Light.............................9
Adjusting Oven Temperature...............9
Oven Cleaning.......................................10
General Cleaning.............................11-12
Avoid Service Checklist..................13-14
Notes.......................................................15
Warranty & Service Information..........16
the LOOK of better performance
P/N 318200917 (9912) Rev. A
Product Registration
Register Your Product
ThePRODUCTREGISTRA TION CARD
should be filled in completely, signed
and returned to Frigidaire Company.
Thank you for choosing this appliance. The information contained within this
Owner's Guidewill instruct you on howto properly operate and carefor your oven.
Pleaseread through the information contained in your literature pack to learn more
about your new appliance.
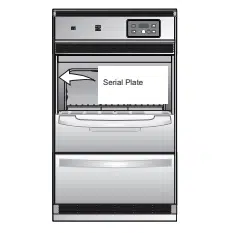
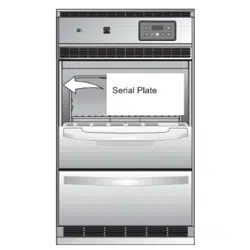
Record Your Model and Serial Numbers
Record inthe spaceprovided belowthe model and serialnumbers found on the serial
plate located on the side of the lower oven frame.
Model Number:
Serial Number:
Date of Purchase:
Contents
This Owner's Guide contains general
operating instructions for your range and
feature information for several models.
Your range may not have all the
described features.
Version en espa_ol
Sideseaobtener una copia en espahol de
este Manual del Usuario, sfrvaseescribir a
ladirecci6n que seincluye acontinuaci6n.
Solicite la P/N 318201147.
SpanishOwner's Guides
Frigidaire Home Products
Consumer Relations
P.O. Box 212378
Augusta, Georgia 30917-2378S
© 1997 White Consolidated Industries
All rights reserved
If the information in this manual is not
followed exactly, a fire or explosion may result causing
property damage, personal injury or death.
FOR YOUR SAFETY."
m Do not store or use gasoline or other flammable vapors
and liquids in the vicinity of this or any other appliance.
WHAT TO DO IF YOU SMELL GAS:
• Do not try to light any appliance.
• Do not touch anyelectricalswitch; do not use anyphone
in your building.
• Immediately call your gas supplier from a neighbor's
phone. Follow the gas supplier's instructions.
• If you cannot reach your gas supplier, call the fire
department.
Installation and service must be performed by a qualified
installer, servicer or the gas supplier.
IMPORTANT SAFETY INSTRUCTIONS
Read all instructions before using this appliance.
Save these instructions for future reference.
This guide contains important safety symbols and instructions. Pleasepay special attention to these symbols and follow all instructions
given. Here is a brief explanation of the use of these symbols.
_This symbol will help alert you to situations that
may cause serious bodily harm, death or property damage.
ri_'_ This symbol will help alert you to situations that
may cause bodily injury or property damage.
• Remove all tape andpackaging wrap before using the wall
oven. Destroythe carton and plastic bags after unpacking the
wall oven. Never allow children to play with packaging material.
Do not remove the wiring label and other literature attached tothe
back of the wall oven. Do not remove model/serial number plate.
• Proper Installation--Be sure your appliance is properly
installed and grounded by a qualified electrician or installer
in accordance with the National Electrical Code ANSI/NFPA
No. 70 (U.S.A.) or CSA C22.1, PART 1 (Canada)--la test editions
and local code requirements. Install only per installation
instructions provided in the literature package for this wall oven.
Ask your dealer to recommend a qualified installer, technician or
anauthorized repair service. Know howto disconnect the electrical
power to the wall oven at the circuit breaker or fuse box incase of
an emergency.
• User Servicing--Do not repair or replace any part of the
appliance unless specifically recommended in the manuals. All
other servicing should be done only by a qualified technician. This
may reducethe risk of personal injury and damagetothe wall oven.
• Never modify or alter the construction of the wall oven by
removing panels, wire covers, or any other part of the
product.
• Remove the oven door from any unused wall oven if it is to
be stored or discarded.
r __'A'I_LIL"L'L" IStepping, leaning orsitting on the doors of this
wall oven can result m serious injuries and may also cause
damage to the walloven. Do not allow children to climb or play
around the wall oven.
• StorageinoronAppliance--Flammablematerialsshouldnot
be stored in an oven, or in the storage drawer (if equipped).
This includes paper, plastic and cloth items, such as cookbooks,
plasticware and towels, aswell asflammable liquids. Donot store
explosives, such as aerosol cans, in or near the wall oven.
_ Do not use the wall oven for storage.
_ Do not store items of interest to children in the
cabinets above a walloven. Children climbing on thewall oven
to reach items could be seriously injured.
• Do not leave children alone--Children should not be left
alone or unattended in the area where anappliance b in use.
They should never be allowed to sit or stand on any part of the
appliance.
• DO NOT TOUCH INTERIOR OVEN BURNER OR INTERIOR
SURFACES OF THE WALL OVEN UNTIL THEY HA VECOOLED.
The oven heating burner may be hot eventhough the flames are
not visible. Areas near the burner may become hot enough to
cause burns. During and after use, do not touch, or let clothing
or other flammable materials touch these areas until they have
had sufficient time to cool. Among these areas are the oven vent
openings, the surfaces near these openings, oven door and
window.
• Wear Proper Apparel--Loose-fitting or hanging garments
should never be worn while using the appliance. Do not let
clothing or other flammable materials contact hot surfaces.
Never use your appliance for warming or
heating the room.
• DoNotUse WaterorFIouronGreaseFires--Smotherthefire
with a pan lid, or use baking soda, a dry chemical or foam-
type extinguisher.
• When heating fat orgrease, watch itclosely. Fat or grease may
catch fire if allowed to become too hot.
• UseOnlyDryPotholders--Moistordamppotholdersonhot
surfaces may result in burns from steam. Do not let the
potholderstouch the flame or burners. Do not use a towel or other
bulky cloth instead of a potholder.
• Do Not Heat Unopened Food Containers--Build-up of
pressure may cause the container to burst and result in injury.
• Remove the oven doors from any unused walloven if it is to
be stored or discarded.
• IMPORTANT--Do notattempt to operate the oven during a
power failure. If the power fails, always turn the oven off.
If the oven is not turned off and the power resumes, the oven will
begin to operate again. Food left unattended could catch fire or
spoil.
IMPORTANT SAFETY INSTRUCTIONS (continued)
IMPORTANT INSTRUCTIONS FOR
USING YOUR OVEN
• Use Care When Opening an Oven Door--Stand to the side of
the wall oven when opening the door of a hot oven. Let hot air
or steam escape before you remove or replace food in the oven.
• Keep Oven Vent Ducts Unobstructed. The waII oven isvented
at the upper control panel grille. Touching the surfaces inthis area
when the wall oven isoperating maycause severe burns. Also, do
not place plastic or heat-sensitive items near the oven vent. These
items could melt or ignite.
• Placement of Oven Racks. Always place oven racks in desired
location while oven is cool. If the rack must be moved while the
oven is hot, use extreme caution. Use potholders and grasp the
rack with both hands to reposition. Do not let potholders contact
the oven burner flame or interior of the oven. Removeall utensils
from the rack before removing the rack.
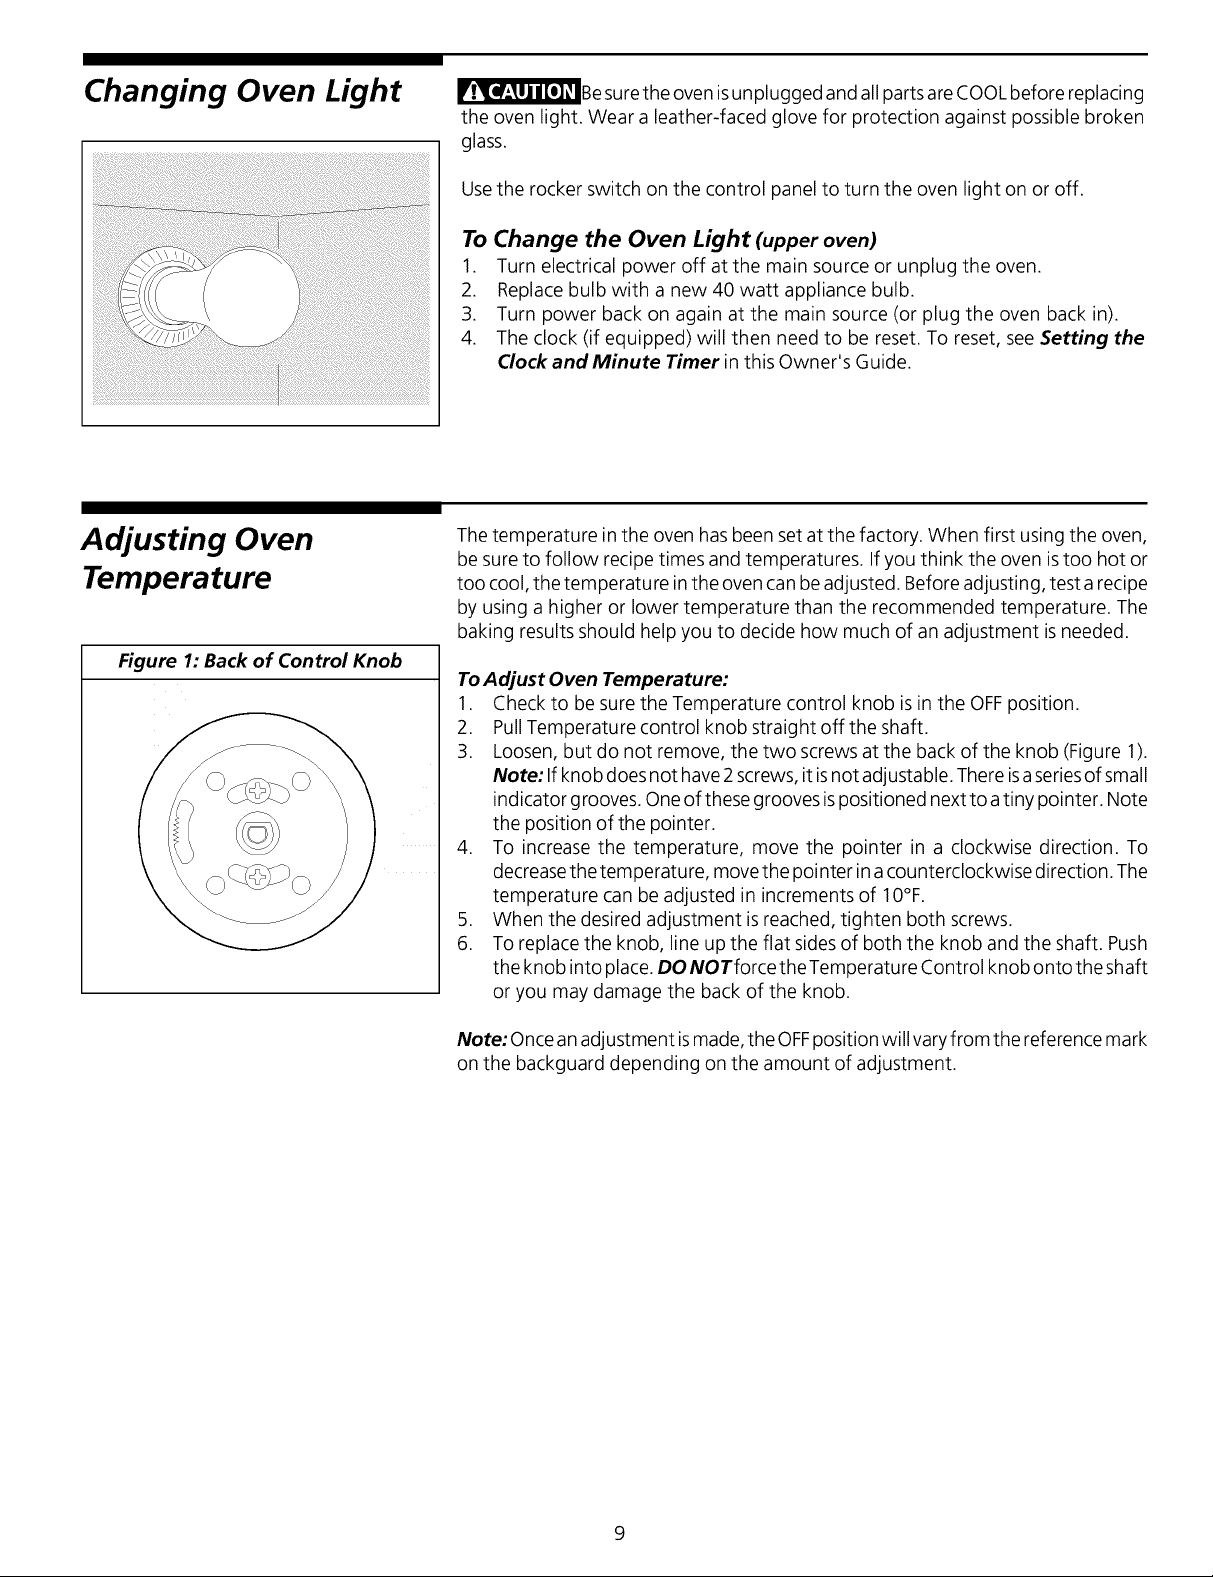
• Do not use the broilerpan withoutits insert. The broiler pan
and grid allow dripping fat to drain and be kept away from the
high heat of the broiler.
• Donotcoverthebroilergridorovenbottomswithaluminum
foil. Exposed fat and grease could ignite.
• Do not touch a hot oven light bulb with a damp cloth. Doing
socould causethe bulb to break. Disconnect the oven or shut off
the power to the oven before removing and replacing the bulb.
IMPORTANT INSTRUCTIONS FOR
CLEANING YOUR OVEN
• Clean the wall oven regularly to keep allparts free of grease
that could catch fire. Do not allow grease to accumulate.
• Kitchen cleaners/aerosols--Always follow the manufacturer's
recommended directions for use. Be aware that excess residue
from cleaners and aerosols may ignite causing damage and/or
injury.
SAVE THESE INSTRUCTIONS
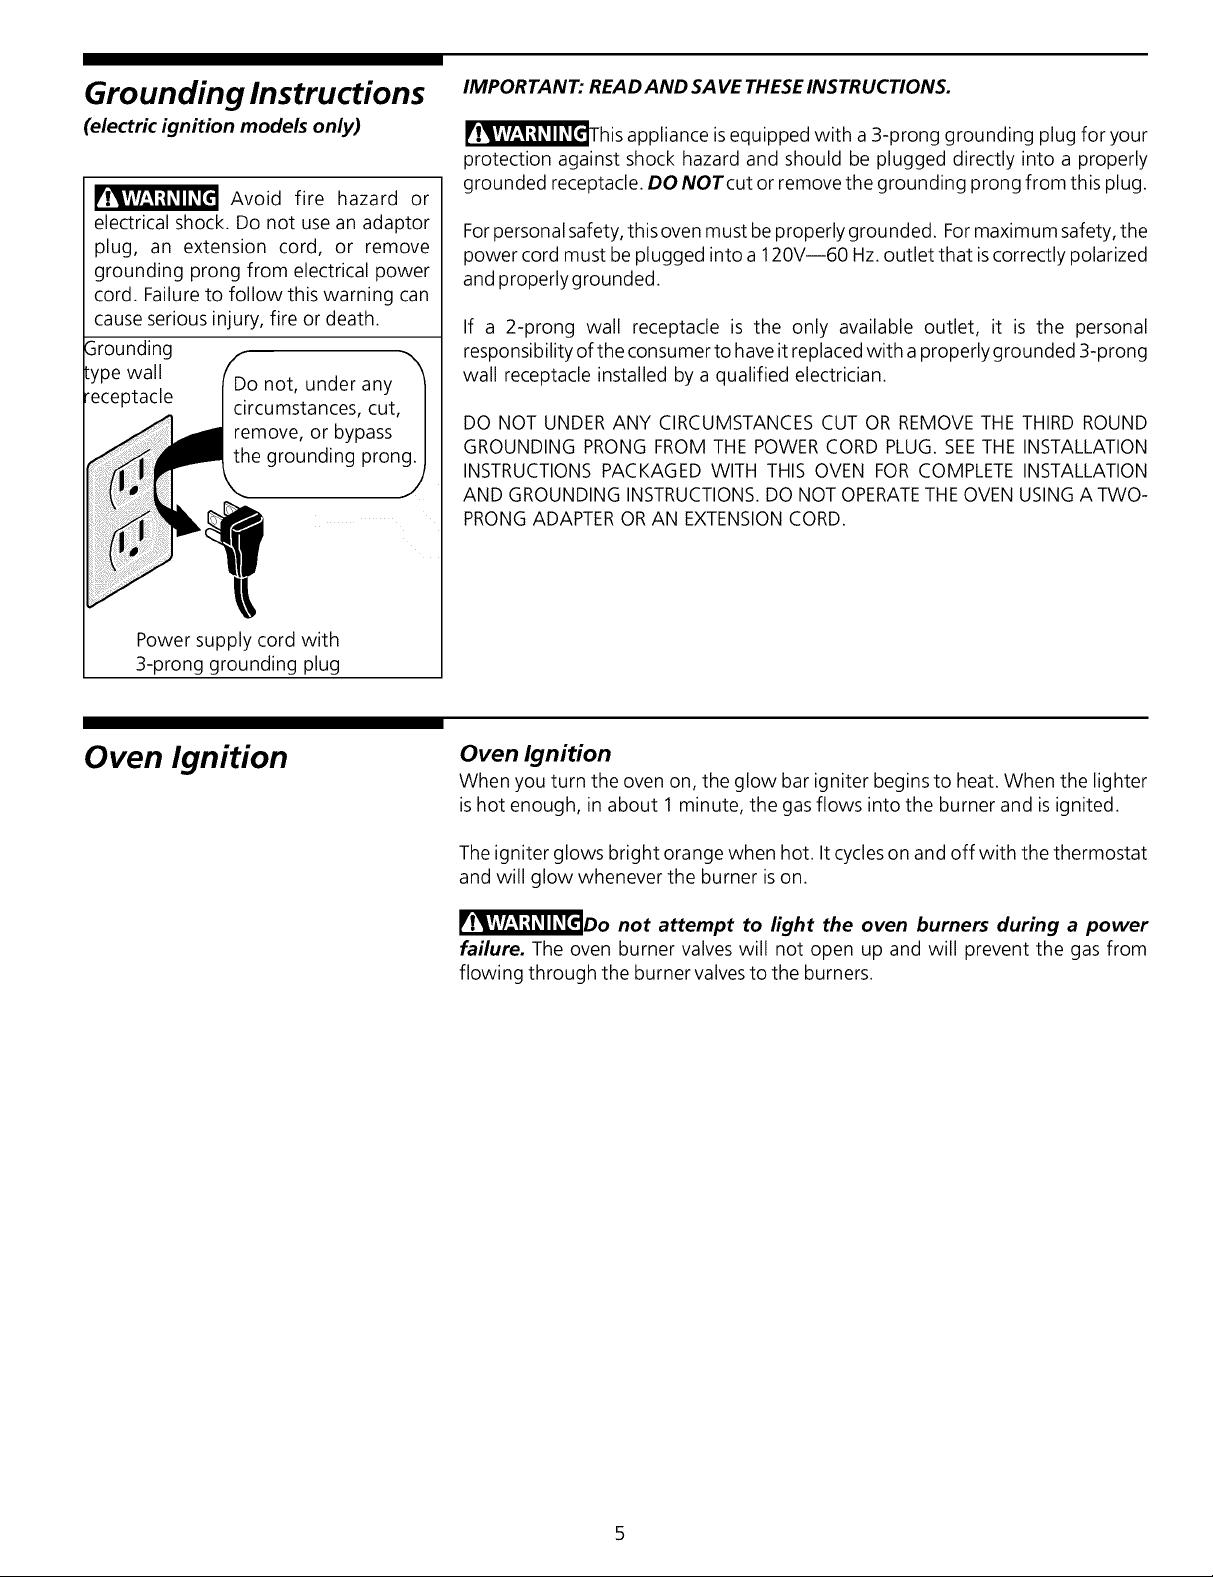
Grounding Instructions
(electric ignition models only)
Avoid fire hazard or
electrical shock. Do not use an adaptor
plug, an extension cord, or remove
grounding prong from electrical power
cord. Failure to follow this warning can
cause serious injury, fire or death.
Grounding
type
wall
Do not, under any
receptacle circumstances, cut,/
remove, or bypass |
he grounding pron_)
Power supply cord with
3-prong grounding plug
IMPORTANT: READ AND SAVE THESE INSTRUCTIONS.
_his appliance isequipped with a 3-prong grounding plug for your
protection against shock hazard and should be plugged directly into a properly
grounded receptacle. DO NOTcut or remove the grounding prong from this plug.
Forpersonal safety, this oven must be properly grounded. Formaximum safety, the
power cord must be plugged into a 120Vi60 Hz. outlet that iscorrectly polarized
and properlygrounded.
If a 2-prong wall receptacle is the only available outlet, it is the personal
responsibility of the consumer to have it replaced with a properly grounded 3-prong
wall receptacle installed by a qualified electrician.
DO NOT UNDER ANY CIRCUMSTANCES CUT OR REMOVE THE THIRD ROUND
GROUNDING PRONG FROM THE POWER CORD PLUG. SEE THE INSTALLATION
INSTRUCTIONS PACKAGED WITH THIS OVEN FOR COMPLETE INSTALLATION
AND GROUNDING INSTRUCTIONS. DO NOT OPERATE THE OVEN USING A TWO-
PRONG ADAPTER OR AN EXTENSION CORD.
Oven Ignition
Oven Ignition
When you turn the oven on, the glow bar igniter begins to heat. When the lighter
ishot enough, in about 1 minute, the gas flows into the burner and is ignited.
The igniter glows bright orange when hot. It cycles on and off with the thermostat
and will glow whenever the burner ison.
_Do not attempt to light the oven burners during a power
failure. The oven burner valves will not open up and will prevent the gas from
flowing through the burner valvesto the burners.
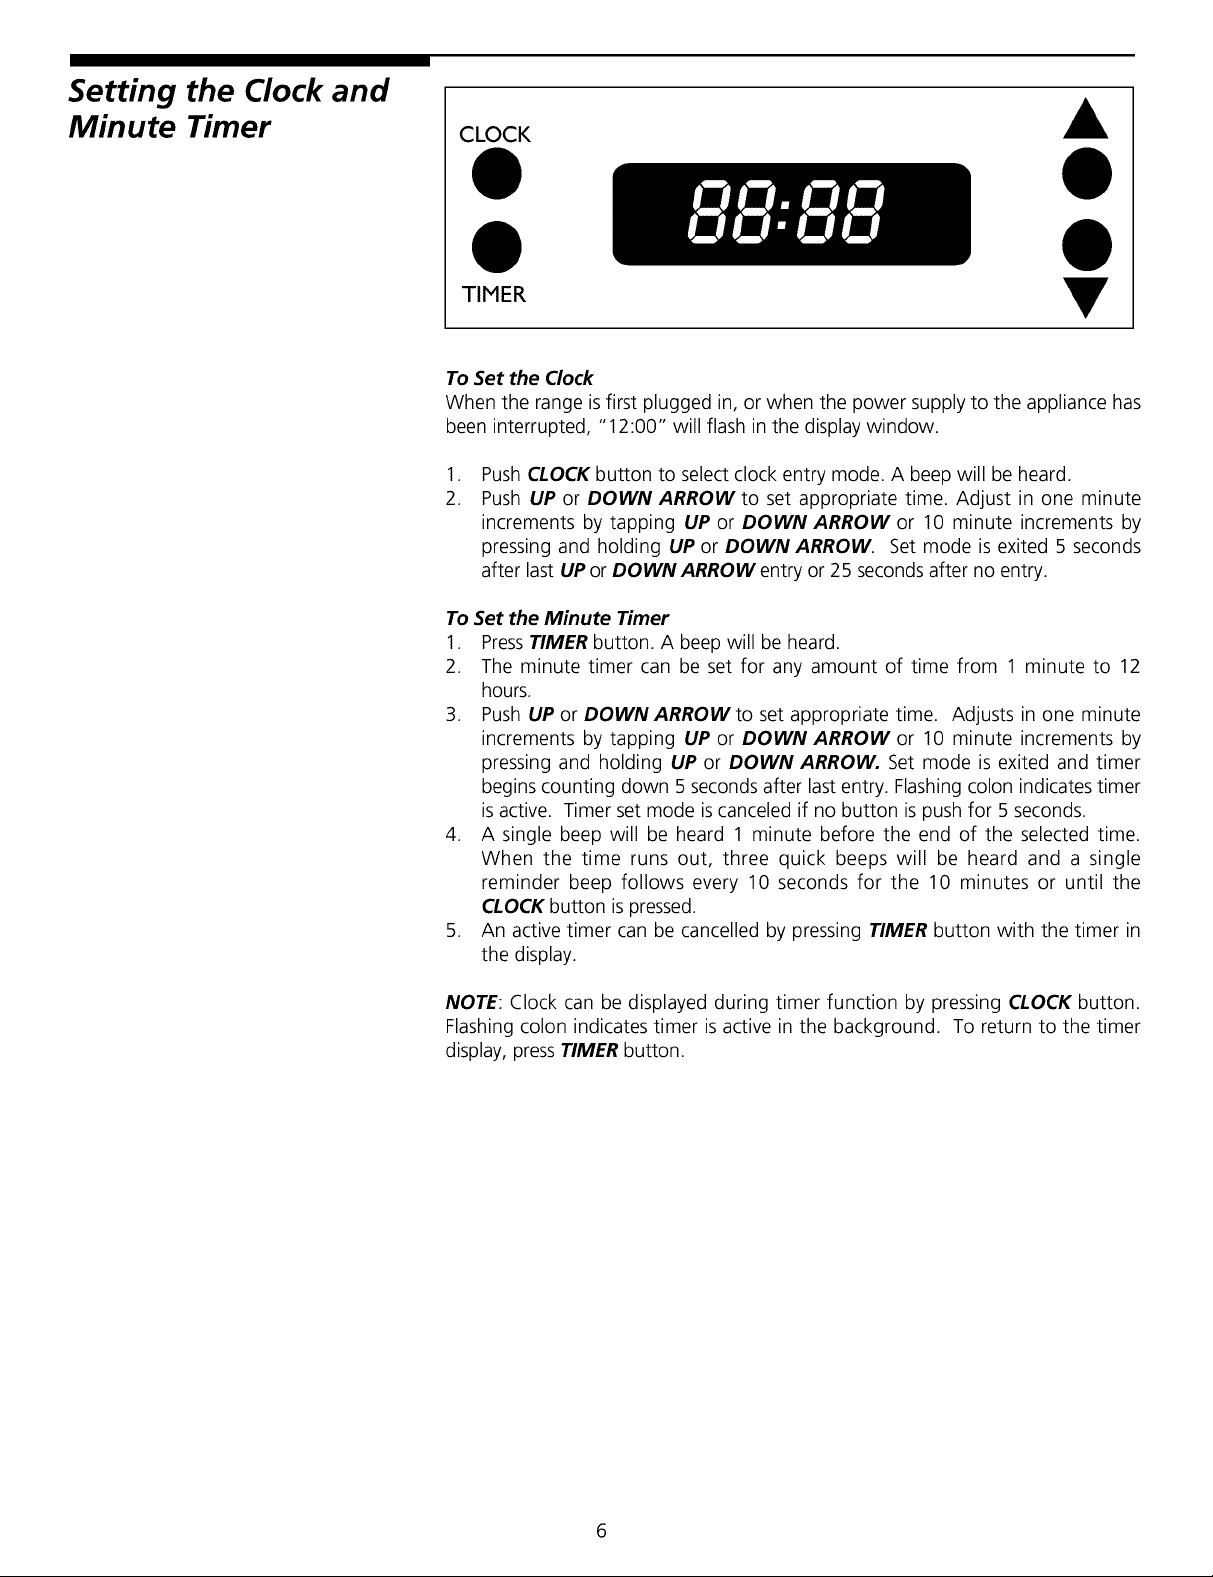
Setting the Clock and
Minute Timer CLOCK A
• •
0
TIMER
To Set the Clock
When the range is first plugged in, or when the power supply to the appliance has
been interrupted, "12:00" will flash in the display window.
.
2.
Push CLOCK button to select clock entry mode. A beep will be heard.
Push UP or DOWN ARROW to set appropriate time. Adjust in one minute
increments by tapping UP or DOWN ARROW or 10 minute increments by
pressing and holding UP or DOWN ARROW. Set mode is exited 5 seconds
after last UP or DOWN ARROW entry or 25 secondsafter no entry.
To Set the Minute Timer
1. PressTIMER button. A beep will be heard.
2. The minute timer can be set for any amount of time from 1 minute to 12
hours.
3. Push UP or DOWN ARROW to set appropriate time. Adjusts in one minute
increments by tapping UP or DOWN ARROW or 10 minute increments by
pressing and holding UP or DOWN ARROW. Set mode is exited and timer
begins counting down 5 seconds after last entry. Flashing colon indicates timer
isactive. Timer set mode iscanceled if no button is push for 5 seconds.
4. A single beep will be heard 1 minute before the end of the selected time.
When the time runs out, three quick beeps will be heard and a single
reminder beep follows every 10 seconds for the 10 minutes or until the
CLOCK button is pressed.
5. An active timer can be cancelled by pressing TIMER button with the timer in
the display.
NOTE: Clock can be displayed during timer function by pressing CLOCK button.
Flashing colon indicates timer isactive in the background. To return to the timer
display, pressTIMER button.
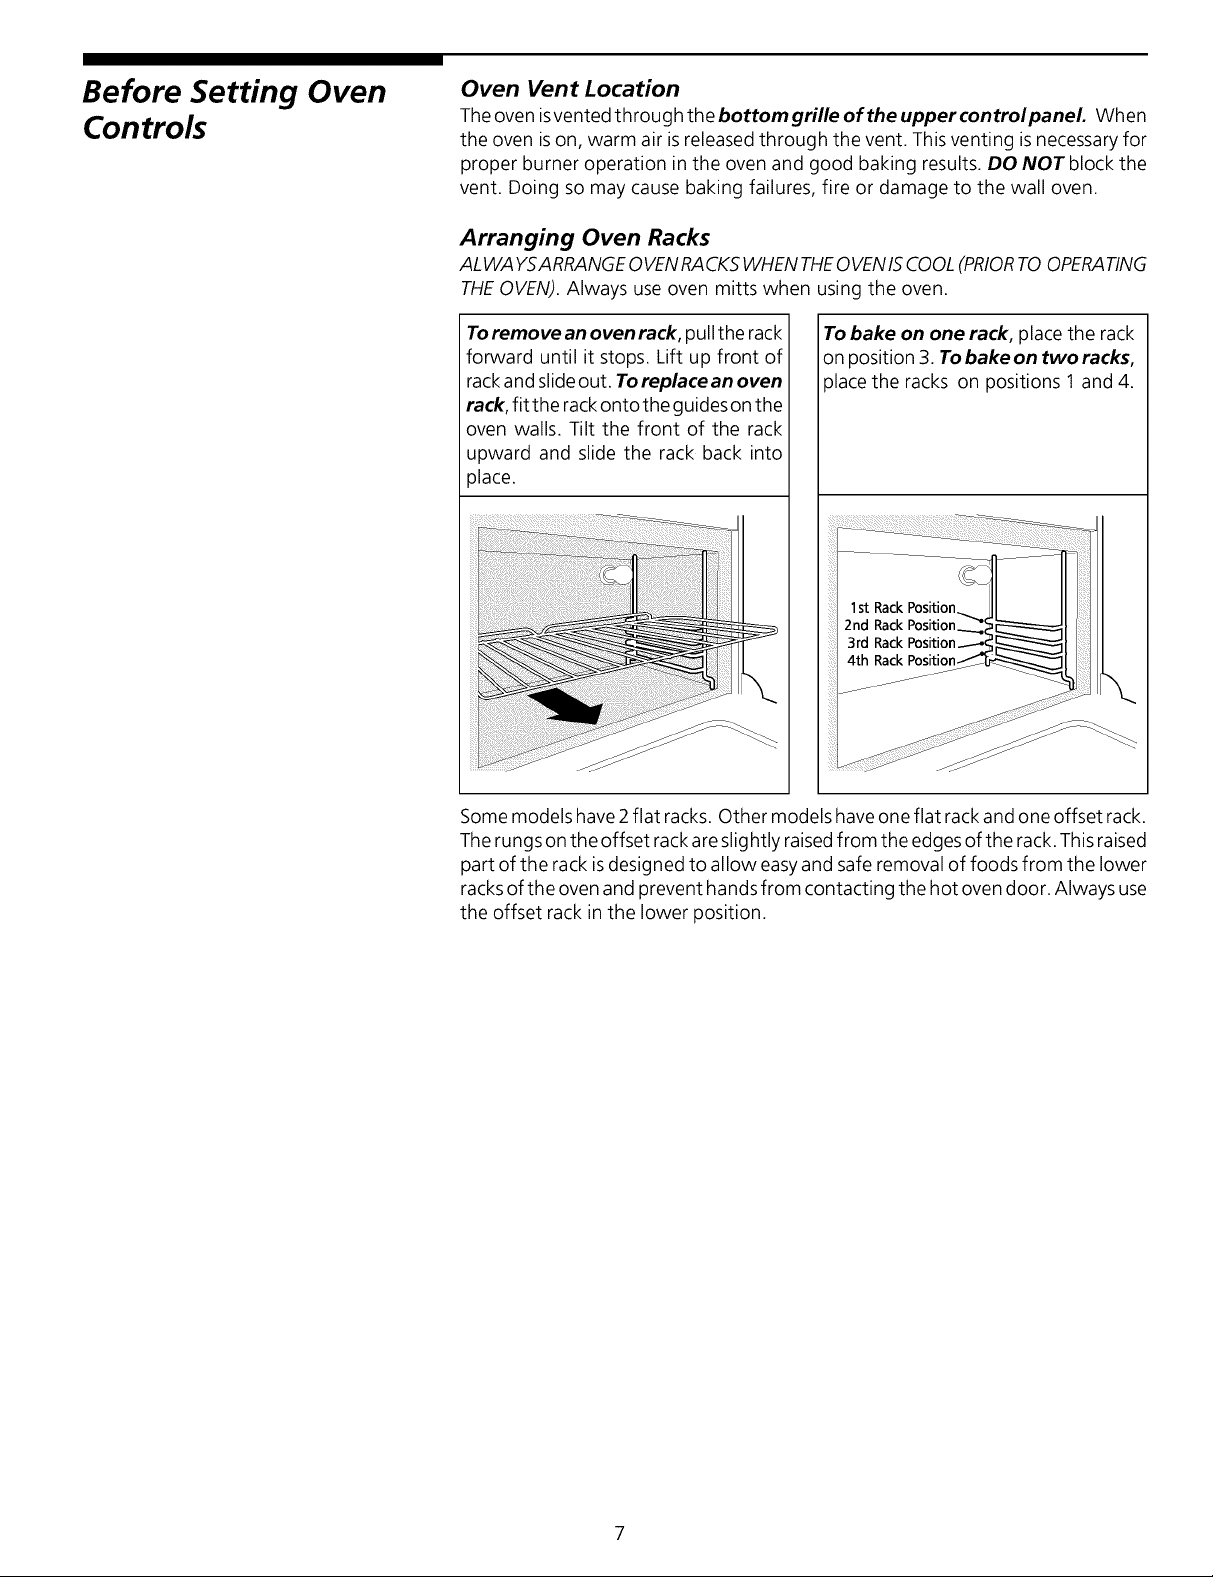
Before Setting Oven
Controls
Oven Vent Location
Theoven isvented through the bottom grille of the upper control panel. When
the oven ison, warm air isreleased through the vent. This venting isnecessary for
proper burner operation in the oven and good baking results. DO NOT block the
vent. Doing so may cause baking failures, fire or damage to the wall oven.
Arranging Oven Racks
AL WAYSARRANGEOVENRACKSWHENTHEOVENISCOOL(PRIORTOOPERATING
THEOVEN). Always use oven mitts when using the oven.
To remove an oven rack, pull therack
forward until it stops. Lift up front of
rack and slideout. Toreplacean oven
rack, fit the rackontothe guides on the
oven walls. Tilt the front of the rack
upward and slide the rack back into
place.
\
To bake on one rack, place the rack
on position 3. Tobakeon tworacks,
)lace the racks on positions 1 and 4.
Some models have2 flat racks. Other models haveone flat rack and one offset rack.
Therungs on the offset rack areslightly raisedfrom the edgesof the rack.This raised
part of the rack isdesigned to allow easy and safe removal of foods from the lower
racksof the oven and prevent hands from contacting the hot oven door. Always use
the offset rack in the lower position.
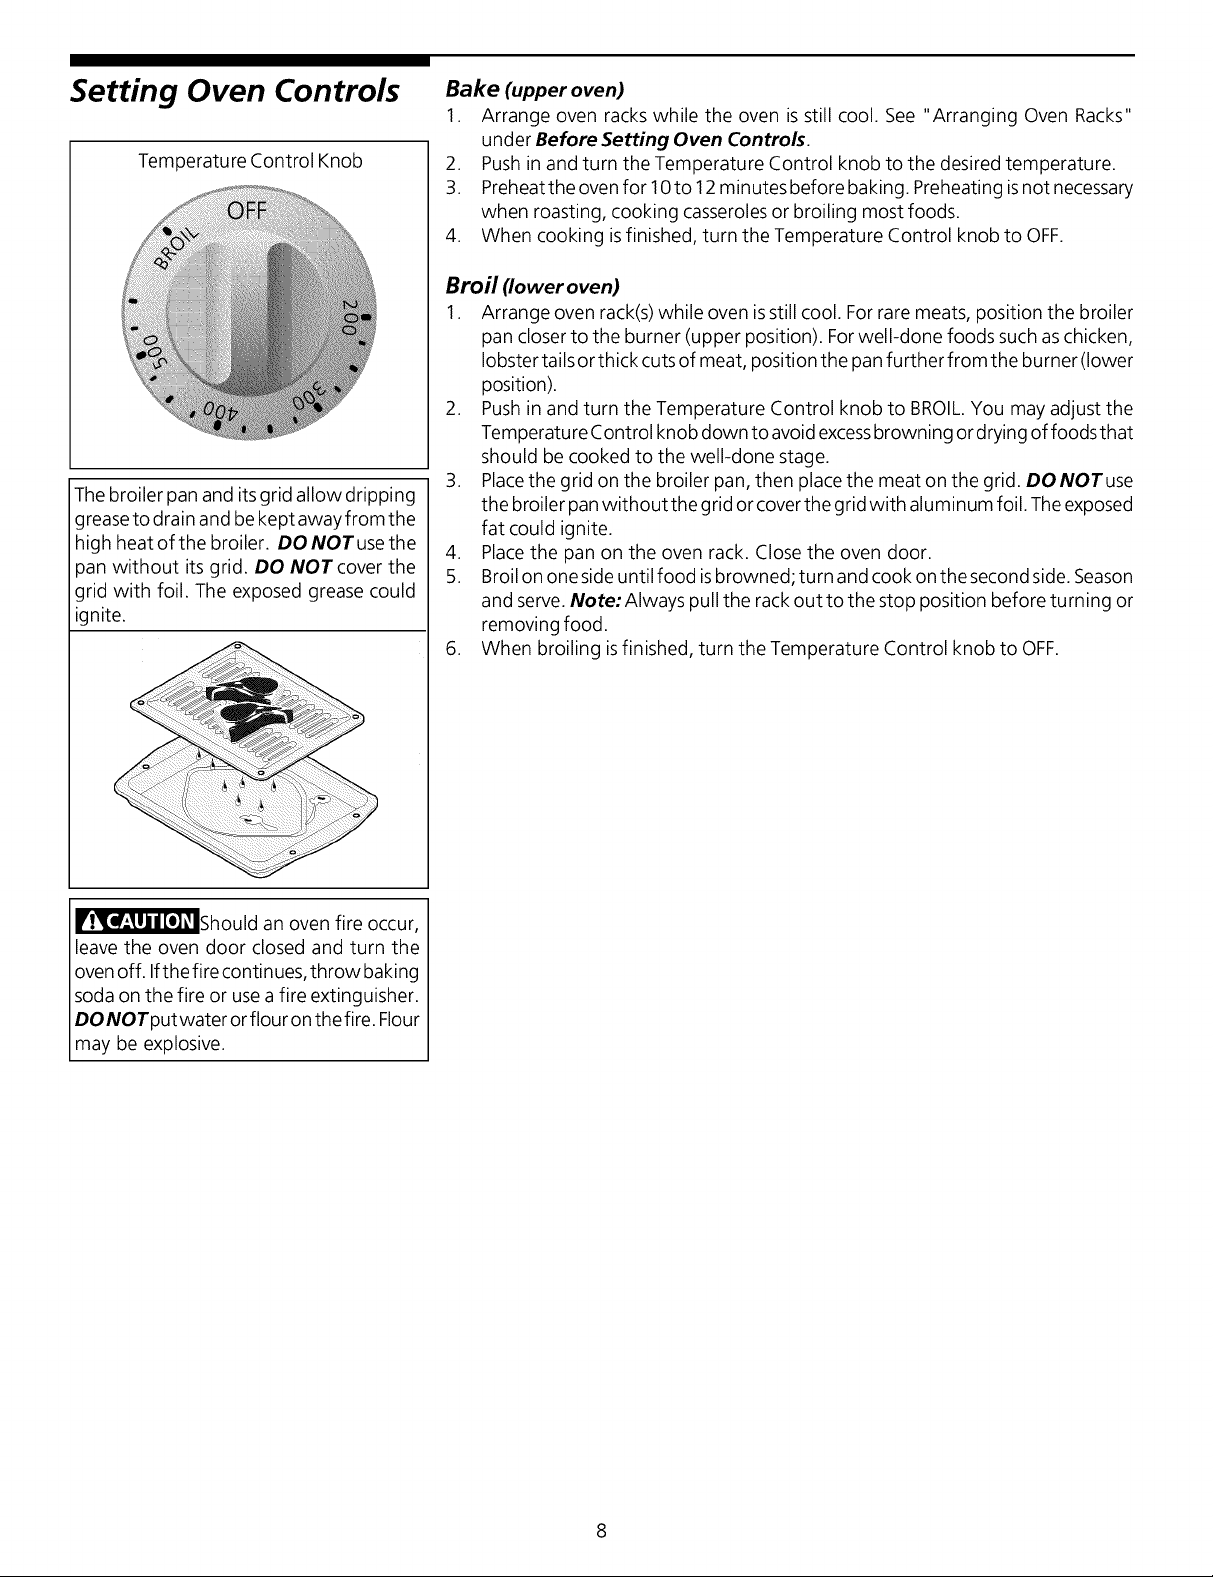
Setting Oven Controls
Temperature Control Knob
Thebroiler pan and its grid allow dripping
greaseto drain and be kept away from the
high heat of the broiler. DO NOT usethe
pan without its grid. DO NOTcover the
grid with foil. The exposed grease could
ignite.
Bake (upper oven)
1. Arrange oven racks while the oven is still cool. See "Arranging Oven Racks"
under Before Setting Oven Controls.
2. Pushin and turn the Temperature Control knob to the desired temperature.
3. Preheatthe oven for 10 to 12 minutes before baking. Preheating isnot necessary
when roasting, cooking casserolesor broiling most foods.
4. When cooking isfinished, turn the Temperature Control knob to OFF.
Broil (lower oven)
1. Arrange oven rack(s)while oven isstill cool. Forrare meats, position the broiler
pan closer to the burner (upper position). Forwell-done foods such aschicken,
lobster tailsor thick cutsof meat, position the pan further from the burner(lower
position).
2. Pushin and turn the Temperature Control knob to BROIL.You may adjust the
Temperature Control knob down to avoidexcessbrowning or drying of foods that
should be cooked to the well-done stage.
3. Placethe grid on the broiler pan, then place the meat on the grid. DO NOTuse
the broiler pan without the grid or cover the grid with aluminum foil. Theexposed
fat could ignite.
4. Placethe pan on the oven rack. Close the oven door.
5. Broil on one side until food isbrowned; turn and cook on the second side. Season
and serve. Note: Always pull the rack out to the stop position before turning or
removing food.
6. When broiling isfinished, turn the Temperature Control knob to OFF.
r_!_'['_Should an oven fire occur,
leave the oven door closed and turn the
ovenoff. Ifthe fire continues, throw baking
soda on the fire or usea fire extinguisher.
DO NOTputwater or flour on the fire. Flour
may be explosive.
Changing Oven Light
__'_Be surethe oven isunplugged and all partsare COOLbefore replacing
the oven light. Wear a leather-faced glove for protection against possible broken
glass.
Usethe rocker switch on the control panel to turn the oven light on or off.
To Change the Oven Light (upper oven)
1. Turn electrical power off at the main source or unplug the oven.
2. Replace bulb with a new 40 watt appliance bulb.
3. Turn power back on again at the main source (or plug the oven back in).
4. The clock (if equipped) will then need to be reset. To reset, see Setting the
Clock and Minute Timer in this Owner's Guide.
Adjusting Oven
Temperature
Figure 1: Back of Control Knob
The temperature in the oven hasbeen set at the factory. When first using the oven,
be sure to follow recipe times and temperatures. If you think the oven istoo hot or
too cool, the temperatu re inthe oven can be adjusted. Before adjusting, test a recipe
by using a higher or lower temperature than the recommended temperature. The
baking results should help you to decide how much of an adjustment is needed.
ToAdjust Oven Temperature:
1. Check to be sure the Temperature control knob is in the OFFposition.
2. PullTemperature control knob straight off the shaft.
3. Loosen, but do not remove, the two screws at the back of the knob (Figure 1).
Note: If knob does not have2screws, it isnot adjustable. There isaseriesof small
indicator grooves. One of these grooves ispositioned next to atiny pointer. Note
the position of the pointer.
4. To increase the temperature, move the pointer in a clockwise direction. To
decreasethe temperature, move the pointer in acounterclockwise direction. The
temperature can be adjusted in increments of IO°F.
5. When the desired adjustment is reached, tighten both screws.
6. To replace the knob, line up the flat sides of both the knob and the shaft. Push
the knob into place. DONOTforcetheTemperature Control knob ontothe shaft
or you may damage the back of the knob.
Note: Onceanadjustment ismade,the OFFposition will vary from the reference mark
on the backguard depending on the amount of adjustment.
Oven Cleaning
Adhere to the following cleaning
precautions:
• AIIowthe oven to cool before cleaning.
• Wear rubber gloves when cleaning the
oven manually.
REMOVE SPILLOVERS AND HEAVY
SOILING AS SOON AS POSSIBLE.
REGULAR CLEANINGS WILL REDUCE
THE NUMBER OF MAJOR CLEANINGS
LATER.
ri_[__Ammonia must be rinsed
before operating the oven. Provide
adequate ventilation.
_DO NOT line the oven
walls, bottom, racksor any other part of
the range with aluminum foil. Doing so
will destroy heat distribution, produce
poor baking resultsand cause permanent
damage to the oven interior (aluminum
foil will melt to the interior surface of the
oven).
Porcelain Enamel Ovens
Porcelain has a smooth finish and isa type of glass fused to metal. Oven cleaners
can be used on all interior oven surfaces.
General Cleaning
Remove soils using hot, soapy water. Do not allow food spills with a high sugar or
acid content (suchasmilk, tomatoes, saukerkraut, fruit juices or piefilling)to remain
on the surface asthey may cause a dull spot even after cleaning.
To Remove Heavy Soil
1. Allow a dish of ammonia to sit in the oven overnight or for several hours with
the oven door closed. Clean softened spots using hot, soapy water. Rinsewell
with water and a clean cloth.
2. If soil remains, use a soap-filled scouring pad or a nonabrasive cleaner. If
neccessary,usean oven cleaner following manufacturer's instructions. DONOT
mix ammonia with other cleaners.
3. Cleanany soilfrom the oven frame, the door liner outside the oven door gasket,
the area at the front center of the oven bottom and the oven vent exit (located
atthe lower end of the upper control panel). Cleanwith hot, soapywater. Rinse
well using clean water and a cloth.
Adhere to the following precautions when using oven cleaners:
1. DO NOTspray on the electrical controls or switches because it could cause a
short circuit and result in sparking or fire.
2. DONOTallowafilmfromthecleanertobuilduponthetemperaturesensing
bulb; it could cause the oven to heat improperly. (The bulb islocated in the rear
of the oven.) Carefully wipe the bulb clean after each oven cleaning, being
careful notto move the bulb. A change in its position could affect howthe oven
bakes. Avoid bending the bulb and capillary tube.
3. DO NOTspray any cleaner on the oven door trim or gasket, handles or any
exterior surfaces of the range, wood or painted surfaces. The cleaner can
damage these surfaces.
Cleaning the Oven Bottoms
The oven bottom in porcelain enamel oven models can be removed for
cleaning. See "To Remove and Replace Oven Bottom" under General Cleaning.
Clean using hot, soapy water, a mild abrasive cleanser, a soap-filled abrasive pad
or oven cleaner following manufacturer's instructions.
10
General Cleaning
Cleaning Various Parts of Your Wall Oven
Before cleaning any part of the wall oven, be sureall controls are turned OFFand the
oven isCOOL. REMOVESPILLOVERSAND HEAVYSOILINGAS SOONAS POSSIBLE.
REGULARCLEANINGSWILL REDUCETHENUMBEROFMAJOR CLEANINGSLATER.
Surfaces
Aluminum (Trim Pieces)
Glass, Painted and Plastic
Body Parts and Decorative Trim
Con trol Panel
Porcelain Enamel Broiler Pan
and Grid, Door Liner, Oven
Bottoms
Stainless Steel, Chrome
Decorative Trim
Oven and Broiler Rack(s)
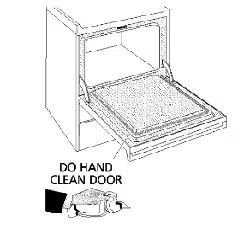
Oven Door
DO HAND
CLEAN DOOR
How to Clean
Use hot, soapy water and acloth. Drywith a clean cloth. DO NOTscour or useall-purpose
cleaners, ammonia, powdered cleansers or commercial oven cleaner. They can scratch
and discolor aluminum.
Forgeneral cleaning, usehot soapy water and a cloth. Formore difficult soils and built-up
grease, apply a liquid detergent directly onto the soil. Leaveon soil for 30 to 60 minutes.
Rinsewith a damp cloth and dry. DO NOTuse abrasive cleaners, spray cleaners or scou ring
pads on any of these materials. These cleaners can permanently damage the control pad
surface.
Before cleaning the controlpanel, turn all controls to OFFand remove the control knob(s).
To remove, pull each knob(s) straight off the shaft. Clean as instructed above. Squeeze
excesswater from the cloth before wiping the panel; especially when wiping around the
control. Excesswater in or around the controls may cause damage to the appliance. To
replace knob(s) after cleaning, line up the flat sides of both the knob(s) and the shaft, then
push the knob(s)into place.
Gentle scouring with asoapyscouring pad will remove most spots. Rinsewith a 1:1solution
of clear water and ammonia. If necessary, cover difficult spots with an ammonia-soaked
paper towel for 30 to 40 minutes. Rinsewith clean water and a damp cloth, and then scrub
with a soap-filled scouring pad. Rinseand wipe drywith a clean cloth. Remove all cleaners
or the porcelain may become damaged during future heating.
Clean with hot, soapy water and a dishcloth. Rinsewith clean water and a cloth. Cover
stubborn spots with an ammonia-soaked paper towel for 30 to40 minutes. Rinse.Cleaners
made especially for stain lesssteel are recommended. Besureto rinsethe cleaners asbluish
stains may occur during heating and cannot be removed.
Remove racks. See "Removing and Replacing Oven Racks" under Before Setting Oven
Controls. Use a mild, abrasive cleaner, following manufacturer's instructions. Rinsewith
clean water and dry. After cleaning the racks, rub the sides of the rackswith wax paper or
acloth containing asmall amount of baby oil or saladoil(this will make the racksglide easier
into the rack positions).
To clean oven door, wash with hot, soapy water and a clean cloth. DO NOTimmerse the
door in water.
11

General Cleaning
(continued)
Upper Oven
Use the finger openings along the
outside edges of the oven bottom to
remove the oven bottom.
Lower Oven
To Remove and Replace Oven Door
To Remove Oven Door:
1. Closethe door about 3/4ofthewaytothe quarter-open position. Graspthe door
firmly on both sides. Lift up and away from the wall oven.
2. To clean oven door, seethe cleaning chart on page 11.
To Replace Oven Door:
1. Grasp the door firmly on both sides.
2. Placetop ofthe hinge arm against the openings in the door. Pushthe bottom of
the door in until the hinge isall the way into the opening, and slide down.
3. Close the oven door completely. Ifthe door doesnot line up with the oven frame,
remove the door and repeat the above steps.
lri_!_'_'_'_Th e door isheavy. Forsafe, temporary storage, laythe door flat with
the inside of the door facing down.
To Remove and Replace Oven Bottoms
To Remove the Oven Bottom (upper oven):
1. Remove racks, broiler pan and wire guides.
2. Using the finger openings on each side of the oven bottom, pull out and lift up
the oven bottom.
To Replace the Oven Bottom (upper oven):
1. Graspthe oven bottom and position the fronttabs in place inthe slotsatthe rear
of the oven bottom.
2. Lower the front of the oven bottom and slide into place.
3. Replace wire guides.
Note: If oven bottom fitstootightly, placeyour hand under the bottom through the
lower cavity and push up on each side of the front end.
To Remove the Oven Bottom (lower oven):
1. Remove racks, broiler pan and wire guides.
2. Pull out and lift up the oven bottom.
To Replace the Oven Bottom (lower oven):
1. Lower the front of the oven bottom and slide into place.
2. Replace wire guides.
12
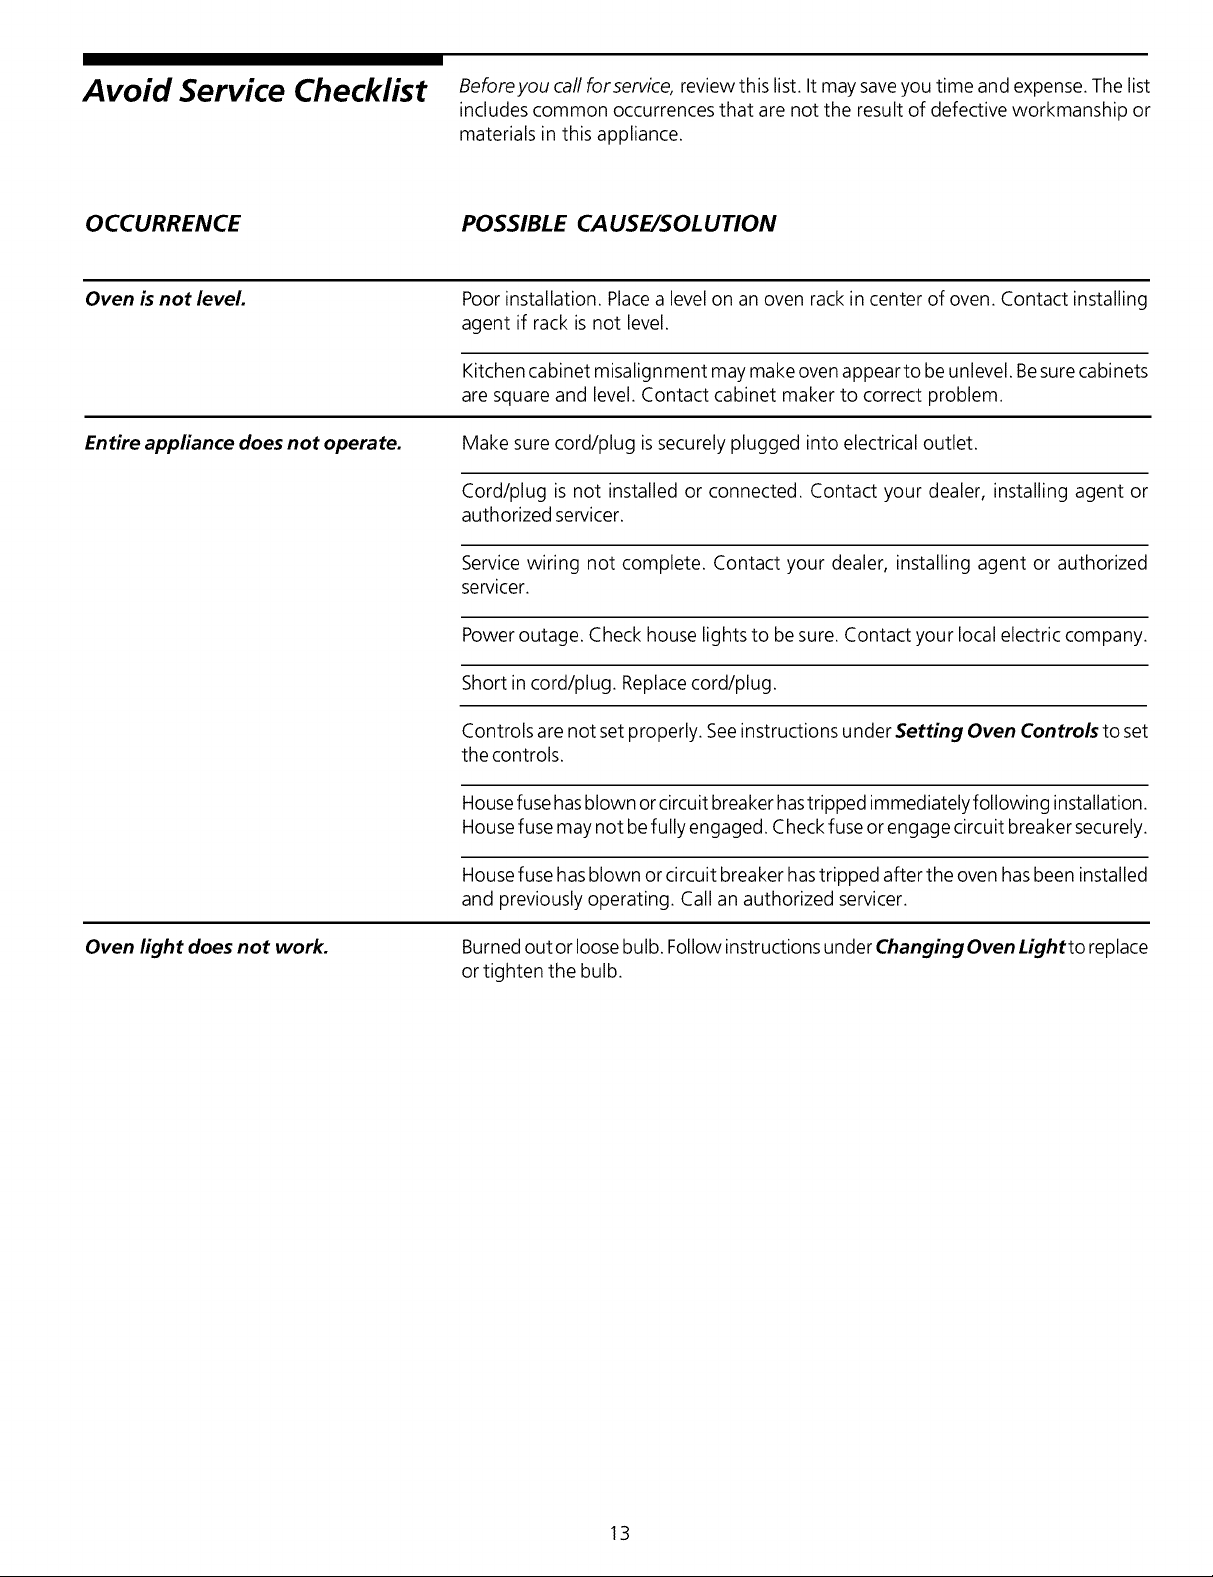
Avoid Service Checklist Beforeyou call for service, review this list. It may saveyou time and expense. The list
includes common occurrences that are not the result of defective workmanship or
materials in this appliance.
OCCURRENCE POSSIBLE CAUSE/SOLUTION
Oven is not level
Poor installation. Placea level on an oven rack in center of oven. Contact installing
agent if rack is not level.
Kitchen cabinet misalign ment may make oven appear to be unlevel. Besurecabinets
are square and level. Contact cabinet maker to correct problem.
Entire appliance does not operate. Make sure cord/plug issecurely plugged into electrical outlet.
Cord/plug is not installed or connected. Contact your dealer, installing agent or
authorized servicer.
Service wiring not complete. Contact your dealer, installing agent or authorized
servicer.
Power outage. Check house lights to be sure. Contact your local electric company.
Short in cord/plug. Replacecord/plug.
Controls are not set properly. Seeinstructions under Setting Oven Controls to set
the controls.
Housefuse hasblown or circuit breaker hastripped immediately following installation.
House fuse may not befully engaged. Check fuse or engage circuit breaker securely.
House fuse hasblown or circuit breaker hastripped after the oven hasbeen installed
and previously operating. Call an authorized servicer.
Oven light does not work. Burned out or loosebulb. Follow instructions under Changing Oven Lightto replace
or tighten the bulb.
13

Oven smokes excessively during
broiling.
Door isopen. Door should be closed during broiling.
Meat too close to the broil burner. Reposition the rack to provide more clearance
between the meat and the broiler.
Meat not properly prepared. Remove excess fat from meat. Slashremaining fatty
edges to prevent curling, but do not cut into the lean.
Grid on broiler pan wrong sideup. Greasecannot drain into broiler pan.Always place
the grid on the broiler panwith the ribs up and the slots down to allow greaseto drip
into the pan.
Broiler pan usedwithout grid or grid covered with foil. DO NOT usethe broiler pan
without the grid or cover the grid with foil.
Grease spatters and food buildup cause excessive smoke. Regular cleaning is
necessarywhen broiling frequently.
Poor Baking Results. If baked food items are too dark on top or bottom, allow the oven to preheat to set
temperature before placing food in oven. Make sure the proper rack position is
used when baking. Settemperature 25°F lower than recommended. If food is not
done after recommended time, increase the set temperature 25°F.
Flames inside oven or smoke from
vent.
Excessivespillovers inoven. Thisisnormal, especiallyfor high oven temperatures, pie
spillovers or for large amounts of grease on bottom of oven. Wipe up excessive
spillovers.
14

Notes
15
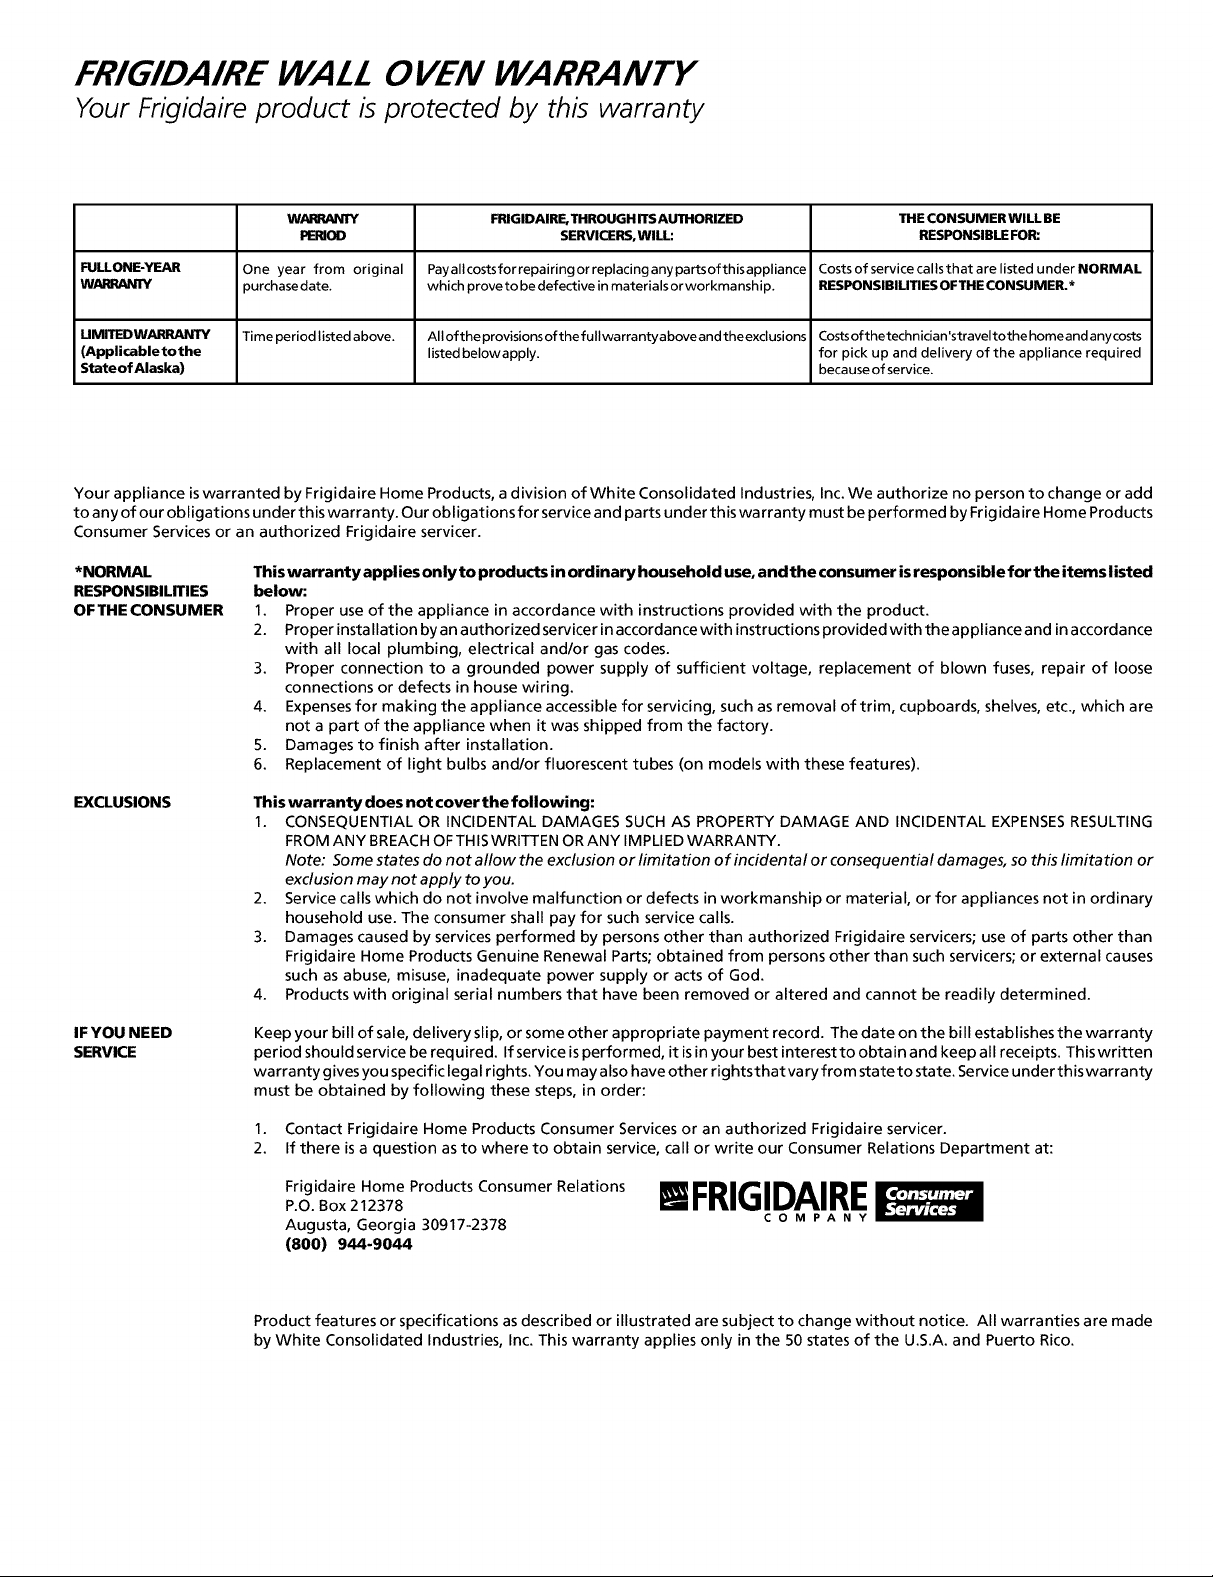
FRIGIDAIRE WALL OVEN WARRANTY
Your Frigidaire product is orotected by this warranty
WARRANTY FRIGIDAIRE, THROUGH ITSAUTHORIZED THE CONSUMER WILL BE
SERVICERS, WILL: RESPONSIBLE FOR:
FULLONE-YEAR One year from original Payallcostsforrepairingorreplacinganypartsofthisappliance CostsofservicecallsthatarelistedunderNORMAL
WARRANTY purchasedate, which prove to be defective in materials orworkmanship. RESPONSIBILmES OFTHE CONSUMER.*
UMITEDWARRANTY Time period listed above. All of the provisions ofthe fullwarrantyabove and the exclusions Costsofthetechnician'straveltothe home and anycosts
(Applicabletothe listed belowapply, for pick up and delivery of the appliance required
Stateof Alaska) because of service.
Your appliance iswarranted by Frigidaire Home Products, a division of White Consolidated Industries, Inc. We authorize no person to change or add
to any of our obligations under this warranty. Our obligations for service and parts under this warranty must be performed by Frig ida ire Home Products
Consumer Services or an authorized Frigidaire servicer.
*NORMAL
RESPONSIBILITIES
OF THE CONSUMER
This warranty applies only to products in ordinary household use, and the consumer isresponsible for the items listed
below:
1. Proper use of the appliance in accordance with instructions provided with the product.
2. Proper installation by an authorized servicer in accordance with instructions provided with the appliance and in accordance
with all local plumbing, electrical and/or gas codes.
3. Proper connection to a grounded power supply of sufficient voltage, replacement of blown fuses, repair of loose
connections or defects in house wiring.
4. Expenses for making the appliance accessible for servicing, such as removal of trim, cupboards, shelves, etc., which are
not a part of the appliance when it was shipped from the factory.
5. Damages to finish after installation.
6. Replacement of light bulbs and/or fluorescent tubes (on models with these features).
EXCLUSIONS
This warranty does not cover the following:
1. CONSEQUENTIAL OR INCIDENTAL DAMAGES SUCH AS PROPERTY DAMAGE AND INCIDENTAL EXPENSESRESULTING
FROM ANY BREACHOF THISWRITTEN OR ANY IMPLIED WARRANTY.
Note: Some states do not allow the exclusion or limitation of incidental or consequential damages, so this limitation or
exclusion may not apply to you.
2. Service calls which do not involve malfunction or defects in workmanship or material, or for appliances not in ordinary
household use. The consumer shall pay for such service calls.
3. Damages caused by services performed by persons other than authorized Frigidaire servicers; use of parts other than
Frigidaire Home Products Genuine Renewal Parts; obtained from persons other than such servicers; or external causes
such as abuse, misuse, inadequate power supply or acts of God.
4. Products with original serial numbers that have been removed or altered and cannot be readily determined.
IF YOU NEED
SERVICE
Keep your bill of sale, delivery slip, or some other appropriate payment record. The date on the bill establishes the warranty
period should service be required. If service is performed, it is in your best interest to obtain and keep all receipts. Thiswritten
warranty gives you specific legal rights. You may also have other rightsthat vary from state to state. Service under thiswarranty
must be obtained by following these steps, in order:
1. Contact Frigidaire Home Products Consumer Services or an authorized Frigidaire servicer.
2. If there is a question as to where to obtain service, call or write our Consumer Relations Department at:
Frigidaire Home Products Consumer Relations
P.O. Box 212378
Augusta, Georgia 30917-2378
(800) 944-9044
ltFRIGIDAIRE
COMPANY
Product features or specifications as described or illustrated are subject to change without notice. All warranties are made
by White Consolidated Industries, Inc. This warranty applies only in the 50 states of the U.S.A. and Puerto Rico.