Loading ...
Loading ...
Loading ...
7
ASSEMBLY
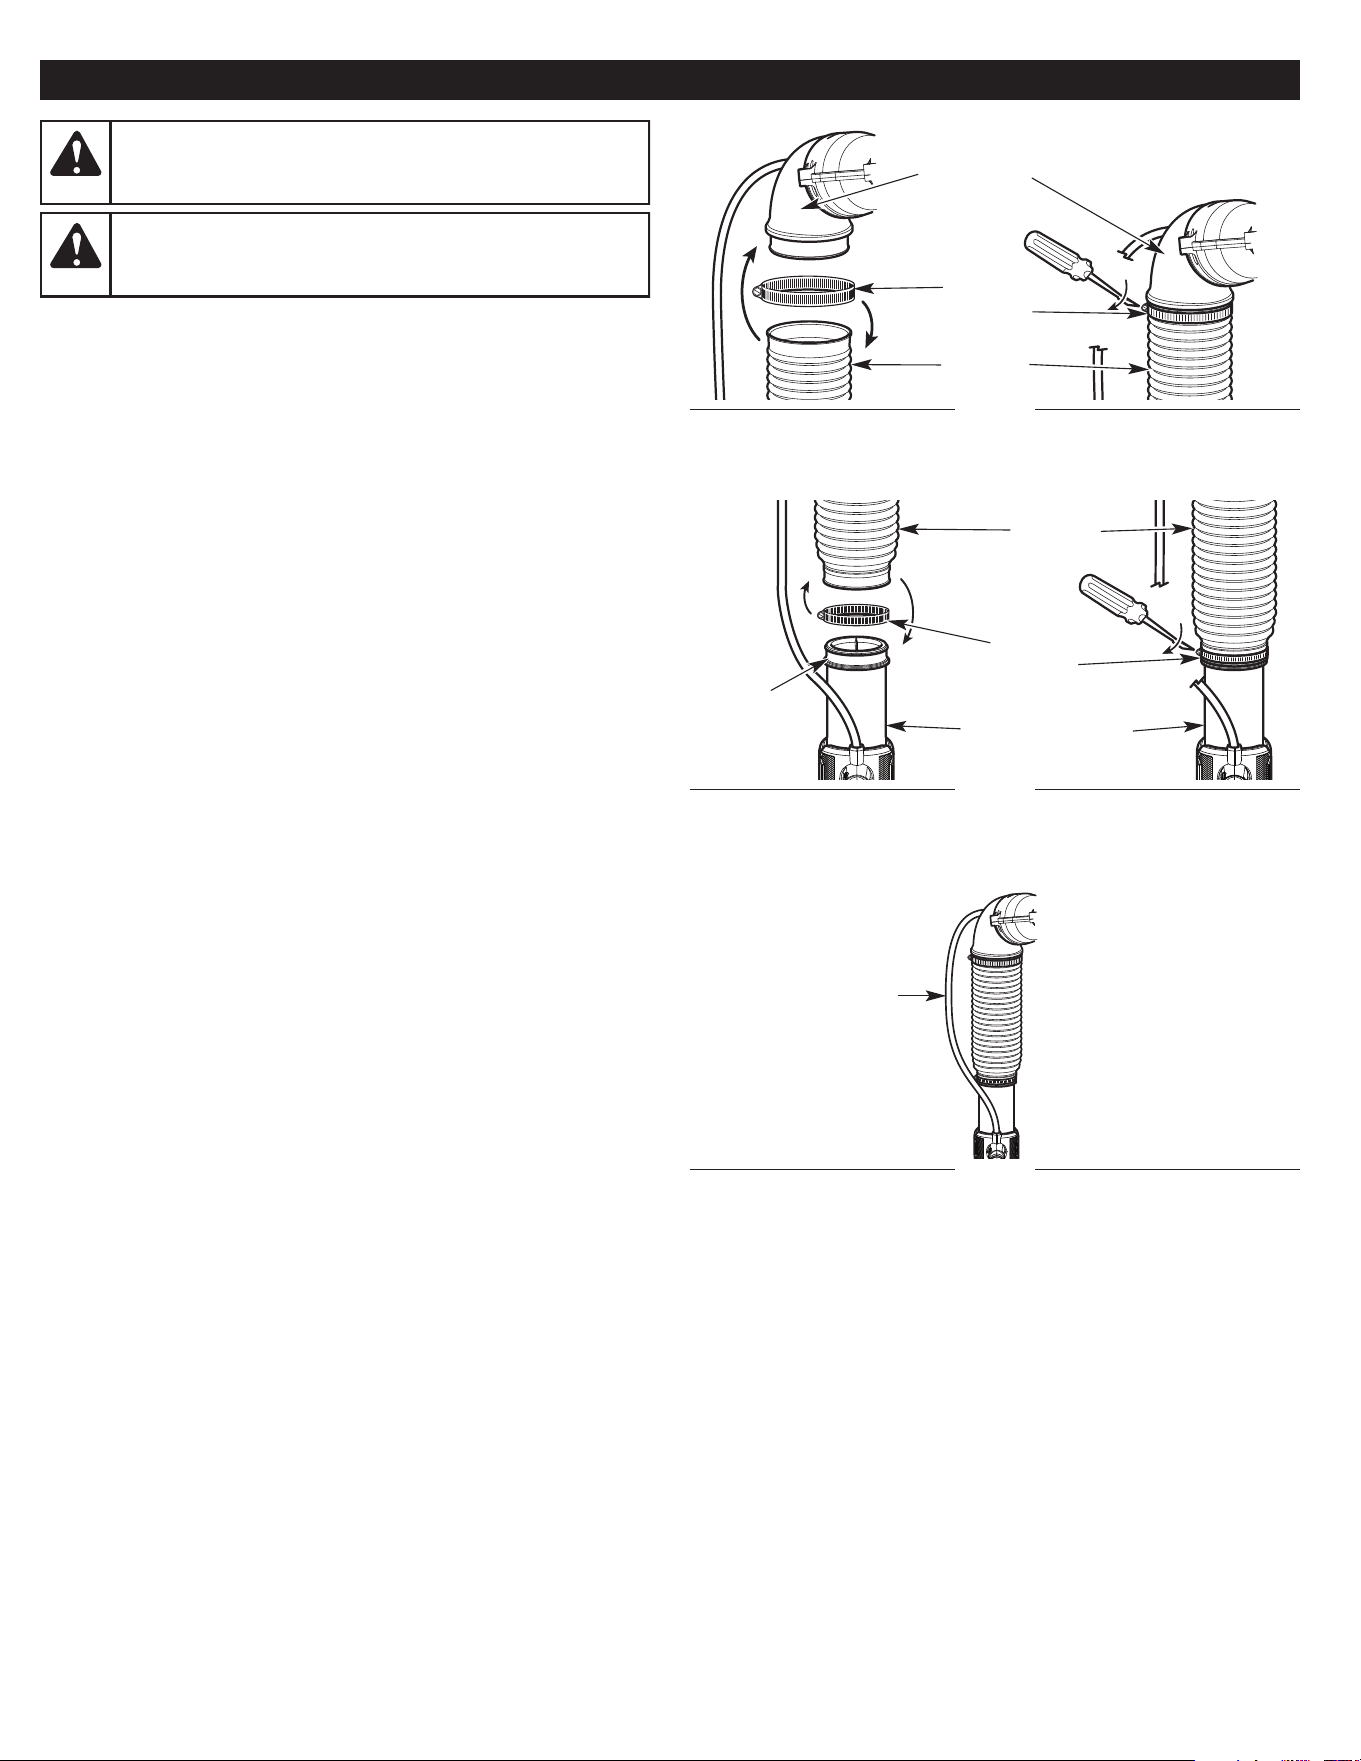
Fig. 1
Large Hose
Clamp
Flex Tube
Elbow Tube
Fig. 2
Fig. 3
WARNING:
To avoid serious personal injury and
damage to the unit, shut the unit off before removing or
installing the blower tubes or the nozzle.
Flex Tube
Small Hose
Clamp
Upper Blower Tube
ASSEMBLING THE UNIT
• Always install the upper blower tube.
• The lower blower tube and nozzle are optional.
• Use the lower blower tube for most operations.
• Only use the nozzle to concentrate and intensify the air flow
when needed.
• The nozzle can be installed into the upper blower tube or lower
blower tube.
Installing the Flex Tube
1. Set the unit on a flat, level surface.
2. Place the large hose clamp around the large end of the flex tube
(Fig. 1).
3. Slide the flex tube and hose clamp onto the elbow tube (Fig. 1).
4. Tighten the screw on the hose clamp with a flat-head
screwdriver (Fig. 1).
Installing the Upper Blower Tube
1. Set the unit on a flat, level surface.
2. Place the small hose clamp around the small end of the flex tube
(Fig. 2).
3. Slide the flex tube and hose clamp onto the upper end of the
upper blower tube (Fig. 2).
4. Tighten the screw on the hose clamp with a flat-head screwdriver
(Fig. 2).
NOTE: A swivel comes pre-installed on the upper blower tube. Do
not remove the swivel (Fig. 2).
NOTE: Keep the cables straight. Make sure that the cables are not
wrapped around the flex tube (Fig. 3).
WARNING:
To prevent serious personal injury, never
operate the unit without the upper blower tube firmly
installed.
Cables
Swivel
Loading ...
Loading ...
Loading ...