MODEL: HWT10MW2
TOP LOAD FULLY AUTOMATIC WASHING MACHINE
OWNER’S MANUAL
Please read this manual carefully before
operating your washing machine and retain
it for future reference.
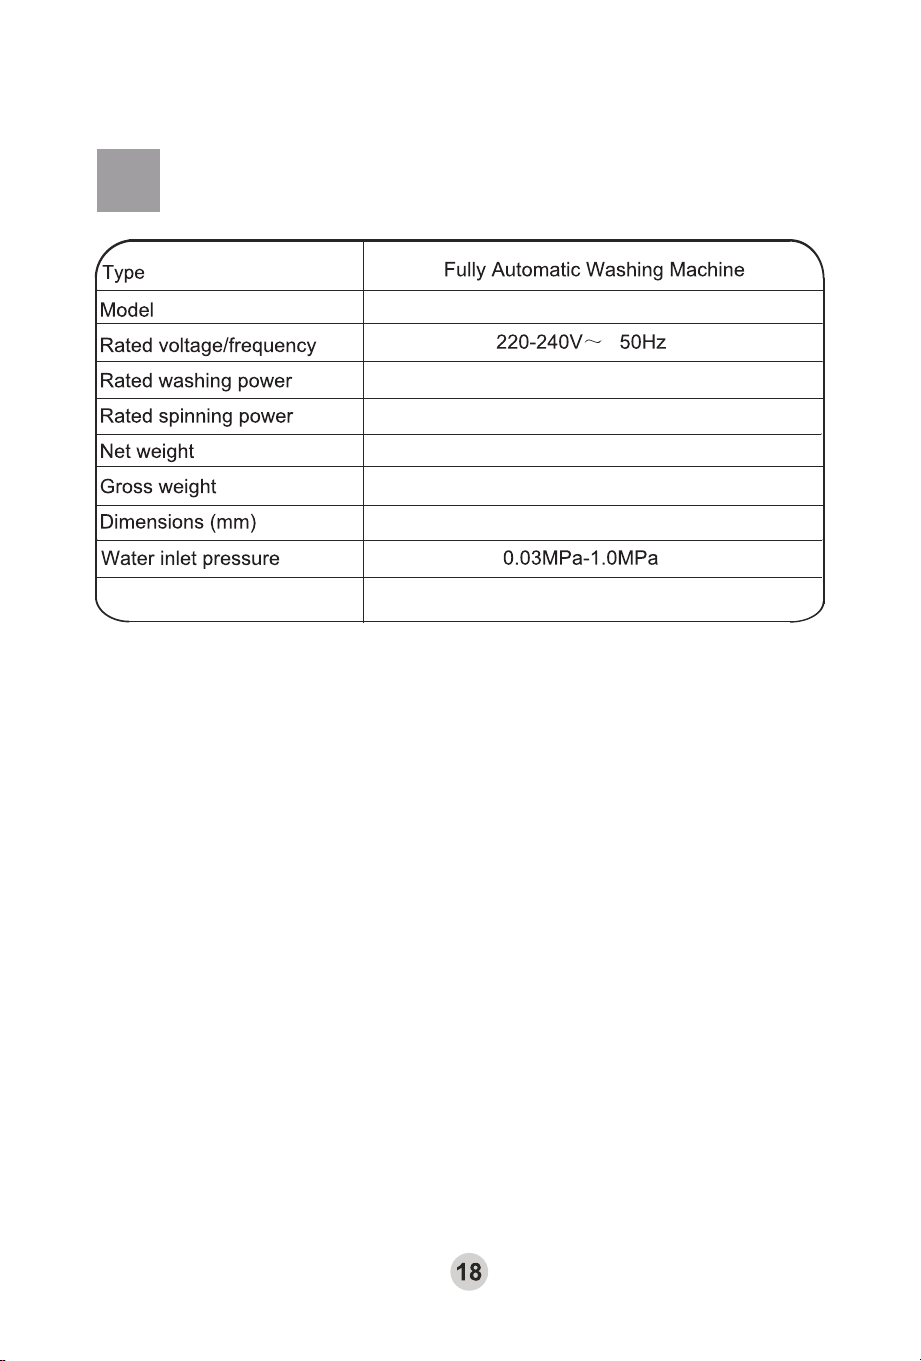
Specification
W 610 D 620 H 1045
300W
350W
45kg
52kg
Rated Washing capacity
10kg
HWT10MW2
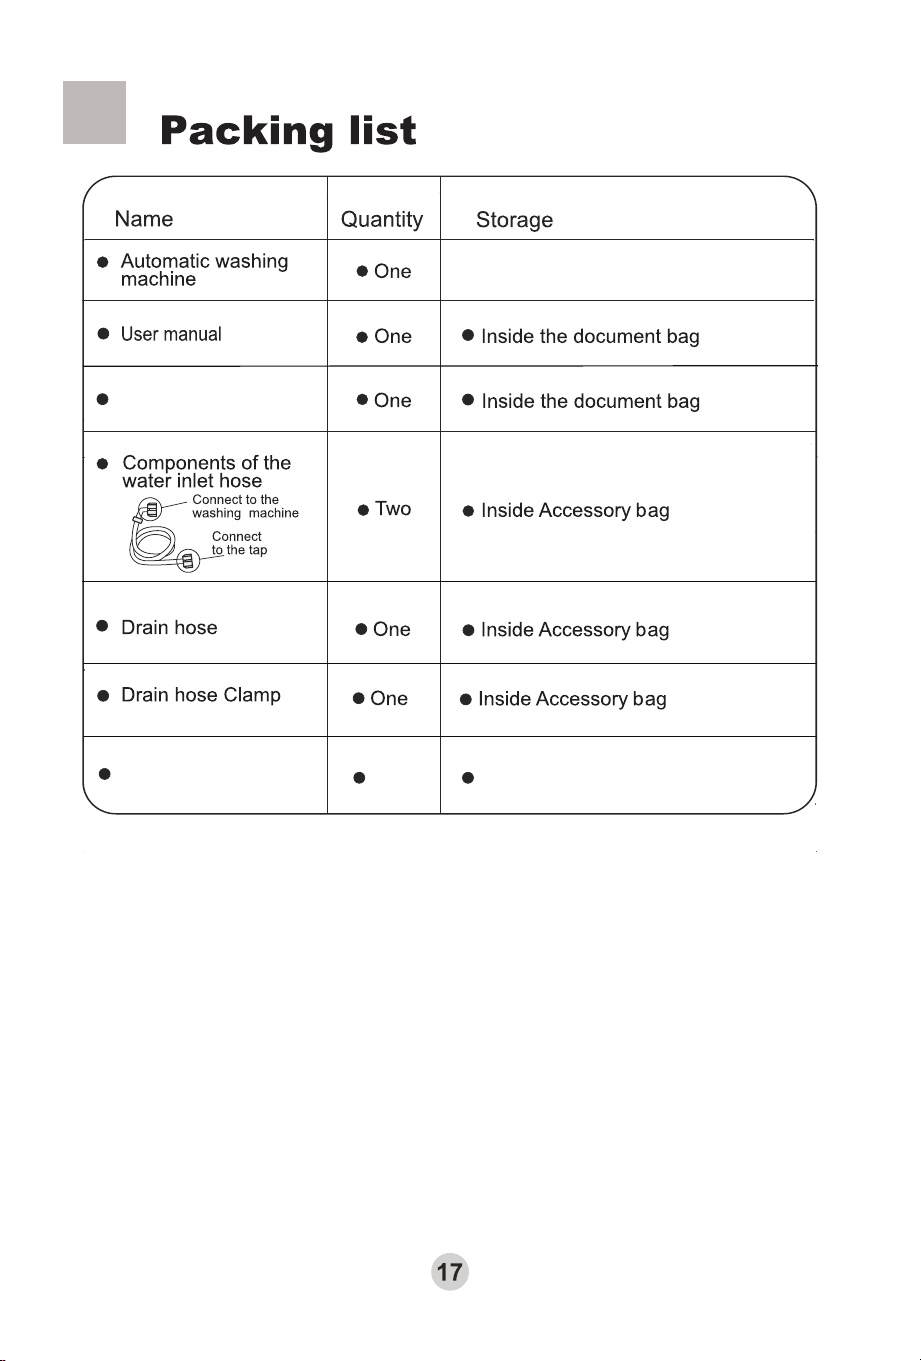
.
Bracket
One
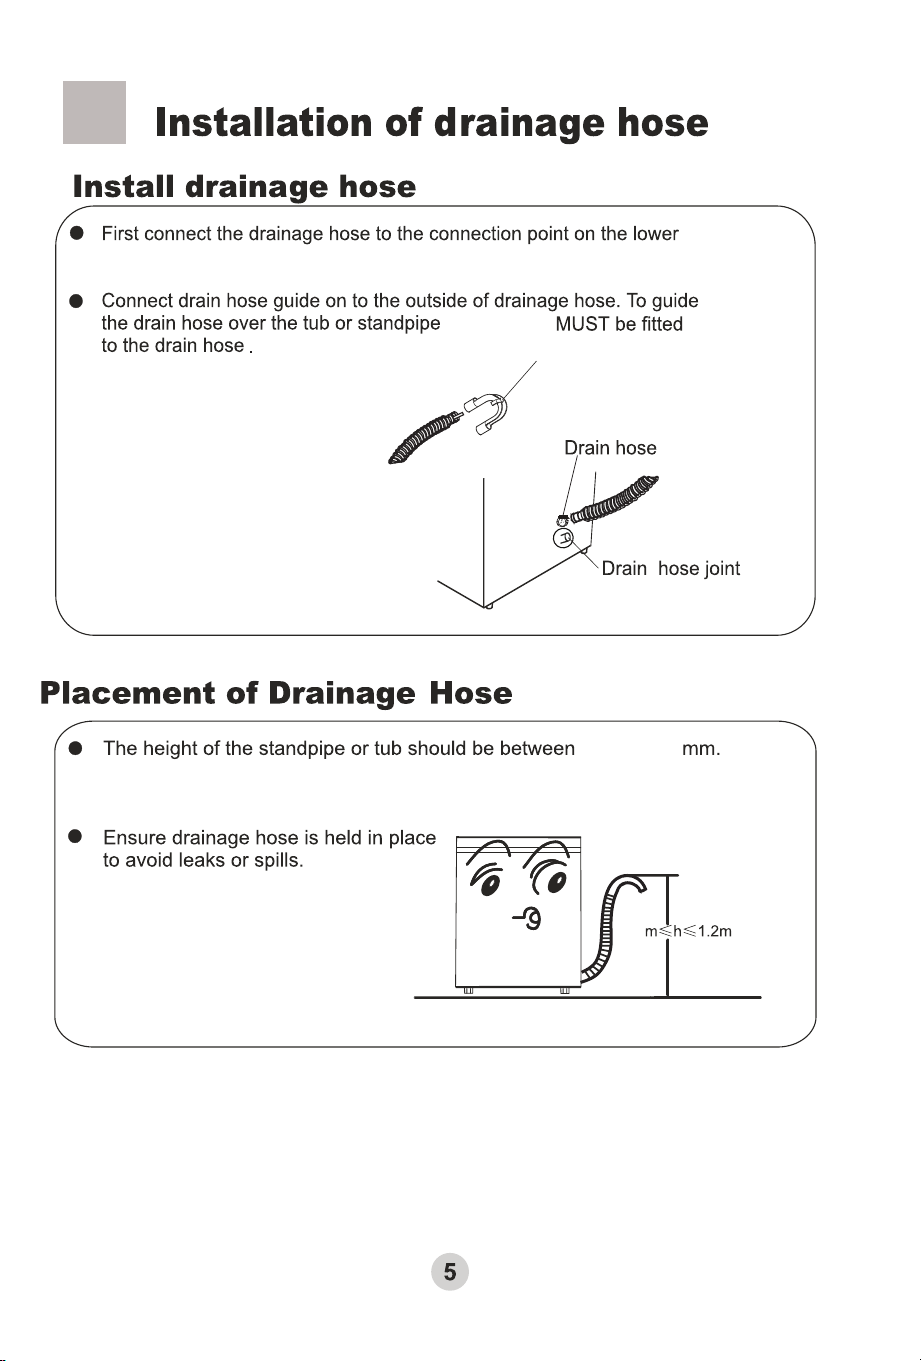
On The Drain hose
Location
Warranty card
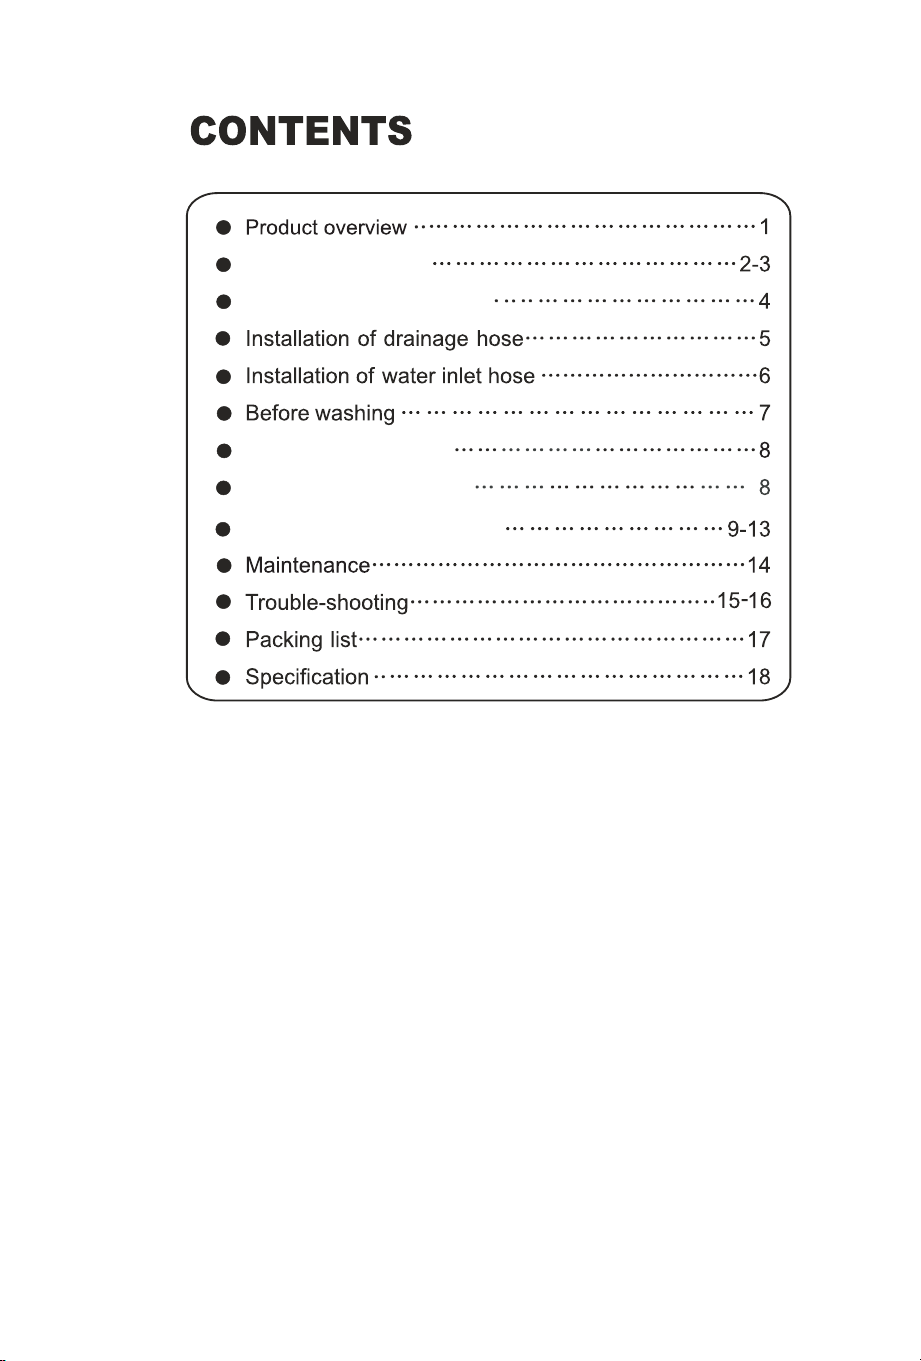
Operation & Wash cycles
Installation & Adjustment
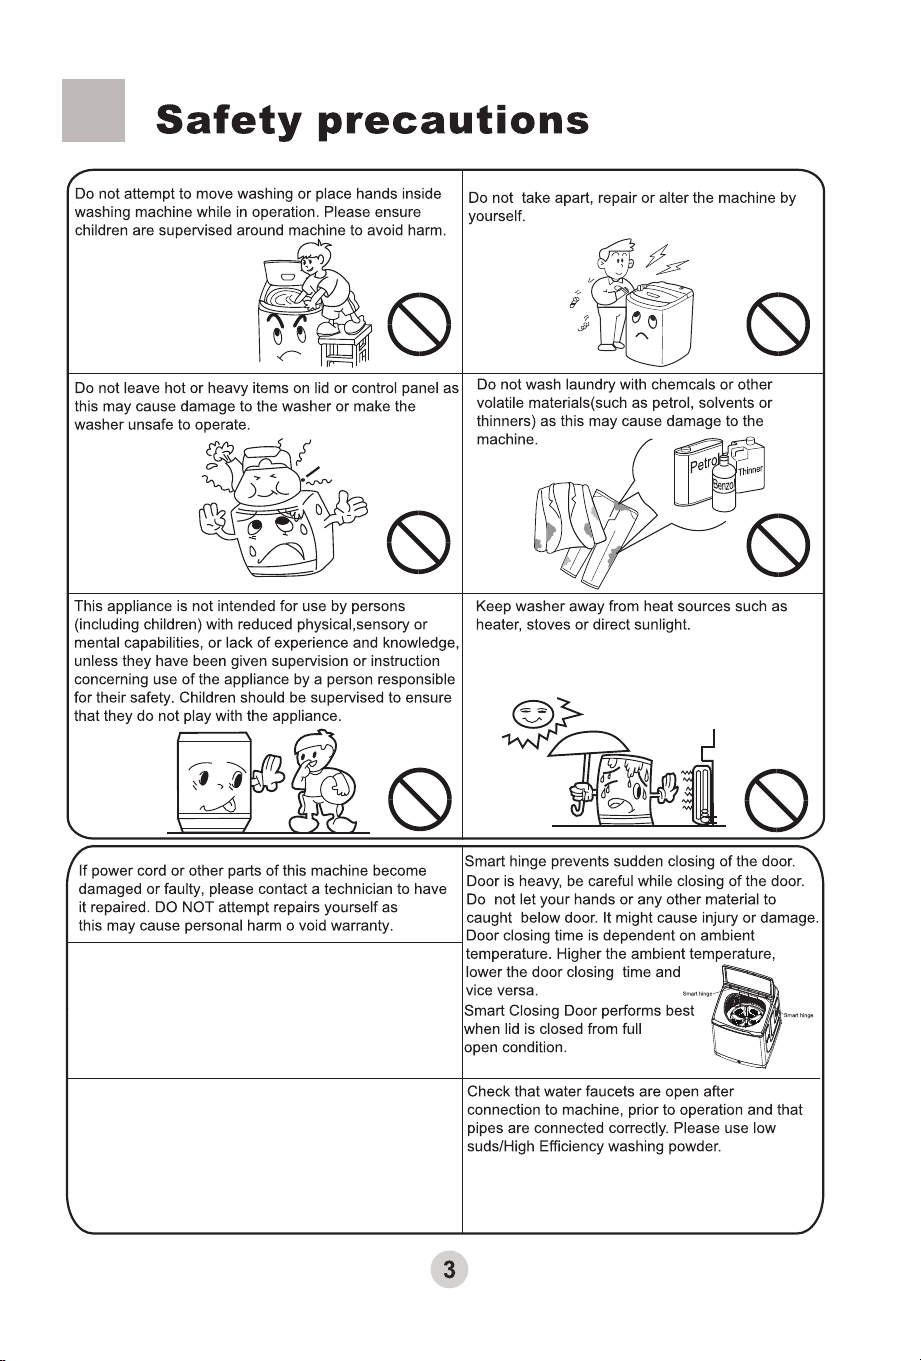
Safety precautions
Loading your laundry
Detergent usage guide
an injury to the
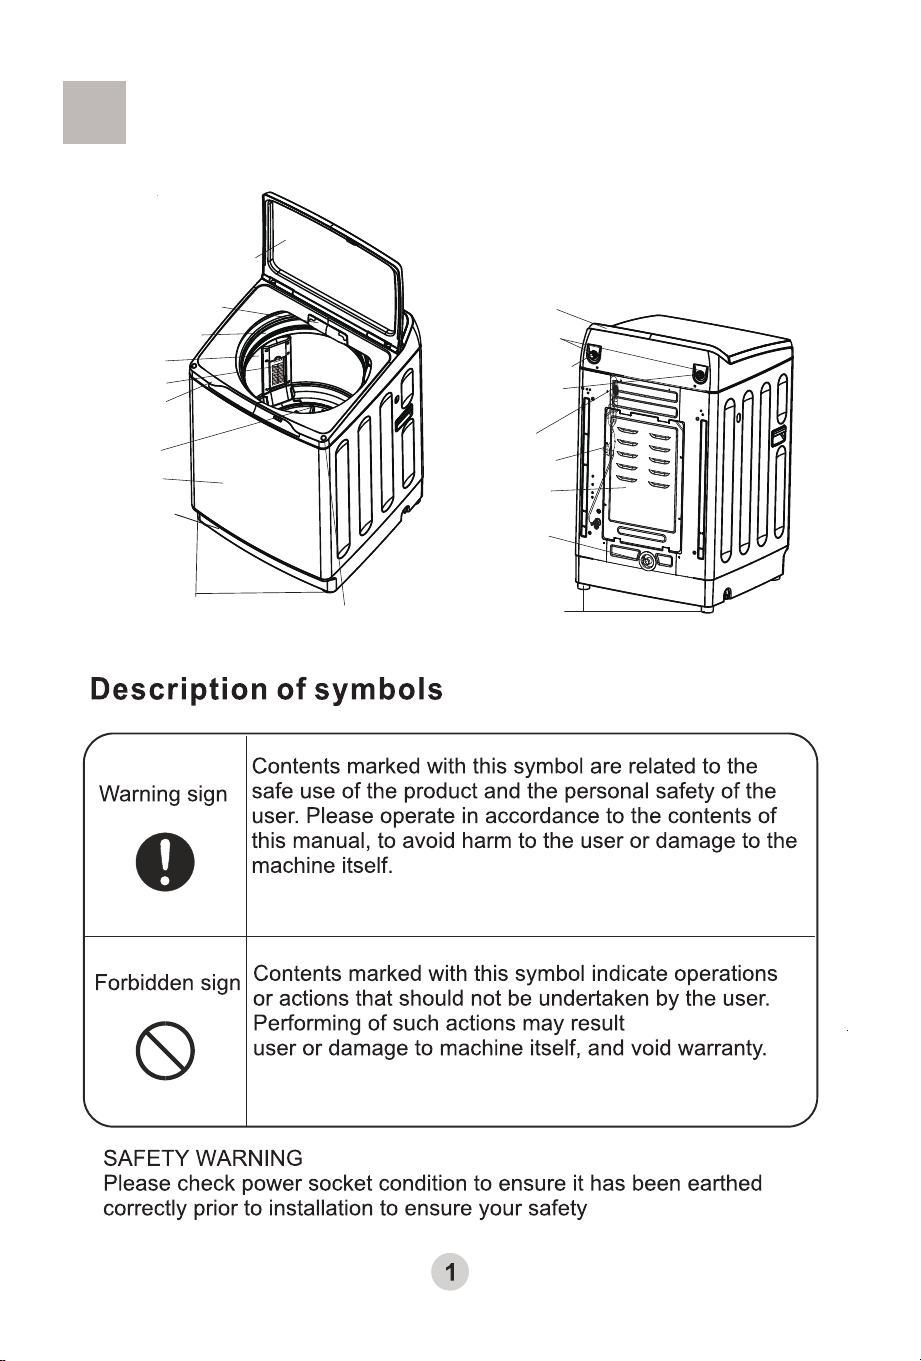
Product overview
Outer tub cover
Detergent box
Top lid component
Inner tub
Pulsator
Cabinet
Base frame
Control pannel seat
Adjustable foot(2pieces)
Screw cover
Filter frame
Power cord
Drain hose joint
Back cover
Cold water inlet valve
Water absorption gasket
Fixed foot(2 pieces)
Hook
Back panel
Hot water inlet valve
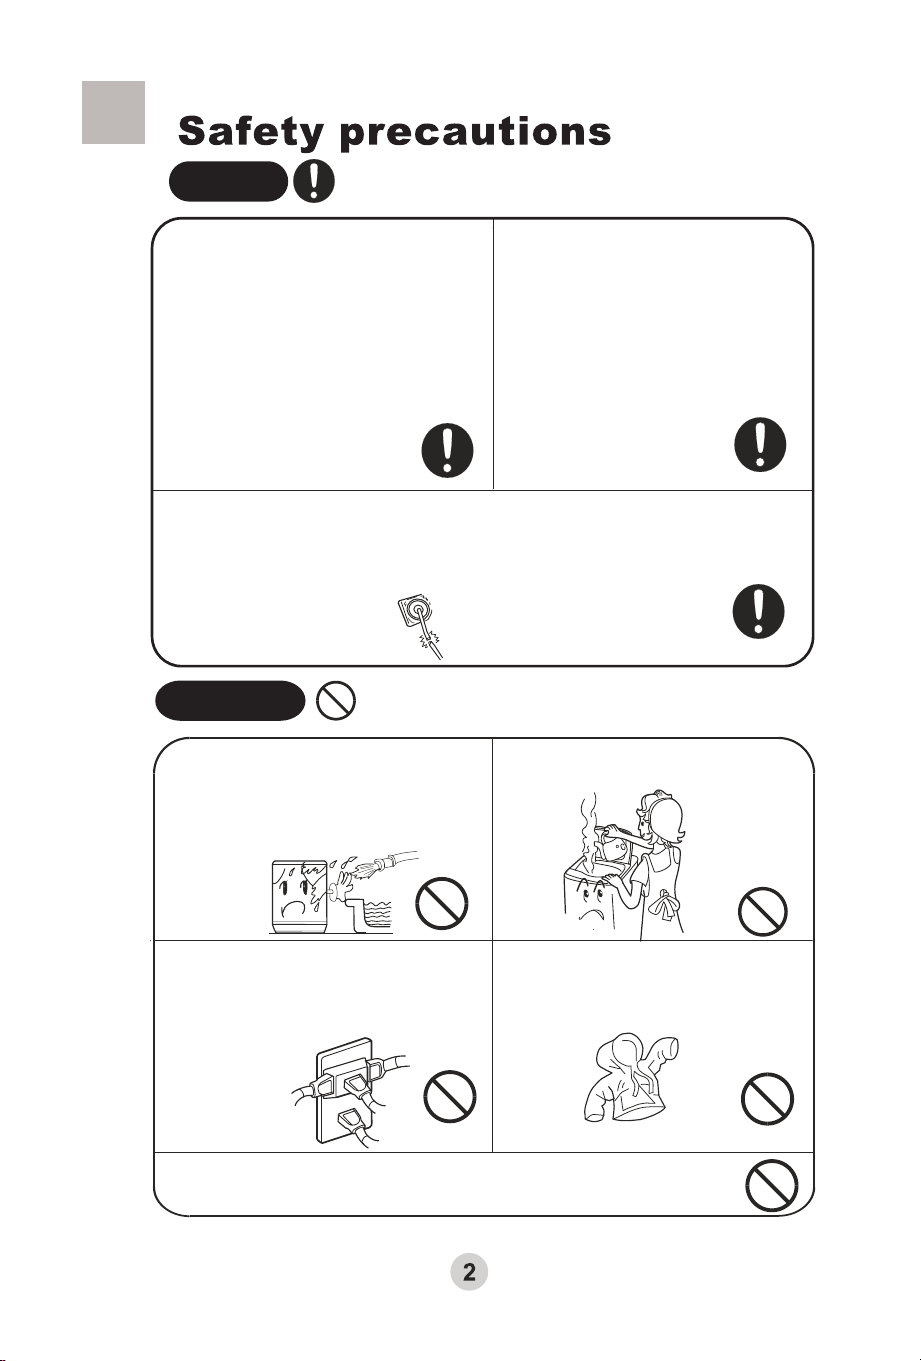
Warning
If the supply cord is damaged, it must be replaced by a special cord or assembly
available from the manufacturer or its service agent.
A separate, earthed power socket is
required for the power supply. Hold the
plug-NOT the electric cable-when
unplugging the washing machine. Do not
insert or remove the power plug with
wet hands. The power plug should be
accessible after the machine installation.
Ensure the plug is removed and the
taps turned off in the followng cases:
Power failure, cleaning, moving,
installation and when not in use.
Forbidden
50
If you are using an extension cord or a
portable electrical outlet device (not
recommended), ensure that it is
positioned so that it does not come into
contact with water
or moisture
The openings must not be obstructed by a carpet
Do not install this appliance in a damp
or wet environment. Do not leave wet
laundry on the Control Panel or spray
water directly on to this appliance,as
this may cause the washer to
malfunction
or cause an
electrical
fault.
Do not wash water-proof clothing as
this may affect load balance
during spin cycle(s).
Do not connect to hot water higer than
50°C temperature.
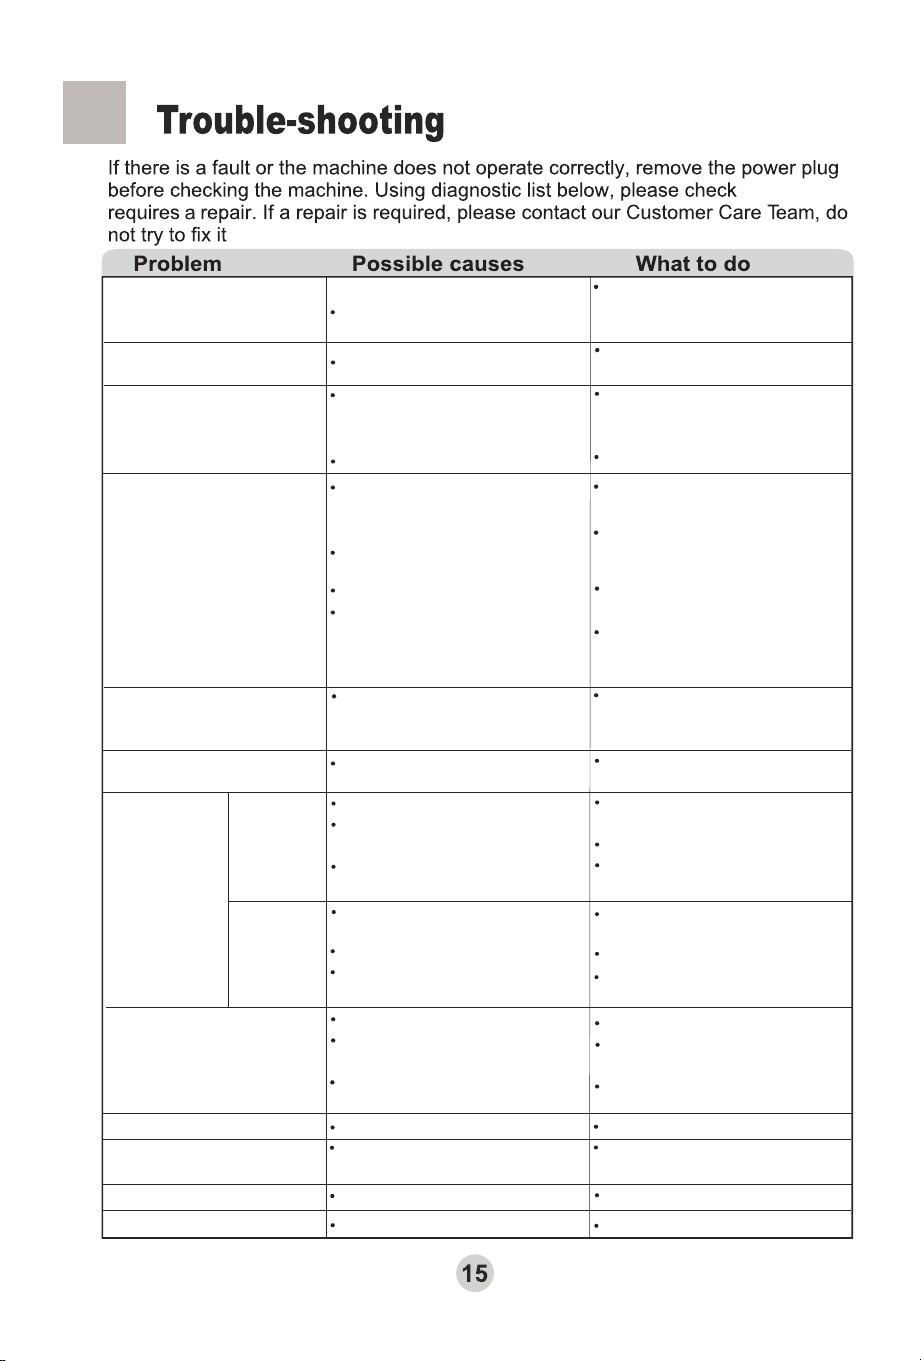
Is the door lock broken?
by yourself.
if the machine
Communication failure
between display board
and motor driver.
Please contact Customer Care.
The display shows E9.
Communication failure between
show board and power board.
Please contact Customer Care.
The display shows FC.
The display shows E8.
Is the drain hose set too low?
The height of the end of the
drain hose should be between
800mm-1200mm.
The machine does not
drain or drain slowly.
The display shows E1.
Is the drain hose blocked?
Remove the blockage.
Push the Start/Pause button
once.
The machine stops running.
The display shows E2.
The top lid is not closed.
Close the top lid. Push the
Start/Pause button once.
The machine does not
spin.The display shows E3.
Has the laundry been placed
unevenly in the machine?
Is the machine level?
Redistribute the load evenly.
Push the Start/Pause button
once.
Level t
he machine.
The display shows E4.
The display shows FA.
Is the water tap closed or
has the water supply been
interrupted?
Is the water inlet valve
blocked?
Is the water pressure too low?
Open the water tap. Push
the Start/Pause button once.
Clean the water inlet valve
then push the Start/Pause
button once.
Use after t
he water pressure
is normal.
The water level sensor has
failed.
Please contact Customer Care.
The machine
does not work.
Will not
wash
Will not
spin
The water tap leaks.
There are abnormal
sounds inside the machine.
Is the water inlet hose loose?
Fasten the inlet hose.
Is the machine level?
Level the machine.
Has the laundry been placed
unevenly in the machine?
Are there any foreign objects
inside the bowl?
Redistribute the load evenly.
Close the top lid.
Remove the foreign object.
Redistribute the laundry.
Close the top lid.
Is the top lid closed?
Is the power plug inserted
tightly?
Is the laundry distributed
unevenly in the machine?
Insert the power plug tightly.
Is there a power failure?
Is the power plug inserted
tightly?
Insert the power plug tightly.
Wait for the power supply to
be restored.
Wait for the
water to fill to the
preset level.
Has the water level reached
preset position?
Please contact Customer Care.
The display shows F2.
Over flow Error
Please contact Customer Care.
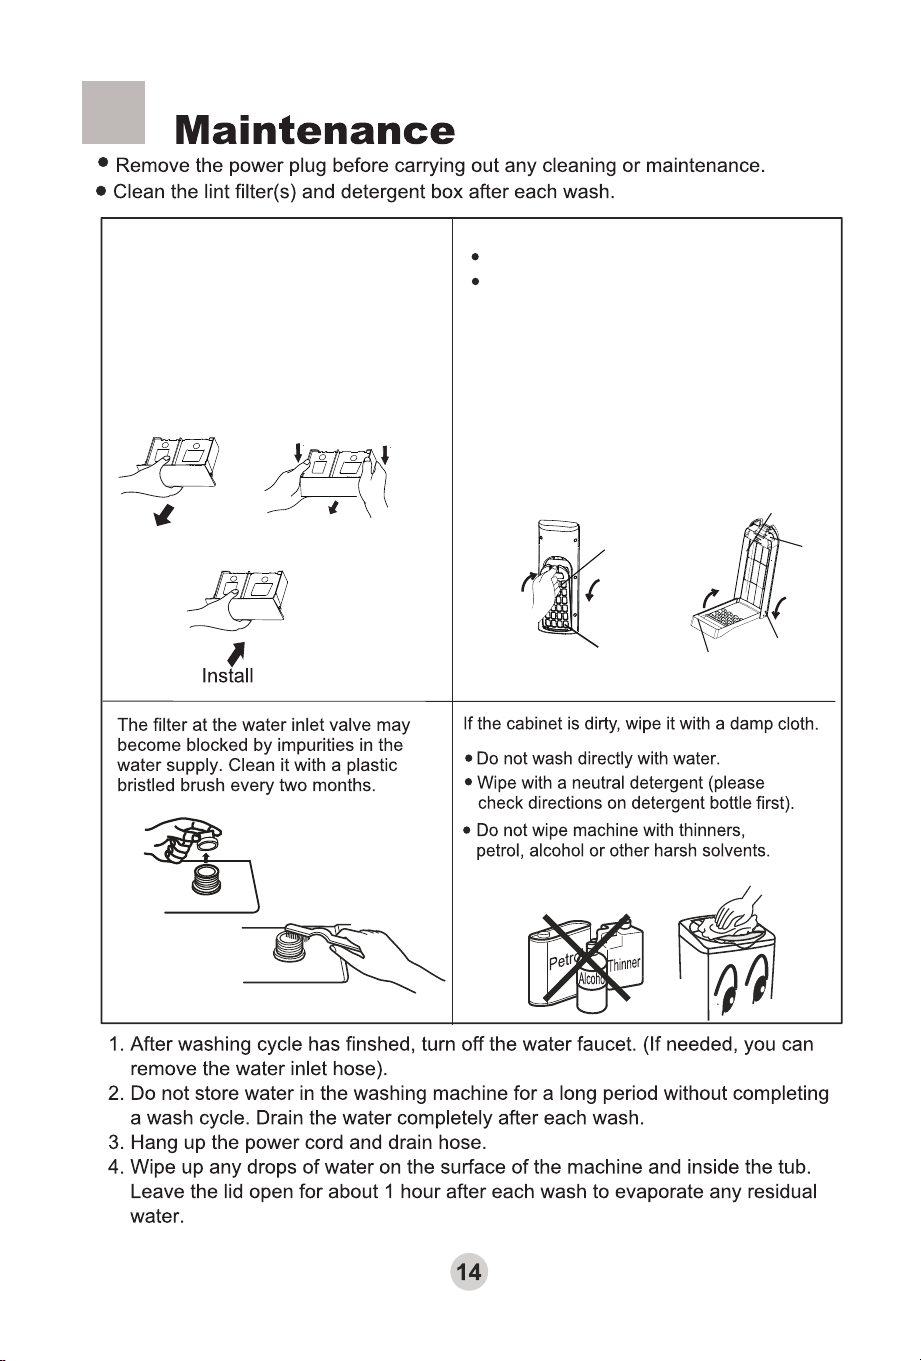
Remove
Lint filter:
The lint filter must be used during washing.
It must be cleaned in time after each using.
Figure 1
Figure 2
Clean the detergent box and set it on the
control panel seat.
1.Dismantle: Pull the detergent box, then hold
two sides with hands.Press downwards and
pull meanwhile, then it can be pulled out.
.
1.Push down the spring piece of the top lint filter to
make the claws out of the filter cover, and then pull
out the lint filter to get it down.( figure 1)
2.Pull the back of the lint filter, and then you can get
down it off the front cover of the lint filter.(figure 2)
3.Sweep the lint in the lint filter.
4.Put the back of the lint filter into the front cover .
5.Put the lint filter into filter cover, and make it tight.
6.Make sure the lint filter well installed, or it can
influence your use.
The front cover of the lint filter
The back cover of the lint filter
Up
Install
Dismantle
Down
Up
Down
Install
Dismantle
3.Install : Install it upwards and push it in.
2.Clean: Use a brush and duster cloth to clean
it, then flush it with water.
The applicance water pressure is 0.03MPa-1.0MPa
(when water temperature is 55℃,the water inlet
pressure of hot water shall not exceed 0.4MPa).
℃
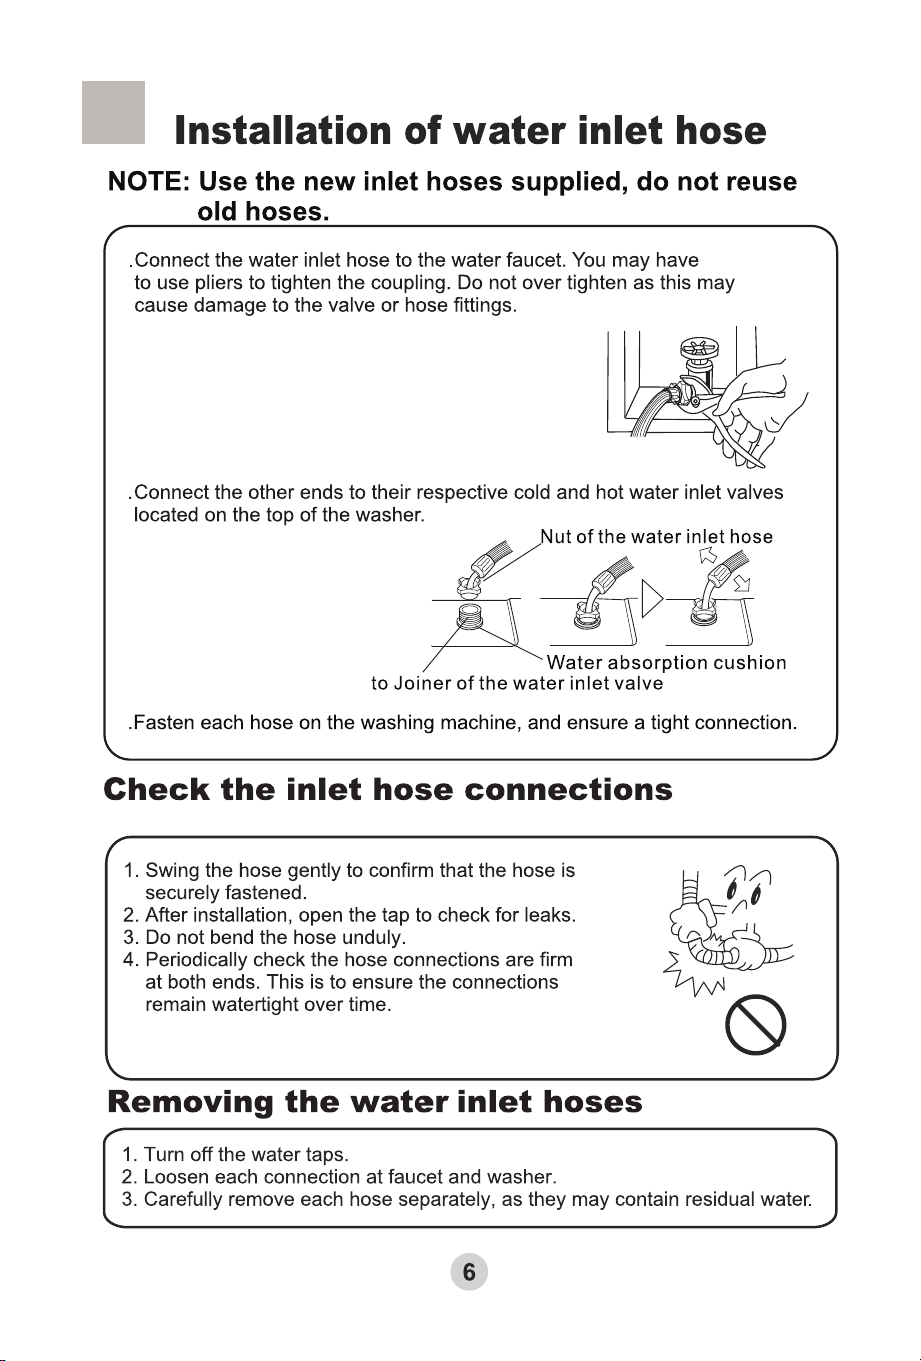
The new hose-sets supplied with the appliance
are to be used and that old hose-sets should
not be reused.
The maximum mass of dry cloth to be used in the
appliance is 10kg for HWT10MW2.
This product has been designed for use in a normal
domestic (residential) environment.
This product is not designed for any commercial use
(whatsoever). Any commercial use by a customer will
affect this product’s Manufacturer’s Warranty.
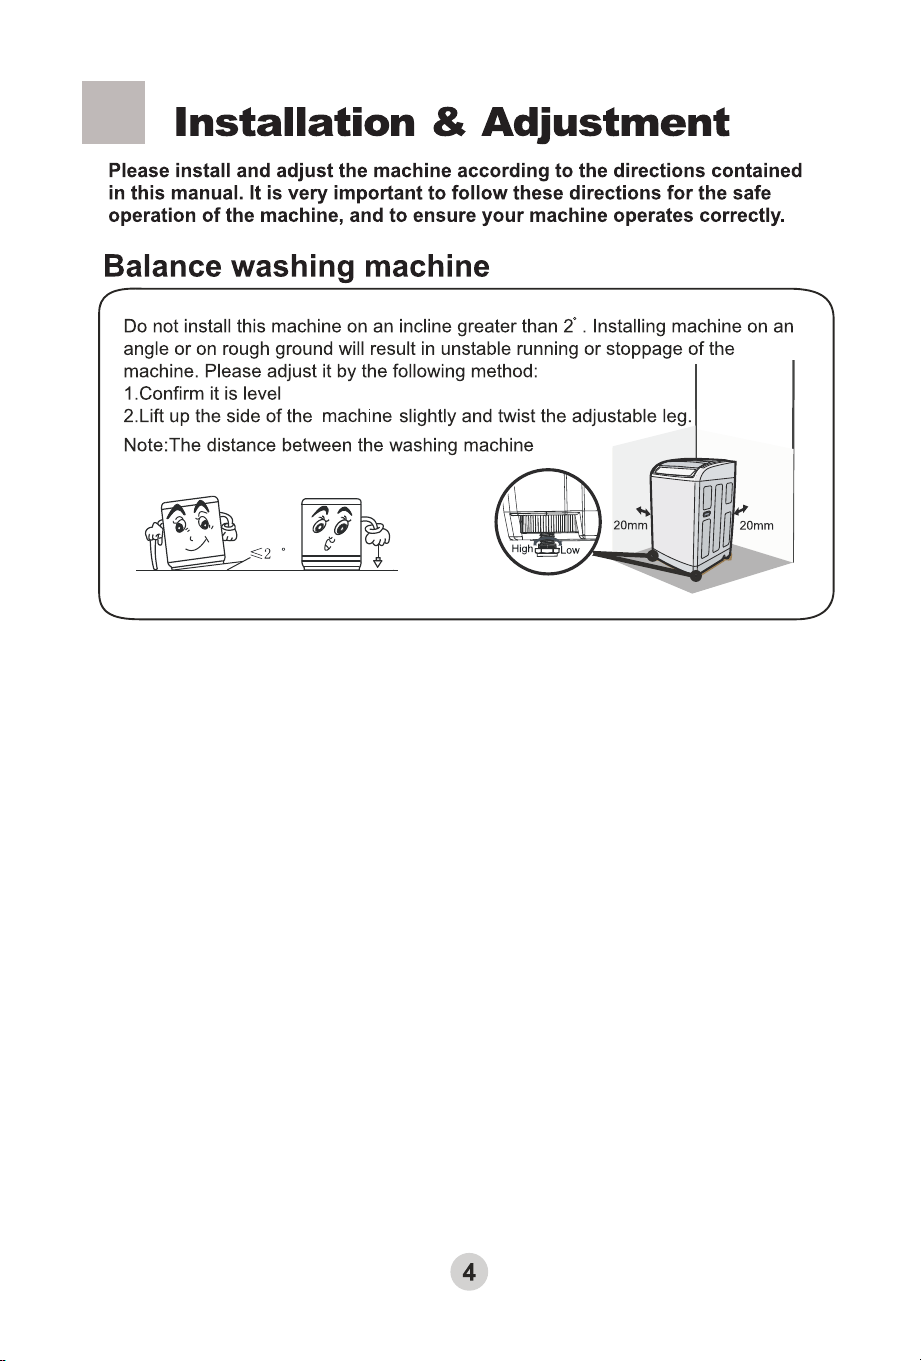
and wall should be at least 20mm
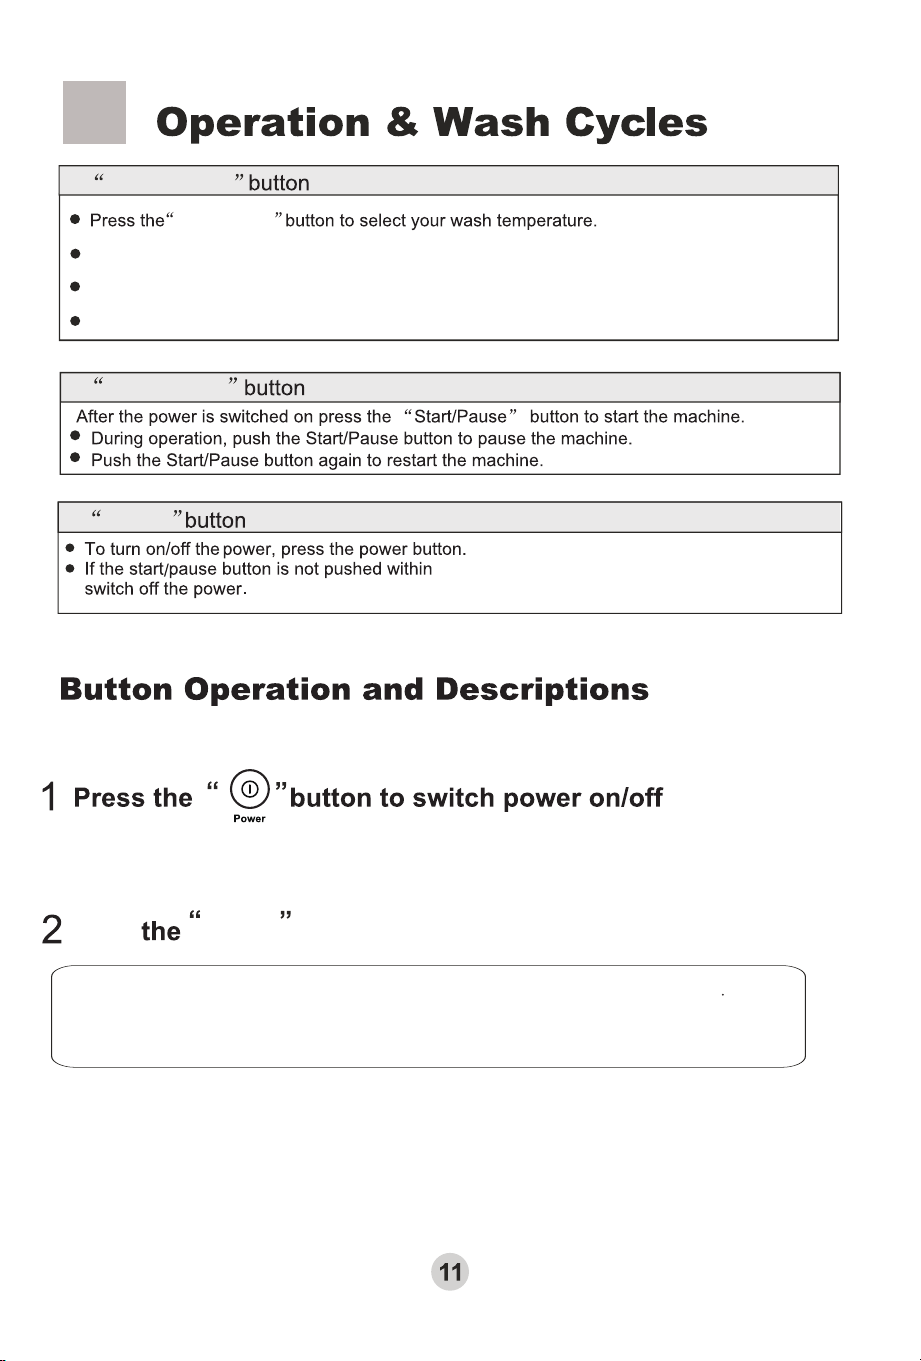
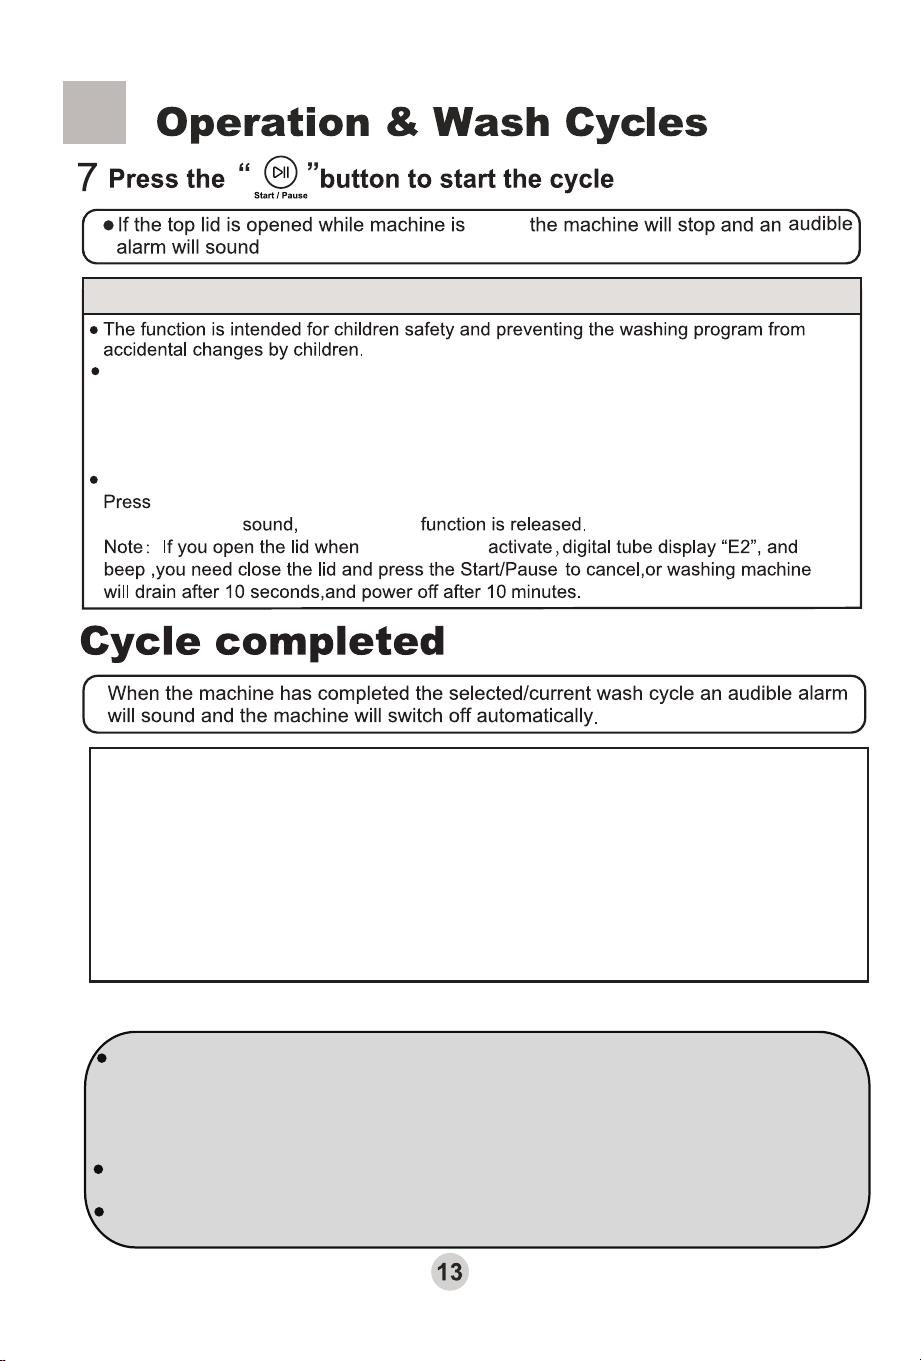
Set the desired washing program,after setting, press the “Start/Pause” button,and
washing machine begin to run. Then hold the “Progress” button and “Delay” button at
the same time for more than 3 seconds,you will hear three beep sound,digital tube
display “CL”,and the child lock will activate. All of the buttons are locked, and will no
function.
the “Progress” button and “Delay” button at the same time for more than 3 seconds,
Child Lock
the child Lock
the child lockafter three beep
The energy test program was performed using the "Cotton" cycle
setting of:
Soak:30 mins; Water Temp:Warm; Rinse: 1 Rinse;Spin:7 mins
Water level:Max.
Please use low suds/high efficiency detergent.
Note:
This washer has a 2-step water fill to achieve the required water level and temperature
for the best cleaning result.
First Fill - Once options and cycle are selected and the Start/Pause Button is pressed,
both hot and cold water will flow into the inner tub. The warm water temperature helps
to dissolve detergent quickly. The washing operation starts at the end of the hot water
fill and is followed by a 5-minute (approximately) soak-agitation session to help the
detergent mix completely with the laundry.
Second Fill - The second fill is in order to reach the selected water level and make
the clothes completely soaked in water to achieve a better wash effect.
To disable the child lock function:
used,
,close the lid and press the “start/pause”,the machine will run
“ ”
If you choose the Cotton program, it is not suggested to put the
softener, because the softener can not be put in the inner tub
For the “Cotton” and “Eco”cycles the machine will run a Fuzzy Logic program
Temp
During Express,Wool, Duvet , Drum Clean and Anti Crease cycles,these settings
cannot be changed and buttons will not function, as machine will only follow
pre-programmed settings.
Spin
not
Attention: Even there’s no water in the tub, the spinning will start after a certain period
“Start/Pause” button is pushed.
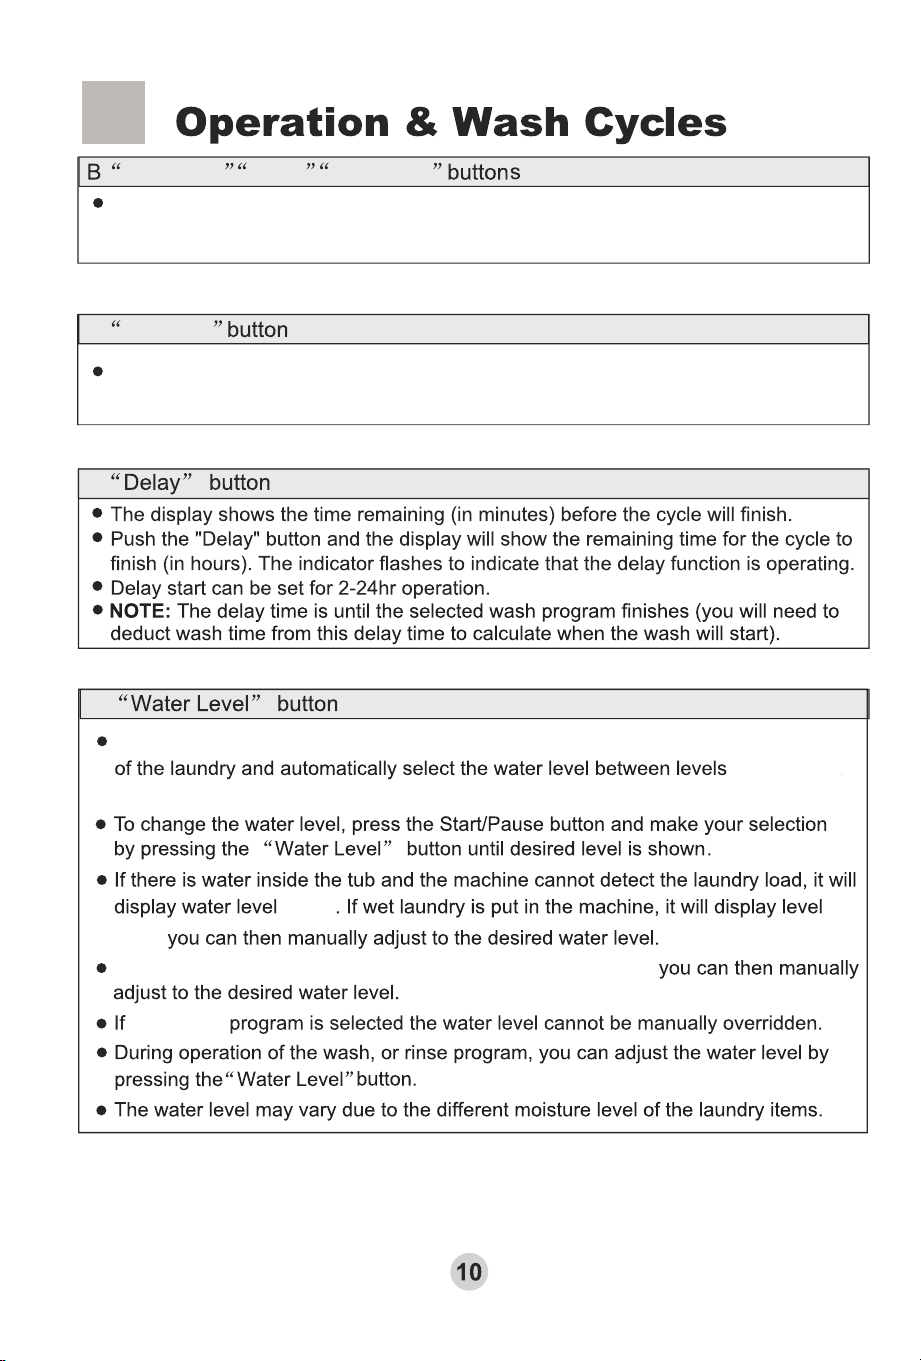
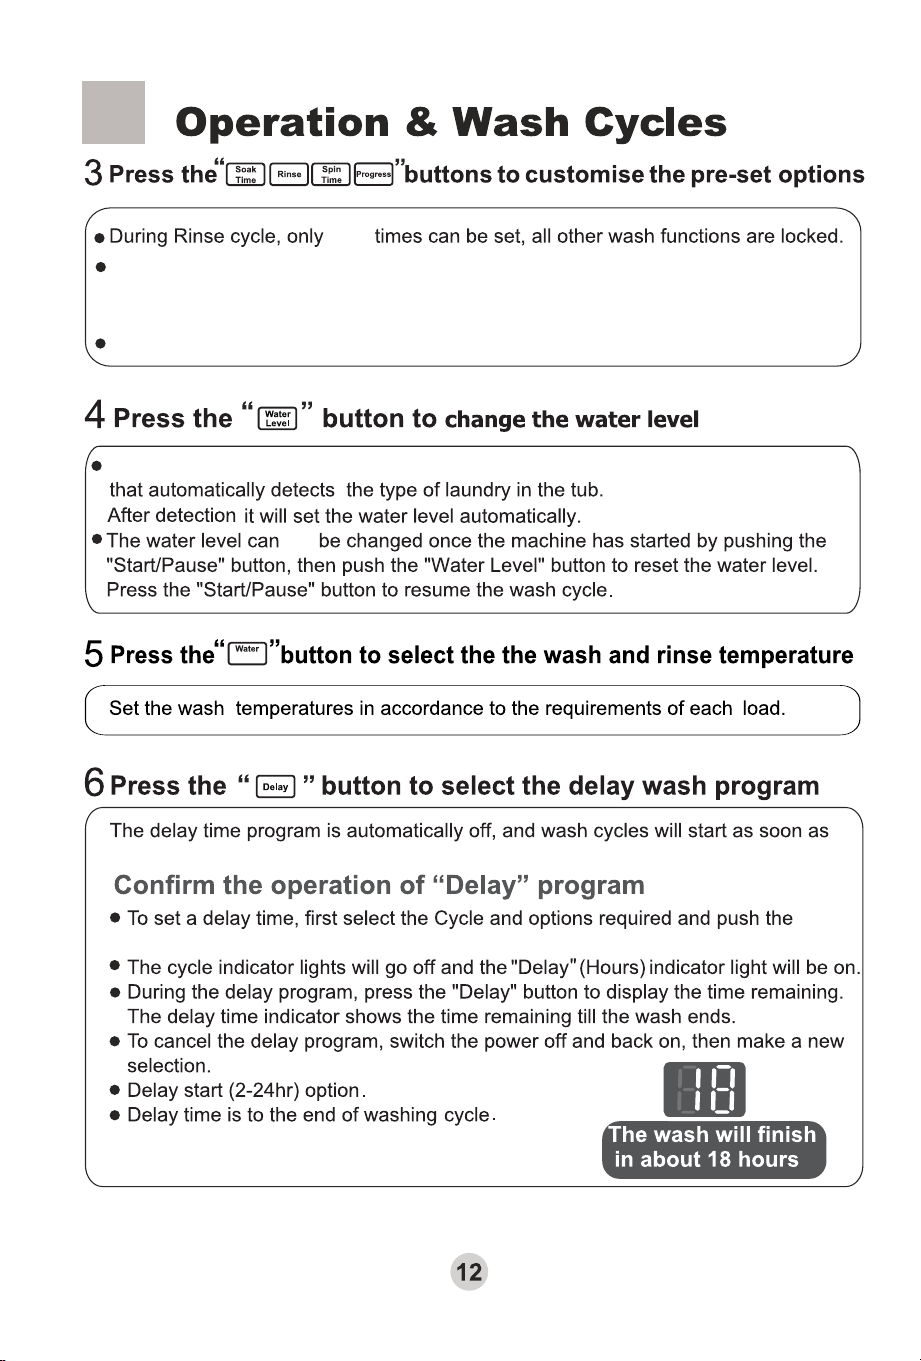
“Delay” button .
back side of the cabinet, and fasten with drain hose clamp(provided).
clamp
Bracket
800-1200
0.8
the bracket
,
F
G
H
Water Temp
Water Temp
10 minutes, the washing machine will automatically
Start/Pause
Power
During Drum Clean cycle, the “Cold”,“Warm”,“Max” water temperature cannot be chosen.
During Anti Crease cycle, the “Hot”,“Max” water temperature cannot be chosen.
During Wool and Duvet cycles, the “Hot”,“Warm”,“Max” water temperature cannot be chosen.
When the power is switched on “Cotton” cycle is automatically set
Turn the “cycle” button to select automatic program.
Turn Cycle button to select automatic program
1
2
3
If Express program is selected it will display water level
Progress
E
D
C
Mid,High or
Max.
“Mid”
“Low”
“Max”,
You may change the Progress,except
Express,Wool, Duvet ,Drum Clean and
Anti Crease
cycles are selected.
During the Eco and Cotton programs the washing machine will detect the size
Drum Clean
Soak Time Spin TimeRinse
You may change the Soak time,Rinse and Spin time, except Express, Wool,
Anti Crease.
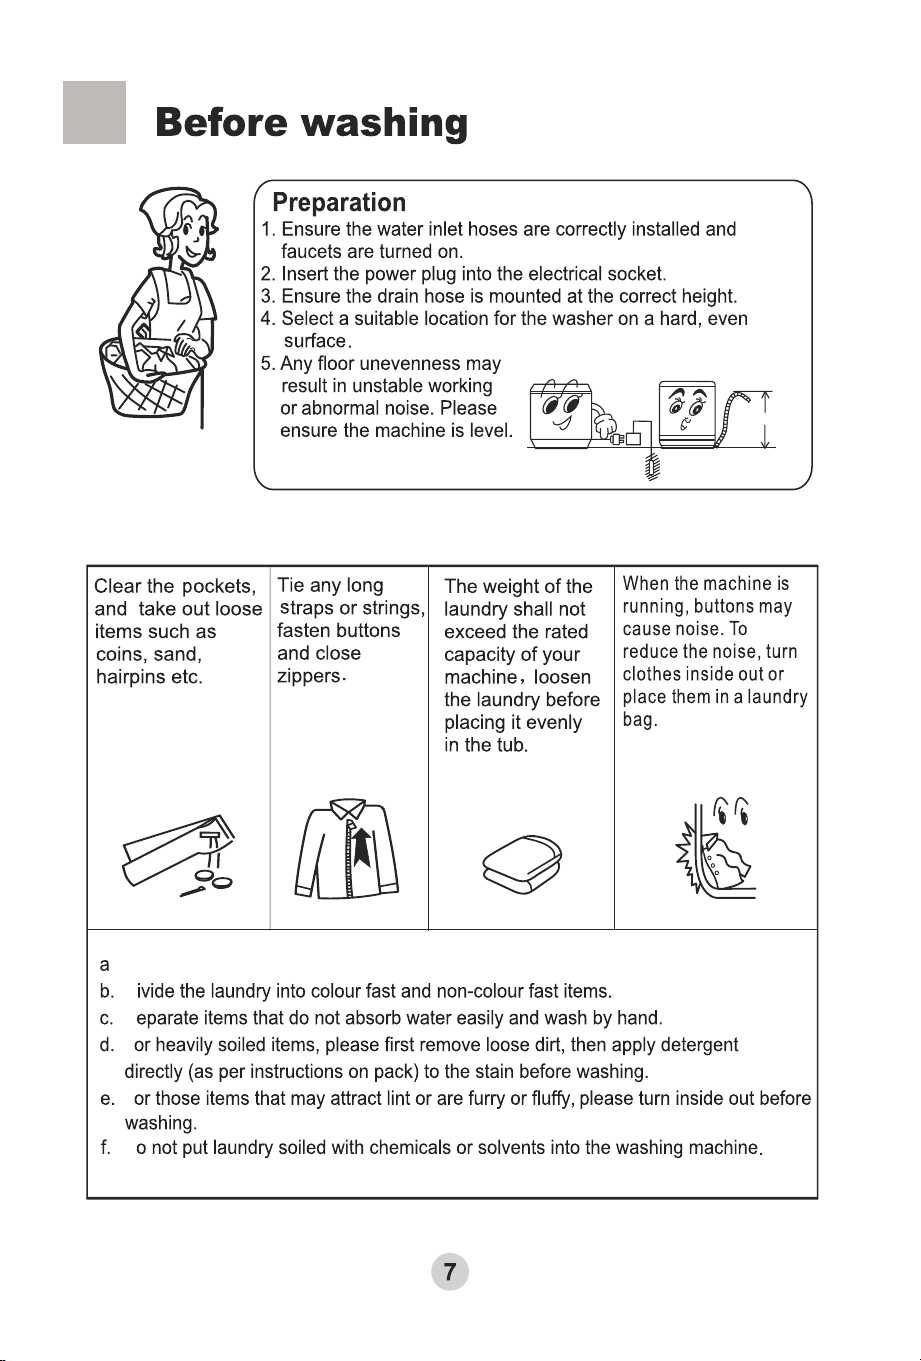
Check the following before washing
Check if the laundry has any special washing instructions.
D
S
F
F
D
800mm≤h≤1200mm
low
washing powder is used
Mid
A
C DEF
G
H
B
B
B
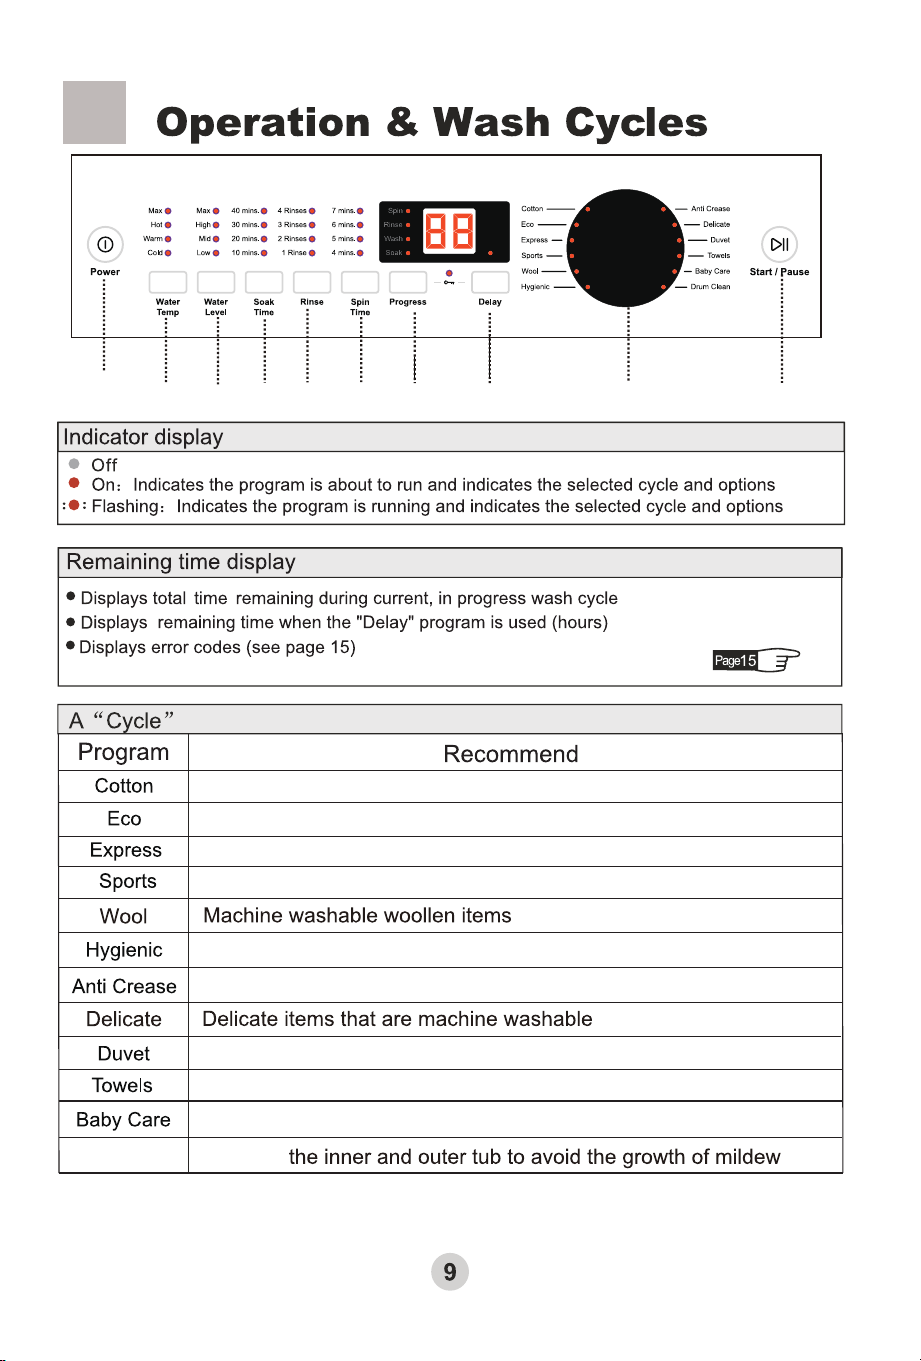
Washing Cotton laundries
The cycle of energy saving
Washing Sports clothes
Hygienic Washing
Washing T-shirts, shirts laundries
Washing Duvet
Washing Towels
Washing Synthetic laundries
Drum Clean
Cleaning
knob
Lightly soiled or small laundry loads less than 1.5kg
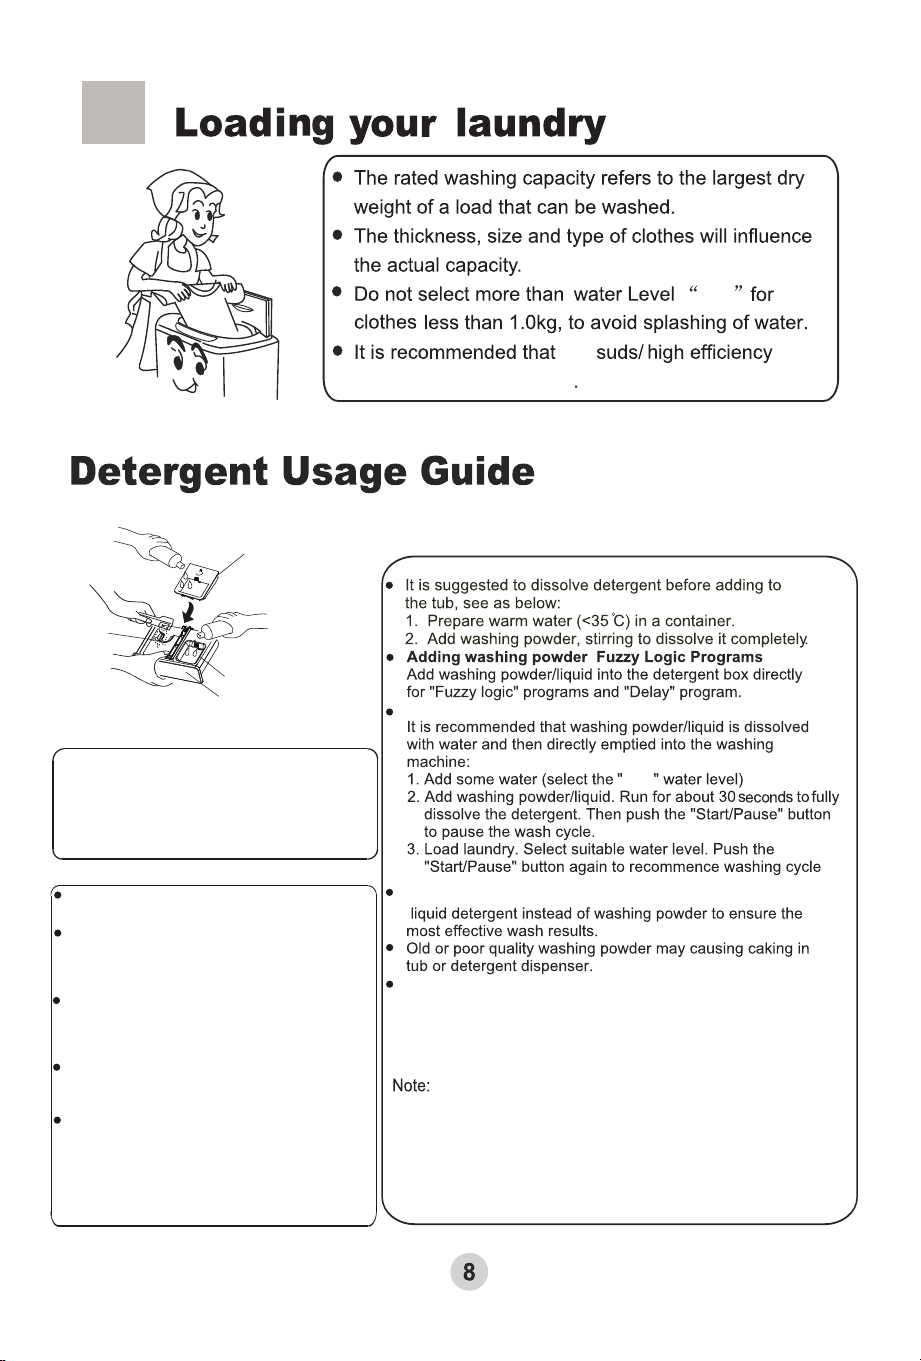
Adding washing power
If a manufacture specifies only the use of a low-sudsing or
high-efficiency type detergent, then detergent for drum type machines
shall be used irrespective of the type of machine under test.
Otherwise the detergent type to be used shall be chosen according to
the type of clothes washing machine under test, as follows.
If you select “Express”program,it is recommended to use
Low
Adding washing powder Cotton Wash
How to use liquid detergent
Before washing put the liquid detergent into the
liquid detergent box directly as indicated the above
figure. The usage and dose of the liquid detergent
as per the specifications of liquid detergent.
Put the liquid detergent box on the right of the
detergent box. See the above figure.
The usage and dose of the softener as per
the specifications of softener.
Before washing put the softener into the
detergent box directly. See the above figure.
The softener will put into the washer when the
last rinsing.
After that,please close the detergent box refer to
the following list for the usage of the detergent:
selection of the water level,water quantity and
dosage of detergent
After the softener is put in,please don't place for
a long time otherwise softener may solidify and
cause flowing not smooth.
How to use softener
When water pressure is too low, it is possible that washing powder or
washing liquid cannot be washed away effectively, and washing powder
or washing liquid would be agglomerated after a period of time. Please
clean the detergent box in time. It is recommended to pour the washing
powder or liquid into the basket directly.
When water pressure is too low, it is possible
that softener cannot be washed away effectively,
and softener would be agglomerated after a
period of time. Please clean the softener box in
time. It is recommended to pour the softener
into the basket directly after water is filled at the
last rinse.
Softener inlet
Detergent box
Liquid detergent box
Washing
powder inlet
low
washing powder is used
Mid
A
C DEF
G
H
B
B
B
Washing Cotton laundries
The cycle of energy saving
Washing Sports clothes
Hygienic Washing
Washing T-shirts, shirts laundries
Washing Duvet
Washing Towels
Washing Synthetic laundries
Drum Clean
Cleaning
knob
Lightly soiled or small laundry loads less than 1.5kg
Adding washing power
If a manufacture specifies only the use of a low-sudsing or
high-efficiency type detergent, then detergent for drum type machines
shall be used irrespective of the type of machine under test.
Otherwise the detergent type to be used shall be chosen according to
the type of clothes washing machine under test, as follows.
If you select “Express”program,it is recommended to use
Low
Adding washing powder Cotton Wash
How to use liquid detergent
Before washing put the liquid detergent into the
liquid detergent box directly as indicated the above
figure. The usage and dose of the liquid detergent
as per the specifications of liquid detergent.
Put the liquid detergent box on the right of the
detergent box. See the above figure.
The usage and dose of the softener as per
the specifications of softener.
Before washing put the softener into the
detergent box directly. See the above figure.
The softener will put into the washer when the
last rinsing.
After that,please close the detergent box refer to
the following list for the usage of the detergent:
selection of the water level,water quantity and
dosage of detergent
After the softener is put in,please don't place for
a long time otherwise softener may solidify and
cause flowing not smooth.
How to use softener
When water pressure is too low, it is possible that washing powder or
washing liquid cannot be washed away effectively, and washing powder
or washing liquid would be agglomerated after a period of time. Please
clean the detergent box in time. It is recommended to pour the washing
powder or liquid into the basket directly.
When water pressure is too low, it is possible
that softener cannot be washed away effectively,
and softener would be agglomerated after a
period of time. Please clean the softener box in
time. It is recommended to pour the softener
into the basket directly after water is filled at the
last rinse.
Softener inlet
Detergent box
Liquid detergent box
Washing
powder inlet
If Express program is selected it will display water level
Progress
E
D
C
Mid,High or
Max.
“Mid”
“Low”
“Max”,
You may change the Progress,except
Express,Wool, Duvet ,Drum Clean and
Anti Crease
cycles are selected.
During the Eco and Cotton programs the washing machine will detect the size
Drum Clean
Soak Time Spin TimeRinse
You may change the Soak time,Rinse and Spin time, except Express, Wool,
Anti Crease.
Check the following before washing
Check if the laundry has any special washing instructions.
D
S
F
F
D
800mm≤h≤1200mm
F
G
H
Water Temp
Water Temp
10 minutes, the washing machine will automatically
Start/Pause
Power
During Drum Clean cycle, the “Cold”,“Warm”,“Max” water temperature cannot be chosen.
During Anti Crease cycle, the “Hot”,“Max” water temperature cannot be chosen.
During Wool and Duvet cycles, the “Hot”,“Warm”,“Max” water temperature cannot be chosen.
When the power is switched on “Cotton” cycle is automatically set
Turn the “cycle” button to select automatic program.
Turn Cycle button to select automatic program
1
2
3
For the “Cotton” and “Eco”cycles the machine will run a Fuzzy Logic program
Temp
During Express,Wool, Duvet , Drum Clean and Anti Crease cycles,these settings
cannot be changed and buttons will not function, as machine will only follow
pre-programmed settings.
Spin
not
Attention: Even there’s no water in the tub, the spinning will start after a certain period
“Start/Pause” button is pushed.
“Delay” button .
back side of the cabinet, and fasten with drain hose clamp(provided).
clamp
Bracket
800-1200
0.8
the bracket
,
and wall should be at least 20mm
Set the desired washing program,after setting, press the “Start/Pause” button,and
washing machine begin to run. Then hold the “Progress” button and “Delay” button at
the same time for more than 3 seconds,you will hear three beep sound,digital tube
display “CL”,and the child lock will activate. All of the buttons are locked, and will no
function.
the “Progress” button and “Delay” button at the same time for more than 3 seconds,
Child Lock
the child Lock
the child lockafter three beep
The energy test program was performed using the "Cotton" cycle
setting of:
Soak:30 mins; Water Temp:Warm; Rinse: 1 Rinse;Spin:7 mins
Water level:Max.
Please use low suds/high efficiency detergent.
Note:
This washer has a 2-step water fill to achieve the required water level and temperature
for the best cleaning result.
First Fill - Once options and cycle are selected and the Start/Pause Button is pressed,
both hot and cold water will flow into the inner tub. The warm water temperature helps
to dissolve detergent quickly. The washing operation starts at the end of the hot water
fill and is followed by a 5-minute (approximately) soak-agitation session to help the
detergent mix completely with the laundry.
Second Fill - The second fill is in order to reach the selected water level and make
the clothes completely soaked in water to achieve a better wash effect.
To disable the child lock function:
used,
,close the lid and press the “start/pause”,the machine will run
“ ”
If you choose the Cotton program, it is not suggested to put the
softener, because the softener can not be put in the inner tub
Remove
Lint filter:
The lint filter must be used during washing.
It must be cleaned in time after each using.
Figure 1
Figure 2
Clean the detergent box and set it on the
control panel seat.
1.Dismantle: Pull the detergent box, then hold
two sides with hands.Press downwards and
pull meanwhile, then it can be pulled out.
.
1.Push down the spring piece of the top lint filter to
make the claws out of the filter cover, and then pull
out the lint filter to get it down.( figure 1)
2.Pull the back of the lint filter, and then you can get
down it off the front cover of the lint filter.(figure 2)
3.Sweep the lint in the lint filter.
4.Put the back of the lint filter into the front cover .
5.Put the lint filter into filter cover, and make it tight.
6.Make sure the lint filter well installed, or it can
influence your use.
The front cover of the lint filter
The back cover of the lint filter
Up
Install
Dismantle
Down
Up
Down
Install
Dismantle
3.Install : Install it upwards and push it in.
2.Clean: Use a brush and duster cloth to clean
it, then flush it with water.
The applicance water pressure is 0.03MPa-1.0MPa
(when water temperature is 55℃,the water inlet
pressure of hot water shall not exceed 0.4MPa).
℃
The new hose-sets supplied with the appliance
are to be used and that old hose-sets should
not be reused.
The maximum mass of dry cloth to be used in the
appliance is 10kg for HWT10MW2.
This product has been designed for use in a normal
domestic (residential) environment.
This product is not designed for any commercial use
(whatsoever). Any commercial use by a customer will
affect this product’s Manufacturer’s Warranty.
Warning
If the supply cord is damaged, it must be replaced by a special cord or assembly
available from the manufacturer or its service agent.
A separate, earthed power socket is
required for the power supply. Hold the
plug-NOT the electric cable-when
unplugging the washing machine. Do not
insert or remove the power plug with
wet hands. The power plug should be
accessible after the machine installation.
Ensure the plug is removed and the
taps turned off in the followng cases:
Power failure, cleaning, moving,
installation and when not in use.
Forbidden
50
If you are using an extension cord or a
portable electrical outlet device (not
recommended), ensure that it is
positioned so that it does not come into
contact with water
or moisture
The openings must not be obstructed by a carpet
Do not install this appliance in a damp
or wet environment. Do not leave wet
laundry on the Control Panel or spray
water directly on to this appliance,as
this may cause the washer to
malfunction
or cause an
electrical
fault.
Do not wash water-proof clothing as
this may affect load balance
during spin cycle(s).
Do not connect to hot water higer than
50°C temperature.
Is the door lock broken?
by yourself.
if the machine
Communication failure
between display board
and motor driver.
Please contact Customer Care.
The display shows E9.
Communication failure between
show board and power board.
Please contact Customer Care.
The display shows FC.
The display shows E8.
Is the drain hose set too low?
The height of the end of the
drain hose should be between
800mm-1200mm.
The machine does not
drain or drain slowly.
The display shows E1.
Is the drain hose blocked?
Remove the blockage.
Push the Start/Pause button
once.
The machine stops running.
The display shows E2.
The top lid is not closed.
Close the top lid. Push the
Start/Pause button once.
The machine does not
spin.The display shows E3.
Has the laundry been placed
unevenly in the machine?
Is the machine level?
Redistribute the load evenly.
Push the Start/Pause button
once.
Level t
he machine.
The display shows E4.
The display shows FA.
Is the water tap closed or
has the water supply been
interrupted?
Is the water inlet valve
blocked?
Is the water pressure too low?
Open the water tap. Push
the Start/Pause button once.
Clean the water inlet valve
then push the Start/Pause
button once.
Use after t
he water pressure
is normal.
The water level sensor has
failed.
Please contact Customer Care.
The machine
does not work.
Will not
wash
Will not
spin
The water tap leaks.
There are abnormal
sounds inside the machine.
Is the water inlet hose loose?
Fasten the inlet hose.
Is the machine level?
Level the machine.
Has the laundry been placed
unevenly in the machine?
Are there any foreign objects
inside the bowl?
Redistribute the load evenly.
Close the top lid.
Remove the foreign object.
Redistribute the laundry.
Close the top lid.
Is the top lid closed?
Is the power plug inserted
tightly?
Is the laundry distributed
unevenly in the machine?
Insert the power plug tightly.
Is there a power failure?
Is the power plug inserted
tightly?
Insert the power plug tightly.
Wait for the power supply to
be restored.
Wait for the
water to fill to the
preset level.
Has the water level reached
preset position?
Please contact Customer Care.
The display shows F2.
Over flow Error
Please contact Customer Care.
an injury to the
Product overview
Outer tub cover
Detergent box
Top lid component
Inner tub
Pulsator
Cabinet
Base frame
Control pannel seat
Adjustable foot(2pieces)
Screw cover
Filter frame
Power cord
Drain hose joint
Back cover
Cold water inlet valve
Water absorption gasket
Fixed foot(2 pieces)
Hook
Back panel
Hot water inlet valve
Bracket
One
On The Drain hose
Location
Warranty card
Operation & Wash cycles
Installation & Adjustment
Safety precautions
Loading your laundry
Detergent usage guide
MODEL: HWT10MW2
TOP LOAD FULLY AUTOMATIC WASHING MACHINE
OWNER’S MANUAL
Please read this manual carefully before
operating your washing machine and retain
it for future reference.
Specification
W 610 D 620 H 1045
300W
350W
45kg
52kg
Rated Washing capacity
10kg
HWT10MW2
.